Kewpie Mayo Recipe: Ever heard the hype around Kewpie Mayo and wondered what the fuss is about? You’re about to find out! Kewpie Mayo is not your average mayonnaise. It’s a rich, umami-packed condiment that brings an unmistakable depth of flavor to anything it touches. Originally from Japan, Kewpie Mayo is creamier, tangier, and just more luxurious than regular American mayo. Thanks to its unique blend of egg yolks, rice vinegar, and a touch of MSG, it has a cult-like following worldwide.
But here’s the kicker: you don’t need to hunt it down in a specialty store. You can make your own at home, and guess what? It’s fresher, healthier, and even more delicious.
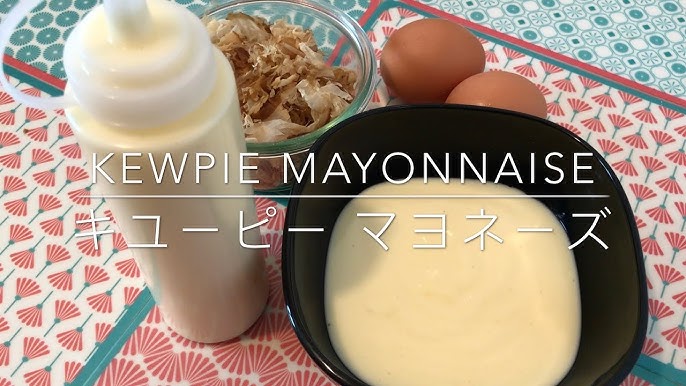
Key Ingredients Needed
Before diving in, let’s gather the magic:
- Egg yolks: Only yolks, no whites. They make the mayo rich and silky.
- Neutral oil: Think canola or grapeseed — nothing too strong.
- Rice vinegar: Adds that signature tanginess.
- Salt: Essential to balance flavors.
- MSG (optional): For that classic umami punch.
- A touch of sugar: Balances the acidity.
If you want an authentic Kewpie clone, try to stick with rice vinegar and add a pinch of MSG. But if you can’t find it, no worries — your mayo will still be delicious.
Where to Buy Special Ingredients
- Asian grocery stores
- Online marketplaces like Amazon
- Some well-stocked supermarkets
Tools You’ll Need
You don’t need a professional kitchen setup. Just a few basics:
- A blender or food processor: For a smooth, emulsified finish.
- A whisk and a bowl: If you’re feeling old school.
- Measuring spoons: Precision matters in mayo-making.
- A clean jar: For storage.
Trust me, investing in a decent blender will make this process quick and painless.
Step-by-Step Instructions
Let’s get into the fun part: making your own creamy, dreamy Kewpie Mayo!
Step 1: Gather Your Ingredients
Double-check you have:
- 2 egg yolks
- 1 tablespoon rice vinegar
- 1 teaspoon sugar
- 1/2 teaspoon salt
- 1/2 teaspoon MSG (optional)
- 1 cup neutral oil
Pro Tip: Make sure everything is at room temperature to help with emulsification.
Step 2: Separate Egg Yolks
Carefully separate your egg yolks from the whites. You only need the yolks for this recipe. Save the whites for an omelet or meringue later!
Use the eggs fresh as possible — it makes a huge difference in taste.
Step 3: Blend the Ingredients
In your blender:
- Add the egg yolks, rice vinegar, sugar, salt, and MSG.
- Pulse a few times to mix.
Now, slowly drizzle in the neutral oil while the blender is running. Super slow — think drop by drop at first. You’re forming an emulsion, and patience is key.
As it thickens, you can start pouring the oil a little faster.
The magic happens fast. One second it’s liquid, and suddenly it’s thick, luxurious mayo.
Step 4: Adjust Texture and Flavor
Taste your mayo. Want it tangier? Add a splash more rice vinegar. Need it sweeter? A pinch more sugar.
Blend for a few more seconds, and voila — you just made homemade Kewpie Mayo!
Tips for Perfect Kewpie Mayo
Making mayo sounds simple, but it’s easy to mess up if you’re not careful. Here’s how to ensure you nail it every time:
Common Mistakes to Avoid
- Pouring oil too fast: This is the number one mistake. If you dump the oil in quickly, your emulsion can break and you’ll end up with a runny mess.
- Using cold ingredients: Cold eggs and oil won’t emulsify well. Always use room temperature ingredients.
- Wrong type of oil: Strong-tasting oils like olive oil can overpower the delicate flavor. Stick to neutral oils like canola or grapeseed.
- Over-blending: Believe it or not, blending too long can also cause separation. Stop blending once the mayo is thick and creamy.
How to Get the Creamy Texture
- Drizzle the oil slowly at first, almost painfully slow.
- Keep blending steadily without stopping halfway.
- Taste and tweak as needed—Kewpie is supposed to be a little sweeter and tangier than regular mayo.
Seriously, making mayo is a bit like babysitting a newborn—lots of attention at the start but incredibly rewarding!
How to Store Homemade Kewpie Mayo
Now that you have your golden jar of goodness, here’s how to keep it fresh:
Best Practices for Freshness
- Use a clean jar or container to avoid introducing bacteria.
- Seal it tightly after each use.
- Keep it refrigerated immediately after making it.
How Long It Lasts
Homemade Kewpie Mayo doesn’t have preservatives like the store-bought version. Typically:
- Shelf Life: About 1 week in the fridge.
- Signs of Spoilage: If it smells funky or changes color, toss it.
You worked hard for this mayo, so don’t let it go bad. Make smaller batches if you don’t think you’ll use it up quickly.
Creative Ways to Use Kewpie Mayo
Okay, so you’ve made it — now what? Trust me, once you taste it, you’ll want to slather it on everything.
In Sandwiches
Kewpie Mayo brings sandwiches to life. Spread it generously on bread, layer up some ham or turkey, and bite into pure bliss. It’s also killer on BLTs.
In Sushi Rolls
Ever wonder why sushi restaurants have that creamy spicy sauce? Yup — it’s often Kewpie Mayo mixed with a bit of Sriracha. Add it to your homemade sushi rolls for an authentic touch.
As a Dip
Mix a bit of wasabi or hot sauce into your mayo and serve it as a dip for fries, shrimp, or even raw veggies. It’s addictive.
Here’s a quick idea table:
| Use | How To Mix |
|---|---|
| Spicy Dip | Mayo + Sriracha |
| Wasabi Mayo | Mayo + Wasabi Paste |
| Herby Spread | Mayo + Chopped Fresh Herbs |
| Garlic Aioli | Mayo + Crushed Garlic |
Get creative — Kewpie is versatile enough to handle any flavor profile you throw at it.
Nutritional Information
Here’s a rough idea of what you’re consuming per tablespoon of homemade Kewpie Mayo:
| Nutrient | Amount |
|---|---|
| Calories | ~90 kcal |
| Total Fat | ~10g |
| Saturated Fat | ~1.5g |
| Carbohydrates | ~0.5g |
| Protein | ~0.6g |
| Sodium | ~70mg |
It’s a little heavier than your average mayo, thanks to the richness of egg yolks, but hey—totally worth it for the flavor.
Why Make Kewpie Mayo at Home?
Sure, you could buy a bottle, but there’s something special about making it yourself.
Benefits Over Store-Bought
- No preservatives: You control what goes into it.
- Customizable flavor: Want it sweeter? Tangier? Adjust it easily.
- Freshness: Nothing beats the taste of fresh mayo.
- Saves money: Store-bought Kewpie can be pricey.
Plus, there’s just a sense of pride that comes with saying, “Yeah, I made that.”
FAQs about Kewpie Mayo Recipe
What makes Kewpie mayo different from regular mayonnaise?
Kewpie mayo uses only egg yolks (not whole eggs), giving it a richer, creamier texture and a slightly tangy, umami-packed flavor compared to American mayonnaise.
Can I substitute regular mayo for Kewpie mayo in recipes?
You can, but the taste and texture will differ. For the best authentic flavor, it’s worth making or buying real Kewpie mayo.
Is Kewpie mayo healthier than regular mayo?
It depends on your health goals. Kewpie mayo tends to be slightly richer in fat because of the extra egg yolks but is often free from added sugars and artificial preservatives.
Can I make Kewpie mayo without rice vinegar?
Yes! If you don’t have rice vinegar, you can substitute it with a mild vinegar like apple cider vinegar or even lemon juice for a similar tang.
How long does homemade Kewpie mayo last?
Stored in an airtight container in the fridge, homemade Kewpie mayo can last up to 1 week. Always check for any changes in smell or texture before using.


