Katsu Recipe: If you’ve ever dived into the world of Japanese cuisine, you’ve probably heard of “Katsu.” But what exactly is it? Katsu, short for katsuretsu, simply means “cutlet” in Japanese. It refers to a breaded and deep-fried piece of meat, usually pork or chicken, that is crispy on the outside and juicy on the inside. Think of it as Japan’s answer to schnitzel—but with its own distinctive flavor and flair.
Katsu is commonly served with a mound of finely shredded cabbage, a bowl of steamed white rice, and a drizzle (or dip) of savory, tangy tonkatsu sauce. It’s hearty, comforting, and completely irresistible.
It’s not just popular in restaurants or bento boxes. Katsu has found its way into sandwiches (called katsu sando), curries (katsu curry), and even ramen toppings. Whether you’re a seasoned home chef or just someone looking for a cozy new dish to try, Katsu is both accessible and deeply satisfying to make.
Origins of the Katsu Dish
Katsu may feel quintessentially Japanese, but its roots are actually European. The dish was inspired by the Western-style cutlet, introduced to Japan in the late 19th century during the Meiji Restoration. At the time, Japan was opening its doors to Western culture, and with that came food influences—one of them being the European breaded cutlet.
Originally, Katsu was made with beef and called gyū katsu. Over time, pork took the spotlight, and the beloved tonkatsu (pork cutlet) was born. As Japanese cuisine evolved, Katsu adapted into multiple regional and creative variations, including chicken, fish, and even tofu katsu for vegetarians.
Today, Katsu is not only a culinary staple but also a cultural one. It’s often eaten before exams or competitions in Japan because “katsu” is a homophone for the verb “katsu” (勝つ), which means “to win.” So yes, eating Katsu isn’t just delicious—it might even bring you good luck!
Types of Katsu
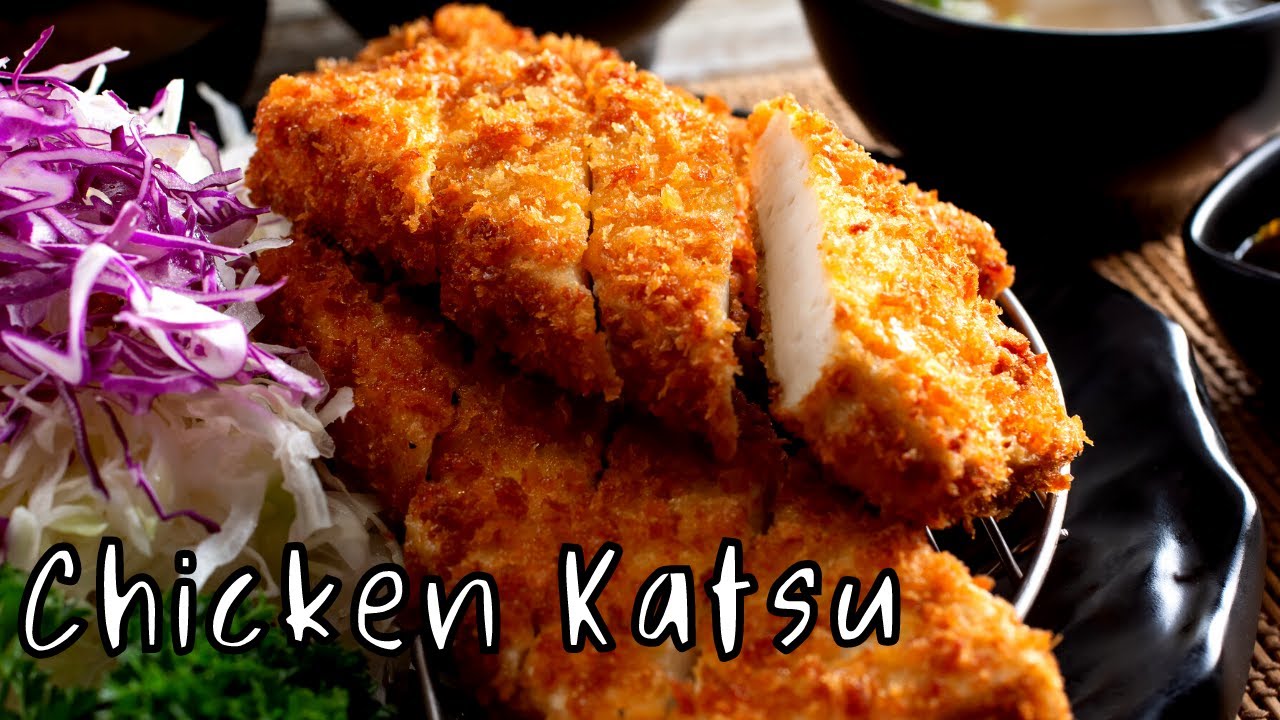
Chicken Katsu
Chicken Katsu is the perfect gateway into Katsu cooking. It’s lighter than pork, easier to find, and incredibly versatile. This variation uses boneless chicken breasts or thighs, pounded thin for even cooking. Once coated in flour, dipped in egg, and dredged through crunchy panko breadcrumbs, it’s fried until golden brown and served with katsu sauce and rice.
You can also serve Chicken Katsu in sandwiches, on salads, or as a protein-packed topping for noodle dishes. If you’re new to making Katsu, chicken is a great starting point—it’s forgiving, cooks quickly, and delivers flavor in every bite.
Tonkatsu (Pork Katsu)
Tonkatsu is arguably the most traditional and iconic form of Katsu. It typically uses pork loin (rosu) or tenderloin (hire), which are both tender and flavorful. The pork is pounded, seasoned, coated in flour, egg, and panko, and deep-fried until golden and crisp.
Served with shredded cabbage, miso soup, and a special tonkatsu sauce, Tonkatsu is more than just a meal—it’s an experience. In Japan, there are entire restaurants dedicated solely to Tonkatsu, offering different cuts and cooking styles.
If you want an authentic, deeply savory experience, Tonkatsu is your go-to.
Other Katsu Variations
Katsu isn’t limited to just pork or chicken. There are tons of creative takes on this classic. Here are a few notable ones:
- Gyū Katsu: Thin-sliced beef cutlet, often cooked rare in the center and served with a hot stone for DIY searing.
- Fish Katsu: White fish like cod or tilapia, breaded and fried—perfect for seafood lovers.
- Tofu Katsu: A fantastic vegetarian version using firm tofu, pressed, seasoned, and coated in panko.
- Katsu Curry: Any Katsu, usually pork or chicken, served atop Japanese curry and rice.
These variations keep the crispy, comforting essence of Katsu but allow for dietary flexibility and creativity. Whether you’re a carnivore, pescatarian, or vegetarian, there’s a Katsu for you.
Ingredients Needed
Main Ingredients
To make a traditional Katsu dish, you don’t need anything too fancy. Here are the staples:
- Meat: Boneless pork loin, tenderloin, or chicken breasts/thighs.
- Salt & Pepper: Basic seasoning to bring out flavor.
- All-Purpose Flour: For the first layer of coating.
- Eggs: Beaten, to help the panko adhere.
- Panko Breadcrumbs: Japanese-style breadcrumbs that are light, airy, and super crispy.
- Oil for Frying: Vegetable, canola, or peanut oil are good choices.
- Katsu Sauce: Store-bought or homemade (more on that later).
- Shredded Cabbage & Steamed Rice: For the classic side presentation.
Optional Additions and Substitutes
Want to tweak your Katsu game? Try these:
- Gluten-Free Flour & Breadcrumbs: For dietary restrictions.
- Egg Substitutes: Like aquafaba or cornstarch slurry for egg-free versions.
- Seasonings: Garlic powder, onion powder, or even a pinch of curry powder for an extra punch.
You can also experiment with different types of panko—some are finer, some chunkier, and each offers a different crunch profile.
Choosing the Best Cuts of Meat
Choosing the right meat makes a big difference. For pork, the loin (rosu) offers a nice balance of meat and fat, while tenderloin (hire) is leaner and more delicate. For chicken, thighs are juicier but breasts are leaner and cook faster.
Make sure your meat is uniform in thickness for even frying. You can use a meat mallet to pound it to about ½ inch thickness. Not only does this help with cooking, but it also makes the meat more tender.
Essential Tools for Making Katsu
Kitchen Equipment You’ll Need
You don’t need a professional kitchen to whip up a good Katsu, but a few tools will make life easier:
- Cutting Board & Sharp Knife: For prepping your meat.
- Meat Mallet: To flatten and tenderize.
- Mixing Bowls: For your flour, eggs, and panko.
- Tongs or Chopsticks: For handling the meat without losing coating.
- Deep Frying Pan or Dutch Oven: For a stable frying environment.
- Oil Thermometer: To monitor temperature and avoid burning.
- Paper Towels & Wire Rack: For draining and keeping the crust crisp.
Having these on hand streamlines your process and helps maintain kitchen safety, especially when hot oil is involved.
Preparing Your Workstation
Before you even crack an egg, make sure your setup is on point. Lay out three shallow bowls: one for flour, one for beaten eggs, and one for panko. Keep your meat nearby, and have a plate or tray ready for breaded pieces.
Heat your oil gradually while you prep. If you rush this part, you’ll end up with unevenly cooked meat or soggy breading. A neat, well-organized station helps you focus on the cooking instead of fumbling around.
Preparing the Meat
Proper Cleaning and Trimming
Start with clean hands and a sanitized surface. Rinse your meat under cold water and pat it dry with paper towels. For pork or chicken, trim off any excess fat or sinew. This not only improves texture but also helps the breading adhere more evenly.
Once trimmed, lay the meat flat and cut any uneven areas to ensure consistent thickness. Uneven pieces can cause some parts to overcook while others stay raw—not what we want.
Preparing the Meat
Tenderizing Techniques
One of the secrets to juicy, melt-in-your-mouth Katsu is proper tenderizing. Tenderizing serves two main purposes: it ensures even cooking and breaks down the fibers to make the meat softer.
Here’s how to do it right:
- Pound It Out: Use a meat mallet or the back of a heavy knife to gently pound the meat to about ½ inch thick. Do this evenly across the surface to avoid thinner sections cooking faster and drying out.
- Score the Meat: Especially with pork, lightly scoring the surface (just shallow crisscross cuts) can prevent it from curling during frying and allows seasoning to penetrate more deeply.
- Marinate if Needed: For an extra punch of flavor and tenderness, you can marinate your meat for 15-30 minutes in a mix of soy sauce, mirin, or sake. This step is optional but adds another layer of deliciousness.
Once your meat is pounded and ready, pat it dry again to help the flour stick better. Moisture is the enemy of crispy Katsu, so get it as dry as possible before you start breading.
Seasoning and Coating Process
Seasoning for Authentic Flavor
Seasoning might sound simple, but it makes or breaks a Katsu. At its core, traditional Katsu is seasoned very lightly—salt and pepper are often enough. This minimalist approach lets the natural flavors of the meat and the crunch of the panko shine through.
Here are some seasoning ideas:
- Basic Seasoning: Salt both sides generously and add a bit of freshly ground black pepper.
- Flavor Boosters: Garlic powder, onion powder, or a touch of smoked paprika can elevate the taste.
- Japanese Twist: Try sprinkling a little bit of dashi powder or furikake (Japanese seasoning mix) for umami depth.
After seasoning, let the meat sit for 5-10 minutes. This helps the flavor absorb into the surface and ensures it sticks through the frying process.
Breading in the Classic Japanese Style
Now comes the most satisfying part: the coating! This traditional three-step dredging method gives Katsu its signature crunch.
Step 1: Dredge in Flour
Lightly coat each piece of meat with all-purpose flour. Shake off the excess. This dry layer helps the egg stick better and creates a barrier that locks in the juices during frying.
Step 2: Dip in Beaten Eggs
Crack two eggs into a shallow bowl and beat them well. Dip the floured cutlet into the egg, coating it completely. This acts as a glue for the breadcrumbs.
Step 3: Coat in Panko Breadcrumbs
Finally, press the cutlet into a plate of panko breadcrumbs. Don’t just sprinkle—press the breadcrumbs firmly into the meat so they stick well. Flip and repeat.
Here’s a tip: don’t rush. Let the breaded cutlets rest on a tray for 5-10 minutes before frying. This gives the coating time to set and reduces the chance of it falling off in the oil.
The Art of Frying Katsu
Choosing the Right Oil
The oil you choose plays a massive role in how your Katsu turns out. You want something with a high smoke point that won’t overpower the taste of the dish.
Here are your best bets:
- Vegetable Oil
- Canola Oil
- Peanut Oil
- Sunflower Oil
Avoid strong-flavored oils like olive oil or sesame oil for frying—they burn too quickly and affect the taste.
Oil Temperature Matters: Aim for 340°F to 350°F (170°C to 175°C). If it’s too hot, the breadcrumbs will burn before the meat cooks. Too cold, and you’ll end up with greasy, soggy Katsu.
Use a thermometer if you can. If not, drop a breadcrumb in—if it sizzles immediately and rises to the surface, your oil is ready.
Getting the Perfect Crisp
Time to fry!
- Gently place one or two cutlets into the hot oil—don’t overcrowd the pan or the temperature will drop too fast.
- Fry each side for about 3–4 minutes or until golden brown. Flip only once to avoid breaking the coating.
- Use tongs or chopsticks to handle the meat gently. Rough movements can cause the breading to flake off.
- Once done, transfer the Katsu to a wire rack (not paper towels) to drain excess oil while keeping the crust crispy.
Let it rest for a few minutes before slicing—it helps the juices settle and keeps the meat tender.
Making Homemade Katsu Sauce
Traditional Japanese Tonkatsu Sauce Recipe
Store-bought Katsu sauce is great, but making your own takes the flavor to a whole new level. Here’s a quick, delicious recipe for homemade tonkatsu sauce:
Ingredients:
- 1/4 cup ketchup
- 2 tablespoons Worcestershire sauce
- 1 tablespoon soy sauce
- 1 tablespoon mirin (or sugar)
- 1 teaspoon Dijon mustard
- A pinch of garlic powder (optional)
Instructions:
- Mix all the ingredients in a bowl.
- Stir until well blended.
- Taste and adjust—add more mirin for sweetness, more mustard for tang.
This sauce is thick, tangy, slightly sweet, and full of umami—it’s basically the soul mate of your crispy Katsu.
Alternative Sauce Ideas
Want to mix it up? Try these:
- Spicy Mayo: Mayo + Sriracha for a creamy kick.
- Ponzu Sauce: For a citrusy, soy-based flavor—great with chicken.
- Japanese Curry Sauce: Perfect for turning your Katsu into Katsu Curry.
- Teriyaki Glaze: Sweet and sticky, a fun twist for kids.
Don’t be afraid to experiment. Katsu is like a blank canvas—it works beautifully with bold flavors.
Side Dishes to Pair with Katsu
Classic Rice and Cabbage
When it comes to classic Japanese comfort food, Katsu is almost always served with two key sides: steamed white rice and shredded cabbage. These aren’t just fillers—they’re carefully chosen companions that complement the richness of fried meat.
Steamed White Rice: This fluffy, sticky rice helps balance the crispy, savory texture of Katsu. It’s neutral in flavor, making it the perfect base to soak up the juicy meat and Katsu sauce. Use Japanese short-grain or medium-grain rice if possible. Rinse the rice thoroughly before cooking to remove excess starch and get that signature glossy texture.
Shredded Cabbage: Thinly sliced raw cabbage adds freshness and crunch. It acts like a natural palate cleanser, cutting through the oiliness of fried food. Want it extra crispy? Soak the cabbage in ice water for 10 minutes before draining and serving. Many Japanese restaurants drizzle a little sesame dressing or a tangy vinaigrette over the cabbage, but it’s also fantastic plain.
Together, these sides make every bite of Katsu feel balanced—comforting yet refreshing.
Creative Side Dish Options
Want to go beyond the traditional rice-and-cabbage combo? Here are some creative, flavorful options that take your Katsu meal to the next level:
- Miso Soup: Warm and savory with seaweed, tofu, and green onions. It’s a light, nourishing complement to the fried cutlet.
- Pickled Vegetables (Tsukemono): These bright, acidic veggies add a pop of flavor and crunch. Try pickled radish or cucumber.
- Edamame: A simple, protein-rich side dish. Steam and sprinkle with sea salt for a healthy nibble.
- Japanese Potato Salad: Creamy and slightly sweet, often made with mashed potatoes, carrots, and cucumber.
- Seaweed Salad: Briny and refreshing, it adds another texture and boosts your umami game.
Mix and match these sides to suit your mood. Whether you keep it traditional or go adventurous, Katsu plays well with almost anything.
Plating and Presentation Tips
Aesthetic Arrangement Ideas
Japanese cuisine places a huge emphasis on visual appeal. A well-plated Katsu not only tastes great—it looks beautiful too. Here are some tips to elevate your Katsu presentation game:
- Use a Flat Plate: Place the cutlet slightly off-center to create visual balance.
- Slice the Katsu: Cut the fried meat into even strips, about ¾ inch wide, before plating. It makes the dish easier to eat and gives it that professional touch.
- Fan the Slices: Arrange the Katsu slices in a slight fan shape. It looks elegant and shows off the crispy coating.
- Add Color: Serve with a side of vibrant green cabbage, bright red pickles, or even a wedge of lemon for visual contrast.
- Rice in a Bowl: Scoop the rice into a small bowl and invert it onto the plate for a neat dome shape.
This method isn’t just about looking fancy—it enhances the dining experience by creating a balanced and inviting plate.
Garnishing for Extra Appeal
Little details make a big difference. Here are some garnish ideas to add flavor, texture, and style:
- Fresh Herbs: Sprinkle finely chopped parsley or green onions over the top for a pop of green.
- Sesame Seeds: Toasted white or black sesame seeds add a nutty flavor and visual appeal.
- Lemon Wedges: A quick squeeze adds brightness and helps cut through the richness of the meat.
- Drizzle Sauce Artistically: Instead of drowning the Katsu in sauce, drizzle it in zigzag patterns or serve it on the side for dipping.
Don’t forget your plate itself! Using traditional Japanese dishware or rustic ceramic plates adds an authentic feel to your home dining experience.
Storage and Reheating Tips
Keeping Katsu Fresh
Let’s be honest—Katsu is at its best when it’s fresh and hot. But if you’ve got leftovers (lucky you!), storing them properly ensures you’ll enjoy a second round that’s almost as good as the first.
How to Store:
- Let the Katsu cool completely before storing to prevent condensation and sogginess.
- Wrap each piece in paper towel and place in an airtight container.
- Store in the refrigerator for up to 3 days.
Avoid adding sauce before storing. Always keep the sauce separate to preserve the crispiness of the breading.
Freezing Katsu:
Want to prep ahead? You can freeze uncooked breaded cutlets. Lay them flat on a tray to freeze individually, then transfer to a freezer bag. When you’re ready to eat, fry them straight from frozen—just add an extra couple of minutes to the cooking time.
Best Reheating Methods
The trick to reheating Katsu is bringing back the crisp without drying out the meat. Here are the best ways to do it:
- Air Fryer: The top choice. Set it to 350°F (175°C) and reheat for 5–7 minutes. It revives the crisp like magic.
- Oven: Place the Katsu on a wire rack over a baking tray. Heat at 375°F (190°C) for about 10–15 minutes.
- Stovetop: Lightly pan-fry on medium heat with a bit of oil for a quick crisp-up.
Avoid microwaving—it makes the breading soggy and the meat rubbery. If you must use it, reheat the Katsu in 30-second bursts and then finish it off in a skillet for crunch.
Common Mistakes to Avoid
Overcooking or Undercooking
Let’s be real—frying meat can be tricky. One of the biggest mistakes people make when preparing Katsu is getting the cook time wrong. Whether it’s chicken or pork, you want the inside perfectly juicy and the outside golden and crunchy.
Overcooking will dry out the meat and make it chewy. You’ll lose that juicy bite that makes Katsu so satisfying. On the other hand, undercooking—especially with pork or chicken—can be dangerous and lead to foodborne illness.
Tips to Avoid This:
- Use a meat thermometer. Aim for an internal temperature of 160°F (71°C) for pork and 165°F (74°C) for chicken.
- Flatten your meat evenly. Uneven thickness means uneven cooking.
- Don’t fry too fast. High heat may brown the outside quickly but leave the inside raw.
- Let the oil return to temp between batches. Frying too many cutlets at once lowers the oil temperature, which affects the texture and cook time.
A little patience goes a long way—especially when you’re aiming for crispy-on-the-outside, juicy-on-the-inside perfection.
Bread Crumbs Falling Off
There’s nothing worse than seeing your beautiful breading slide off in the oil. Not only does it ruin the texture, but it also makes your oil messy and your cutlet sad.
Why does it happen?
- The meat wasn’t dry enough before coating.
- You rushed through the breading steps.
- You handled the cutlet too much after breading.
- The oil wasn’t hot enough, so the coating didn’t set quickly.
How to Fix It:
- Pat the meat dry before you start breading.
- Follow the 3-step coating method precisely—flour → egg → panko.
- Press the breadcrumbs firmly onto the meat.
- Let the breaded cutlet rest for 5–10 minutes before frying.
- Avoid flipping multiple times. Flip only once to keep that crust intact.
Think of breading like applying layers of paint—you’ve got to prep the surface, apply evenly, and let it dry for best results.
Healthier Katsu Alternatives
Baking Instead of Frying
We get it—fried food isn’t always the healthiest choice. But the good news is, you can still enjoy the flavors and textures of Katsu with a lighter touch by baking instead of frying.
How to Bake Katsu:
- Preheat your oven to 400°F (200°C).
- Place breaded cutlets on a wire rack over a baking tray. This helps air circulate for even crisping.
- Lightly spray both sides of the Katsu with cooking oil or brush with olive oil.
- Bake for 20–25 minutes, flipping once halfway through.
The result? A golden, crunchy coating with significantly less oil. While you won’t get that deep-fried flavor 100%, it’s still delicious—and way better for your waistline.
Bonus Tip: For extra crisp, turn on the broiler for the last 2–3 minutes. Keep a close eye to prevent burning.
Using Lean Meats and Whole Grain Breading
Another great way to healthify your Katsu is by switching up the ingredients:
- Choose lean cuts: Go for pork tenderloin, chicken breast, or even turkey breast. These options are high in protein and low in fat.
- Try plant-based proteins: Tofu, tempeh, or seitan can be excellent vegetarian bases that mimic meat’s texture when breaded and cooked right.
- Swap panko for whole-grain crumbs: Whole wheat panko or crushed bran flakes can add a nutty flavor and extra fiber.
- Use egg whites instead of whole eggs to cut cholesterol.
You can also experiment with air frying, which uses minimal oil but still gives that crisp texture we all crave.
Being healthy doesn’t mean you have to give up comfort food. With these small tweaks, you can enjoy your Katsu and feel good about it too.
Cultural Significance of Katsu in Japan
Symbolism and Celebratory Uses
Katsu isn’t just a tasty meal—it holds deep cultural meaning in Japan. It’s commonly eaten before important events, like exams, job interviews, or sports competitions. Why? Because the word katsu is a homophone for the Japanese verb “勝つ” (katsu), which means “to win.”
So when a student eats Katsu the night before a big test, it’s more than just dinner—it’s a good luck charm.
Traditions Include:
- Parents preparing Katsu for children during exam season.
- Athletes eating Katsu before matches for a winning edge.
- Serving Katsu at school cafeterias during testing weeks.
It’s the ultimate fusion of food and meaning. In Japan, eating Katsu isn’t just about filling your stomach—it’s about feeding your spirit.
Katsu in Modern Japanese Cuisine
In modern Japan, Katsu has gone beyond the traditional plate. It’s evolved into street food, gourmet fare, and fast food staples. From convenience store Katsu sandwiches to high-end Tonkatsu specialty restaurants, the dish has proven its staying power.
Modern Variations You’ll Find in Japan:
- Katsu Sando: Crispy cutlet sandwiched between fluffy white bread with tonkatsu sauce—often sold in convenience stores or bakeries.
- Katsu Don: Katsu simmered in sweet soy-based sauce with egg and served over rice.
- Katsu Ramen: A twist on ramen with a crispy cutlet on top.
- Cheese Katsu: Pork cutlet stuffed with gooey cheese before frying. Yes, it’s as good as it sounds.
It’s clear that Katsu is more than a meal—it’s a dynamic part of Japanese culinary identity that continues to evolve with the times.
FAQs about Katsu Recipe
What is Katsu?
Katsu is a popular Japanese dish that features breaded and deep-fried meat, typically chicken or pork. The term “katsu” is a shortened form of “katsuretsu,” the Japanese transliteration of the word “cutlet.”
What ingredients are needed for a Katsu recipe?
The essential ingredients for a basic Katsu recipe include:
- Meat (chicken or pork)
- Salt and pepper
- Flour
- Eggs
- Panko breadcrumbs
- Oil for frying
How do you prepare Katsu?
To prepare Katsu, start by seasoning the meat with salt and pepper. Then, dredge the meat in flour, dip it in beaten eggs, and coat it with Panko breadcrumbs. Heat oil in a pan and fry the breaded meat until it’s golden brown and cooked through.
What is the best way to serve Katsu?
Katsu is traditionally served with steamed rice, shredded cabbage, and a thick, sweet-tonka sauce called Tonkatsu sauce. It can also be enjoyed with a side of miso soup.
Can Katsu be made with other types of meat?
Yes, while chicken and pork are the most common, Katsu can also be made with other meats like beef or even with vegetarian alternatives like tofu or seitan for a meat-free version.
Is Katsu suitable for meal prep?
Absolutely! Katsu can be prepared in advance and reheated, making it a convenient option for meal prep. It retains its texture well, especially if reheated in the oven or air fryer.
What are some common variations of Katsu?
Some popular variations include:
- Cheese Katsu: Stuffed with cheese before breading.
- Menchi Katsu: Made with ground meat instead of a whole cut.
- Katsu Curry: Served with Japanese curry sauce over rice.
These FAQs aim to provide a comprehensive understanding of Katsu, offering a glimpse into its preparation, variations, and how it can be served. Whether you’re a novice cook or a seasoned chef, incorporating Katsu into your culinary repertoire can add a delicious twist to your meals.
Conclusion
From its humble origins to its deep-rooted symbolism in Japanese culture, Katsu is more than just fried meat—it’s an experience. With the right ingredients, a little practice, and the step-by-step guide above, you can bring this beloved dish to life right in your own kitchen.
So go ahead—grab your apron, heat up that oil, and get ready to fry up some joy. Whether it’s your first time or your hundredth, every bite of Katsu feels like a small victory.