Jurassic Tacos Salsa Recipe: Let’s talk tacos—specifically, the legendary Jurassic Tacos. If you’ve ever had the pleasure of biting into one, you know the salsa is the secret weapon that elevates it to another dimension. That perfectly balanced burst of heat, tang, and fresh flavor isn’t just an afterthought—it’s the soul of the taco. And now, you’re going to learn how to make it from scratch in your very own kitchen.
What makes this salsa so special? It’s not just another tomato blend. It’s a flavor bomb that combines fire-roasted vegetables, zesty lime juice, and just the right touch of heat to deliver a bold, smoky punch that lingers on the taste buds. Whether you’re a taco enthusiast or just someone who loves making sauces at home, this recipe will be your new obsession.
We’ll walk you through everything—from picking the perfect ingredients to blending and storing it like a pro. Buckle up, because by the end of this article, you’ll be making Jurassic Tacos Salsa that rivals the original.
List of Ingredients You’ll Need
Before we jump into the fiery magic of salsa-making, let’s break down everything you need. The best part? Most of these are simple pantry staples you probably already have. But when combined, they create something extraordinary.
Core Ingredients:
- 6 Roma tomatoes – firm and ripe
- 2 jalapeño peppers – remove seeds if you want less heat
- 1 medium white onion – peeled and halved
- 4 garlic cloves – skin on for roasting
- 1 handful fresh cilantro – stems and all
- 1 lime – juiced
- 1 tablespoon white vinegar
- Salt – to taste (start with 1 tsp)
Optional Add-ins for Custom Flavor:
- 1 chipotle pepper in adobo sauce – for that smoky depth
- 1 teaspoon cumin powder
- A dash of sugar – balances acidity if needed
- 1 serrano pepper – for extra heat if you’re brave
Substitutions & Pro Tips:
- No Roma tomatoes? Use plum or heirloom varieties.
- Hate cilantro? Swap for flat-leaf parsley or skip altogether.
- Want it milder? Use only one jalapeño and deseed it.
This recipe is flexible enough to adapt to your taste but structured enough to guarantee an amazing outcome every time. The magic is in the method—and we’re about to show you just that.
Kitchen Tools You’ll Need
Great salsa isn’t just about what goes in it—it’s also about how you make it. The tools you use can actually change the texture and flavor in big ways. Here’s what you’ll want on your kitchen counter before you begin.
Must-Have Tools:
- Cast iron skillet or sheet pan – for roasting
- Blender or food processor – for blending
- Tongs – to flip roasted items
- Sharp knife – for prepping your veggies
- Cutting board
- Citrus juicer – optional but helpful
- Mixing bowl and spoon – for seasoning
Optional (But Awesome) Tools:
- Mortar & pestle – for hand grinding spices
- Gas stove top or grill – for fire-roasting
- Mason jars – for storage and serving
Having the right tools not only makes the process smoother but can also enhance the final taste. Don’t stress if you’re missing a few—there’s always a workaround.
Choosing the Right Tomatoes
Now let’s get into the nitty-gritty of what really forms the base of your salsa—tomatoes. Not all tomatoes are created equal, and using the wrong ones can throw off your flavor balance completely.
Fresh vs. Canned
If you’re aiming for the freshest, boldest flavor, fresh tomatoes win every time. Canned tomatoes are convenient, but they often come with added sodium or preservatives that can dull the natural zing of your salsa.
Best Varieties for Salsa:
- Roma tomatoes – low moisture, rich flavor
- Plum tomatoes – slightly sweeter, still meaty
- Heirloom – more acidic and juicy (use less vinegar if you go this route)
Roasted vs. Raw:
This recipe uses roasted tomatoes to amp up the depth. Roasting intensifies sweetness, cuts acidity, and gives you that unmistakable Jurassic Tacos taste. It’s like the difference between boiled chicken and grilled steak—both are food, but one is clearly more flavorful.
The Role of Peppers in Flavor
No salsa is complete without peppers. They bring the heat, the smoky undertones, and sometimes even a touch of sweetness. In Jurassic Tacos Salsa, peppers are the heart of the flavor profile—bold, assertive, and deeply satisfying when balanced right.
Types of Peppers Used:
- Jalapeños: The classic green pepper most commonly used. They offer mild to medium heat and a fresh, grassy flavor. For a milder salsa, remove the seeds and ribs before roasting.
- Serrano Peppers: These are spicier than jalapeños and bring a sharper heat. Use them if you like your salsa with a serious kick.
- Chipotle Peppers (in adobo): These smoked and dried jalapeños are soaked in a tangy tomato-based sauce. Adding just one can infuse the salsa with a smoky depth that mimics fire-grilled flavor.
Adjusting Spice Levels:
Here’s the rule: the more seeds and membranes you leave in, the hotter it gets. Want it milder? Use one jalapeño, deseeded and deveined. Want it hotter? Add a serrano or go wild with an extra chipotle. It’s all about balance.
Roasting for Depth:
Roasting the peppers does two things:
- Enhances flavor by caramelizing natural sugars.
- Mellows heat, making the salsa rich rather than harshly spicy.
Try roasting your peppers directly over an open flame or in a hot skillet until they’re charred and blistered. That smoky aroma? Pure gold.
Garlic & Onion: The Bold Backbone
Garlic and onion are the unsung heroes of salsa—they bring that deep, savory edge that rounds out all the fresh, acidic notes. Without them, your salsa can taste flat or overly tangy. These two provide the “umami” hit that makes it irresistible.
Sautéed vs. Raw:
- Roasting or sautéing your onions and garlic mellows their bite and adds sweetness.
- Raw garlic or onion brings sharpness and bite—great for a fresh salsa but not ideal for this roasted Jurassic-style version.
In our recipe, we roast them along with the tomatoes and peppers. For the garlic, roast with the skin on to prevent burning. Once soft and browned, peel them and toss them into the blender.
Recommended Quantities:
- 1 medium white onion, halved or quartered
- 4 garlic cloves, unpeeled
If you like a stronger garlic flavor, add another clove or two. Prefer something milder? Cut it back to two cloves. Taste as you go and adjust accordingly.
Pro Tip:
Don’t over-roast garlic—it turns bitter. Look for golden brown and soft cloves. For onions, you want caramelized edges and softened centers. This balance creates the complex base that sets this salsa apart.
Acidic Balance: Lime Juice & Vinegar
Acidity isn’t just about flavor—it’s about balance. The right level of acid cuts through the richness of roasted vegetables and brings a fresh zip that keeps your palate coming back for more.
The Tangy Twist:
- Lime juice adds freshness and that unmistakable citrusy tang.
- White vinegar offers sharpness and helps preserve the salsa slightly longer in the fridge.
Together, they create a two-layer punch of acidity—bright and zingy at first, then clean and sharp as the flavor settles.
How Much to Use:
- Juice of 1 lime (about 2 tablespoons)
- 1 tablespoon white vinegar
Add them to the blender last, after you’ve tasted your salsa. Too tangy? Dial back with a pinch of sugar. Not tangy enough? Squeeze in a bit more lime.
Substitutes if You’re Out:
- Apple cider vinegar – adds fruity notes
- Lemon juice – slightly sharper but still refreshing
- Rice vinegar – milder, less harsh
Remember, salsa should make your taste buds dance, not pucker. Taste, adjust, and find your sweet (or sour) spot.
Fresh Herbs: Cilantro Magic
Ah, cilantro. You either love it or you hate it. For fans, it’s the herb that gives salsa its signature green zing. For the rest, don’t worry—we’ve got workarounds.
How Much to Use:
- 1 generous handful (around 1/2 cup loosely packed)
Stems are totally fine—just chop them finely. They carry tons of flavor, and skipping them is like leaving money on the table.
What if You Hate Cilantro?
You’re not alone. Around 10-15% of people think cilantro tastes like soap (thanks, genetics). Try these alternatives:
- Flat-leaf parsley – adds greenery without the soapy notes
- Fresh oregano or basil – unexpected, but delicious twists
- Green onions – for a grassy freshness
Chopping Techniques:
Rinse your cilantro well (it can be gritty), pat it dry, and chop it finely before adding it to your blender. This prevents long strings in the salsa and helps it blend smoothly.
Whether you’re a cilantro lover or a hater, adding a fresh green herb brings a pop of color and vibrancy that every good salsa needs.
Salt & Seasoning Game
Seasoning might seem like a no-brainer, but don’t underestimate the power of salt and spices. They unlock the full potential of every ingredient in your salsa. Skip this step, and your salsa will taste… meh. Nail it, and you’ll have something crave-worthy.
What Kind of Salt to Use:
- Kosher salt – clean taste, dissolves well
- Sea salt – adds a subtle minerality
- Avoid iodized salt – it can taste metallic
Start with 1 teaspoon of salt and adjust after blending. Salsa can trick your taste buds right after blending, so let it rest a bit before final seasoning.
Secret Spices to Elevate the Taste:
- Cumin – earthy warmth (start with ½ tsp)
- Black pepper – a mild kick
- Smoked paprika – adds smoky depth without heat
- Oregano – for a hint of herbal sharpness
Taste Test Tips:
- Let the salsa rest 10 minutes before tasting—it mellows out.
- Always test with a chip (they’re salty)—don’t just taste with a spoon.
- Add salt in pinches and retaste. Too salty? Add a squeeze of lime or a dash of sugar.
Seasoning is an art, not a science. Adjust and fine-tune until your salsa hits that sweet spot where all flavors sing.
Step-by-Step Guide: How to Make Jurassic Tacos Salsa
Now that we’ve walked through all the ingredients and how to prep them, it’s finally time to bring this salsa to life. This step-by-step process will give you a salsa that’s smoky, spicy, fresh, and unforgettable—just like Jurassic Tacos intended.
Step 1: Roast the Ingredients
Place tomatoes, tomatillos, onions, garlic, and your choice of chilies (jalapeños, serranos, or habaneros) on a hot skillet, grill, or broiler. Roast until charred and blistered. This smoky base is what gives Jurassic Tacos salsa its deep, prehistoric-level flavor.
Step 2: Blend It Right
Transfer the roasted ingredients to a blender. Add fresh cilantro, lime juice, and salt. Pulse instead of blending continuously—Jurassic-style salsa should be rustic and chunky, not overly smooth.
Step 3: Simmer for Boldness
Pour the blended salsa into a saucepan and simmer for 10–15 minutes. This step concentrates the flavors and melds the roasted notes into a rich, bold sauce.
Step 4: Final Seasoning Touch
Taste and adjust. Add more lime for acidity, salt for balance, or chilies for heat. A pinch of sugar can soften overly acidic tomatoes.
Step 5: Chill & Serve
Cool the salsa, refrigerate for at least 30 minutes, and serve with tacos, chips, or grilled meats. Enjoy!
Roasting vs. Boiling – Which is Better for Flavor?
People often debate: Should you roast or boil your ingredients when making salsa? Let’s break it down and see why Jurassic Tacos’ approach leans heavily on roasting.
| Method | Flavor | Texture | Color | Time |
|---|---|---|---|---|
| Roasting | Smoky, deep, caramelized | Slightly thicker, rustic | Darker and richer | 20–25 mins |
| Boiling | Mild, clean, slightly watery | Softer, smoother | Lighter and brighter | 10–15 mins |
Why Roasting Wins (Usually):
- Adds charred complexity
- Enhances natural sweetness
- Reduces water content, leading to a more concentrated flavor
Boiling can be good for quick salsas or when you want something light, but roasting gives that signature Jurassic-style depth.
If you’re short on time, boiling is okay—but if you want salsa that slaps, go with the roast.
Blending Techniques That Matter
Believe it or not, how you blend your salsa makes a big difference. Whether you want a rustic texture or a smooth restaurant-style dip, it’s all in the method.
Food Processor vs. Blender:
- Blender: Produces smoother results. Great for when you want a pourable salsa that coats tacos evenly.
- Food Processor: Perfect for a chunkier, rustic feel. Leaves bits of charred tomato and herbs for texture.
Chunky vs. Smooth – What’s Ideal?
It really depends on how you’re using the salsa.
- Chunky: Better for dipping with chips
- Smooth: Ideal for spooning over tacos, meats, or burritos
Pulse Method:
Use short pulses rather than blending continuously. This gives you more control and prevents over-processing. It’s like seasoning a dish—do it a little at a time and taste often.
Pro Tip: If your salsa ends up too thick, thin it out with a splash of water or lime juice. Too watery? Simmer it down for a few minutes to concentrate the flavors.
How to Store Your Salsa
So you’ve made a batch (or two), and now you’re wondering: how do I keep this gold fresh? Good news—this salsa stores really well.
Fridge Storage Tips:
- Store in glass containers for best flavor retention (plastic can absorb odors).
- Keep tightly sealed.
- Best consumed within 5–7 days.
Pro Tip: Let the salsa sit for a day—it actually tastes better after the flavors meld overnight.
Freezing Salsa:
Yes, you can freeze it! Let it cool completely, then:
- Pour into freezer-safe bags or containers
- Leave about 1 inch of space for expansion
- Label with date
- Freeze up to 3 months
To use, thaw overnight in the fridge. Stir well before serving—it may need a fresh squeeze of lime or a dash of salt.
Shelf Life Overview:
| Storage Method | Shelf Life |
|---|---|
| Room Temp (not recommended) | 2–4 hours |
| Refrigerated | 5–7 days |
| Frozen | Up to 3 months |
Keeping your salsa fresh means you can enjoy it longer—if it lasts that long, anyway.
Perfect Pairings with Jurassic Tacos Salsa
Let’s be honest—this salsa is so good, you could eat it straight from the jar with a spoon. But if you’re looking to take it to the next level, here are some incredible ways to serve it up and impress even the pickiest eaters.
Tacos (Obviously!)
Jurassic Tacos salsa was made for tacos. Whether it’s carne asada, grilled chicken, carnitas, or vegetarian tacos, this salsa ties all the flavors together. Spoon it on top right before serving for that final punch of heat and freshness.
Best Taco Pairings:
- Street-style tacos with grilled onions and cilantro
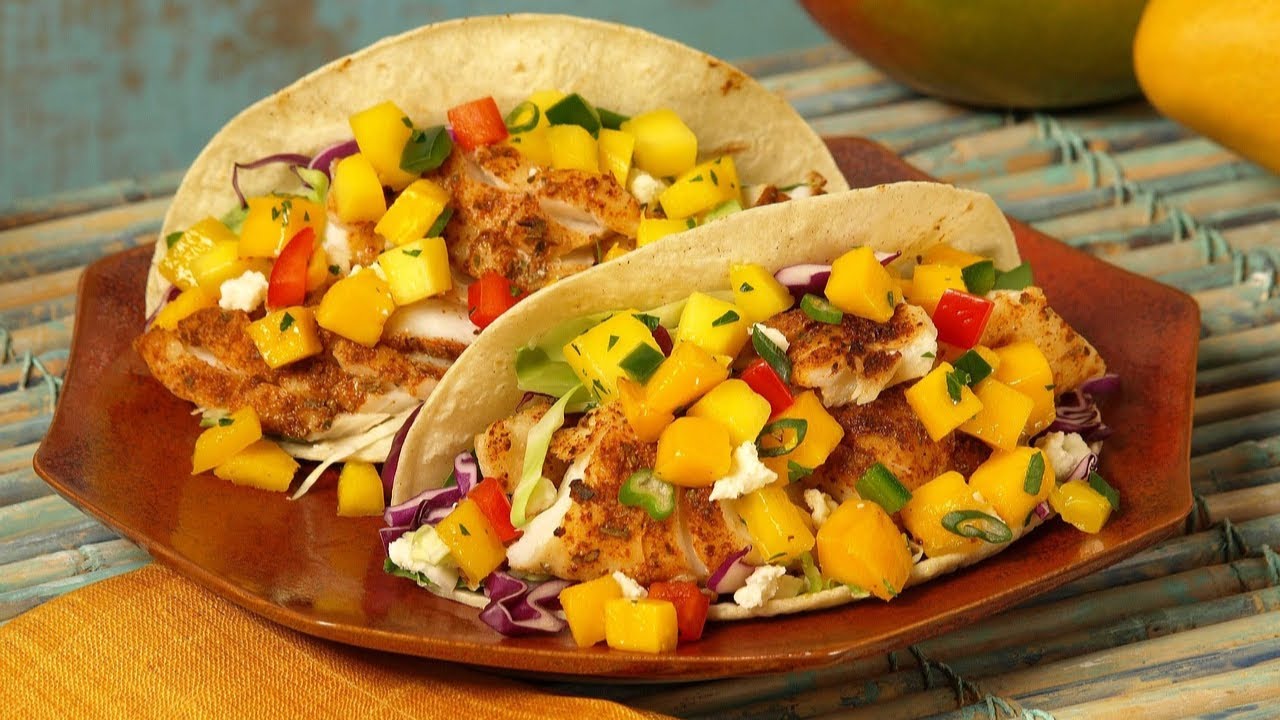
- Fish tacos with shredded cabbage and lime crema
- Mushroom or roasted veggie tacos for a vegan twist
Want a fun idea? Create a DIY taco bar and put this salsa center stage. It’ll disappear faster than you can say “más salsa, por favor.”
Nachos & Burritos
This salsa works wonders drizzled over loaded nachos. Pair it with melted cheese, black beans, jalapeños, and sour cream for an epic snack or party appetizer.
Wrap it in a burrito? Oh yes. The roasted flavors cut through rich meats and creamy fillings. Try it with:
- Rice, beans, and grilled steak burritos
- Breakfast burritos with scrambled eggs and chorizo
- Veggie burritos with quinoa and sweet potatoes
Beyond the Taco: Out-of-the-Box Ideas
Feeling adventurous? This salsa’s bold profile makes it super versatile. Try it with:
- Scrambled eggs or omelets – for a Mexican breakfast twist
- Grilled chicken or steak – as a dipping sauce or marinade
- Rice bowls or taco salads – as a dressing
- Burgers or sliders – swap ketchup for salsa!
- Quesadillas – for dipping or drizzling
And yes, it even makes a great topping for avocado toast. You’re welcome.
This salsa doesn’t just belong to tacos—it belongs in your everyday rotation. Once you try it on different dishes, you’ll wonder how you lived without it.
Common Mistakes to Avoid
Making salsa might seem simple, but even the best home cooks can stumble into a few traps. Let’s go over the biggest mistakes people make with homemade salsa—and how you can avoid them like a pro.
1. Over-Blending the Ingredients
This is one of the most common errors. If you blend too long, you end up with salsa soup. Unless you’re aiming for a hot sauce-like texture, keep it pulsed and rustic.
Fix: Use short pulses, check consistency often, and stop once you hit your preferred texture.
2. Choosing the Wrong Tomatoes
Watery or flavorless tomatoes will ruin the base. Avoid using standard salad tomatoes (like beefsteak) which are high in water and low in flavor.
Fix: Stick to Roma or plum tomatoes for a thicker, richer blend. Roast them for added depth.
3. Using Raw Onions and Garlic in Roasted Salsa
Raw onion and garlic are great for fresh salsas, but they’re too harsh for this roasted version. They overpower the smoky notes and make the salsa taste sharp.
Fix: Always roast your onion and garlic. It mellows their flavor and balances the salsa beautifully.
4. Overseasoning Before Resting
Salsa flavors evolve after blending. Many make the mistake of adding too much salt or lime juice before letting the salsa rest.
Fix: Let it sit for at least 30 minutes before doing your final seasoning. It will mellow and balance out on its own.
5. Skipping the Taste Test
Every batch is a little different, especially if you’re eyeballing measurements (which, let’s be honest, we all do).
Fix: Always taste before you finish. Test with a chip (not a spoon) to get the real effect.
Avoiding these rookie mistakes will take your salsa from decent to jaw-dropping. It’s the difference between a nice topping and the best salsa your guests have ever tasted.
Expert Tips to Elevate the Recipe
Okay, now you’ve got the basics down—but how do you go from “good salsa” to “people begging for your recipe”? Let’s unlock those expert-level moves that make a big difference.
1. Layer Your Flavors
Don’t just blend and go. Simmering after blending gives you a chance to layer flavors by adding extra garlic, spice, or lime juice in stages. Think of it like cooking chili—flavor gets deeper over time.
2. Add a Hint of Smoke
Want that taco truck char? Add:
- 1 chipotle in adobo sauce
- Or a dash of smoked paprika
- Or roast over an open flame instead of in the oven
This adds a deep, smoky flavor that’s hard to resist.
3. Rest Before Serving
Yes, this again—because it’s that important. Just like chili or soup, salsa gets better after it rests. Let it chill for at least 30 minutes, but overnight is even better. It allows all the flavors to mingle and mellow into perfection.
4. Balance is Everything
Too spicy? Add sugar or more tomatoes.
Too bland? Add lime or salt.
Too thick? Thin with water or more lime juice.
Think of salsa as a balancing act—not a set-in-stone recipe. Trust your taste buds.
5. Double Batch & Freeze
Since it freezes so well, make a double or triple batch and freeze in smaller portions. You’ll thank yourself later when you’re craving tacos and already have a jar of magic ready to go.
These tips separate the casual cook from the salsa master. Use them, and you’ll be everyone’s go-to for taco night.
Health Benefits of Homemade Salsa
You probably don’t think “healthy” when you think of tacos, but homemade salsa? It’s actually a nutritional powerhouse hiding in plain sight.
1. Low in Calories, Big on Flavor
Unlike creamy dips or store-bought condiments, this salsa is:
- Naturally low-calorie
- Fat-free
- Packed with flavor so you need less of it
It’s one of the few toppings you can enjoy guilt-free.
2. Packed with Vitamins & Antioxidants
Thanks to the fresh veggies and herbs, you get:
- Vitamin C from tomatoes, lime, and peppers
- Vitamin A from jalapeños
- Antioxidants that help fight inflammation
- Fiber that aids digestion
You’re basically getting a veggie boost without even trying.
3. No Preservatives or Additives
Unlike store-bought versions, this salsa is:
- Free of added sugars
- Low in sodium (you control the salt)
- Fresh and clean
You know exactly what’s in it. No weird ingredients you can’t pronounce—just real, roasted goodness.
4. Helps You Eat More Veggies
Let’s be real—who says no to more salsa on their taco? By topping your food with it, you’re sneaking in extra servings of veggies without even noticing.
Homemade salsa proves that delicious can also be nutritious. Now that’s a win-win.
FAQs about Jurassic Tacos Salsa Recipe
1. Can I can Jurassic Tacos Salsa for long-term storage?
Yes, you can! Use proper canning techniques (hot water bath method), sterilize your jars, and ensure the salsa is at the right pH level (typically below 4.6). The vinegar helps with preservation.
2. How spicy is the original version of this salsa?
It’s moderately spicy, thanks to roasted jalapeños. You can tone it down by removing seeds or kicking it up with serrano or chipotle peppers.
3. Can I make this without a blender?
Absolutely. Use a mortar and pestle or finely chop everything for a rustic salsa. It’s more labor-intensive but delivers amazing texture.
4. What’s the best tomato substitute if I don’t have Roma tomatoes?
Plum tomatoes or canned whole San Marzano tomatoes work great. Just make sure to drain the canned ones before roasting or blending.
5. Can I use dried herbs instead of fresh cilantro?
Fresh is best for flavor and color, but in a pinch, you can use 1 tsp of dried cilantro or substitute with parsley or oregano for a twist.
Conclusion
There you have it—a complete, step-by-step guide to recreating the bold, smoky, and addictive Jurassic Tacos Salsa right in your own kitchen. From choosing the right tomatoes to mastering the roast and blending like a pro, you now have every tool you need to elevate taco night forever.
This isn’t just a salsa. It’s a flavor experience—a perfect blend of heat, acidity, depth, and freshness that makes every bite unforgettable. And the best part? You made it yourself.
So the next time someone dips a chip into your salsa and pauses mid-bite with wide eyes, just smile and say, “It’s the Jurassic way.”


