Jeera Rice Recipe: If you’re craving a simple yet flavorful rice dish that pairs with almost anything, Jeera Rice should be your go-to recipe. It’s one of the easiest Indian side dishes you can whip up with minimal ingredients, but the aroma and taste will make you feel like a pro chef.
Whether it’s a lazy weekday lunch or a lavish dinner party, Jeera Rice brings that extra warmth and spice to your meal without overpowering it.
Ready to learn how to make restaurant-style Jeera Rice at home? Let’s dive in.
What is Jeera Rice?
Jeera Rice, also known as cumin rice, is a fragrant Indian dish made by tempering cumin seeds in ghee or oil and then mixing them with cooked basmati rice. While it may sound overly simple, the secret lies in the technique—the way the cumin is tempered, the rice is cooked, and everything is brought together at the end.
This dish is immensely popular in Indian households and restaurants alike. It’s not spicy, which makes it a perfect companion for bold and creamy curries like butter chicken, dal makhani, or palak paneer. The beauty of Jeera Rice lies in its versatility and ability to elevate even the most humble meals.
Why You’ll Love This Recipe
There are countless reasons why Jeera Rice is a crowd favorite, but here are a few that stand out:
- Quick and Easy: It takes under 30 minutes to prepare from start to finish.
- Flavorful Yet Simple: The cumin-infused aroma makes it delicious without being too complex.
- Customizable: Add veggies, nuts, or herbs to make it your own.
- Perfect for Meal Preps: It stores well and reheats beautifully.
- Pairs with Everything: From dal to meat curries, Jeera Rice is the ideal side.
Whether you’re a beginner or a seasoned cook, this recipe is foolproof. All you need is some good basmati rice, cumin seeds, and a bit of patience to let the aroma fill your kitchen.
Ingredients You’ll Need
Let’s talk ingredients—because simplicity doesn’t mean compromise. The magic of Jeera Rice lies in its minimalist ingredient list.
Basic Ingredients
Here’s what you’ll absolutely need:
- Basmati rice – 1 cup (long grain preferred)
- Cumin seeds (jeera) – 1.5 to 2 teaspoons
- Ghee or oil – 1.5 tablespoons (ghee gives a richer flavor)
- Salt – to taste
- Water – 2 cups (for stovetop method)
- Bay leaf – 1 (optional but adds subtle aroma)
Optional Add-ons for Flavor
Want to add a little twist? These are optional but highly recommended:
- Cloves – 2-3
- Green cardamom – 1-2 pods
- Cinnamon stick – a small piece
- Green chili – 1 (slit for mild heat)
- Chopped coriander – for garnish
- Sautéed onions – for added sweetness
- Cashews – roasted in ghee for crunch
These ingredients won’t take away from the dish’s simplicity but will definitely enhance the flavor and aroma.
Best Type of Rice to Use for Jeera Rice
The quality of rice can make or break your Jeera Rice. Basmati rice is the gold standard here—and not just any variety. Look for long grain, aged basmati rice for that perfect non-sticky, fluffy texture.
Why basmati? Because it’s naturally aromatic and complements the cumin flavor perfectly. When cooked right, each grain remains separate, giving that restaurant-style appeal. Avoid short-grain or sticky rice types; they’ll clump together and dilute the subtlety of jeera.
Pro tip: Always rinse your rice well and soak it for at least 20–30 minutes before cooking. This helps in removing excess starch and ensures fluffy rice every time.
Choosing the Right Spices
Jeera (cumin) is the star of this dish. Always use whole cumin seeds and not cumin powder. Toasting them in hot ghee releases essential oils that infuse the dish with its signature nutty and earthy flavor.
Other spices like bay leaves, cloves, cardamom, and cinnamon are optional but recommended if you want a slightly more aromatic version. They won’t overpower the cumin but will add depth to the flavor.
Always toast spices on medium heat—burnt cumin can taste bitter and ruin the whole dish.
Essential Equipment for Making Jeera Rice
You don’t need any fancy tools for this recipe, but here’s what helps:
- Heavy-bottomed saucepan or kadhai – for even cooking
- Rice cooker – if you prefer a hands-off method
- Strainer – to rinse and drain rice properly
- Wooden spatula or fork – to fluff rice gently
- Pressure cooker or Instant Pot – for a quicker version
Having the right equipment ensures your rice doesn’t stick, burn, or overcook.
Step-by-Step Guide to Making Jeera Rice
Ready to cook? Let’s walk through the process step by step. Follow these instructions and you’ll get perfect Jeera Rice every single time.
Step 1: Rinse and Soak the Rice
Start by measuring out your 1 cup of basmati rice and placing it in a bowl.
- Rinse it under cold water 3-4 times until the water runs clear.
- This removes excess starch and prevents the rice from becoming sticky.
- Then soak the rice in water for 20 to 30 minutes.
Soaking is optional but highly recommended. It helps the rice cook evenly and fluff up beautifully.
Step 2: Cook the Rice Perfectly
Drain the soaked rice and set it aside.
- In a pot, bring 2 cups of water to a boil.
- Add a pinch of salt and a drop of oil or ghee (this helps keep the grains separate).
- Add the drained rice and cook uncovered on medium heat.
- Once the water is mostly absorbed and you see small holes on the surface, cover the pot, reduce the heat to low, and cook for 5-7 minutes.
Once done, switch off the heat and let it sit covered for another 10 minutes. This resting time ensures all moisture is absorbed and the grains are perfectly cooked.
Step 3: Prepare the Jeera (Cumin) Tempering
While the rice is resting, prepare your tadka (tempering):
- In a small pan or kadhai, heat 1.5 tablespoons ghee or oil.
- Add 1.5–2 teaspoons cumin seeds.
- Let them sizzle and crackle until aromatic.
- You can also toss in a bay leaf, a couple of cloves, or a small cinnamon stick at this stage for extra aroma.
Make sure the cumin doesn’t burn—medium heat is key.
Step 4: Mix the Rice with the Jeera Tadka
Now comes the best part—bringing everything together:
- Fluff the cooked rice gently using a fork.
- Pour the prepared tadka over the rice.
- Mix it gently without breaking the grains.
Use a light hand to avoid making the rice mushy. You want each grain to remain separate and intact.
Step 5: Final Touch and Fluffing
Once everything is mixed, let it sit for a few minutes to absorb the flavor. Then garnish with:
- Freshly chopped coriander leaves
- Optional roasted cashews or fried onions
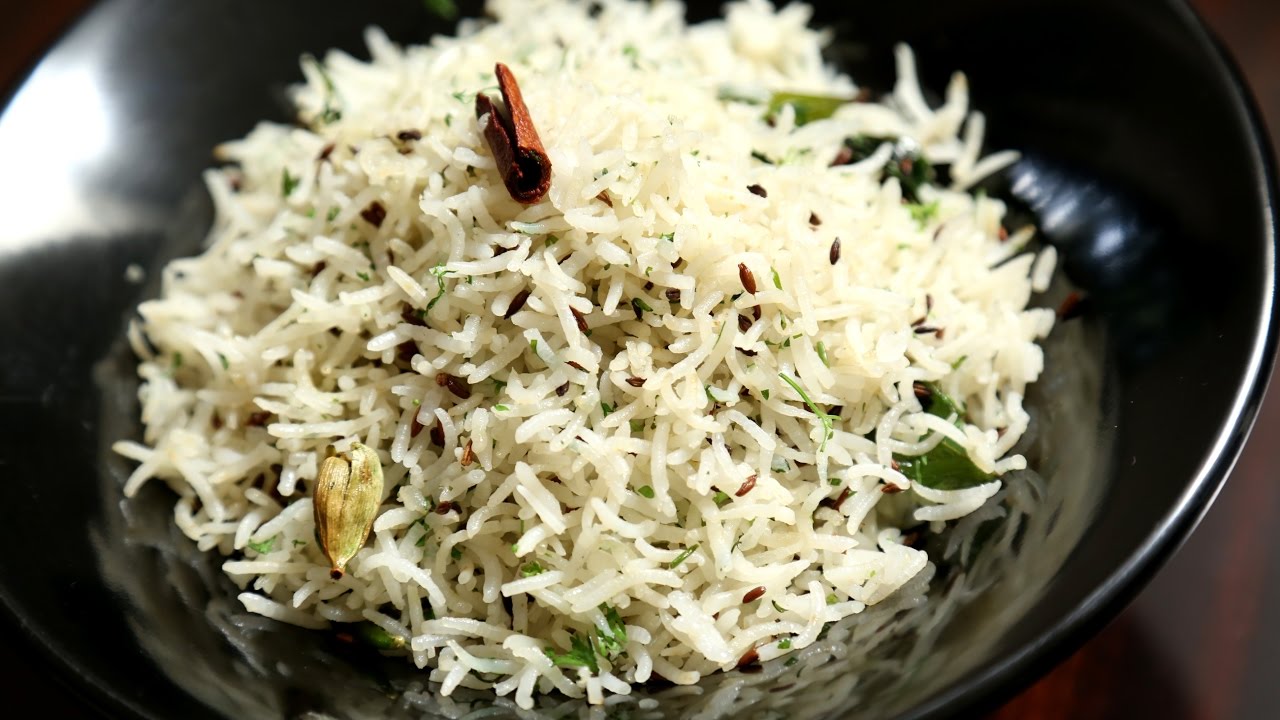
Your Jeera Rice is now ready to serve. Simple, aromatic, and utterly delicious!
Jeera Rice in Pressure Cooker
Want to save time? The pressure cooker method is your best friend. It’s perfect for those busy weeknights when you want a hearty side dish without hovering over the stove.
How to make Jeera Rice in a pressure cooker:
- Rinse and soak 1 cup of basmati rice for 20–30 minutes, then drain.
- Heat 1.5 tablespoons of ghee in a pressure cooker.
- Add 1.5 teaspoons cumin seeds and let them splutter.
- Add whole spices like bay leaf, cloves, cardamom, and a small cinnamon stick (optional).
- Stir in the soaked rice and sauté gently for a minute.
- Add 1.5 cups of water and salt to taste.
- Close the lid and cook on medium heat for 1 whistle.
- Turn off the heat and let the pressure release naturally.
Once the pressure drops, gently fluff the rice with a fork. This method gives you perfectly cooked, non-sticky Jeera Rice in under 15 minutes.
Jeera Rice in Instant Pot
Got an Instant Pot? You’re just a few button presses away from the fluffiest Jeera Rice. It’s quick, easy, and perfect for batch cooking or meal prepping.
Steps for making Jeera Rice in an Instant Pot:
- Turn the Instant Pot on Sauté Mode.
- Heat 1.5 tablespoons ghee or oil.
- Add 1.5–2 teaspoons cumin seeds and let them crackle.
- Add optional whole spices for added aroma.
- Add 1 cup rinsed and soaked rice, 1.25 cups water, and salt to taste.
- Cancel sauté and switch to Pressure Cook (Manual) mode.
- Set the timer for 5 minutes on High Pressure.
- Once done, let the pressure release naturally for 10 minutes, then do a quick release.
Open the lid, fluff gently with a fork, and your Jeera Rice is ready. No babysitting, no overcooking—just perfect every time.
Jeera Rice in a Pan or Kadhai
If you don’t have a pressure cooker or Instant Pot, no worries. The traditional stovetop method in a kadhai or pan works just as well. You just need a little patience.
Here’s how:
- Soak and drain the basmati rice as usual.
- In a deep pan or kadhai, heat 1.5 tbsp ghee or oil.
- Add jeera seeds and let them crackle.
- Optional: Add chopped green chili or ginger for an extra kick.
- Add soaked rice and stir gently.
- Pour in 2 cups of water and add salt.
- Bring to a boil, then cover and simmer on low for 10-12 minutes.
- Turn off the heat and let it rest for another 10 minutes.
This method gives you control and yields beautifully cooked rice with each grain standing apart.
Tips to Make Perfect Jeera Rice Every Time
Cooking rice seems easy—until it turns out sticky or bland. Here are some fail-proof tips to ensure your Jeera Rice turns out just right, every time:
- Use aged basmati rice for better flavor and fluffiness.
- Soak rice for at least 20 minutes before cooking to prevent clumping.
- Don’t skip the tadka – that sizzling jeera in hot ghee is the soul of the dish.
- Always fluff rice with a fork, not a spoon, to avoid breaking the grains.
- Avoid overmixing – gentle folding is all it needs.
- For added aroma, try cooking the rice with a small piece of cinnamon or a bay leaf.
- Want extra richness? Roast a few cashews in ghee and sprinkle on top.
These small tweaks make a big difference in the final flavor and texture of your dish.
How to Store and Reheat Leftover Jeera Rice
Made a little too much? No worries—Jeera Rice stores well and can be easily reheated for a quick meal later.
To store:
- Cool the rice completely.
- Transfer it into an airtight container and refrigerate.
- It will stay fresh for up to 3–4 days.
To reheat:
- Sprinkle a few drops of water over the rice.
- Microwave for 1–2 minutes, or steam it in a pan with a lid.
- Add a little ghee or butter to bring back the fresh flavor.
Avoid reheating rice multiple times to keep the texture and taste intact.
Serving Suggestions – What to Eat with Jeera Rice
Jeera Rice is the ultimate sidekick. Its subtle flavor complements both vegetarian and non-vegetarian dishes perfectly. Here are some fantastic pairings:
With Vegetarian Dishes:
- Dal Tadka
- Rajma (Kidney Beans Curry)
- Chana Masala
- Palak Paneer
- Aloo Matar
With Non-Vegetarian Dishes:
- Butter Chicken
- Chicken Curry
- Mutton Rogan Josh
- Egg Curry
- Fish Masala
You can also enjoy Jeera Rice with:
- Raita (boondi or cucumber)
- Pickle and papad
- Plain curd
- A drizzle of lemon juice and ghee
It’s a comfort food that pairs beautifully with almost any Indian curry or gravy.
Nutritional Information
Here’s an approximate nutritional breakdown for 1 serving (1 cup) of Jeera Rice:
| Nutrient | Amount |
|---|---|
| Calories | 220–250 kcal |
| Carbohydrates | 40–45g |
| Protein | 4–5g |
| Fat | 7–10g (with ghee) |
| Fiber | 1–2g |
| Sodium | Varies by salt |
Jeera Rice is a moderate-calorie dish, and when cooked with ghee, it offers healthy fats. It’s gluten-free and vegetarian-friendly, making it suitable for a variety of diets.
Common Mistakes to Avoid
Even a simple dish like Jeera Rice can go wrong if you’re not careful. Here are common pitfalls to watch out for:
- Skipping the soak time – leads to sticky rice.
- Using low-quality or broken rice – ruins texture.
- Burning the cumin seeds – makes the dish bitter.
- Adding too much water – turns rice mushy.
- Over-stirring the rice – breaks the grains.
Stick to the process, don’t rush, and treat each step with care—you’ll get perfect results every time.
FAQs about Jeera Rice Recipe
1. Can I make Jeera Rice without soaking the rice?
Yes, but soaking helps in fluffier texture and even cooking. Without soaking, increase the water slightly and adjust cooking time.
2. Is Jeera Rice spicy?
No, Jeera Rice is mildly flavored. You can add green chilies for heat, but the base recipe is quite neutral.
3. Can I use brown rice instead of basmati?
Yes, but adjust the cooking time and water accordingly. Brown rice takes longer and may not be as fragrant.
4. What can I use instead of ghee?
You can use any neutral oil or butter. Ghee gives a rich aroma, but it’s not mandatory.
5. Can I freeze Jeera Rice?
Yes! Cool it completely, portion it out, and freeze. To reheat, microwave or steam directly from frozen.
Conclusion
Jeera Rice isn’t just rice—it’s comfort in a bowl. Whether you’re pairing it with a rich curry or just enjoying it with dal and a bit of pickle, it always hits the spot. The beauty of this dish lies in its simplicity. A handful of ingredients, a few mindful steps, and you’ve got yourself a dish that feels like home and tastes like restaurant magic.
From beginners to seasoned home cooks, this is one recipe that belongs in everyone’s kitchen. So go ahead, grab that basmati, heat that ghee, and let the aroma of toasted cumin take over your senses.