Japanese Mayo Recipe: Japanese mayo isn’t just your average mayonnaise—it’s a rich, creamy, umami-packed condiment that can level up just about any dish. While most of us are familiar with the traditional Western mayo (thicker, slightly bland, often overly tangy), Japanese mayonnaise brings a different vibe. It’s silkier in texture, slightly sweeter, and has a subtle tang thanks to a secret ingredient: rice vinegar. It’s also got that signature umami boost that makes it especially addictive.
And let’s be real—nothing beats homemade. No preservatives, no artificial flavor enhancers—just pure, flavorful mayo made right in your own kitchen. Whether you’re craving that authentic Kewpie-style experience or you just want a healthier, tastier alternative to store-bought options, making Japanese mayo at home is a game changer.
Benefits of Making Japanese Mayo at Home
There are tons of reasons to make your own Japanese mayo from scratch—and no, you don’t need to be a pro chef to pull it off.
- Healthier ingredients: When you DIY it, you control what goes in. Say goodbye to additives, fillers, and unnecessary sugars.
- Tailor-made flavor: Want it tangier? Add more vinegar. Creamier? Use a bit more yolk. Spicier? Mix in sriracha or wasabi. It’s your mayo, your rules.
- Cost-effective: Once you’ve got the core ingredients, you can make multiple batches for a fraction of the price of specialty mayo bottles.
- No preservatives: That means it’s fresher, better for your body, and just plain delicious.
- Fun and easy: Seriously, it takes about 10 minutes, tops. No excuse not to try.
If you’ve been buying Kewpie or other Japanese-style mayo brands for years, one taste of this homemade version will have you saying, “Where have you been all my life?”
What Makes Japanese Mayo Unique?
Japanese mayo stands out for a few key reasons:
- Only Egg Yolks: Unlike traditional mayo, which uses the whole egg, Japanese mayo typically uses only yolks, giving it that deep richness and yellow tint.
- Rice Vinegar: Instead of white or apple cider vinegar, Japanese mayo relies on rice vinegar. It’s milder and slightly sweet, which tones down the acidity.
- MSG or Umami Boosters: Authentic brands like Kewpie use MSG for that unbeatable umami. At home, you can sub with a pinch of dashi powder or nutritional yeast if preferred.
- Sweeter Flavor Profile: There’s usually a touch of sugar or mirin, balancing the acidity and making it more palatable.
All of these tweaks may seem small, but together, they create a mayo that’s wildly different—and dare we say, better—than the stuff you’re used to.
Ingredients You’ll Need
Here’s everything you’ll need to whip up a batch of homemade Japanese mayo:
Essential Ingredients:
- 2 large egg yolks (room temperature)
- 1 tablespoon rice vinegar (unseasoned)
- 1 teaspoon Dijon mustard or Japanese hot mustard (Karashi)
- 1 teaspoon sugar
- ½ teaspoon salt
- ¾ to 1 cup neutral oil (like canola, grapeseed, or sunflower)
- Optional: A small pinch of MSG or dashi powder for umami boost
Optional Add-ins:
- Lemon juice (for extra tang)
- Mirin (for extra sweetness)
- Garlic powder or wasabi (for flavor twists)
Ingredient Tips:
- Egg yolks: Fresh, high-quality eggs make a huge difference here. Pasture-raised if possible.
- Oil: Stick with a neutral-flavored oil—olive oil or peanut oil can overpower the taste.
- Vinegar: Rice vinegar is key. Avoid seasoned rice vinegar (which already has sugar/salt added).
Most of these can be found at an Asian grocery store or online, but they’re becoming more common in regular supermarkets too.
Tools You’ll Need in Your Kitchen
To keep things smooth and stress-free, gather these tools before you start:
- Medium mixing bowl
- Balloon whisk or electric hand mixer
- Measuring spoons and cup
- Clean glass jar with lid (for storing the mayo)
- Small funnel (optional but useful)
- Damp kitchen towel or rubber mat (to hold bowl steady)
For easier and faster results, you can also use:
- Immersion blender
- Food processor
But honestly? A hand whisk does just fine if you’re making a small batch.
Step-by-Step Guide to Making Japanese Mayo
Step 1: Prep Your Station
Start by cleaning your workspace and setting out all your ingredients. This helps prevent mistakes and keeps things efficient. Place a damp towel under your mixing bowl so it doesn’t slip while whisking.
Step 2: Separate Egg Yolks
Crack two eggs and carefully separate the yolks from the whites. You’ll only be using the yolks. Put them in your mixing bowl. Discard or save the whites for another recipe.
Step 3: Mix in Mustard, Vinegar, Sugar, and Salt
Add 1 tablespoon of rice vinegar, 1 teaspoon of mustard, 1 teaspoon of sugar, and ½ teaspoon of salt to the yolks. Whisk thoroughly until the mixture is creamy and well combined.
Step 4: Emulsify Slowly with Oil
This is where the magic happens. Begin adding the oil—drop by drop at first—while whisking constantly. It’s critical to go slow in the beginning. Once the mixture starts to thicken and emulsify, you can start adding the oil in a thin stream. Keep whisking like your life depends on it.
Step 5: Adjust and Flavor
Taste the mayo and adjust. Want it tangier? Add a touch more vinegar. Creamier? Add a bit more oil. Want umami? Sprinkle in a pinch of MSG or dashi powder and whisk it in.
Step 6: Chill
Transfer the mayo to a clean jar, seal it, and chill it in the fridge for at least 30 minutes before use. This helps the flavors meld beautifully.
Japanese Mayo Recipe (Printable Format)
Here’s a quick-reference version of the recipe that you can print out or save for later:
Ingredients:
- 2 egg yolks (room temperature)
- 1 tbsp unseasoned rice vinegar
- 1 tsp Dijon or Japanese mustard
- 1 tsp sugar
- ½ tsp salt
- ¾ to 1 cup neutral oil (canola, grapeseed, or sunflower)
- Optional: a pinch of MSG or dashi powder for umami
Instructions:
- In a bowl, whisk together egg yolks, vinegar, mustard, sugar, and salt.
- Begin adding oil slowly—drop by drop—while whisking vigorously to create an emulsion.
- Gradually increase the oil stream as the mixture thickens.
- Taste and adjust the flavor with extra vinegar, salt, or umami boosters.
- Store in a sealed jar and chill before using.
Prep Time: 10 minutes
Total Time: 10 minutes
Yields: ~1 cup
How to Store Homemade Japanese Mayo
Homemade Japanese mayo doesn’t have the preservatives that store-bought versions do, so storage is key.
- Refrigerate immediately: Always store your mayo in a clean, airtight glass container. Keep it cold to prevent spoilage.
- Shelf life: Homemade mayo will typically last 1 to 2 weeks in the fridge. Always use clean utensils to scoop it out.
- Check for spoilage: If you notice a sour smell, discoloration, or change in texture, toss it out. It’s not worth the risk.
Storage Tips:
- Label your jar with the date you made it.
- Don’t store it in the fridge door where temperatures fluctuate—keep it at the back for max freshness.
- If the mayo separates slightly over time, a quick stir should bring it back together.
Variations You Can Try
Once you’ve mastered the basic recipe, try spicing it up. Literally.
1. Spicy Japanese Mayo
- Mix in 1-2 tsp sriracha or Japanese chili oil (rayu). Great on sushi rolls, fries, or even burgers.
2. Wasabi Mayo
- Add ½ tsp wasabi paste for a bold, nasal-clearing twist. Perfect with grilled fish or sandwiches.
3. Garlic or Yuzu Mayo
- Mix in a small clove of grated garlic or a splash of yuzu juice for a citrusy zing.
4. Dashi Mayo
- Add ¼ tsp dashi powder for an even deeper umami flavor. Amazing on okonomiyaki or takoyaki.
These variations are easy to experiment with—just add the flavoring once the base mayo is emulsified.
Common Mistakes to Avoid
Homemade mayo is simple—but there are a few mistakes that can turn your creamy dream into a curdled mess.
- Adding oil too fast: If you rush it, the emulsion can break. Start drop by drop and only speed up once it thickens.
- Using cold ingredients: Everything should be at room temperature to blend smoothly.
- Wrong oil choice: Strong-flavored oils like olive or coconut will overpower the taste. Always go neutral.
- Overwhipping or underwhipping: You need enough whisking to form the emulsion but don’t overdo it with machines unless you’re experienced—they can overheat and split the mix.
- Not tasting as you go: Don’t forget to adjust for flavor! Your vinegar, mustard, and salt levels can all shift slightly depending on your ingredients.
Stay calm, go slow, and you’ll nail it.
Tips to Perfect the Texture
One of the defining features of Japanese mayo is its silky-smooth, rich texture. Here’s how to get that perfect consistency:
- Whisk like a pro: Use a balloon whisk and keep a steady rhythm. Your forearms will get a workout, but it’s worth it.
- Emulsify correctly: The slower the oil is added at first, the thicker the final mayo will be.
- Use only egg yolks: Skipping the whites ensures a denser, creamier outcome.
- Chill after mixing: Letting it rest in the fridge for at least 30 minutes helps thicken the mayo and mellow the flavors.
If your mayo turns out too thin, add more oil slowly while whisking until it thickens. If it’s too thick, add a few drops of water or vinegar.
Is Japanese Mayo Healthier?
Let’s be honest: mayo isn’t a “health food”—but homemade Japanese mayo does have some perks:
Pros:
- No preservatives or additives
- You control the sugar and salt levels
- Fresh eggs = better nutrients
- Fewer processed ingredients
Nutritional Comparison (Per Tablespoon):
| Type | Calories | Fat (g) | Sugar (g) | Sodium (mg) |
|---|---|---|---|---|
| Homemade | ~90 | 10 | <1 | ~100 |
| Kewpie (Store) | ~100 | 11 | 1.5 | ~120 |
| Regular Mayo | ~95 | 10 | 0.5 | ~115 |
In moderation, it’s a delicious and customizable alternative—especially if you’re avoiding additives like MSG or seed oils used in commercial versions.
Best Ways to Use Japanese Mayo
You’ve made it. Now it’s time to drizzle, dip, and slather.
Top Uses:
- Sushi Rolls: Drizzle it over spicy tuna rolls or California rolls.
- Japanese Sandwiches (Tamago Sando): Combine with boiled eggs for the creamiest egg salad.
- Okonomiyaki & Takoyaki: Squiggle it over these street-food classics.
- French Fries or Karaage: Dip crispy fried goodies into your homemade mayo.
- Salad Dressings & Dips: Mix with soy sauce, lemon, or sesame oil for killer dips.
You can also use it just like regular mayo on burgers, wraps, or even deviled eggs.
Japanese Mayo vs. Kewpie: What’s the Difference?
Kewpie is the gold standard of Japanese mayo. Here’s how it compares:
Kewpie Highlights:
- Only egg yolks
- Rice vinegar
- MSG for umami
- Extra creamy consistency
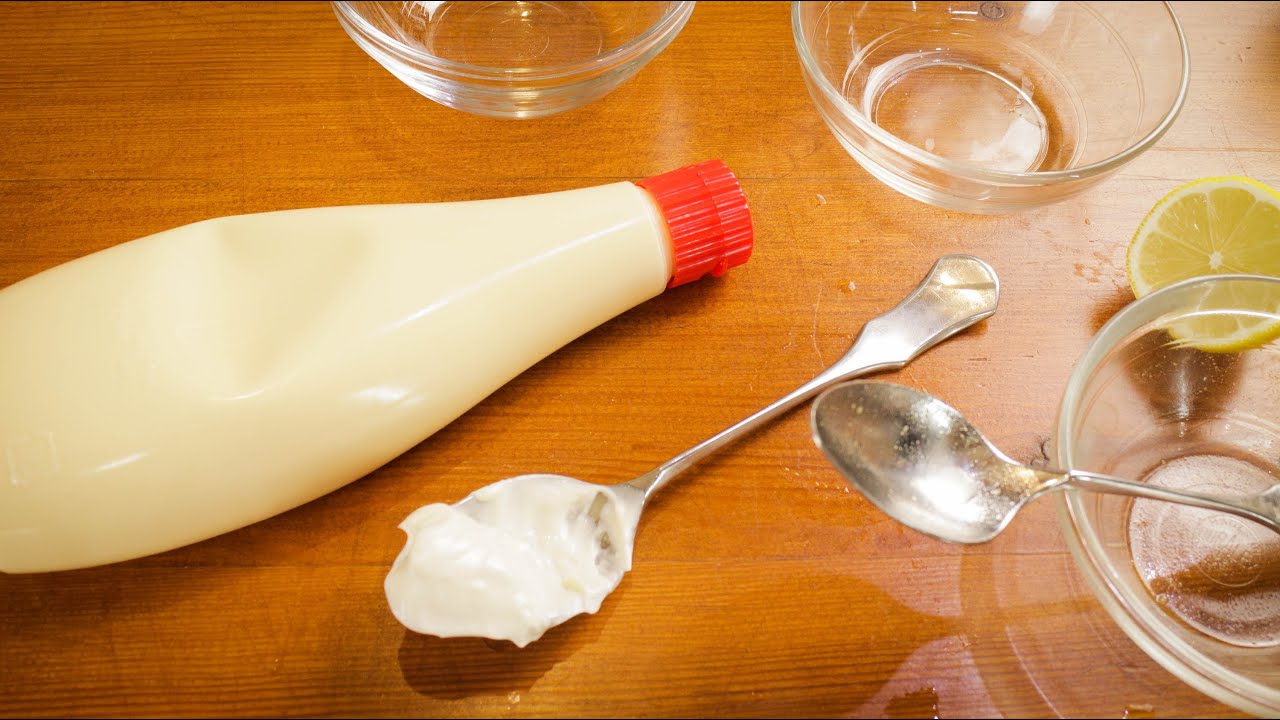
- Sold in soft bottles with a red cap
Homemade Alternative:
- Same yolk-only base
- No preservatives
- Option to skip or replace MSG
- Just as tasty—if not better—when fresh
You can get extremely close to the Kewpie taste with the recipe above. If you want that extra signature punch, try adding a tiny pinch of MSG (or dashi powder) and a few drops of apple cider vinegar.
FAQs about Japanese Mayo Recipe
1. Can I use a whole egg instead of just yolks?
Technically yes, but it will create a lighter, less rich mayo. For the signature Japanese texture, stick to yolks only.
2. How long does homemade Japanese mayo last?
About 1–2 weeks in the fridge if stored properly in an airtight jar.
3. Can I make it without mustard?
Yes, but mustard helps with emulsification and adds a nice tang. You can substitute with wasabi or omit it if needed.
4. What oil is best for this recipe?
Use a neutral oil like canola, sunflower, or grapeseed. Avoid strong-flavored oils like olive oil or sesame.
5. Can I use apple cider vinegar instead of rice vinegar?
You can, but it will change the flavor. Rice vinegar has a gentler, sweeter taste that’s key to authentic Japanese mayo.
Conclusion
There you have it—your complete guide to mastering Japanese mayo at home. Whether you’re after that creamy umami bomb for your sushi rolls or just want a more flavorful spread for sandwiches, making it from scratch is hands-down the way to go.
With just a few pantry staples and 10 minutes of your time, you’ll unlock a condiment that beats anything you can find on a store shelf. Better taste, better texture, and more control over what goes in your food—it’s a win all around.
Now go grab those eggs, oil, and whisk. Your fridge deserves a jar of the good stuff.