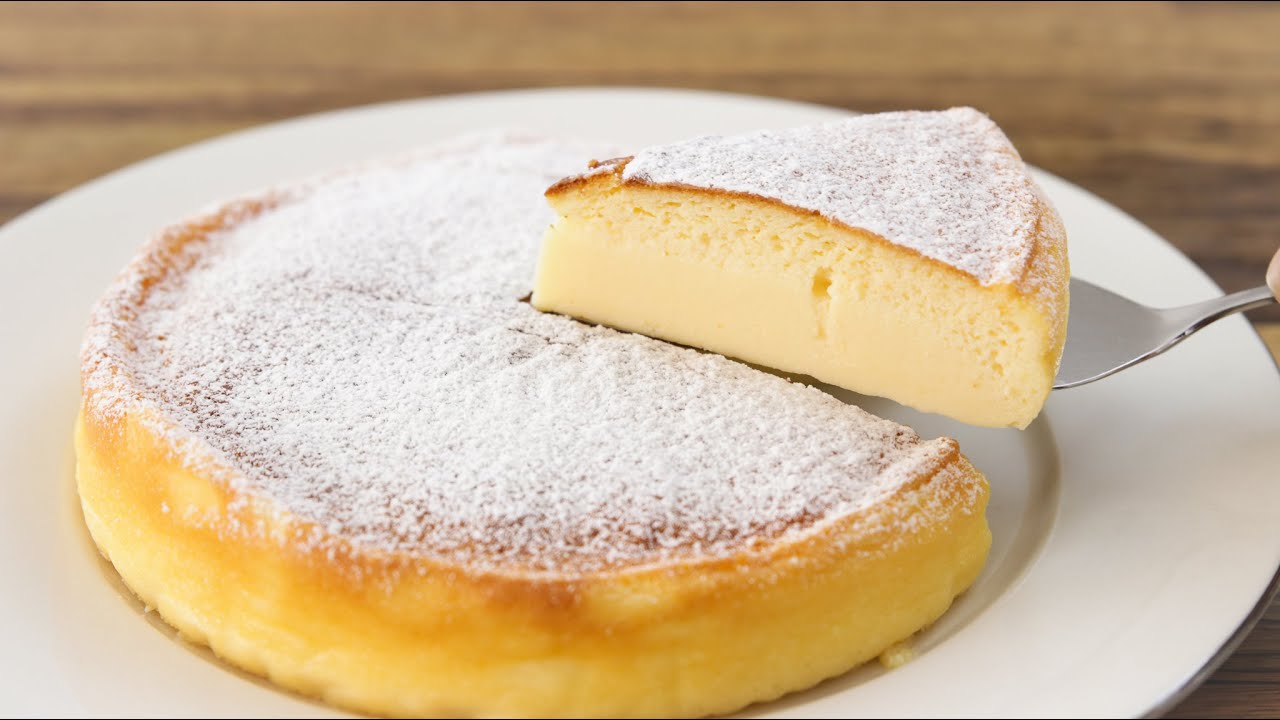
Japanese Cheesecake Recipe: If you’re craving something that’s fluffy, light, and melts right in your mouth, then you’re going to fall head over heels for Japanese cheesecake. Unlike the dense, rich cheesecakes you might be familiar with, Japanese cheesecake is airy and delicately sweet. It’s a dessert that feels like biting into a cloud!
What Makes Japanese Cheesecake Different?
The magic of Japanese cheesecake lies in its texture. While traditional Western cheesecakes are heavy and creamy, Japanese cheesecake is a beautiful hybrid between a sponge cake and a cheesecake. Thanks to a whipped meringue folded into the batter, it comes out super airy and light, yet still carries that signature creamy flavor we all adore.
Imagine combining the best parts of a souffle and a cheesecake, and voilà — you’ve got Japanese cheesecake. Plus, it’s not overpoweringly sweet, which means you can easily enjoy more than one slice (dangerous, but totally worth it!).
A Brief History of Japanese Cheesecake
Japanese cheesecake, also known as “cotton cheesecake” or “soufflé cheesecake,” became popular in Japan during the 1980s. Inspired by the traditional German cheesecake called Käsekuchen, Japanese bakers adapted the recipe to suit local tastes, making it lighter and less sweet. Over time, it evolved into the delightful cloud-like dessert that’s now loved worldwide.
Ingredients You’ll Need
Before diving into baking, let’s make sure you have everything you need. The ingredient list is surprisingly simple, but each plays a critical role in achieving that perfect fluffy texture.
Core Ingredients
Here’s what you’ll need:
- 250g (8.8 oz) cream cheese
- 50g (1.8 oz) unsalted butter
- 100ml (3.4 fl oz) milk
- 60g (2.1 oz) cake flour (or all-purpose flour, sifted)
- 20g (0.7 oz) cornstarch
- 6 large eggs (separate the yolks and whites)
- 140g (5 oz) granulated sugar
- 1 tsp lemon juice
- 1 tsp vanilla extract
- A pinch of salt
Optional Add-ins for Extra Flavor
If you’re feeling fancy, you can also add:
- Zest of one lemon for a citrusy zing
- A drop of almond extract for a nutty undertone
- Matcha powder for a Japanese twist
These are optional, but they can really elevate your cheesecake!
Tools and Equipment Required
Make sure you have the following:
- Electric mixer (hand or stand)
- 8-inch (20 cm) round cake pan
- Large mixing bowls
- Rubber spatula
- Fine mesh sieve
- Roasting pan (for the water bath)
- Parchment paper
- Kitchen scale (recommended for accuracy)
Having the right tools makes everything smoother and helps you nail that perfect rise and texture.
Preparing for Baking
Before mixing things up, some prep work is necessary to set yourself up for cheesecake success.
Preparing the Pan
Line the bottom and sides of your cake pan with parchment paper. Make sure the paper extends about an inch above the rim of the pan. This extra height gives the batter some support as it rises, preventing collapse.
Also, wrap the outside of the pan with aluminum foil to keep water from leaking into your cheesecake during baking.
Setting Up a Water Bath
The water bath (or bain-marie) is non-negotiable for Japanese cheesecake. It keeps the baking environment humid and ensures gentle, even heat, which is key for that dreamy texture.
Place your foil-wrapped cake pan in a larger roasting pan. When it’s time to bake, you’ll pour hot water into the roasting pan until it comes halfway up the sides of the cake pan.
How to Make Japanese Cheesecake – Step-by-Step Instructions
Alright, now that you’re all set, let’s dive right into making your very own Japanese cheesecake!
Step 1: Preparing the Cream Cheese Mixture
Start by softening the cream cheese. Place the cream cheese, butter, and milk into a heatproof bowl and set it over a pot of simmering water (double boiler method). Stir continuously until everything is melted and smooth. Make sure the mixture isn’t too hot—lukewarm is perfect.
Once melted, remove the bowl from heat and let it cool slightly. Then, sift in the flour and cornstarch. Add the egg yolks, vanilla extract, and a pinch of salt. Whisk everything together until it forms a silky, lump-free batter. At this point, the mixture should be rich but not too thick.
Pro Tip: If you notice any lumps, pass the batter through a fine sieve for that ultimate smoothness.
Step 2: Making the Meringue
Now for the fun part—the meringue! This is what gives the cheesecake its signature fluffy, cloud-like texture.
In a clean, dry bowl, beat the egg whites with an electric mixer on medium speed until they become foamy. Add the lemon juice at this stage to help stabilize the meringue. Gradually add the granulated sugar, about one tablespoon at a time, while continuing to beat.
Keep beating until you reach soft peaks—this means when you lift the beater, the tip of the meringue should curl over. You don’t want stiff peaks here, or the batter will be harder to fold and might deflate.
Reminder: Always make sure your bowl and beaters are grease-free; even a bit of fat can ruin your meringue.
Step 3: Folding the Meringue into the Batter
This step requires a little patience and a gentle hand.
First, take one-third of the meringue and mix it into the cream cheese batter to lighten it. Then, carefully fold in the remaining meringue in two batches using a rubber spatula. Be sure to fold, not stir—use a gentle scooping motion from the bottom of the bowl to the top to preserve the air bubbles.
It’s better to leave a few streaks of meringue than to overmix and lose all that fluffiness.
Pro Tip: Think of this step like handling a sleeping kitten—gentle, careful, and with lots of love.
Step 4: Baking the Cheesecake
Pour the batter into your prepared cake pan, gently tapping the pan on the counter to release any large air bubbles.
Place the pan in your larger roasting pan, then pour hot water into the roasting pan until it comes halfway up the sides of the cake pan. Carefully transfer everything to a preheated oven at 320°F (160°C).
Bake for about 25 minutes, then reduce the oven temperature to 285°F (140°C) and bake for another 55 minutes.
You’ll know it’s done when the top is golden and the cheesecake jiggles slightly when shaken gently.
Baking Tips:
- Avoid opening the oven door during the first 45 minutes.
- If the top is browning too fast, cover it loosely with a piece of foil.
Step 5: Cooling and Serving
Turn off the oven and leave the cheesecake inside with the door slightly ajar for about an hour. This gradual cooling helps prevent cracking.
After that, remove the cake from the pan and peel off the parchment paper. Let it cool completely on a wire rack before refrigerating for at least 4 hours (overnight is even better).
When you’re ready to serve, slice with a warm, sharp knife for clean, beautiful cuts. Dust with powdered sugar for that classic Japanese bakery look!
Tips for the Perfect Japanese Cheesecake
- Room temperature ingredients: Make sure your eggs, cream cheese, and milk are at room temp for a smoother batter.
- Gentle folding: Be delicate when mixing the meringue into the batter.
- Water bath: Don’t skip this step—it ensures even baking and prevents cracks.
- Slow cooling: Rapid temperature changes can cause the cheesecake to collapse.
Mastering these tips will make you a cheesecake pro in no time!
Common Mistakes to Avoid
- Overbeating the meringue: Stiff peaks can make it harder to fold into the batter, leading to deflation.
- Skipping the water bath: Without it, your cheesecake could end up dense and cracked.
- Opening the oven too early: This will cause your delicate cake to sink.
Be patient and trust the process—your reward will be sweet and fluffy!
Serving Suggestions
Japanese cheesecake is incredibly versatile when it comes to serving. Thanks to its light and airy texture, it pairs beautifully with a variety of toppings and sides. Here are some ideas to make your cheesecake presentation extra special:
- Powdered Sugar Dusting: Keep it simple and classic by dusting a light layer of powdered sugar over the top. It gives that delicate, bakery-style finish everyone loves.
- Fresh Berries: Serve with a handful of strawberries, blueberries, or raspberries for a refreshing pop of color and flavor.
- Whipped Cream: A dollop of lightly sweetened whipped cream takes the experience to a whole new level of indulgence.
- Fruit Compote: Warm berry or citrus compote can add a lovely tartness that balances the sweetness of the cheesecake.
- Matcha Sprinkle: A light dusting of matcha powder can add an authentic Japanese flair and a slight bitterness that contrasts beautifully with the sweet cheesecake.
You can also serve it slightly warmed or chilled straight from the fridge depending on your mood—either way, it’s heavenly!
Storing Leftover Japanese Cheesecake
If (and that’s a big if) you have any leftovers, proper storage is key to maintaining that soft, moist texture.
- In the Fridge: Wrap the cheesecake tightly with plastic wrap or place it in an airtight container. It will keep well in the refrigerator for up to 4 days.
- In the Freezer: Japanese cheesecake can also be frozen! Wrap individual slices in plastic wrap and place them in a zip-lock bag or airtight container. When you’re ready to enjoy, just thaw them in the fridge for a few hours or overnight.
Note: Freezing may slightly alter the texture, making it a tad denser but still delicious.
FAQs about Japanese Cheesecake Recipe
What makes Japanese cheesecake different from regular cheesecake?
Japanese cheesecake is much lighter, fluffier, and less sweet than traditional American cheesecake. It has a soft, airy texture because it’s made by folding whipped egg whites into the batter, similar to a soufflé.
Why does my Japanese cheesecake crack on top?
Cracking often happens due to sudden changes in temperature or overbaking. To prevent this, bake your cheesecake in a water bath and allow it to cool slowly inside the oven with the door slightly open.
Can I make Japanese cheesecake without cream cheese?
Cream cheese is a key ingredient for that rich, slightly tangy flavor. If you need a substitute, mascarpone cheese can work, but the taste and texture may differ slightly.
How do I know when Japanese cheesecake is done baking?
Your cheesecake is ready when it has a light golden top and a slight jiggle in the center. A skewer inserted into the middle should come out mostly clean.
Should I refrigerate Japanese cheesecake before serving?
Yes! Japanese cheesecake tastes best when chilled. Refrigerate it for at least 4 hours (preferably overnight) to allow it to fully set and develop its delicate flavor.
Can I freeze Japanese cheesecake?
Absolutely. Wrap it tightly in plastic wrap and freeze for up to 1 month. Thaw it in the refrigerator overnight before serving for the best texture.
Conclusion
And there you have it—a complete, step-by-step guide to baking your very own Japanese Cheesecake! It’s light, fluffy, creamy, and everything you could ever want in a dessert. With the right ingredients, tools, and a little bit of patience, you’ll be able to recreate this iconic treat right in your own kitchen.
Remember, baking is both a science and an art. So don’t be discouraged if your first cheesecake isn’t absolute perfection. With practice (and a lot of tasting), you’ll get there! Once you master this recipe, you’ll not only impress yourself but anyone lucky enough to get a slice.
Happy baking and happy eating!


