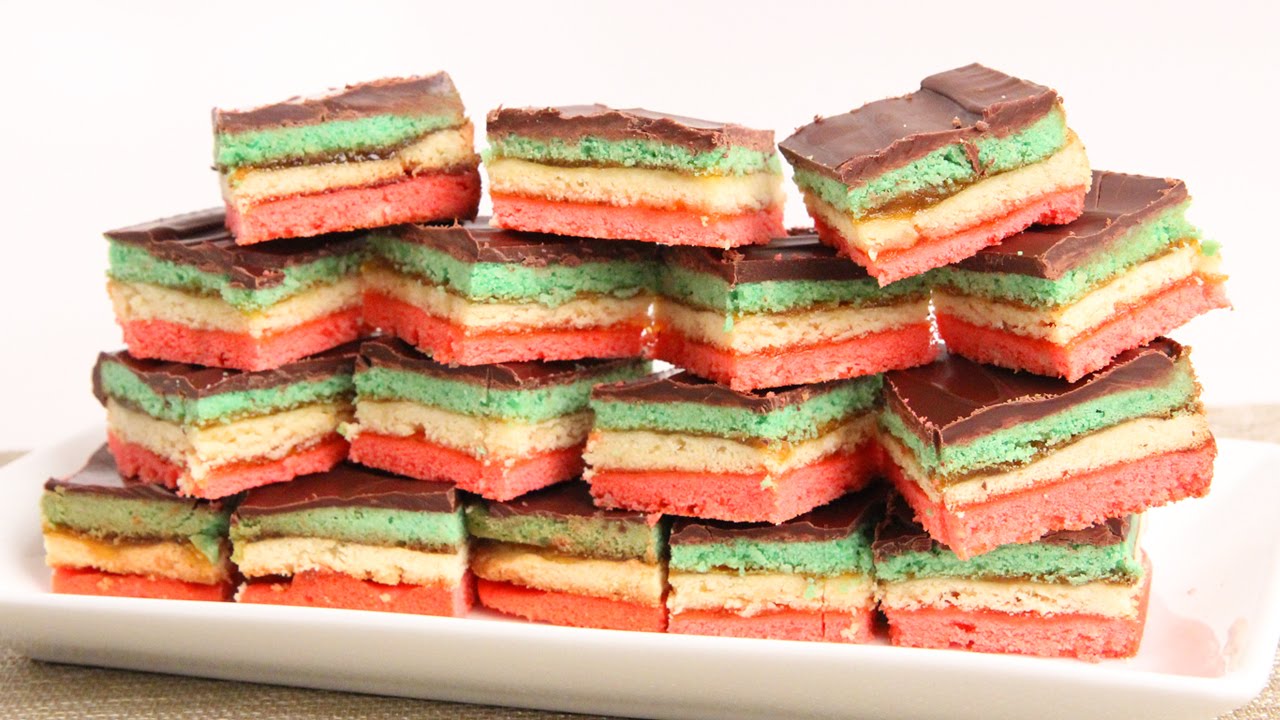
Italian Rainbow Cookies Recipe: Italian Rainbow Cookies—those colorful little layered bites of joy you spot in Italian bakeries—are more than just a treat. They’re a nostalgic trip, a festive display, and a flavor explosion all rolled into one.
Despite being called “cookies,” they’re more like mini almond cakes stacked together with rich raspberry or apricot jam and topped with a layer of melted chocolate. Every bite is buttery, moist, and deliciously almondy with just the right touch of sweetness.
Whether you’re planning to impress at a holiday gathering or want a new baking challenge, this guide will take you from start to finish with a foolproof approach.
A Sweet Slice of History
Italian Rainbow Cookies didn’t originate in Italy, surprisingly. They were created by Italian-American immigrants in the early 20th century who wanted to honor their homeland by using the colors of the Italian flag: green, white, and red. Over the years, they’ve become a staple in Italian-American bakeries, especially around the holidays. Although their colors scream Christmas, you can enjoy them any time of the year. The blend of almond paste, fruity jam, and rich chocolate makes them timeless.
What Makes Rainbow Cookies So Special?
What sets rainbow cookies apart from other sweets? It’s their unique structure. The cake itself is dense yet moist, thanks to almond paste and plenty of butter. The layering process—sandwiching two layers of jam between the colorful almond cakes—gives them their distinct look and flavor. And let’s not forget the glossy layer of chocolate on top that seals the deal. They’re not just visually striking—they’re flavor-packed and textured perfectly. Each bite has the chewiness of cake, the slight tartness of jam, and the richness of dark chocolate.
Tools and Equipment You’ll Need
Before we dive into the recipe, let’s talk about tools. Having the right equipment makes this process smoother and helps ensure your layers are even and your final result is bakery-level good.
- 3 9×13-inch baking pans (or bake in batches)
- Electric mixer or stand mixer
- Mixing bowls
- Rubber spatulas
- Offset spatula (for spreading batter and chocolate)
- Wax paper or parchment paper
- Cooling racks
- Double boiler or microwave-safe bowl (for melting chocolate)
- Plastic wrap
- Sharp knife for slicing
Having these tools ready will make each step of the process go more smoothly.
List of Ingredients You’ll Need
Getting your ingredients lined up before you start is key to a stress-free baking experience. Here’s what you’ll need for the almond cake layers and the delicious jam and chocolate fillings.
Almond Cake Layer Ingredients
- 1 cup (2 sticks) unsalted butter, softened
- 1 cup granulated sugar
- 4 large eggs, separated
- 8 oz almond paste (not marzipan)
- 1 teaspoon pure almond extract
- 1 1/4 cups all-purpose flour
- Red and green food coloring (gel preferred)
- Pinch of salt
Filling and Topping Ingredients
- 1/2 cup seedless raspberry jam (you can also use apricot)
- 1 tablespoon of water (for thinning jam, optional)
- 6 oz semi-sweet or dark chocolate (chopped or chips)
- 1 tablespoon butter (for glossy chocolate)
Make sure all your ingredients are at room temperature before you start for best results, especially the butter and eggs.
Preparing for Baking – A Few Pro Tips
Before we start mixing, here are a few tips that can make your baking session smoother:
- Line your baking pans with parchment paper and spray them lightly with non-stick spray. This makes it easier to lift the layers out.
- Almond paste can be tough to break down—grate it or chop it into small chunks before adding it to your batter.
- Use gel food coloring instead of liquid to avoid thinning out your batter.
- Whip your egg whites separately and fold them in last for a lighter, fluffier texture.
- Plan ahead! These cookies need to chill overnight for the layers to meld together.
Now, let’s get baking.
Step-by-Step Guide to Making Italian Rainbow Cookies
Step 1: Preheat and Prep Your Pans
Preheat your oven to 175°C (350°F). Line three identical baking pans with parchment paper and lightly grease them. Using separate pans ensures even baking for each colored layer.
Step 2: Mix the Batter
In a large bowl, beat softened butter and sugar until light and fluffy. Add egg yolks and almond extract, mixing well. In a separate bowl, whip egg whites until stiff peaks form. Gently fold the egg whites into the batter, alternating with flour, until smooth and airy.
Step 3: Divide and Color the Batter
Divide the batter evenly into three bowls. Tint one portion red, one green, and leave one plain or yellow using food coloring. Mix gently to maintain the airy texture.
Step 4: Bake the Layers
Spread each batter evenly into its prepared pan. Bake each layer for 8–10 minutes, or until set and lightly golden. Allow the layers to cool completely.
Step 5: Cool and Layer the Cakes
Place one cooled layer on a flat surface. Spread a thin layer of apricot or raspberry jam on top. Add the second layer, spread more jam, then top with the final layer.
Step 6: Chill Overnight
Wrap the stacked layers tightly in plastic wrap. Place a flat weight on top and refrigerate overnight. This helps the layers bond and makes slicing easier.
Step 7: Melt and Spread the Chocolate
Melt dark chocolate gently and spread a thin, even layer over the top. Let it set slightly, then flip and coat the other side.
Step 8: Final Chill and Slice
Refrigerate until fully set. Slice into small rectangles using a sharp knife. Serve chilled or at room temperature.
Tips for Perfect Italian Rainbow Cookies
Want to make your cookies bakery-quality? Here are some tips to level up your game:
- Use almond paste, not marzipan. Almond paste is less sweet and perfect for baking. Marzipan is too sugary.
- Don’t skimp on chilling. Both the overnight press and the chocolate setting times are essential for structure and flavor.
- Use good quality jam. Raspberry or apricot with no seeds and real fruit flavor will elevate the whole cookie.
- Sharp knife = clean cuts. Wipe your knife between slices to avoid smearing chocolate.
- Don’t overbake. The layers are thin and can dry out quickly. Stick to the 10–12 minute rule.
Common Mistakes to Avoid
Even experienced bakers can mess these up without knowing it. Here’s what to watch for:
- Skipping the chilling time. You won’t get clean, cohesive layers without it.
- Using liquid food coloring. It can thin out your batter and affect baking.
- Not trimming the edges. The final look depends on sharp, clean lines.
- Melting chocolate improperly. Burnt or seized chocolate ruins the topping—always melt gently.
- Uneven layers. Measure your batter to get equally thick layers for a balanced bite.
Avoiding these common errors will help you nail the recipe every time.
How to Store and Keep Them Fresh
Italian Rainbow Cookies actually get better with time, which makes them perfect for making ahead.
- Refrigerator: Store in an airtight container, separated by parchment layers, for up to 2 weeks.
- Freezer: You can freeze these cookies! Just place them in a sealed container and freeze for up to 2 months. Thaw in the fridge overnight before serving.
The flavors intensify over a few days, so don’t be afraid to make them early.
How to Serve Italian Rainbow Cookies
These cookies are showstoppers on any dessert platter. Here are some ways to serve them:
- Holiday trays: Add them to a cookie tray with biscotti, pizzelles, and cannoli.
- Tea time: Serve alongside espresso or tea for an elegant treat.
- Party favors: Wrap a few in a clear bag with a ribbon—perfect edible gift!
- Bake sales or events: Their bright colors attract attention and they’re sturdy enough for transport.
Serve chilled or at room temperature for best flavor and texture.
Variations and Flavor Twists
Feeling creative? You can tweak this classic recipe to make your own signature cookie:
- Different jams: Try cherry, fig, or orange marmalade for a twist.
- Chocolate ganache filling: Swap the jam for a thin layer of ganache.
- Sprinkles on top: Add festive sprinkles to the chocolate layer before it sets.
- Rainbow effect: Use more than three colors for a full rainbow cookie.
- Nut-free version: Use imitation almond extract and skip the almond paste for those with allergies (note: this changes the flavor).
Gluten-Free or Vegan Alternatives
Want to make these more inclusive? Here’s how:
- Gluten-free: Substitute the flour with a 1:1 gluten-free baking blend. Make sure it includes xanthan gum for structure.
- Vegan: Use vegan butter, egg replacers (like aquafaba or flaxseed eggs), dairy-free chocolate, and confirm your jam is gelatin-free.
Just note, almond paste contains eggs and dairy, so for fully vegan cookies, you’ll need a homemade almond paste substitute—use ground almonds, maple syrup, and a touch of coconut oil to create a similar texture.
FAQs about Italian Rainbow Cookies Recipe
1. Can I use marzipan instead of almond paste?
No. Marzipan is too sweet and smooth. Almond paste has the right consistency and balance of sweetness for baking.
2. How long do Italian Rainbow Cookies last?
Up to 2 weeks in the fridge or 2 months in the freezer if stored properly in an airtight container.
3. Can I skip the chocolate layer?
Technically yes, but it’s not recommended—the chocolate layer completes the cookie’s texture and flavor.
4. My layers are sliding! What did I do wrong?
You may have skipped the overnight chilling step. This allows the jam to set and the layers to bind together.
5. Can I double the recipe?
Absolutely. Just make sure you have enough pans or bake in batches. Use a larger tray for layering if needed.
Conclusion
Italian Rainbow Cookies are more than a treat—they’re a statement. Bold, beautiful, and full of flavor, these layered cookies are worth every minute of effort. Whether you’re baking for a special event, holiday, or just to satisfy a sweet craving, this step-by-step guide sets you up for success. With vibrant colors, rich almond cake, sweet jam, and silky chocolate, these cookies are sure to impress. Now go make your kitchen smell like an Italian bakery and create something unforgettable.