Italian Focaccia Recipe: Imagine biting into a piece of bread that’s perfectly crisp on the outside, yet pillowy soft and airy inside. That’s Italian focaccia for you. This golden, olive oil-rich flatbread is a staple across Italian kitchens—and once you learn how to make it, you’ll see why it’s such a beloved recipe. From Ligurian coastal towns to bustling Roman bakeries, focaccia is cherished both as a side dish and as a star on its own. It’s rustic, it’s flavorful, and it carries centuries of tradition in each bite.
And the best part? You don’t need to be a seasoned baker to master it. Focaccia is surprisingly forgiving. With a bit of patience, a good drizzle of quality olive oil, and a warm corner in your kitchen, you’re on your way to making magic.
What Makes Focaccia So Special?
Focaccia is more than just bread—it’s an experience. Its texture, achieved through generous hydration and proper fermentation, is unlike any regular loaf. Those little dimples? They’re not just for aesthetics. They hold pools of olive oil and help flavor penetrate deep into the dough. Whether you’re going for the traditional rosemary and sea salt version or jazzing it up with cherry tomatoes, garlic, and caramelized onions, focaccia is infinitely customizable.
Another thing that makes focaccia special is its versatility. Eat it warm with soup, serve it with dips, slice it for sandwiches, or enjoy it solo as a snack. It’s the kind of recipe that becomes a household favorite because it’s just so flexible.
Ingredients You’ll Need
Basic Pantry Ingredients
Before you roll up your sleeves, let’s talk ingredients. What’s beautiful about focaccia is its simplicity. You don’t need anything fancy—just good-quality basics:
- All-purpose flour – 4 cups (you can also blend in some bread flour for more structure)
- Warm water – 1 ¾ cups (about 110°F)
- Active dry yeast – 2 ¼ teaspoons (or one packet)
- Olive oil – ¼ cup for the dough, plus more for topping and the pan
- Salt – 2 teaspoons
- Sugar – 1 teaspoon (helps activate the yeast)
Optional: A pinch of love and a splash of Italian vibes!
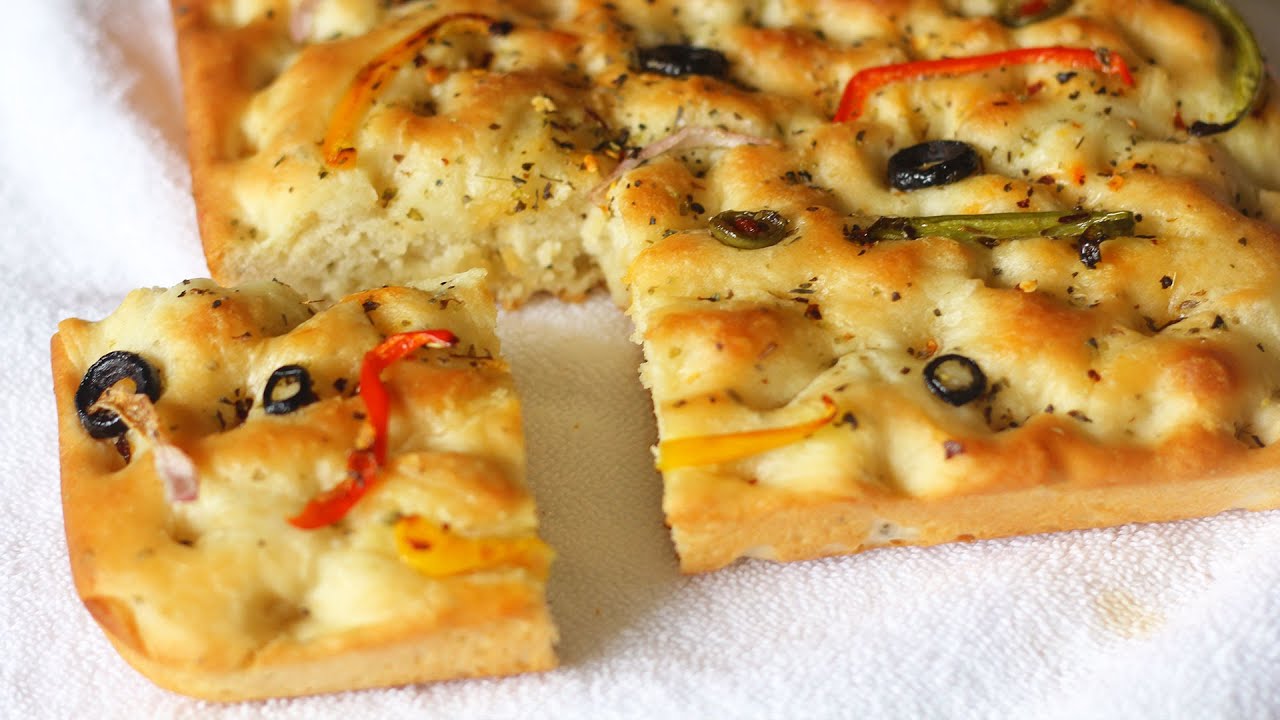
Optional Toppings for Extra Flavor
Focaccia loves to dress up. You can go simple or get as creative as your palate allows. Here are some popular toppings:
- Fresh rosemary – classic and aromatic
- Flaky sea salt – for texture and flavor
- Cherry tomatoes – halved and pressed into the dough
- Caramelized onions – sweet and savory
- Sliced olives – add a Mediterranean twist
- Garlic cloves – roasted or thinly sliced for a bold hit
- Grated parmesan – for a salty, cheesy finish
- Sun-dried tomatoes or artichokes – for depth and tang
Whatever you choose, the key is balance. Let the dough shine but give it some flair with toppings that complement, not overpower.
Essential Tools and Equipment
Kitchen Tools That Make a Difference
You don’t need a bakery’s worth of equipment, but a few tools will make your life easier:
- Mixing bowls – At least one large one for the dough
- Measuring cups and spoons – Precision matters
- Wooden spoon or silicone spatula – To mix without overworking
- Bench scraper – Handy for kneading and transferring dough
- 9×13-inch baking pan – A metal pan gives the best crispy bottom
- Plastic wrap or a clean towel – To cover the dough while it rises
- Oven thermometer (optional) – Ensures accurate baking temp
Prepping Your Workspace
Set yourself up for success by organizing your ingredients and clearing some counter space. You’ll need room to knead the dough, and later, to spread it into the pan. Lightly oil the baking pan so you’re ready once it’s time to shape. Have a small bowl of olive oil nearby for drizzling. Think of this as setting the stage—focaccia is the star performer, and your kitchen is the theater.
Preparing the Dough
Mixing Ingredients with Precision
Start by activating your yeast. In a small bowl, combine the warm water, sugar, and yeast. Let it sit for 5–10 minutes until it becomes frothy. If it doesn’t bubble up, your yeast might be dead—best to start fresh.
In a large mixing bowl, combine the flour and salt. Make a well in the center and pour in the yeast mixture and olive oil. Stir everything together until it forms a shaggy dough. Don’t worry if it looks messy—it’s supposed to at this stage.
Now comes the part that requires a little patience. The dough is very wet and sticky, but that’s a good thing. It means it will yield a super light, airy focaccia. Stir or use your hands to fold and stretch the dough gently in the bowl for about 5 minutes. You’re not going for a tight, smooth dough—just enough to bring everything together and start building gluten.
Kneading Techniques for Fluffy Texture
With focaccia, you don’t need to knead like you’re training for arm day. Instead, you’ll let time and folds do the work. After mixing, let the dough rest for 10 minutes. Then, with wet or oiled hands, perform a series of folds: pull one side of the dough up and fold it over itself. Rotate the bowl and repeat on all four sides.
Do this fold-rest-fold process a couple of times over the next hour. Each time, the dough will get smoother, more elastic, and easier to handle. This method (sometimes called “stretch and fold”) develops gluten while preserving the dough’s airy structure.
After the final fold, cover the bowl with plastic wrap and get ready for the magic of fermentation.
The Art of Fermentation
First Rise – Let the Dough Relax
This is where the dough gets its mojo. After your kneading and folding efforts, let the dough rest and rise in a lightly oiled bowl. Cover it with plastic wrap or a clean kitchen towel and place it in a warm, draft-free area of your kitchen. If your kitchen is cold, you can put the bowl inside a turned-off oven with just the oven light on—it creates the perfect warm environment.
This first rise should last about 1 to 2 hours, or until the dough has doubled in size. Don’t rush this step. Fermentation isn’t just about puffing up the dough; it’s about building flavor. As the yeast feeds on the sugars in the flour, it releases carbon dioxide, creating those lovely air pockets that make focaccia so light. You’ll also get subtle tangy notes that deepen the taste.
It’s tempting to poke or press the dough during this time, but patience pays off. Let it do its thing.
Second Rise – Time to Build Flavor
After the dough has doubled, it’s time to prep for the second rise—but first, get that 9×13-inch pan ready. Generously oil the bottom and sides of the pan. Remember, this not only prevents sticking but also contributes to that famously crisp bottom crust.
Transfer the dough to the pan using oiled hands or a dough scraper. Don’t punch it down. Instead, gently stretch and pat it into place. It might resist at first; that’s okay. Let it rest for 10 minutes, then stretch again. The dough should eventually fill the pan comfortably.
Now comes the second rise. Cover the dough again and let it rest for 45 minutes to an hour. This final proof allows the dough to puff up again and get ready for baking. The second rise is just as critical as the first—it ensures your focaccia is light, fluffy, and full of flavor.
Shaping and Dimpling the Dough
Spreading the Dough on the Pan
When your dough has gone through its first rise and relaxed a bit in the pan, it should be nice and stretchy. If it’s springing back when you try to shape it, wait 10 more minutes. Gravity and time will loosen it up, and you’ll find it easier to coax into shape without tearing.
Make sure the dough is evenly spread. You don’t want thin spots that will bake faster than the rest. Use your fingertips and gently push it to the edges. Don’t flatten it like pizza—it should still be fluffy and full of air bubbles underneath.
The oil in the pan is your secret weapon here. It not only adds flavor but also helps form that deliciously golden and crisp crust on the bottom.
Creating Those Signature Dimples
Ah, the dimples—focaccia’s trademark. They’re not just pretty; they help catch pools of olive oil and prevent the dough from rising unevenly in the oven.
To dimple, oil your hands generously and press your fingertips into the dough all over the surface. You want to press firmly but not all the way through. Think of playing a piano made of dough. Every press should leave a deep, distinct impression.
Once you’ve finished dimpling, drizzle more olive oil over the top, letting it collect in those little pockets. This final touch is what gives focaccia its unique look and rich flavor. You’re nearly there—the masterpiece is ready for its topping and oven time.
Adding Toppings and Flavors
Classic Toppings You’ll Love
There’s a reason rosemary and sea salt are the go-to toppings for focaccia: they’re timeless and just plain delicious. Fresh rosemary leaves provide an aromatic punch, while flaky sea salt adds a savory crunch that elevates every bite.
To apply, sprinkle your toppings evenly right after dimpling and drizzling olive oil. Press ingredients like rosemary and olives slightly into the dough so they stay put during baking. Avoid piling too much on—focaccia is best when the bread itself is the star.
Another great classic? Garlic. Whether roasted whole and gently mashed, or finely sliced and scattered on top, garlic adds a sweet, earthy flavor that pairs beautifully with the bread’s softness and the oil’s richness.
Creative Twists for Modern Palates
Feeling adventurous? Focaccia is the perfect canvas for bold flavors and creative flair. Here are some unique combinations to try:
- Sweet & Savory: Figs + goat cheese + honey drizzle
- Spicy Kick: Jalapeños + cheddar + crushed chili flakes
- Brunch Vibes: Caramelized onions + mushrooms + thyme
- Garden Fresh: Zucchini slices + ricotta + lemon zest
- Mediterranean Mood: Sun-dried tomatoes + capers + feta
Want to impress your guests? Try focaccia art. Arrange thin slices of colorful veggies and herbs into floral patterns. It looks stunning and tastes even better. Just make sure everything is sliced thin so it bakes evenly.
Whatever you choose, keep balance in mind. Use toppings that enhance, not overpower, the pillowy bread beneath.
Baking the Perfect Focaccia
Ideal Temperature and Time
Preheat your oven to 450°F (232°C). This high heat is essential—it helps develop that golden-brown crust while keeping the interior moist and fluffy.
Place your pan on the middle rack of the oven. Bake for about 20–25 minutes, depending on your oven. You’re looking for a focaccia that’s deeply golden on top and crisp underneath. If you lift a corner with a spatula and it’s still pale, give it a few more minutes.
During baking, your kitchen will smell absolutely heavenly. That’s the olive oil mingling with the herbs and the dough transforming into pure gold.
Avoid opening the oven too often—it lets out heat and can mess with the final texture. Trust the process, and let the oven work its magic.
Signs It’s Ready to Come Out
Wondering if your focaccia is done? Here are a few signs to check:
- Color: The top should be golden brown with slightly darker spots where toppings caramelized.
- Texture: The edges should be crisp, and the center should feel firm but springy.
- Sound: Tap the crust—it should sound hollow. That’s a good sign your crumb is light and airy.
- Bottom: Peek under a corner—it should be nicely browned and crisp.
Once it’s out, give it a few minutes to cool in the pan. Then transfer to a cooling rack to prevent the bottom from getting soggy. You can slice it warm, but letting it rest a bit helps the texture set beautifully.
Serving Suggestions
Pairing with Meals
Focaccia is not just bread—it’s a statement. Its rich olive oil flavor and soft interior with a crispy crust make it the ultimate sidekick for so many dishes. It pairs beautifully with soups, salads, pasta, and roasted meats. Think about dunking a warm, herb-scented slice into a bowl of creamy tomato basil soup, or serving it alongside a fresh Caprese salad. Yes, please!
Another popular pairing is with Italian antipasto platters. Lay out slices of focaccia next to cured meats, cheeses, olives, and marinated veggies. It’s a feast that feels fancy but is easy to pull together. Even simple meals like a grilled chicken breast or baked fish get an upgrade when served with warm, homemade focaccia.
Pro tip? Use it as a base for bruschetta. Just toast a slice, rub it with garlic, top with diced tomatoes, basil, and a drizzle of balsamic—boom, you’ve got a five-star appetizer.
Turning Focaccia into Sandwiches
Focaccia sandwiches are a whole vibe. The bread is sturdy enough to hold fillings, but soft enough to bite into without everything sliding out. Just slice it horizontally and stuff it with your favorite combos. Here are some killer ideas:
- Italian Classic: Prosciutto, mozzarella, arugula, and a swipe of pesto.
- Veggie Delight: Roasted eggplant, zucchini, hummus, and sun-dried tomatoes.
- Breakfast Style: Scrambled eggs, bacon, avocado, and cheddar.
- Caprese Twist: Tomato, fresh mozzarella, basil, and balsamic glaze.
The possibilities are endless. Warm them up in a panini press or wrap them for a picnic lunch—they hold up well and only get better with time.
Storage and Reheating Tips
Keeping It Fresh Longer
Focaccia is best enjoyed fresh out of the oven, but leftovers? Still gold. To keep it soft and tasty, wrap it tightly in plastic wrap or aluminum foil once it cools completely. Then store it at room temperature for up to two days. Don’t refrigerate—it dries out the bread faster.
If you want to keep it longer, freezing is your best bet. Cut it into portions, wrap them individually, and store them in a zip-top freezer bag. This way, you can take out a slice or two whenever the craving strikes. It’ll stay good in the freezer for up to 2 months.
Best Ways to Reheat without Losing Texture
Reheating focaccia can be tricky—do it wrong, and you’ll end up with a rubbery mess. Here’s how to do it right:
- Oven Method (Best Option): Preheat to 375°F, wrap the focaccia in foil, and warm for 8–10 minutes. Remove foil for the last 2 minutes if you want to crisp up the crust.
- Skillet Method: Heat a dry skillet over medium heat, and place the focaccia cut-side down. Warm for 2–3 minutes until the bottom is crispy and the inside is heated through.
- Toaster Oven: Perfect for individual portions. Heat on medium for 5–7 minutes.
- Avoid the Microwave: It may be fast, but it turns that lovely texture into a soggy, chewy disappointment.
Want to revive the flavor? Brush a little olive oil on top before reheating—it’ll bring back that just-baked aroma and taste.
Troubleshooting Common Issues
Dough Not Rising?
If your dough didn’t puff up during proofing, don’t panic—there are a few usual suspects. First, check your yeast. If it didn’t foam during activation, it might be expired or the water was too hot and killed it. Always use water around 105–110°F for best results.
Temperature plays a big role too. If your kitchen is cold, it can slow down fermentation. Move the dough to a warmer spot, like inside your oven with just the light on. If that’s not enough, give it extra time—some doughs take 3–4 hours to double if conditions aren’t ideal.
Also, be sure you’re using enough yeast and not adding salt too early—it can inhibit yeast activity if it comes in direct contact before mixing.
Focaccia Too Dry or Too Oily?
A dry focaccia usually means one of two things: not enough hydration or overbaking. This dough is meant to be sticky and wet—it gives the bread its signature airy texture. Resist the urge to add more flour when kneading. Also, don’t skimp on the olive oil. It’s key to both moisture and flavor.
Overbaking can also lead to dryness. Keep an eye on your oven, and take it out as soon as it hits that golden brown sweet spot. If the crust gets too dark, the inside can dry out.
On the flip side, too much oil on top can leave the surface greasy instead of golden. A good rule of thumb? Coat the dough, not drench it. Let the oil sit in the dimples, not flood the pan.
Variations of Focaccia from Different Italian Regions
Focaccia Genovese
Focaccia Genovese is the OG version from Liguria, and it’s all about simplicity and texture. It’s thinner than other regional versions, super golden from the olive oil, and often topped with just a touch of salt and sometimes onions. What sets it apart? It has a briny flavor thanks to a unique step: brushing it with a salty water emulsion before baking. This keeps the crust crisp and the crumb soft—perfection in every bite.
Bakers in Genoa often serve it as a breakfast item—yes, with coffee! Don’t knock it till you try it. The savory notes actually pair beautifully with a strong espresso.
Focaccia Barese
From Bari in Southern Italy comes a heartier version: Focaccia Barese. It’s typically made with a combination of semolina and all-purpose flour, giving it a slightly denser texture and more golden hue. What really makes it stand out are the toppings: ripe cherry tomatoes, green olives, and sometimes oregano.
This focaccia is baked in round pans and has a thicker, more bread-like bite. It’s rustic, robust, and downright addictive. Serve it warm with a cold beer or a chilled glass of white wine, and you’ve got yourself a full Italian experience.
Nutritional Breakdown
Caloric Content
Focaccia is a flavorful and satisfying bread, but like all delicious things, it comes with calories—most of them from flour and olive oil. A standard serving (about 1/12th of a 9×13-inch pan) typically contains:
| Nutrient | Amount per Serving |
|---|---|
| Calories | 180–250 kcal |
| Fat | 7–12g |
| Carbs | 30–35g |
| Protein | 4–6g |
| Fiber | 1–2g |
Olive oil contributes significantly to the fat content, but it’s the good kind—rich in monounsaturated fats that support heart health. So, while focaccia is no “low-cal” snack, it’s got a nutritional upside, especially when enjoyed in moderation.
Toppings can add calories, too. Cheese, nuts, or meats will increase fat and protein, while veggies can add fiber and vitamins without a big caloric hit. If you’re counting calories, go lighter on the oil or cut the focaccia into smaller servings.
Healthier Alternatives
If you’re watching your intake or have dietary restrictions, there are still ways to enjoy focaccia guilt-free:
- Whole Wheat Flour: Swap up to 50% of all-purpose flour for whole wheat to boost fiber.
- Gluten-Free Blend: Use a gluten-free flour mix designed for yeasted doughs—just be prepared for a slightly denser result.
- Less Oil: Reduce the oil in the dough to 2 tablespoons and brush the top instead of dousing it.
- Low-Sodium: Limit added salt and avoid salty toppings like olives or cured meats.
- Add Seeds: Flax, chia, or sunflower seeds sprinkled on top add nutrition and crunch.
Healthy doesn’t have to mean boring. With the right tweaks, focaccia can fit into most diets while still delivering on taste and texture.
Tips for First-Time Bakers
What to Do and What to Avoid
Baking focaccia for the first time? Here are some golden rules:
Do:
- Use high-quality olive oil—it makes a huge difference in flavor.
- Let the dough rise fully. Don’t rush it.
- Keep your hands oiled while handling the dough to avoid stickiness.
- Dimple generously before baking. It’s more than just decoration.
- Use a metal pan for that crispy bottom crust.
Avoid:
- Over-kneading. This dough is meant to be handled gently.
- Under-proofing. Flat focaccia isn’t fun.
- Skipping the second rise—it’s key for a fluffy texture.
- Going topping-crazy. You want to complement the bread, not smother it.
- Using cold water for the yeast—it won’t activate properly.
Most importantly, don’t stress if it’s not perfect the first time. Bread-making is an art, and each loaf teaches you something new.
Encouragement for Beginners
Here’s the truth: if you can mix, wait, and press with your fingers, you can make focaccia. It’s one of the best breads for beginners because it’s so forgiving. Unlike baguettes or sourdough, it doesn’t require shaping skills or baking stones.
Every step—mixing, rising, baking—builds confidence. And the results? Ridiculously rewarding. You’ll find yourself saying, “Wait, I made this?” And yes, you did.
So if you’re just starting your baking journey, let focaccia be your first win. From your kitchen to your table, it’s homemade comfort that everyone will love.
FAQs about Italian Focaccia Recipe
Q: What type of flour is best for making focaccia?
A: For authentic Italian focaccia, it’s ideal to use a high-quality bread flour, which has a higher protein content than all-purpose flour. This gives the bread its characteristic chewy texture. Some recipes might also blend in some whole wheat or semolina flour for a nuanced flavor.
Q: How long should I let focaccia dough rise?
A: Focaccia dough should typically rise until it doubles in size, which usually takes about 1-1.5 hours. A second rise after shaping can further enhance the texture, making it airier.
Q: What are some common toppings for focaccia?
A: Classic toppings include rosemary and sea salt. However, variations might include caramelized onions, olives, sun-dried tomatoes, or a sprinkling of cheese. The key is to choose ingredients that can withstand the heat of baking without burning.
Q: Can I make focaccia dough ahead of time?
A: Absolutely! You can prepare focaccia dough a day in advance and let it rise slowly in the refrigerator. This not only eases the baking process but can also deepen the flavors of the dough.
Q: Is focaccia vegan-friendly?
A: Traditional focaccia is made with flour, water, yeast, salt, and olive oil, all of which are vegan. Just be mindful of the toppings and avoid cheeses or any non-vegan additions if you want to keep it vegan.
Q: How do I ensure my focaccia is crispy on the outside and soft on the inside?
A: To achieve that perfect texture, make sure your oven is properly preheated and bake the focaccia at a high temperature. Also, using a good amount of olive oil not only adds flavor but helps achieve a crispy crust.
Conclusion
Focaccia isn’t just bread—it’s Italy’s gift to comfort food lovers around the world. With a crispy edge, a soft pillowy center, and the magical touch of olive oil and herbs, it’s the kind of thing that turns a simple meal into something unforgettable. And the best part? You don’t need to be a chef to make it. With a little time, some basic ingredients, and a whole lot of love, anyone can bake up a golden tray of focaccia that tastes like it came straight from a rustic Italian bakery.
So whether you stick to the classic rosemary and sea salt or go bold with sun-dried tomatoes and feta, just remember—focaccia is as much about the process as it is the product. Enjoy the mixing, the rising, the anticipation as it bakes, and most of all, that first warm, heavenly bite.