Israeli Couscous Recipe: Couscous might sound familiar, but Israeli couscous? That’s a whole different level of delicious. Known also as ptitim, Israeli couscous has become a star in kitchens around the world—and for good reason.
This recipe will walk you through exactly how to cook it to perfection, with all the little flavor-boosting tips thrown in.
What is Israeli Couscous?
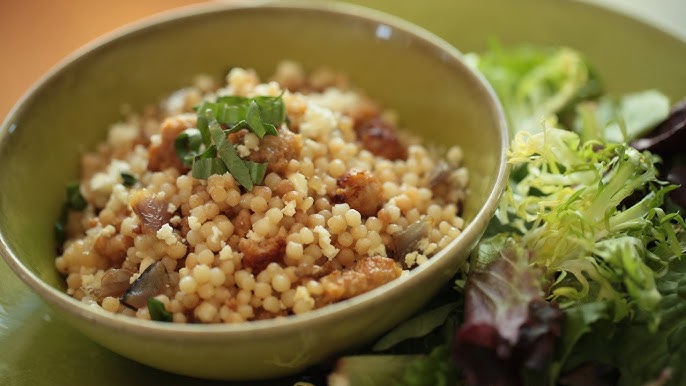
Israeli couscous is a small, round pasta—often confused with traditional couscous, which is much finer and grainier. Think of it like tiny pearls of pasta that soak up flavor like a sponge. Made from wheat flour and toasted to give it that nutty depth, it’s chewy, tender, and surprisingly satisfying. The size and texture make it versatile enough for everything from a cozy winter side to a refreshing summer salad.
Unlike regular couscous, which is steamed, Israeli couscous is boiled much like pasta. Its slightly chewy bite gives it a unique personality that really sets it apart in the world of grains and pastas.
Origins and Cultural Significance
Originally created in Israel in the 1950s as a rice substitute during a shortage, ptitim quickly became a pantry staple. Over time, chefs and home cooks began to see its potential beyond necessity. Today, it’s a cherished element in Middle Eastern cuisine and has gained global popularity.
Its origins may be humble, but Israeli couscous now appears in high-end restaurants and home kitchens alike. It bridges the gap between rustic tradition and modern flair, offering something for every palate.
Why You’ll Love This Recipe
Israeli couscous might not be as trendy as quinoa or as familiar as spaghetti, but it packs a punch in its own unique way.
Unique Texture and Taste
Let’s be honest—texture matters. Israeli couscous offers that perfect blend of al dente bite and soft chew, kind of like a hybrid between pasta and risotto. It absorbs flavor well, whether it’s simmered in broth or mixed with herbs, citrus, or a touch of garlic.
Its slightly toasted flavor right out of the pan adds an extra dimension that elevates even the simplest preparations. It’s the kind of dish that keeps you going back for “just one more spoonful.”
Versatile Ingredient for Any Meal
Another reason to love Israeli couscous? It plays well with others. Want a warm, comforting dinner? Cook it with sautéed mushrooms and thyme. Looking for a cool, refreshing salad? Toss it with cucumber, feta, lemon, and mint.
It’s a blank canvas with personality. You can turn it into a hearty side dish, a vibrant salad, or even a main course by adding your favorite protein.
Ingredients You’ll Need
Simple ingredients. Big flavor.
Core Ingredients
To get started, gather the basics:
- 1 cup Israeli couscous
- 1 tablespoon olive oil or butter
- 1 ½ cups water or vegetable broth
- ½ teaspoon salt
These few ingredients are all you need for a classic, satisfying dish. But don’t stop there—this base is meant to be built on.
Optional Add-Ins for Flavor Boost
Want to jazz it up? Here are some optional ingredients to level up your couscous:
- Garlic (minced or roasted)
- Onion or shallots (sautéed)
- Fresh herbs like parsley, cilantro, or dill
- Crumbled feta or goat cheese
- Chopped nuts for crunch (almonds, pistachios, pine nuts)
- Dried fruits like cranberries or apricots
- Lemon zest or juice for brightness
With just a few tweaks, this simple dish can transform into something truly memorable.
Step-by-Step Cooking Instructions
Time to get cooking. Follow these foolproof steps for delicious results every single time.
Step 1: Toast the Couscous
Start by heating the olive oil or butter in a saucepan over medium heat. Once warm, pour in the couscous and toast it for 4–5 minutes. Stir frequently to prevent burning.
You’re aiming for a golden-brown color. This step is what sets Israeli couscous apart—it adds a subtle nutty flavor that elevates the whole dish. Don’t skip it!
Step 2: Simmer to Perfection
Once the couscous is nicely toasted, add your water or broth and salt. Give it a good stir, bring to a boil, then reduce the heat to low and cover the pan.
Let it simmer for about 10 minutes, or until all the liquid is absorbed. Resist the urge to lift the lid during cooking—you want that steam to work its magic.
Step 3: Fluff and Finish
After the cooking time is up, turn off the heat and let the couscous sit covered for 5 more minutes. This final rest helps it reach the perfect texture.
Fluff it gently with a fork, and you’re done! Taste and adjust seasoning if needed. Add any of those optional extras you like—fresh herbs, cheese, or a squeeze of lemon really bring it to life.
Pro Tips for Perfect Israeli Couscous
Ready to take it to the next level?
Cooking Tips from the Pros
- Use broth instead of water for deeper flavor.
- Don’t overcook—you want it tender, not mushy.
- Let it rest after cooking to absorb remaining moisture.
- Stir gently when fluffing to keep the texture light and separate.
Flavor Enhancing Secrets
- Mix in roasted garlic for a rich, earthy depth.
- Add lemon zest for brightness and a pop of freshness.
- Top with a drizzle of good olive oil before serving.
These little tweaks can transform your Israeli couscous from good to “where did you learn to cook like this?” level.
Creative Variations of Israeli Couscous
Once you’ve mastered the basic recipe, it’s time to explore the endless possibilities. Israeli couscous is incredibly adaptable—it can go from simple side dish to the star of the meal with just a few additions.
Israeli Couscous Salad
This variation is perfect for picnics, potlucks, or a light lunch.
Ingredients:
- Cooked and cooled Israeli couscous
- Chopped cucumbers
- Cherry tomatoes
- Red onion
- Crumbled feta
- Kalamata olives
- Fresh parsley or mint
- Lemon juice and olive oil
Instructions:
Toss all ingredients together in a large bowl. Season with salt and pepper to taste. Let it chill for an hour to allow the flavors to meld. It’s bright, tangy, and refreshingly light.
Mediterranean Couscous Bowl
Need something more filling? Try this wholesome bowl.
Ingredients:
- Warm Israeli couscous
- Roasted vegetables (zucchini, eggplant, peppers)
- Hummus or tahini drizzle
- Grilled chicken or chickpeas for protein
- A sprinkle of za’atar
Instructions:
Layer couscous with vegetables and your choice of protein. Drizzle with tahini or lemony hummus. Serve warm or at room temp. This one’s a weeknight favorite!
Creamy Mushroom Couscous
If comfort food is what you’re after, this version delivers.
Ingredients:
- Butter and olive oil
- Sliced mushrooms (cremini or button)
- Garlic and shallots
- Vegetable broth
- Heavy cream or cashew cream
- Fresh thyme or rosemary
Instructions:
Sauté mushrooms, shallots, and garlic in butter. Stir in toasted couscous, add broth, and simmer. Finish with cream and herbs for a rich, risotto-like dish that’s velvety and deeply savory.
How to Store and Reheat Israeli Couscous
Sometimes you’ve got leftovers—or maybe you’re meal prepping for the week. Either way, knowing how to store and reheat couscous ensures it stays tasty.
Storage Tips
- Allow couscous to cool completely before storing.
- Store in an airtight container in the refrigerator.
- It keeps well for up to 4 days.
To keep it from sticking, drizzle a bit of olive oil before sealing the container.
Reheating Instructions
- For best results, add a splash of water or broth before reheating.
- Microwave on medium for 1–2 minutes, stirring halfway through.
- Or, reheat in a skillet over low heat, adding moisture as needed.
If it’s turned into a salad, just serve it chilled straight from the fridge.
Common Mistakes to Avoid
Cooking Israeli couscous is easy—but a few missteps can ruin its texture or flavor. Avoid these common mistakes:
Overcooking
Couscous can quickly go from perfectly chewy to mushy if left on the heat too long. Stick to the 10-minute simmer and always fluff immediately after resting.
Skipping the Toasting Step
Toasting gives Israeli couscous its signature nuttiness. Skipping this step results in a more bland, pasta-like finish.
Using Too Much Liquid
Unlike pasta, couscous doesn’t need to be drained. Be sure to measure your liquid—1½ cups for every cup of couscous is the sweet spot.
Not Seasoning the Liquid
Salt and broth are crucial. Seasoning the water or using a flavorful broth makes a huge difference in taste.
Health Benefits of Israeli Couscous
Though it’s not exactly a “superfood,” Israeli couscous does have nutritional value, especially when prepared with wholesome ingredients.
High in Selenium
Israeli couscous is a good source of selenium, a powerful antioxidant that helps support immune function and thyroid health.
Low in Fat
When prepared without too much oil or butter, it’s relatively low in fat and can be a healthy base for salads or bowls.
Customizable for Special Diets
- Vegetarian/Vegan: Use vegetable broth, olive oil, and plant-based add-ins.
- Gluten-Free: Traditional Israeli couscous is not gluten-free, but you can find gluten-free versions made with corn or rice flour.
- Low-Sodium: Use water instead of broth and adjust salt levels carefully.
Pair it with lots of veggies and lean protein for a balanced meal.
FAQs about Israeli Couscous Recipe
Q1: Can I make Israeli couscous in advance?
Yes! It actually holds up well in the fridge for several days. Just add a little olive oil before storing to prevent clumping.
Q2: Is Israeli couscous gluten-free?
Traditional Israeli couscous is made from wheat flour, so it’s not gluten-free. However, there are gluten-free alternatives available on the market.
Q4: What’s the difference between regular couscous and Israeli couscous?
You can freeze it, but it’s best eaten fresh or stored in the fridge for a few days. If freezing, allow it to cool, portion it out, and reheat with a splash of broth for best texture.
Q4: What’s the difference between regular couscous and Israeli couscous?
Regular couscous is much finer and steam-cooked, while Israeli couscous is pearl-like, toasted, and boiled like pasta. The textures and cooking methods are quite different.
Q5: Can I cook Israeli couscous in the rice cooker?
Yes! Use a 1:1.5 couscous-to-liquid ratio, add your seasonings, and cook just like rice. It’s hands-off and turns out great.
Conclusion
Israeli couscous is more than just a side dish—it’s a flavor-packed, texture-rich ingredient that can fit into any meal. Whether you’re crafting a zesty salad, a cozy bowl, or a quick weeknight side, this little pasta pearl will never disappoint. The key is in the toasting, the seasoning, and the creativity. Once you try it, it just might become your go-to pantry staple.
So go ahead—experiment, play with flavors, and make this dish your own. Israeli couscous is waiting to surprise you with its simplicity and deliciousness.