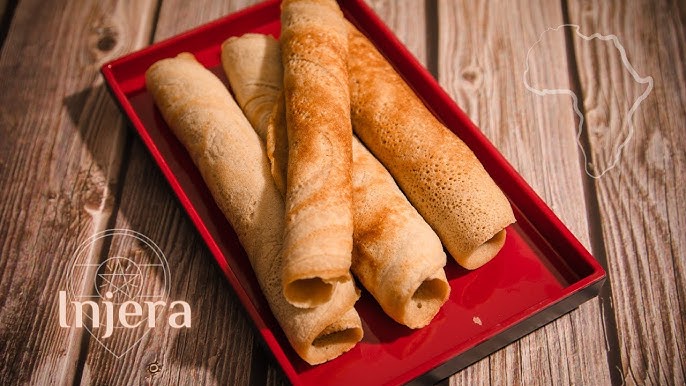
Injera Recipe: Injera isn’t just food—it’s a staple, a plate, and even a cultural symbol in Ethiopian and Eritrean cuisines. If you’ve ever dipped your fingers into spicy stews using a spongy, sour flatbread, chances are it was injera.
This fermented delight may seem intimidating at first, but with the right steps, anyone can master making it at home.
Whether you’re diving into East African cuisine or craving that authentic touch for your home meals, this guide has you covered.
What is Injera?
Injera is a sourdough-risen flatbread with a slightly spongy texture, traditionally made from teff flour. Teff, a tiny ancient grain native to Ethiopia, is gluten-free and nutrient-packed. What makes injera unique isn’t just the ingredients—it’s the fermentation process that gives it that distinct tangy flavor and bubbly texture. This bread is cooked only on one side, creating a top full of tiny holes, known as “eyes,” which soak up sauces and flavors beautifully.
Unlike typical flatbreads, injera serves as both the plate and the utensil in Ethiopian meals. Stews, vegetables, and meats are often placed on top of a large round of injera, and pieces are torn off to scoop up the food. It’s both practical and delicious.
Injera is more than food—it’s a way of sharing and bonding. Meals are communal, and eating with your hands off a shared injera platter is the norm. It’s not just a meal, it’s an experience.
Cultural Significance of Injera
Injera isn’t simply eaten; it’s celebrated. For Ethiopians and Eritreans, injera symbolizes community, tradition, and heritage. It is at the heart of family gatherings, religious festivities, and everyday meals alike. The act of breaking injera together is deeply rooted in social connection. Often, elders or hosts will feed the first piece of injera to a guest or child as a sign of affection and respect.
The fermentation process itself mirrors patience and tradition—many households pass down their own methods or starter cultures from generation to generation. It’s common for Ethiopian households to have a batch fermenting at all times. This long-standing culinary ritual is a cornerstone of their cultural identity, and learning to make it can feel like embracing a piece of that tradition.
Ingredients Needed to Make Injera
Main Ingredients
Here’s a simple list of ingredients you’ll need to get started with your injera:
- Teff flour – Traditionally, injera is made solely with teff flour. It gives the bread its classic earthy flavor and is gluten-free.
- Water – Filtered water is ideal for promoting healthy fermentation.
- Salt – Just a pinch to enhance the flavor.
- Starter (optional) – Some people use a bit of previous batter as a starter, but you can also rely on natural fermentation.
Depending on where you live, 100% teff flour might be hard to find or expensive. In such cases, a mix of teff and other flours like barley, wheat, or all-purpose flour is commonly used for convenience and affordability, especially outside of Ethiopia.
Optional Add-ins for Enhanced Flavor
While traditionalists prefer pure teff flour, many home cooks like to tweak the recipe slightly for taste or texture. Here are a few optional ingredients you can consider:
- Barley or all-purpose flour – To lighten the batter or make it more affordable.
- A small amount of baking soda – To ensure bubbles if fermentation didn’t go well.
- Yeast – To speed up fermentation, especially in colder climates.
These add-ins can help you adapt injera to your kitchen’s conditions while staying close to the traditional flavor profile.
Step-by-Step Guide to Making Injera
Step 1: Preparing the Teff Batter
The foundation of good injera starts with the batter. This isn’t just mixing flour and water—it’s the beginning of a fermentation journey.
Here’s how to do it:
- Measure the teff flour – Use about 2 cups of teff flour for a small batch.
- Add water – Gradually pour in 3 cups of filtered water while whisking to prevent lumps.
- Mix well – Stir until the batter is smooth, with a consistency similar to pancake batter.
- Optional: Add a pinch of salt – This helps enhance the final flavor.
After mixing, cover the bowl with a clean cloth or plastic wrap. If using plastic wrap, poke a few holes to let the batter “breathe.” Store it at room temperature for the next step: fermentation.
Step 2: Fermenting the Batter
Fermentation is what gives injera its signature sour flavor and spongy texture. This is the step where the batter truly transforms.
Fermenting instructions:
- Let it sit for 2-3 days – Depending on the temperature of your kitchen, it may take longer or shorter. Warmer environments speed up the process.
- Watch for bubbles – After a day or two, you’ll see bubbles forming on the surface. This is a good sign—it means fermentation is active.
- Smell test – A sour, yeasty smell indicates it’s ready.
If you notice mold or a bad smell (like rot instead of sourdough), discard the batch and start over. Otherwise, stir it gently before use.
Step 3: Cooking the Injera
Cooking injera is much like making a crepe, but there’s a catch: it’s cooked only on one side and requires a specific technique.
Follow these steps:
- Preheat a nonstick pan or traditional mitad (griddle) – Medium to high heat works best.
- Pour a ladle of batter – Starting from the outside, swirl it in toward the center, just like a crepe.
- Cover and steam cook – Cover with a lid immediately and let it cook for 1-2 minutes.
- Watch for “eyes” – When bubbles form on the surface and the edges lift, it’s done.
- Remove gently and cool – Slide it onto a cloth or basket, don’t stack until cooled to avoid sticking.
Once you get the rhythm, you’ll find it incredibly satisfying to see those signature holes appear.
Tips and Tricks for the Perfect Injera
Achieving the Right Consistency
One of the most common challenges in making injera is nailing the batter consistency. If your batter is too thick, it won’t spread well in the pan. Too thin? It might fall apart or not form those classic bubbly “eyes.” Finding the sweet spot is key—and that comes with a bit of trial and error.
Start with a pancake-like consistency. When you scoop the batter, it should pour smoothly but still coat the back of a spoon. If it’s too thick, add a bit of water gradually. If too thin, stir in a touch more flour. Keep in mind that after fermentation, the batter tends to thicken slightly, so adjust accordingly before cooking.
Another trick? Blend the batter before cooking. While traditional methods involve hand-mixing, blending the fermented batter for just a few seconds helps smooth it out and ensures an even texture when poured onto the pan. Some even strain the batter to remove lumps.
Let the pan do its part, too. A properly preheated, slightly oiled non-stick pan will prevent sticking and give you a clean, golden base.
How to Get the Classic “Eyes” or Holes
The hallmark of perfect injera is the spongy network of tiny holes—called “eyes”—that appear during cooking. These aren’t just for looks; they soak up stews and sauces beautifully, making every bite flavorful and moist.
To get them right, the batter must be well-fermented. A lack of bubbles or a flat texture usually means the fermentation didn’t go far enough. Ideally, after 48 hours, your batter should have a sour aroma and visible bubbling when stirred.
Also, don’t flip the injera! This might seem counterintuitive if you’re used to pancakes or crepes, but injera is cooked only on one side. Covering the pan with a lid traps the steam and cooks the top, allowing the holes to open up.
Timing is crucial. Once the surface looks dry and the edges begin to lift, take it off. If you wait too long, the injera will dry out and lose its softness.
Another expert tip: try using a small amount of baking soda if your batter didn’t ferment enough. It can help create the bubbly texture in a pinch.
Serving and Storing Injera
Traditional Ways to Serve Injera
Injera is not just a bread—it’s a central element of Ethiopian and Eritrean dining. It’s traditionally served as a base on a large, communal platter, with various dishes spread across it like a flavorful canvas. You’ll often find spicy lentils (misir wot), sautéed greens (gomen), chickpeas, and meat stews all arranged on the injera.
There’s no need for utensils. Instead, pieces of injera are torn by hand and used to scoop up the dishes. This method not only enhances the dining experience but also allows for greater intimacy and sharing during meals.
Want to wow your guests? Present your injera with an array of colorful sides like:
- Doro Wat – a spicy chicken stew with hard-boiled eggs
- Shiro – thick chickpea stew
- Atakilt Wat – a blend of cabbage, carrots, and potatoes
- Kitfo – seasoned raw or lightly cooked minced beef
Drinks like tej (honey wine) or spiced Ethiopian coffee make a traditional and heartwarming pairing.
Storing and Reheating Leftovers
So you’ve made a big batch of injera—what now? Good news: injera stores quite well and can be enjoyed for days if handled correctly.
Here’s how to keep your injera fresh:
- Wrap in a clean cloth or parchment paper – This helps retain moisture.
- Seal in a plastic bag or airtight container – Keep air exposure to a minimum to avoid drying out.
- Refrigerate – Injera stays good in the fridge for about 5–7 days.
- Freeze for long-term storage – Separate layers with parchment paper, wrap tightly, and freeze for up to 2 months.
When you’re ready to enjoy it again:
- Reheat on a pan or steam for 10–20 seconds – Just enough to warm and soften it without overcooking.
- Avoid microwaving for too long – It can dry out or toughen the texture.
Planning to use injera for lunch wraps or quick snacks? Cut leftovers into strips and use them like tortillas—they’re perfect with hummus, avocado, or even scrambled eggs.
Troubleshooting Common Injera Issues
Why Didn’t My Batter Ferment Properly?
Fermentation is the soul of injera. When it doesn’t happen as expected, it can be frustrating. If your batter is flat, smells off, or has no bubbles after 2–3 days, don’t worry—let’s fix it.
Here are the top reasons fermentation might fail:
- Too cold: Fermentation thrives in warm environments (around 70–75°F or 21–24°C). If your kitchen is chilly, the batter may need more time. You can wrap the bowl in a towel or place it in the oven with the light on to gently raise the temperature.
- Water quality: Chlorinated tap water can kill natural microbes. Use filtered or dechlorinated water for best results.
- Old flour: If your teff or other flour is stale or has been exposed to moisture, the natural yeast might be inactive.
- Over-cleaning: Washing the bowl or utensils with strong soap before mixing can remove beneficial bacteria needed for fermentation.
How to fix it:
- Add a teaspoon of active dry yeast to the batter, stir, and let it ferment for another 12–24 hours.
- Start a new batch using a bit of yogurt, sourdough starter, or leftover fermented batter (if any) to jumpstart the process.
How to Avoid Sticky or Crumbly Injera
Sticky or crumbly injera can ruin the eating experience, making it hard to tear and scoop up stews. If your injera sticks to the pan or breaks apart, try these tips:
For sticky injera:
- Your pan might not be hot enough. Preheat it thoroughly before pouring the batter.
- Use a non-stick pan or lightly oil a cast iron skillet. Don’t over-grease—just a light coat.
- Let the injera cook completely before removing. If it’s undercooked, it will stick and tear.
For crumbly injera:
- Your batter might be too dry. Add a little more water before cooking.
- Ensure enough fermentation time—properly fermented batter is more elastic and less likely to crumble.
- Try blending the batter before cooking to improve its uniformity and smoothness.
Getting the right result might take a few tries, but it’s worth it. Every batch teaches you something new, and once you master it, you’ll never go back to store-bought alternatives.
Nutritional Benefits of Injera
Why Teff is a Supergrain
Beyond its unique taste and cultural role, injera is a powerhouse of nutrition—thanks to teff, its star ingredient. Teff is naturally gluten-free and incredibly rich in essential nutrients.
Here’s what makes teff so special:
- High in protein – Teff contains all eight essential amino acids, making it a complete protein source.
- Rich in iron and calcium – Just one serving of teff can supply a significant percentage of your daily requirements.
- Loaded with fiber – Helps with digestion and promotes satiety.
- Low glycemic index – Teff is ideal for people managing blood sugar levels.
Injera made from 100% teff flour is also friendly for those with gluten intolerance or celiac disease. Even when combined with other flours, it still retains much of its health benefits.
Eating injera with traditional vegetable- and legume-based dishes makes for a wholesome, balanced meal that aligns well with modern nutrition goals—think high fiber, plant-based, and low fat.
Injera vs. Other Flatbreads
It’s tempting to compare injera to other flatbreads like naan, pita, or tortillas. But injera stands in a league of its own—both in taste and function.
Key differences:
| Feature | Injera | Naan/Pita/Tortilla |
|---|---|---|
| Texture | Spongy, bubbly top | Fluffy or dense |
| Flavor | Sour, fermented | Neutral or slightly sweet |
| Cooking Method | Steam-cooked, one side | Oven or pan-cooked both sides |
| Usage | Plate + utensil | Served on the side |
Injera’s ability to serve as a dish, scoop, and flavor enhancer sets it apart. Its taste profile also adds a zing that elevates accompanying dishes, unlike the often-neutral taste of other flatbreads.
Variations of Injera Across Regions
Modern Twists and Regional Spins
While the classic Ethiopian injera is made from teff, regional variations and modern adaptations have introduced delightful twists to this age-old bread.
Popular variations include:
- Mixed-flour Injera: Common in the Ethiopian diaspora, this uses a blend of teff, barley, wheat, or rice flour to cut costs and ease preparation.
- Whole grain Injera: Some recipes include flaxseed or millet flour for added texture and nutrition.
- Quick Injera (with yeast or soda): For those short on time, a yeast or baking soda version offers quicker results without the long fermentation.
In Eritrea, injera is often called “taita” and may be slightly thinner. In some regions, herbs and spices like fenugreek or cumin are added to the batter for a subtle flavor variation.
Modern kitchens are also experimenting with mini injera rolls, injera chips (baked or fried), and fusion wraps that use injera as a base for non-Ethiopian fillings—like avocado, scrambled tofu, or grilled chicken.
These innovations reflect injera’s versatility and how it’s evolving to suit global palates without losing its cultural roots.
FAQs about Injera Recipe
1. What is injera made of?
Injera is primarily made from teff flour, a naturally gluten-free grain native to Ethiopia. Some recipes mix teff with wheat or barley flour to improve texture and fermentation.
2. Is injera gluten-free?
Yes, traditional injera made solely with teff flour is gluten-free. However, always check the flour blend, as some modern recipes include wheat flour which contains gluten.
3. How long does injera take to ferment?
Typically, injera batter takes 2 to 3 days to ferment at room temperature. Fermentation gives injera its tangy flavor and bubbly texture.
4. Can I speed up the fermentation process?
Yes. You can use a pinch of yeast to help jump-start fermentation, especially if your kitchen is cool. But for authentic flavor, natural fermentation is best.
5. What can I eat with injera?
Injera is traditionally served with stews like doro wat (spicy chicken stew), misir wat (lentil stew), and sautéed vegetables. It’s both the plate and the utensil in Ethiopian meals!
6. How do I store leftover injera?
Wrap it tightly in plastic or foil and refrigerate for up to 3 days. For longer storage, freeze in zip-lock bags for up to 3 months.
7. Can I make injera without teff flour?
You can substitute with all-purpose or whole wheat flour, but the taste and texture won’t be the same. Teff gives injera its authentic, slightly sour flavor and spongy feel.
8. Why is my injera not bubbling?
Lack of bubbles usually means the batter didn’t ferment enough. Give it more time, and ensure it’s kept in a warm environment during fermentation.
9. Do I need a special pan to make injera?
A non-stick skillet works fine for home cooking. Traditionally, injera is made on a mitad, a large clay or electric griddle.
10. Is injera healthy?
Absolutely! Teff is rich in iron, fiber, protein, and essential minerals. It’s a nutritious choice for those seeking a balanced and wholesome diet.
Conclusion
Injera is more than just a flatbread—it’s a story of culture, flavor, and connection. Making it at home may feel like a culinary challenge, but with a little patience and the right guidance, anyone can create this iconic Ethiopian staple. From the earthy teff batter to the spongy texture and fermented tang, every element of injera brings something special to the table.
Whether you stick to tradition or try modern twists, injera offers a delicious, nutritious, and soulful dining experience. Embrace the process, share it with loved ones, and enjoy the journey into East African cuisine.

