Indian Curry Recipe: Indian curry isn’t just a dish; it’s an experience. Rich, fragrant, and layered with spices, it brings people together at the dinner table with its comforting warmth and complex flavors.
Whether you’re a beginner looking to explore the Indian kitchen or a seasoned cook wanting to perfect your curry game, this step-by-step guide will walk you through creating an authentic Indian curry that’s both mouth-watering and easy to prepare.
What Makes Indian Curry Unique?
Indian curry stands out from its global counterparts due to the use of aromatic spices, diverse cooking techniques, and regional ingredients. Unlike Western “curry powder,” which is usually a pre-mixed blend, Indian curries often require individually measured spices like turmeric, cumin, coriander, and garam masala. These spices aren’t just thrown into the pot—they’re carefully layered, toasted, and bloomed to bring out depth and complexity.
Another unique feature? The base. Most Indian curries start with a sautéed mix of onions, garlic, ginger, and tomatoes. This creates a rich, savory foundation that supports everything from chicken to paneer to lentils. Indian curries also vary significantly by region—while Northern curries lean heavily on dairy like cream or yogurt, Southern versions might include coconut milk or tamarind for a tangy twist.
Curries can be spicy or mild, dry or saucy, vegetarian or meaty. But the hallmark of a good Indian curry remains the same: balance. When every spice sings in harmony, you’ve got yourself a winner.
Popular Varieties of Indian Curry
Indian cuisine boasts hundreds of curry varieties, each with its own story and flavor profile. Here are a few classics you might have heard of—or tasted:
- Chicken Tikka Masala: Creamy, tomato-based curry with marinated grilled chicken pieces.
- Butter Chicken (Murgh Makhani): Rich and buttery with a hint of sweetness.
- Chana Masala: A vegetarian delight made with chickpeas and tangy spices.
- Rogan Josh: A spicy lamb curry with Kashmiri origins.
- Palak Paneer: Spinach and cottage cheese curry, wholesome and green.
- Vindaloo: Originally from Goa, this is a fiery hot curry with Portuguese roots.
Each dish tells a story of its region, ingredients, and influences, making Indian curry not just a meal but a cultural journey.
Ingredients You’ll Need
Core Spices and Seasonings
To make a classic Indian curry, you’ll need a robust spice rack. The usual suspects include:
- Turmeric: Adds color and a mild earthy flavor.
- Cumin Seeds: Nutty and aromatic, often toasted in oil.
- Coriander Powder: Citrus-like and warm.
- Garam Masala: A spice blend typically added at the end for fragrance.
- Red Chili Powder: For heat, adjusted to your preference.
- Mustard Seeds: Common in South Indian curries.
- Fenugreek (Methi): Slightly bitter, used sparingly.
Don’t forget salt to taste and sugar or honey to balance flavors if needed.
Fresh Ingredients for Flavor and Texture
While spices build the aroma, fresh ingredients are key to texture and richness:
- Onions: Typically finely chopped or pureed. Caramelizing them slowly enhances the flavor.
- Garlic and Ginger: Minced or ground into a paste for intensity.
- Tomatoes: Fresh or canned, they add acidity and body.
- Protein of Choice: Chicken, lamb, tofu, or chickpeas.
- Fresh Herbs: Cilantro or curry leaves for garnish.
Dairy like yogurt or cream is often used to mellow out the heat and add creaminess.
Optional Add-ins for Customization
Depending on your taste and the specific curry, you can tweak the dish with:
- Coconut Milk: For a smooth, tropical taste (especially in South Indian curries).
- Tamarind Paste: Adds a tangy zing.
- Cashew Paste: Used in Mughlai-style curries for richness.
- Green Chilies: If you like it hot and fresh.
Indian curry is highly customizable. Once you understand the base formula, you can start experimenting.
Tools and Equipment Required
Essential Kitchen Tools
Making curry doesn’t demand a fancy kitchen, but a few key tools can simplify the process:
- Heavy-bottomed Pot or Dutch Oven: Helps prevent spices and onions from burning.
- Sharp Knife: For chopping onions, garlic, and herbs with ease.
- Cutting Board: Preferably one just for aromatics like garlic and onion.
- Measuring Spoons: For precise spice quantities.
- Wooden Spoon or Spatula: Ideal for stirring without scraping the pan.
These basics are more than enough to get started. A non-stick pan also works well for those worried about sticking or burning.
Time-Saving Gadgets
For regular curry-making, some appliances can be life savers:
- Blender or Food Processor: To puree tomatoes, onions, and even whole spices into pastes.
- Instant Pot or Pressure Cooker: Speeds up cooking time, especially for tough meats and legumes.
- Spice Grinder: A must if you’re grinding whole spices at home for maximum flavor.
While not mandatory, these tools can significantly streamline your workflow in the kitchen.
Preparing Your Ingredients
How to Chop and Prep Like a Pro
Preparation is everything when it comes to Indian cooking. Start with mise en place—get all your ingredients chopped and ready before you turn on the stove.
- Onions: Dice them fine or puree them for a smoother curry.
- Garlic and Ginger: Freshly grated or blended into a paste gives the best results.
- Tomatoes: You can dice them or blend into a puree if you prefer a smooth sauce.
- Spices: Measure them out in small bowls for quick access during cooking.
Prepping beforehand prevents overcooking or burning any part of your dish while you’re multitasking. It also lets you focus on layering flavors properly without the panic of chopping mid-recipe.
Tips on Marinating Proteins
Marinating meat or tofu enhances the flavor tenfold. A basic marinade might include:
- Yogurt: Tenderizes and adds richness.
- Spices: Turmeric, chili powder, coriander, and cumin.
- Lemon Juice or Vinegar: For a touch of acidity.
Let it sit for at least 30 minutes—or overnight in the fridge if you have time. Marination not only adds depth but ensures your proteins absorb all that curry goodness from the inside out.
Step-by-Step Cooking Instructions
Step 1 – Heating the Oil and Spices
This first step might seem simple, but it’s where magic begins. Heating the oil and blooming the spices is crucial. Start by heating about 2 to 3 tablespoons of oil in a heavy-bottomed pan. Many Indian cooks prefer using mustard oil, ghee, or vegetable oil for an authentic taste.
Once the oil is hot (but not smoking), add whole spices like cumin seeds, mustard seeds, or bay leaves. These should sizzle and pop gently—this is called “tempering.” As they release their essential oils, your kitchen will be filled with a mouthwatering aroma. Be careful not to burn the spices, though—a few seconds too long and they’ll turn bitter.
This quick tempering step sets the stage for the entire curry. It infuses the oil with flavor, which then permeates every ingredient you add afterward. Think of it as laying down the foundation for a flavor-packed skyscraper.
Step 2 – Sautéing the Base
Next up is your curry base, usually made from onions, garlic, ginger, and tomatoes. Start with finely chopped onions—cook them on medium heat until golden brown. This might take 10-15 minutes but don’t rush it. The slow caramelization builds the deep, sweet flavor you’re aiming for.
Then, add garlic and ginger paste. Stir and sauté until the raw smell disappears. This is your cue to add the tomatoes. If you’re using fresh ones, cook until they’re mushy and the oil begins to separate. This is a good sign that your masala (spice base) is ready for the next stage.
Want extra depth? Add a spoonful of tomato paste or a few pureed cashews here. These give the sauce body and a slightly nutty undertone.
Step 3 – Adding Main Ingredients
Once your base is ready, it’s time to introduce the hero of the dish: your main ingredient. This could be chunks of chicken, pieces of lamb, cubes of paneer, or scoops of cooked chickpeas.
If your protein was marinated, gently add it into the pan and stir to coat with the masala. Sauté it for a few minutes to allow the spices to adhere and slightly cook the outer layer. This step ensures every bite is infused with flavor.
For vegetarian versions, toss in your veggies or legumes and mix well. Add some water or broth to create a sauce-like consistency. This liquid is vital—it helps in cooking the main ingredient while forming a rich gravy.
Cook until the protein is nearly done. For chicken or lamb, this might take 15–20 minutes on medium-low heat. For paneer or tofu, 5–7 minutes is enough.
Step 4 – Simmering for Flavor
Simmering isn’t just about cooking—it’s about fusing. Reduce the heat and let the curry bubble gently for 10 to 15 minutes. During this time, all the ingredients come together, and the flavors meld beautifully.
This is a good time to add heavier elements like cream, yogurt, or coconut milk. Stir them in gently so they don’t curdle. These ingredients not only mellow the heat but also lend the curry a luxurious, silky texture.
Taste and adjust your seasoning—add salt, a pinch of sugar, or a squirt of lemon juice if needed. If the curry is too thick, add more liquid; too watery, cook it uncovered for a few extra minutes.
Cover the pot and let the curry sit for 5–10 minutes off the heat. This resting period allows the flavors to deepen and settle—don’t skip it!
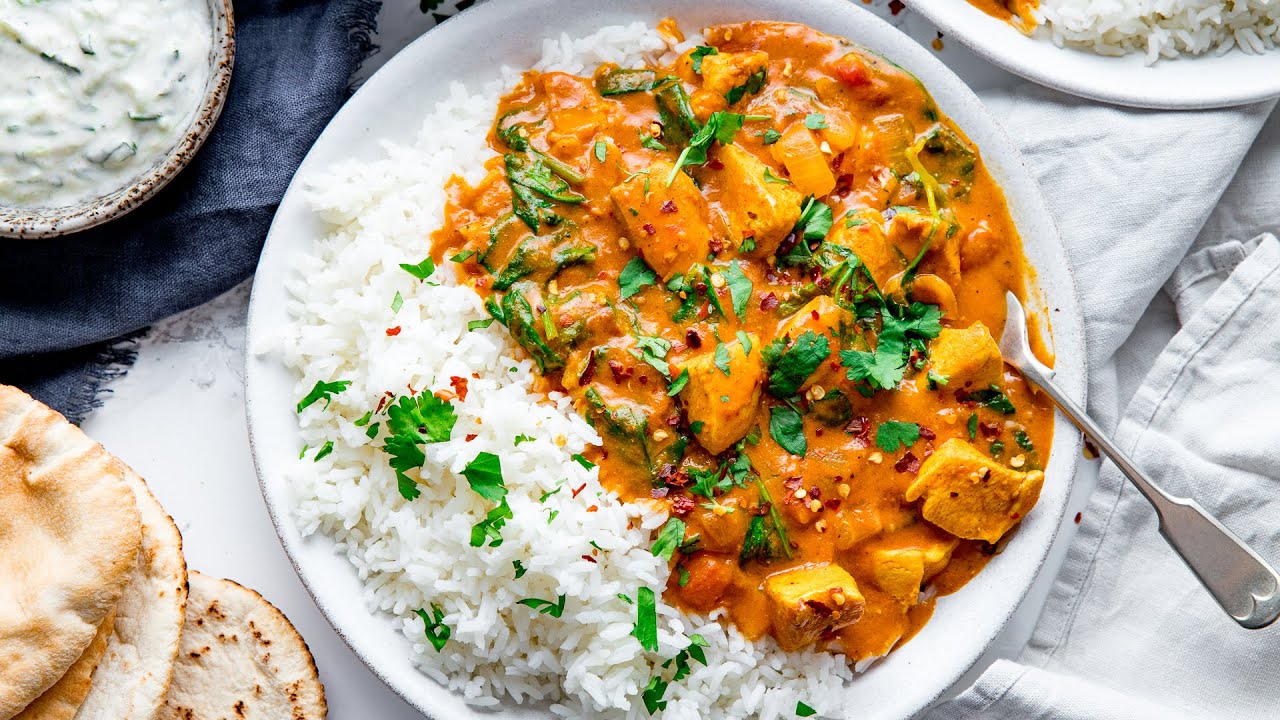
Step 5 – Garnishing and Serving
Presentation matters just as much as flavor. Right before serving, sprinkle fresh coriander leaves over the top. A drizzle of cream or a few fried onions can also make your dish look restaurant-ready.
Serve your curry hot with:
- Steamed Basmati Rice: Perfect for soaking up the gravy.
- Chapati or Naan: Great for scooping and savoring.
- Side of Pickles and Yogurt: Adds a spicy and cooling contrast.
For extra flair, serve in a copper-bottomed kadai or bowl—just like the pros.
Curry always tastes better the next day, so make a double batch if you can. The leftovers will be your new favorite thing.
Tips and Tricks for Perfect Curry Every Time
Mastering the Spice Balance
One of the biggest challenges in Indian cooking is getting the spice balance just right. Too little, and your curry feels bland. Too much, and it can overpower the palate.
Here’s the secret: start small and build up. Add spices in stages rather than all at once. For example, start with a half teaspoon of turmeric or chili powder, then taste and adjust as needed. Keep a small bowl of water nearby to test the gravy’s flavor—dip in a spoon and let it cool before tasting.
Also, remember that not all chili powders are created equal. Kashmiri chili powder, for instance, adds a beautiful red color without too much heat, while Indian red chili powder can be fiery. Use them wisely based on your heat tolerance.
Finally, the salt-sugar-acid triangle is your best friend. If something feels off, try balancing with a dash of lemon juice or a pinch of sugar. These tiny tweaks can bring the entire dish into harmony.
Avoiding Common Mistakes
Even seasoned cooks slip up occasionally. Avoid these rookie mistakes to nail your curry every time:
- Burning the Spices: Never leave spices in hot oil unattended. Once they pop or release aroma, it’s time to move on.
- Overcrowding the Pan: Especially when browning meat or paneer. Cook in batches to keep the texture perfect.
- Under-seasoning: Remember, curry absorbs flavor over time. Taste as you go and season accordingly.
- Adding Dairy at High Heat: Always reduce the heat before adding cream or yogurt to prevent curdling.
- Skipping the Simmer: Let your curry simmer for flavor fusion. Rushing this step can make the dish feel disconnected.
How to Adjust for Dietary Needs
Indian curry is versatile enough to fit almost any diet. Here’s how to tweak it for specific needs:
- Vegetarian/Vegan: Swap meat for tofu, tempeh, or hearty vegetables like potatoes, peas, and cauliflower. Use coconut milk instead of cream.
- Gluten-Free: Most curries are naturally gluten-free. Just double-check your spice blends and sauces for additives.
- Low-Fat: Use less oil and replace cream with low-fat yogurt or skip it altogether for a brothier curry.
- Low-Sodium: Make your own spice blends and limit added salt. Fresh herbs and acid like lemon juice can compensate.
Serving Suggestions and Side Dishes
Best Rice and Bread Pairings
No Indian curry is complete without a solid carb partner. Here are your best options:
- Basmati Rice: Long-grained and aromatic, this is the gold standard for pairing with curry.
- Jeera Rice: Basmati rice sautéed with cumin seeds and a bit of ghee.
- Plain White or Brown Rice: Works in a pinch, though it won’t be as fragrant.
If you’re going the bread route:
- Naan: Soft, chewy, and buttery—a curry’s best friend.
- Chapati (Roti): Whole wheat flatbread, perfect for scooping up thicker curries.
- Paratha: Flaky and rich, often stuffed with potato or paneer.
Rice soaks up the gravy beautifully, while breads let you mop up every last drop. Mix and match depending on your mood!
Side Dishes That Complement Curry
Complete your meal with these easy sides:
- Cucumber Raita: Yogurt mixed with grated cucumber, mint, and a touch of cumin—refreshing and cooling.
- Pickles (Achar): Spicy and tangy, a spoonful of mango or lime pickle adds a bold kick.
- Papadam: Crispy lentil wafers, great for crunch.
- Onion Salad: Sliced onions with lemon juice, salt, and green chilies.
A balanced meal doesn’t mean more cooking—just smart pairing. These sides enhance the curry experience without overshadowing the main dish.
Storing and Reheating Leftovers
Best Practices for Storing Curry
Got leftovers? Lucky you! Indian curry tastes even better the next day. Here’s how to store it properly:
- Cool Completely: Let the curry come to room temperature before storing.
- Use Airtight Containers: Prevents flavors from leaking into your fridge and keeps the curry fresh.
- Label with Date: Most curries last up to 3–4 days in the refrigerator.
For longer storage, freeze individual portions. Use freezer-safe containers or ziplock bags, and press out excess air to prevent freezer burn.
How to Reheat Without Losing Flavor
When it’s time to reheat, do it gently. Use a stovetop for best results:
- Pour the curry into a saucepan.
- Add a splash of water or broth to loosen the consistency.
- Warm over medium heat, stirring occasionally.
Avoid microwaving if possible—it can make the proteins rubbery and unevenly heated. If you must, microwave in short bursts, stirring in between.
FAQs about Indian Curry Recipe
1. Can I make Indian curry without onions and garlic?
Yes! For a no-onion, no-garlic version, use asafoetida (hing), ginger, and tomatoes as your base. Many Indian Jain and sattvic recipes follow this model.
2. What’s the difference between curry powder and garam masala?
Curry powder is a Western invention—a generic spice mix. Garam masala is a traditional Indian blend of whole spices toasted and ground, added at the end for aroma.
3. Why does my curry taste bitter?
Burned spices or garlic can create bitterness. Always sauté spices gently and avoid overheating garlic.
4. Can I use canned tomatoes?
Absolutely. In fact, canned crushed tomatoes often give a richer, more consistent texture. Just adjust salt and sugar accordingly.
5. How can I thicken my curry?
Simmer uncovered to reduce excess liquid. Or add ground cashews, cream, or even mashed potatoes for a thicker texture.
Conclusion
Indian curry isn’t just food—it’s a celebration of culture, tradition, and bold flavors. Whether you’re making it for a weekday dinner or a festive gathering, mastering the art of curry means unlocking a world of culinary creativity. From selecting spices to perfecting the simmer, every step matters. And the best part? It’s incredibly forgiving. Even if you miss a step or overdo a spice, there’s always room to adjust, balance, and turn it into something delicious.
So grab those spices, fire up the stove, and start cooking. You’re just one pot away from a bowl full of happiness.

