Ice Cream Sandwich Recipe: When it comes to desserts that bring back childhood memories, the ice cream sandwich is at the top of the list. There’s something magical about biting into a soft, chewy cookie with creamy, cold ice cream in the middle. It’s the perfect balance of texture and flavor—sweet, smooth, and satisfying.
This guide is not just a simple recipe; it’s your step-by-step roadmap to creating the ultimate homemade ice cream sandwiches. Whether you’re preparing a treat for kids, planning a summer party, or simply craving a nostalgic dessert, this recipe will show you how to make them from scratch with ease.
The best part? You can customize them any way you like. Think chocolate chip cookies filled with mint ice cream, or rich brownies paired with peanut butter ice cream. The possibilities are endless, and the process is much simpler than it might sound. By the end of this article, you’ll not only have a delicious batch of ice cream sandwiches but also the confidence to experiment with flavors and styles.
So, roll up your sleeves, preheat your oven, and get ready to learn the art of making ice cream sandwiches at home—one step at a time.
Why Make Ice Cream Sandwiches at Home?
Sure, you can walk into any grocery store and find pre-packaged ice cream sandwiches, but homemade ones are on a completely different level. First, let’s talk about freshness. Store-bought versions often contain preservatives and stabilizers to extend shelf life. When you make them at home, you’re using fresh, quality ingredients that you control. That means better flavor and a healthier treat overall.
Second, customization is everything. Maybe you love oatmeal cookies instead of chocolate chip. Maybe pistachio ice cream is your favorite, or perhaps you want to try something adventurous like salted caramel or coconut ice cream. With homemade sandwiches, you get to decide the cookie, the ice cream, and even the toppings. You can roll the edges in sprinkles, nuts, or mini chocolate chips to add extra flair.
Another major benefit is portion control. Store-bought sandwiches are usually one-size-fits-all, but at home, you can make mini versions for kids or oversized ones for a special indulgence. Plus, the process itself is fun. Baking cookies, scooping ice cream, and assembling the sandwiches can be a creative activity for families or friends.
Lastly, let’s not forget cost-effectiveness. Buying premium ice cream sandwiches can be expensive, but making them at home is surprisingly budget-friendly. You can prepare a large batch, store them in the freezer, and enjoy them whenever you like. Homemade ice cream sandwiches give you the freedom to enjoy a high-quality dessert without the high price tag.
Ingredients You’ll Need
Before we dive into the step-by-step process, let’s make sure you have everything ready. The ingredients are divided into three categories: cookies, ice cream filling, and optional add-ons.
For the Cookies
The cookie is the foundation of an ice cream sandwich, so it needs to be sturdy enough to hold the filling but soft enough to bite into. Here’s what you’ll need:
- 2 ¼ cups all-purpose flour
- 1 teaspoon baking soda
- ½ teaspoon salt
- 1 cup unsalted butter (softened)
- ¾ cup brown sugar
- ½ cup granulated sugar
- 2 large eggs
- 2 teaspoons vanilla extract
- 2 cups chocolate chips (or chunks, depending on your preference)
This is a classic chocolate chip cookie base, but you can swap in cocoa powder for double chocolate, or add oats for extra chewiness.
For the Ice Cream Filling
You can go with store-bought ice cream or homemade if you’re feeling adventurous. Either way, choose a flavor that complements your cookies. Some popular options include:
- Vanilla ice cream (classic choice)
- Chocolate ice cream
- Strawberry ice cream
- Mint chocolate chip
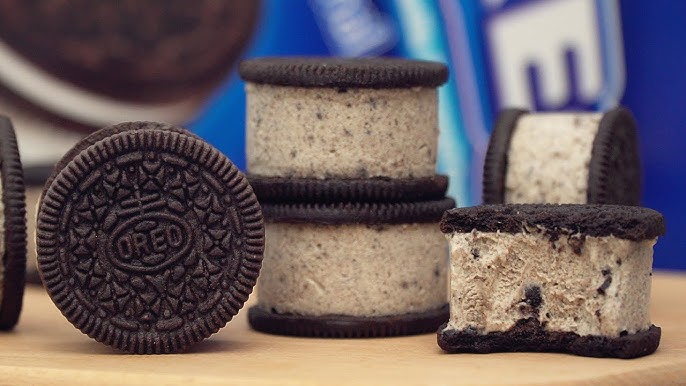
- Cookies and cream
Pro tip: Let the ice cream soften slightly before assembling. This makes it easier to scoop and spread without breaking the cookies.
Optional Add-Ons and Toppings
Want to take your sandwiches to the next level? Try rolling the edges in one of these fun add-ons:
- Mini chocolate chips
- Rainbow sprinkles
- Crushed nuts (almonds, peanuts, or pistachios)
- Shredded coconut
- Crushed candy bars
These extras not only add crunch and flavor but also make your sandwiches look irresistible.
Essential Tools and Equipment
Making ice cream sandwiches doesn’t require fancy kitchen gadgets, but having the right tools can make the process smoother and more enjoyable.
Baking Tools
- Mixing bowls (for wet and dry ingredients)
- Electric mixer or hand whisk
- Measuring cups and spoons
- Baking sheets lined with parchment paper
- Cooling rack
Freezing and Assembling Tools
- Ice cream scoop (for even portions)
- Offset spatula or butter knife (for spreading ice cream)
- Plastic wrap or parchment paper (for wrapping individual sandwiches)
- Airtight container (for storing in the freezer)
Optional but useful: A round cookie cutter. If you want perfectly uniform sandwiches, bake your cookies slightly larger and use a cutter to trim them before assembling. This gives your sandwiches that picture-perfect look.
Having everything organized before you start makes the process feel effortless. Once you’ve gathered your ingredients and tools, you’ll be ready to dive into the fun part—making your ice cream sandwiches.
Step-by-Step Guide to Making Ice Cream Sandwiches
Step 1: Preparing the Cookie Dough
Start by making a batch of cookie dough—classic chocolate chip works best, but you can use sugar cookies, brownies, or even oatmeal cookies. In a bowl, cream together butter and sugar, then mix in eggs and vanilla extract. Add flour, baking soda, and a pinch of salt, stirring until a smooth dough forms. Chill the dough in the fridge for about 30 minutes to keep the cookies from spreading too much when baked.
Step 2: Baking the Cookies
Preheat your oven to 350°F (175°C). Roll the dough into evenly sized balls and place them on a lined baking sheet. Bake for 8–10 minutes, or until the edges are golden but the centers are still slightly soft. Let the cookies cool completely on a wire rack—they need to be firm enough to hold the ice cream.
Step 3: Preparing the Ice Cream
Take your favorite ice cream flavor (vanilla, chocolate, or something fun like mint chip). Let it soften slightly at room temperature so it’s easier to scoop and spread. If you want perfectly shaped sandwiches, spread the softened ice cream into a baking pan lined with parchment paper, freeze it again, and cut it into rounds using a cookie cutter.
Step 4: Assembling the Sandwiches
Place a scoop (or cut-out slice) of ice cream on the flat side of one cookie, then top with another cookie. Gently press together until the ice cream spreads evenly to the edges. For an extra treat, roll the sides of the sandwich in sprinkles, mini chocolate chips, or crushed nuts.
Step 5: Freezing and Serving
Place the assembled sandwiches on a tray lined with parchment paper and freeze for at least 1–2 hours to firm up. Once set, wrap them individually in plastic wrap or parchment paper for easy storage. Serve straight from the freezer on a hot day for the ultimate homemade treat.
Tips for Perfect Ice Cream Sandwiches
Making ice cream sandwiches might sound straightforward, but a few small adjustments can turn good results into truly amazing ones. Here are some tried-and-true tips:
- Don’t skip chilling the dough. This step prevents the cookies from spreading too much and ensures they stay chewy and thick.
- Bake uniform cookies. Use a cookie scoop or weigh the dough balls to make sure they’re the same size. Matching halves make better sandwiches.
- Soften ice cream properly. Too hard, and it’ll crack your cookies. Too soft, and it’ll melt before you can assemble.
- Work in batches. If making many sandwiches, assemble a few at a time and return them to the freezer before moving on.
- Wrap tightly. Air exposure in the freezer causes ice crystals, which ruin texture. Wrapping tightly keeps your sandwiches fresh and smooth.
- Experiment with flavors. Don’t just stick to vanilla—try bold pairings like espresso ice cream with chocolate cookies, or coconut ice cream with oatmeal cookies.
Remember, making perfect ice cream sandwiches is part science and part art. With practice, you’ll find your own rhythm and favorite combinations that make this dessert uniquely yours.
Flavor Variations to Try
The beauty of homemade ice cream sandwiches is that you’re not limited to just one flavor combo. Once you’ve mastered the basics, you can start experimenting with endless pairings. Here are some mouthwatering ideas to get your creativity flowing:
Classic Chocolate Chip & Vanilla
This is the gold standard of ice cream sandwiches. Chewy chocolate chip cookies paired with creamy vanilla ice cream are timeless, simple, and always a hit. The sweet crunch of chocolate in the cookies combined with smooth vanilla is pure nostalgia in every bite. If you want to elevate it, roll the edges in mini chocolate chips or drizzle some melted chocolate over the top.
Brownie & Mint Chocolate Chip
For chocoholics, brownie-based cookies are a dream. They’re fudgy, rich, and hold up beautifully against cold ice cream. Pair them with mint chocolate chip for a refreshing twist. The cool mint balances the richness of the brownie, making every bite indulgent but not overwhelming.
Peanut Butter & Chocolate
Few pairings are as universally loved as peanut butter and chocolate. Use soft peanut butter cookies as the base and fill them with chocolate ice cream. Add a sprinkle of crushed peanuts around the edges for a salty-sweet crunch that takes the sandwich to the next level.
Oatmeal & Strawberry
For something lighter, try oatmeal cookies with strawberry ice cream. The slight chewiness of the oats pairs wonderfully with the fruity sweetness of the ice cream. This version feels a little more wholesome while still being a delicious treat.
Double Chocolate & Salted Caramel
If you’re a fan of rich flavors, go for double chocolate cookies with salted caramel ice cream. The dark cocoa flavor of the cookies brings out the buttery sweetness of caramel, while the touch of salt keeps everything balanced.
Creative Combos to Experiment With
- Coconut macaroons + mango ice cream
- Sugar cookies + lemon ice cream
- Red velvet cookies + cream cheese ice cream
- Snickerdoodles + cinnamon ice cream
Don’t be afraid to mix and match. The best part about homemade ice cream sandwiches is the freedom to invent your own signature creation.
Healthy and Dietary Alternatives
Not everyone can enjoy traditional ice cream sandwiches, but the good news is that there are plenty of alternatives for different dietary needs.
Vegan Options
Swap out dairy ice cream for coconut milk, almond milk, or oat milk–based versions. These vegan ice creams are just as creamy and come in tons of flavors. For cookies, use plant-based butter or coconut oil, and replace eggs with flaxseed or chia seed “eggs” (1 tablespoon ground seeds + 3 tablespoons water = 1 egg).
Dairy-Free Choices
Lactose-intolerant? No problem. Many supermarkets carry lactose-free ice cream, or you can make your own with coconut cream. Pair with dairy-free cookies (use margarine or plant-based butter instead of regular butter).
Gluten-Free Sandwiches
For those avoiding gluten, simply use a gluten-free flour blend in your cookie recipe. Almond flour or oat flour can also work for a different flavor profile. Combine with your favorite gluten-free ice cream for a treat that everyone can enjoy.
Low-Sugar or Keto Versions
If you’re watching sugar, you can opt for low-sugar or keto-friendly ice cream made with sweeteners like stevia or monk fruit. Bake cookies with almond flour, coconut flour, and sugar substitutes to keep carbs low but flavor high.
With a little creativity, you can make ice cream sandwiches that cater to almost any diet without sacrificing taste. In fact, many people find that these alternatives taste just as good—or even better—than the traditional versions.
Storing and Serving Ideas
Once you’ve gone through all the effort of making your ice cream sandwiches, you’ll want to store them properly so they stay fresh and delicious.
Storing in the Freezer
Always wrap each sandwich tightly in parchment paper or plastic wrap to prevent freezer burn. Then, place the wrapped sandwiches in an airtight container or a freezer bag. They’ll stay good for up to 2 weeks, though they rarely last that long once people know they’re in the freezer.
Serving Presentation
Ice cream sandwiches aren’t just tasty—they can also look impressive when served right. For parties, stack them on a decorative platter or tiered stand for a show-stopping dessert centerpiece. You can also individually wrap them in colorful paper or wax bags for a nostalgic ice cream truck vibe.
Portable Treats
Want to bring them to a picnic or BBQ? Wrap sandwiches individually, then pack them in a cooler with ice packs. This keeps them firm until it’s time to eat.
Fun Serving Ideas
- Cut sandwiches into halves or quarters for mini bite-sized versions.
- Serve with a drizzle of chocolate or caramel sauce.
- Create an “ice cream sandwich bar” where guests can choose their cookies, ice cream, and toppings.
By storing and serving them with care, your homemade ice cream sandwiches will taste just as fresh and delightful as the moment you made them.
Common Mistakes to Avoid
Even simple recipes come with a few pitfalls. Here’s what to watch out for when making your ice cream sandwiches:
- Cookies that are too hard – If your cookies turn out crunchy, they’ll crack when you bite into them. Always bake until just golden on the edges and soft in the center.
- Melting ice cream – Don’t try to assemble with fully softened ice cream. Slightly soft is perfect, but too soft will melt everywhere before you can finish.
- Uneven cookie sizes – If your cookies aren’t the same size, your sandwiches won’t line up properly. Use a scoop for consistency.
- Skipping the wrap – Leaving sandwiches unwrapped in the freezer causes ice crystals to form. Always wrap tightly for the best texture.
- Not chilling the dough – Warm dough spreads too much in the oven, leading to thin cookies that don’t hold ice cream well. A short chill makes all the difference.
Avoiding these mistakes ensures your ice cream sandwiches come out bakery-level delicious every single time.
Pairing Ice Cream Sandwiches with Drinks
An ice cream sandwich on its own is a treat, but pairing it with the right drink takes the experience to the next level.
- Milk: The classic combo. A cold glass of milk balances the sweetness and makes the dessert feel nostalgic.
- Coffee: Rich espresso or iced coffee pairs beautifully with chocolate-based cookies and ice cream.
- Milkshakes: Yes, you can go all-in with a milkshake on the side. It’s indulgent, but oh-so-satisfying.
- Iced Tea or Lemonade: Lighter drinks like these pair well with fruity cookie and ice cream combinations, like oatmeal + strawberry.
- Hot Chocolate: In colder months, hot chocolate with a peppermint ice cream sandwich is a cozy, comforting treat.
Pairing your sandwiches with the right drink not only enhances the flavor but also makes the dessert feel more complete.
Fun Ideas for Kids and Parties
Homemade ice cream sandwiches aren’t just desserts—they’re experiences, especially for kids and at gatherings. Here are some fun ways to turn them into the star of any party.
Mini Ice Cream Sandwiches
Kids often struggle to finish a full-sized ice cream sandwich, so why not make bite-sized versions? Use a smaller cookie scoop for the dough, bake mini cookies, and then pair them with tiny scoops of ice cream. These are easier for little hands to hold and make portion control a breeze. Plus, they look adorable on a party platter.
DIY Ice Cream Sandwich Bar
Set up a station where guests can build their own sandwiches. Provide a variety of cookies (chocolate chip, sugar, brownie), ice creams (vanilla, chocolate, strawberry, cookies and cream), and toppings (sprinkles, nuts, chocolate chips, crushed candy bars). Guests will love customizing their own creations, and it doubles as an interactive activity.
Themed Sandwiches
For holidays and celebrations, decorate sandwiches to match the theme:
- Roll edges in red, white, and blue sprinkles for Independence Day.
- Use orange and black toppings for Halloween.
- Try heart-shaped cookies for Valentine’s Day.
Party Favor Wraps
Individually wrap ice cream sandwiches in colorful wax paper or custom-printed wrappers. Add a ribbon or sticker to match the event. Guests can take them home as a sweet party favor (if they can resist eating them first).
Fun Shapes for Kids
If you want to go beyond circles, use cookie cutters to shape your cookies. Stars, hearts, and animal shapes are especially fun for kids’ birthdays. Just make sure the cookies aren’t too thin so they don’t break when filled.
Ice cream sandwiches bring out the child in everyone, so these fun ideas ensure they’re remembered as the highlight of any party.
FAQs about Ice Cream Sandwich Recipe
1. Can I use store-bought cookies for ice cream sandwiches?
Yes! If you’re short on time, you can absolutely use store-bought cookies. Just make sure they’re soft and chewy rather than hard or crumbly, as softer cookies make better sandwiches.
2. How do I keep the ice cream from melting too quickly while assembling?
Work quickly and in small batches. Keep most of your cookies and ice cream in the fridge or freezer until you’re ready to use them. Wrapping each sandwich immediately after assembly also helps prevent melting.
3. Can I make ice cream sandwiches in advance?
Definitely. Ice cream sandwiches store well in the freezer for up to 2 weeks if wrapped tightly. In fact, making them ahead allows the flavors to meld together beautifully.
4. What’s the best type of cookie for ice cream sandwiches?
Soft and chewy cookies are ideal because they stay tender when frozen. Chocolate chip, oatmeal, peanut butter, and brownie cookies are all great options. Avoid crispy cookies since they tend to break when bitten.
5. Can I make ice cream sandwiches without an oven?
Yes! If you don’t want to bake, you can use no-bake cookies or even brownies made in a microwave. Another option is to use graham crackers, wafers, or store-bought soft cookies as your sandwich base.
Conclusion
Not only do they taste better than store-bought versions, but making them is also a fun activity for families, kids, and parties. Plus, when you wrap and store them properly, you’ll always have a sweet treat ready in the freezer for hot days or late-night cravings.
So next time you’re in the mood for something indulgent yet homemade, skip the ice cream truck and whip up your own batch. With this step-by-step guide, you’ve got everything you need to master the art of the ice cream sandwich.