How to Cook Bacon in the Oven Recipe: Oven-cooked bacon is a revelation. If you’ve only been pan-frying your bacon, you’re missing out on a simpler, cleaner, and more foolproof way to get those perfect crispy strips. Imagine starting your morning without grease splatters, hot oil burns, or the stress of flipping each strip one by one. Oven bacon transforms the whole experience into a hands-off, blissfully easy task.
Cooking bacon in the oven isn’t just about convenience—it’s a game-changer in terms of texture and flavor. When you lay out those strips on a baking sheet, they cook evenly and crisp up beautifully. Plus, you can make big batches, which is a lifesaver when you’re feeding a crowd or meal prepping for the week.
But here’s the real kicker—it’s healthier. Oven cooking allows much of the fat to drip off the bacon instead of pooling around it, resulting in slightly leaner strips. You can even elevate the bacon on a rack to let the fat drip off completely, giving you that restaurant-quality crunch every single time. It’s all upside—less mess, less hassle, and bacon that tastes like it came out of a professional kitchen.
What You Need to Get Started
Before diving into the oven, let’s make sure you have everything on hand. This method is delightfully simple, but having the right tools will make your life even easier.
Ingredients List:
- 1 package of bacon (standard or thick cut)
- Optional: black pepper, brown sugar, maple syrup, chili flakes for flavor
Recommended Tools and Equipment:
- A large rimmed baking sheet (to catch grease)
- Aluminum foil or parchment paper (for easy cleanup)
- Optional: a wire rack (for extra crispy bacon)
- Tongs (for easy removal)
- Paper towels (for draining)
Each tool serves a purpose. The foil or parchment paper ensures that cleanup is a breeze—you can just toss the mess instead of scrubbing stuck-on grease. A rimmed baking sheet keeps any rendered fat contained (no fiery accidents in your oven). And a wire rack? That’s your ticket to ultra-crispy, evenly cooked bacon strips that aren’t swimming in their own fat.
Having these basics ready ensures the process goes smoothly from start to finish. And believe me, once you’ve cooked bacon this way, you won’t want to go back to the frying pan again.
Preparing Your Oven and Bacon
This step might seem simple, but it sets the stage for bacon perfection.
Preheat and Line the Baking Sheet
Start by preheating your oven to 400°F (204°C). This is the sweet spot where bacon crisps up nicely without burning too quickly. While the oven is preheating, line your baking sheet with aluminum foil or parchment paper. If you want easy cleanup, foil is your best friend—it holds up well to high heat and can be crumpled up and tossed when you’re done.
If you’re going the extra mile, place a wire rack on top of the foil-lined sheet. This allows air to circulate around each strip, cooking it evenly on all sides. It also helps the fat to drip away from the bacon, giving you that super crispy texture.
Choosing the Right Bacon Cut
The type of bacon you use can make a difference. Standard-cut bacon cooks quicker and will be done in around 15-20 minutes. Thick-cut bacon takes a bit longer—about 20-25 minutes—but gives you a meatier, more satisfying bite.
Want to try something different? Go for peppered bacon, applewood smoked, or hickory smoked varieties. Each brings its own flavor profile to the party. Just be sure to arrange the slices in a single layer so they don’t overlap—this helps them cook evenly and get nice and crispy.
Step-by-Step Instructions for Perfect Oven Bacon
This is where the magic happens. Follow these simple steps and you’ll have golden, crispy bacon every time.
Step 1: Arrange Bacon on Baking Sheet
Lay your bacon strips in a single layer on the lined baking sheet or on the rack if you’re using one. Don’t stack or overlap them, as that leads to uneven cooking. If you need to cook a large batch, use two trays or cook in batches.
Step 2: Baking Time and Temperature
Place the tray on the middle rack of the preheated oven. Bake for 15-20 minutes if you’re using regular-cut bacon and 20-25 minutes for thick-cut. Ovens can vary, so start checking around the 12-minute mark if it’s your first time.
Step 3: Monitoring for Crispiness
Keep a close eye during the last few minutes. Bacon can go from perfect to burnt in under a minute. You’re looking for a deep golden brown color and edges that start to curl slightly.
Step 4: Draining and Serving
Once your bacon is done, use tongs to transfer it to a plate lined with paper towels. This absorbs any remaining grease and helps maintain crispiness. Let it sit for a minute or two before serving—it continues to crisp up as it cools slightly.
Whether you’re adding it to a sandwich, crumbling it on a salad, or just eating it straight (we’ve all done it), this oven-baked method delivers every single time.
Tips for the Best Oven-Baked Bacon
If you want your oven bacon to rival restaurant-quality strips, here are some pro tips to keep in your back pocket. These little tricks can make a huge difference in texture, taste, and cleanup.
Preventing Grease Splatter
Worried about grease splashing all over the oven? One simple fix is to use a baking sheet with higher edges and line it thoroughly with foil. You can also loosely cover the bacon with another sheet of foil—just don’t wrap it tightly. This acts like a mini splatter guard and still allows the bacon to crisp up nicely. Another option is to use a roasting pan with a rack—this lifts the bacon away from the grease and helps control mess.
Getting Even Cooking Every Time
Even cooking starts with how you lay the bacon. Ensure each strip lies flat and has a bit of space around it. Don’t let them overlap. For better consistency, rotate the pan halfway through the cooking time, especially if your oven has hot spots. If you’re using two pans, swap their positions halfway through.
Using a rack is the ultimate hack for even cooking. It allows heat to circulate around each strip and helps you achieve that golden crisp on all sides. If you don’t have a rack, flipping the bacon once halfway through the cooking process can help even things out.
Cleaning Up After Cooking
This might be one of the biggest perks of oven-baked bacon—easy cleanup. No more scrubbing greasy pans or dealing with stovetop splatter.
Handling Grease Safely
Once the bacon is out, let the grease in the pan cool down before attempting to clean it. Never pour hot grease down the sink—it can clog your pipes and cause serious plumbing issues. Instead, wait for it to solidify and scrape it into a disposable container, or pour it into a jar if you plan to reuse it (hello, bacon-flavored everything!).
Cleaning Your Sheet Pan Easily
If you lined your pan well, cleanup should be a breeze. Simply fold up the foil or parchment paper and toss it. If you didn’t use a liner, soak the pan in hot soapy water to loosen any baked-on grease. A baking soda and vinegar mixture can help cut through the grime if it’s particularly stubborn.
Cleaning your wire rack is a bit trickier. Let it soak in hot water and dish soap for 10-15 minutes, then scrub with a brush to remove the grease. A little extra effort, but totally worth it for that crisp perfection.
Variations and Flavor Ideas
Want to take your bacon to the next level? Once you’ve mastered the basics, it’s time to experiment with flavor.
Sweet and Spicy Bacon
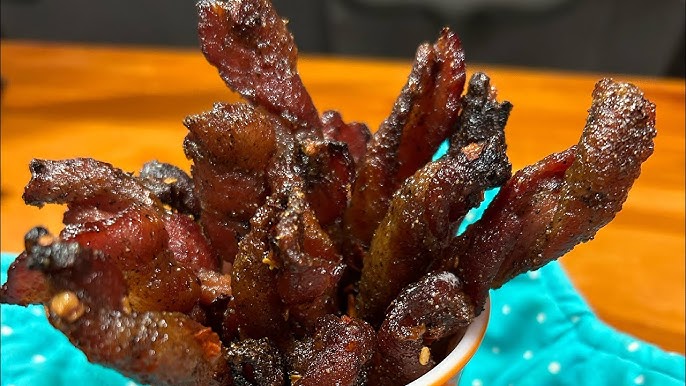
Try brushing your bacon strips with a mixture of brown sugar and cayenne pepper before baking. This creates a beautiful caramelized crust with a hint of heat. Maple syrup is another great option for sweetness. Drizzle it on halfway through the bake for sticky-sweet perfection.
Herb-Infused Bacon
Sprinkle chopped rosemary, thyme, or cracked black pepper over the bacon before it goes into the oven. These herbs add a gourmet touch and infuse the bacon with amazing aroma and flavor. For garlic lovers, a light dusting of garlic powder can give your strips a savory kick.
You can also try experimenting with marinades or even a light brushing of barbecue sauce for a smoky, tangy treat. Just remember, when adding sugary glazes, watch closely toward the end—sugar burns fast.
Storing and Reheating Leftover Bacon
It’s rare to have leftover bacon, but if you do, here’s how to keep it just as delicious the next day.
Best Storage Practices
Let the bacon cool completely before storing. Place it in an airtight container with a sheet of paper towel between layers to absorb any residual grease. Store in the refrigerator for up to 4-5 days. For longer storage, bacon freezes beautifully—wrap individual strips in wax paper and store in a freezer-safe bag for up to a month.
How to Reheat Without Losing Crisp
To bring leftover bacon back to life, avoid the microwave—it can make it chewy. Instead, place the strips on a baking sheet and reheat in a 350°F oven for 5-7 minutes. You can also toss them in a skillet over medium heat for a couple of minutes per side. This keeps the texture intact and even enhances the flavor a bit more.
Whether you’re using leftovers for a sandwich, salad, or breakfast wrap, knowing how to store and reheat correctly ensures every strip is just as satisfying as the first.
Oven vs Skillet: Which is Better?
This age-old debate has a clear winner for most bacon lovers. Let’s break it down.
Pros and Cons of Each Method
Oven Method:
- Pros: Less mess, more consistent cooking, can cook large batches
- Cons: Takes up oven space, slightly longer cook time
Skillet Method:
- Pros: Quick cooking, easy to adjust heat
- Cons: Messy, requires flipping, grease splatter everywhere
When it comes to convenience and cleanup, the oven wins hands down. It’s perfect for lazy mornings or when you need to multitask. Skillet cooking might be better if you’re only doing a strip or two and want to keep it fast.
Flavor and Texture Differences
Oven bacon tends to be more evenly cooked and crisped. Pan-fried bacon can have hot spots and inconsistent doneness unless you’re constantly monitoring and flipping. If you like your bacon flat and crispy without the fuss, the oven method is your best friend.
FAQs About How to Cook Bacon in the Oven Recipe
1. How long does it take to cook bacon in the oven?
Typically, bacon takes about 15 to 20 minutes to cook in the oven at 400°F (200°C). The exact time depends on the thickness of the bacon and your preferred level of crispiness.
2. What’s the best temperature to bake bacon in the oven?
400°F (200°C) is ideal for crispy, evenly cooked bacon. Lower temperatures can work too, but they’ll take longer and may result in chewier strips.
3. Should I use parchment paper or foil when baking bacon?
Both parchment paper and foil work well. Parchment makes cleanup easier and helps prevent sticking, while foil is great for catching grease and supporting crispiness.
4. Can I cook bacon in the oven without a rack?
Yes, you can cook it directly on a lined baking sheet. However, using a rack allows the fat to drip away and results in a crispier texture.
5. How do I prevent bacon from curling in the oven?
Laying the strips flat and spaced apart helps. If needed, place another baking sheet on top for the first 5 minutes to keep them flat.
6. How do I store leftover oven-baked bacon?
Let it cool completely, then store in an airtight container in the fridge for up to 5 days. You can reheat it in the microwave or oven.
7. Can I freeze cooked bacon?
Absolutely! Wrap slices in parchment and store in a freezer bag. They’ll last up to 2 months and can be reheated straight from frozen.
8. Does oven-baked bacon splatter like pan-fried bacon?
Not at all. Baking bacon in the oven reduces grease splatter, making it a cleaner and safer method, especially for larger batches.
9. Is oven-cooked bacon healthier?
It can be slightly healthier because the fat drips away from the bacon as it cooks, especially if you use a rack.
10. Can I cook turkey bacon in the oven the same way?
Yes, but turkey bacon cooks faster. Bake it at 400°F for 10–12 minutes, keeping a close eye to avoid overcooking.
Final Thoughts
Let’s face it—cooking bacon in the oven isn’t just a kitchen hack, it’s a total lifestyle upgrade. Once you’ve tried it, you’ll never look back. This method takes the chaos out of breakfast and transforms bacon-making into a no-fuss, easy, and delicious experience. It frees up your hands and stove, keeps your kitchen clean, and ensures that every single strip comes out perfectly crisp.
Think about it: no more standing over a hot skillet, no oil burns, and no unevenly cooked pieces. Whether you’re prepping for a Sunday brunch, making bacon for a BLT, or meal prepping protein for the week, oven bacon is the way to go. Plus, it’s incredibly easy to scale up if you’re feeding a crowd.
And remember, this method is highly customizable. You can spice it up, sweeten it, or keep it classic. You can make it ahead, store it, and reheat it without losing any flavor or crunch. Oven-baked bacon fits into every lifestyle—whether you’re a busy parent, a brunch enthusiast, or just a bacon lover who wants things done right.
So next time you’re craving those crispy, savory strips, ditch the skillet and fire up the oven. Your future self (and your clean stovetop) will thank you.