Hot Pepper Jelly Recipe: Hot pepper jelly is a delightful combination of sweet and spicy, delivering a burst of flavor that works as both a condiment and a standalone treat. It’s typically made from a blend of hot peppers (like jalapeños or habaneros), vinegar, sugar, and pectin to create that perfect jelly texture. This zingy spread is most often served over cream cheese with crackers, but its versatility makes it a must-have in any kitchen.
You might think of jelly as something strictly for toast, but hot pepper jelly rewrites the rules. It’s more than just a jar of spread—it’s an adventure in a jar. With its vibrant red or green hue and a punchy flavor that balances sweetness with heat, it adds character to charcuterie boards, glazes for meats, and even gourmet sandwiches.
What makes this jelly so intriguing is the play between its innocent, fruity jelly appearance and the surprising heat that sneaks in with each bite. For anyone who enjoys a little spice in their life, this jelly is like the life of the party—charming, memorable, and just the right amount of wild.
Why You’ll Love This Recipe
There are dozens of reasons to fall in love with this hot pepper jelly recipe, but let’s start with the basics: it’s incredibly simple to make, uses minimal ingredients, and is practically foolproof when you follow the steps.
You don’t need to be a canning expert or have a professional kitchen setup to pull this off. Even a beginner can create jars of this spicy-sweet wonder in under an hour. And once you taste it? You’ll be hooked. The heat is adjustable based on the type and quantity of peppers, so you’re in full control of how fiery or mellow you want it.
It’s also an ideal make-ahead gift for holidays, parties, or any occasion where a little homemade touch adds value. Fancy store-bought pepper jellies can be pricey—but now you can make your own gourmet-quality version at a fraction of the cost.
Ingredients You’ll Need
Essential Ingredients for Hot Pepper Jelly
Making hot pepper jelly doesn’t require a mile-long grocery list. In fact, here’s what you’ll need:
- Hot Peppers (1 cup finely chopped): Jalapeños are a popular go-to, but you can mix in habaneros or red chili peppers for more heat.
- Bell Peppers (1 cup finely chopped): These balance the heat with a touch of sweetness and add beautiful color.
- Apple Cider Vinegar (1 cup): It helps preserve the jelly and gives it that tangy backbone.
- Granulated Sugar (5 cups): Essential for the sweet component and to help set the jelly.
- Liquid Pectin (1 packet or about 3 oz): The magic that helps the jelly gel properly.
That’s it! These five ingredients create a powerful, flavorful punch that you can’t resist.
Optional Add-ins for Flavor Variations
Want to get creative? Here are some additions and tweaks you can make to personalize your jelly:
- Fruit – Add crushed pineapple or mango for a tropical twist.
- Garlic – A clove or two of minced garlic can give it an umami boost.
- Lemon or Lime Juice – Adds extra brightness and balances the sugar.
- Spices – A pinch of ground cumin or chili powder can layer in more complexity.
- Herbs – Fresh thyme or cilantro works well with the pepper’s heat.
Experimenting is part of the fun, and once you get the base recipe down, you’ll feel more comfortable adding your own flair.
Tools and Equipment
Must-Have Kitchen Tools
Before you dive into making your jelly, gather the right tools to make the process smooth and safe:
- Large Saucepan or Dutch Oven: You need a big enough pot to handle the bubbling jelly without spilling.
- Blender or Food Processor: For finely chopping the peppers quickly and evenly.
- Measuring Cups and Spoons: Precision matters with this kind of recipe.
- Fine Mesh Strainer (optional): If you want a clearer jelly without chunks.
- Wooden Spoon or Heatproof Spatula: For stirring while cooking.
Having these tools ready will make your cooking session stress-free and enjoyable.
Helpful Prep and Storage Tools
Once your jelly is cooked, it’s time to store it. Here’s what you’ll need:
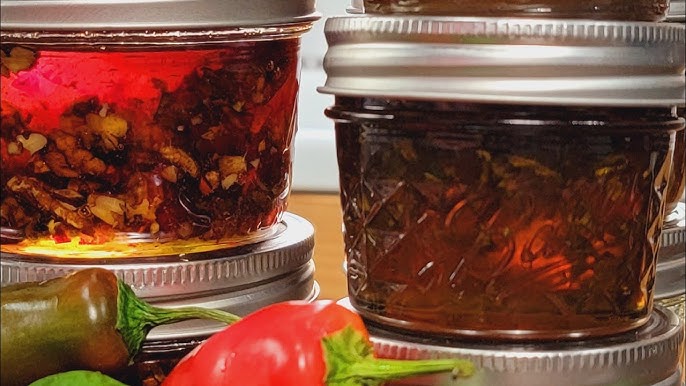
- Sterilized Canning Jars (Half-Pint or Pint): These preserve your jelly safely and attractively.
- Canning Funnel: Helps you pour jelly into jars without making a mess.
- Jar Lifter: Essential for handling hot jars safely.
- Lids and Rings: To seal your jars tightly and safely.
Pro Tip: Make sure to sterilize your jars before you begin to prevent contamination. You can do this by boiling them for 10 minutes or running them through a hot dishwasher cycle.
Step-by-Step Guide to Making Hot Pepper Jelly
Step 1: Prepare the Peppers
First things first—prep those peppers. Wash them thoroughly and remove the stems. If you’re sensitive to spice, consider wearing gloves while handling hot peppers to avoid skin irritation or accidentally rubbing your eyes.
Chop the peppers into chunks and toss them into a blender or food processor. Pulse until they’re finely chopped but not pureed into a paste. You want small bits that will float nicely in your jelly.
Once chopped, measure your peppers carefully. The right balance of hot to sweet is crucial for both taste and safety in preserving. Typically, you’ll want about one cup of hot peppers and one cup of bell peppers. Adjust according to your heat tolerance.
Step 2: Cook the Jelly Base
Now it’s time to build flavor. In a large saucepan, combine your chopped peppers, vinegar, and sugar. Stir well and bring the mixture to a rolling boil over medium-high heat. Stir constantly to prevent scorching.
Let it boil for about 5-6 minutes, allowing the sugar to fully dissolve and the mixture to thicken slightly. This step helps the flavors marry and intensifies the peppery aroma.
During this stage, your kitchen is going to smell amazing—but slightly intense. Be sure your space is well-ventilated. The combination of vinegar and peppers can be eye-watering!
Step 3: Add the Pectin and Boil
Once your pepper-vinegar-sugar mixture is boiling nicely, it’s time to add the pectin. Pectin is the key ingredient that transforms the liquid into jelly. If you’re using liquid pectin, pour in one packet (usually about 3 ounces), and stir it in quickly.
Return the mixture to a full rolling boil—this is when it keeps boiling even while you stir. Let it boil hard for exactly 1 minute. Set a timer because this step is critical. Overcooking can break down the pectin and prevent the jelly from setting properly.
You might notice some foam forming on the surface—that’s normal. Skim it off using a spoon if you want a clearer jelly. Some people also add half a teaspoon of butter to reduce foam.
Once the minute is up, remove the pot from heat. You’ll see the texture change slightly—it’ll still be liquidy but thicker than before. That’s exactly what you want. It will continue to set as it cools.
Step 4: Fill and Seal the Jars
With your jelly still hot, quickly ladle it into your sterilized jars using a funnel for precision. Leave about ¼ inch of headspace at the top to allow for expansion during processing. Wipe the rims clean with a damp paper towel to ensure a tight seal.
Place the lids on and screw on the rings just until finger-tight—not too loose, not too tight. Now, it’s time to process the jars to make them shelf-stable.
Place the filled jars into a boiling water bath (a large stockpot with a canning rack at the bottom). Make sure the jars are fully submerged in water. Boil for 10 minutes. This step ensures the jars are properly sealed and safe to store at room temperature.
Carefully remove the jars with a jar lifter and set them on a towel to cool. You’ll hear satisfying little “pops” as the jars seal themselves. Let them cool completely—don’t tighten the lids or mess with them during this time.
Step 5: Let It Set and Cool
Patience is key in this step. Your jelly will be quite runny right after processing, and that’s totally normal. As it cools, the pectin activates and starts to thicken the mixture into a proper jelly.
Let the jars sit undisturbed for at least 12–24 hours at room temperature. Resist the urge to tilt or shake them—it can interfere with the setting process. After 24 hours, check the seals by pressing the center of each lid. If it doesn’t move, it’s sealed. If it pops up and down, refrigerate and use that jar first.
If your jelly hasn’t fully set by the next day, don’t panic. Sometimes it can take a few days for jelly to reach its final texture, especially if humidity is high or measurements were slightly off. Even slightly runny jelly still tastes amazing!
Serving Suggestions
Delicious Ways to Enjoy Hot Pepper Jelly
Now comes the fun part—how to eat this delicious stuff! Hot pepper jelly isn’t just a novelty condiment; it’s a game-changer in the kitchen. Here are some mouth-watering ways to use it:
- Over Cream Cheese: This is a classic and a favorite at parties. Just pour it over a block of cream cheese and serve with crackers. Simple, fancy, and always a hit.
- On Sandwiches: Spread it on turkey or ham sandwiches for a sweet-spicy kick.
- With Cheese Boards: Add a dollop to your charcuterie boards. It pairs beautifully with brie, goat cheese, or sharp cheddar.
- Glaze for Meats: Brush it over chicken wings, pork chops, or grilled shrimp during the last few minutes of cooking.
- With Breakfast: A spoonful on a biscuit or English muffin adds flair to your morning routine.
The sweet heat makes it incredibly versatile, and once you start incorporating it into your meals, you’ll find yourself reaching for it again and again.
Pairings and Appetizer Ideas
Need some appetizer inspiration? Here are a few ways to serve hot pepper jelly that will impress your guests:
- Mini Pepper Jelly Tartlets: Fill mini tart shells with goat cheese and a spoonful of jelly for an elegant bite-sized snack.
- Pepper Jelly Meatballs: Add it to your slow cooker with frozen meatballs and barbecue sauce for a spicy-sweet crowd-pleaser.
- Baked Brie with Pepper Jelly: Top a wheel of brie with jelly and bake it until melty—serve with crostini or apple slices.
- Deviled Eggs Upgrade: Mix a tiny bit of jelly into the yolk filling for a unique twist on a classic.
Hot pepper jelly can be as fancy or as casual as you want. Whether it’s a gourmet dinner party or a backyard BBQ, it always adds a delicious, unexpected element.
Storage and Shelf Life
How to Store Homemade Hot Pepper Jelly
Storing your homemade hot pepper jelly correctly is essential for maintaining its flavor, texture, and safety. If you’ve processed your jars using the water bath canning method, they’re good to store in a cool, dark place like a pantry or cabinet. Always make sure your jars have sealed properly—look for the vacuum seal by pressing the center of the lid. It should not pop up or move.
When stored properly, hot pepper jelly can last up to 12 months on the shelf. That’s a whole year of sweet, spicy goodness ready to use at your fingertips! Always label your jars with the date so you can keep track of their age. Over time, the jelly might darken a bit, but this is normal and doesn’t affect the flavor significantly.
Once opened, a jar should be refrigerated and used within 3–4 weeks. Use a clean spoon every time you dip in to avoid contamination. Avoid storing opened jars at room temperature, even if it’s just for a short time—bacteria love sugar, and your jelly deserves better.
Tips for Long-Term Preservation
Want to go the extra mile with food safety and flavor preservation? Follow these tips:
- Sterilize Everything: Not just the jars, but the lids, rings, funnels, and ladles too.
- Keep It Airtight: After sealing, never reopen a jar unless you’re ready to use it.
- Avoid Moisture and Sunlight: Store in a dry place away from direct heat to prevent spoilage.
- Test the Seal Before Use: If a lid comes off easily or pops when pressed, toss it—better safe than sorry.
- Don’t Double Dip: If you’re serving straight from the jar, avoid dipping food directly to prevent introducing bacteria.
Home canning is safe and rewarding if done properly. Just follow the best practices, and your jelly will stay fresh and safe for months.
Troubleshooting Common Issues
Why Your Jelly Didn’t Set
So your jelly didn’t turn out quite as firm as you hoped? Don’t worry—it happens to the best of us, and it’s usually fixable.
Here are the most common reasons:
- Underboiling After Adding Pectin: That one minute of a hard boil is crucial. Skipping it or cutting it short affects the set.
- Incorrect Sugar Ratio: Sugar isn’t just for sweetness—it helps the jelly set. Reducing sugar too much can lead to runny jelly.
- Pectin Type or Age: Make sure you’re using fresh liquid pectin. Old or expired pectin may lose its gelling power.
- Humidity or Altitude: Weather and altitude can affect the boiling point and setting process. You may need to adjust cooking times slightly.
If your jelly is still liquid after a few days, you can remake it by reheating with more pectin or turning it into a glaze or sauce—it’s still delicious and salvageable!
Fixing Texture or Taste Problems
Too firm? Too runny? Tastes weird? Here’s what you can do:
- Too Firm: You may have overcooked it or added too much pectin. Use it as a glaze for roasted meats or thin it with a little warm water.
- Too Soft: Reboil the jelly with additional pectin or use it as a sauce for chicken or shrimp—it’s still flavorful!
- Too Sweet or Not Spicy Enough: Increase the hot pepper-to-sweet pepper ratio next time. Or mix with hot sauce to bump up the heat.
- Too Spicy: Mix with more fruit jelly or cream cheese to mellow the heat.
Cooking is all about learning and tweaking. Your next batch will be even better.
Nutritional Information
Calories and Health Considerations
Hot pepper jelly isn’t exactly a low-calorie food, but it’s not meant to be eaten by the spoonful either. Here’s a basic nutritional breakdown per tablespoon (approximate values):
| Nutrient | Amount |
|---|---|
| Calories | 50–60 kcal |
| Sugar | 12–14g |
| Carbohydrates | 13–15g |
| Fat | 0g |
| Protein | 0g |
| Fiber | <1g |
| Sodium | 0–10mg |
It’s primarily sugar, so enjoy in moderation. That said, the peppers do bring some vitamin C and metabolism-boosting capsaicin to the party. If you want a healthier version, experiment with low-sugar recipes and use low-sugar pectin.
FAQs about Hot Pepper Jelly Recipe
1. Can I freeze hot pepper jelly instead of canning it?
Yes! You can pour the jelly into freezer-safe containers instead of canning jars and freeze it for up to 6 months. Just thaw in the fridge before using.
2. What’s the best type of pepper to use?
Jalapeños are popular for moderate heat, but you can mix in habaneros for serious spice or use bell peppers for a milder flavor.
3. Can I use powdered pectin instead of liquid pectin?
Yes, but you’ll need to adjust the cooking method and timing. Always follow the pectin package directions closely.
4. Why does my jelly have bubbles?
Bubbles can form during the cooking or pouring process. Skimming the foam off the top before filling jars can help reduce this.
5. How do I know if a jar hasn’t sealed properly?
Press the center of the lid. If it pops up and down, it hasn’t sealed and should be refrigerated and consumed within a few weeks.
Conclusion
Hot pepper jelly is one of those magical recipes that’s as versatile as it is flavorful. With just a handful of ingredients and a little time, you can whip up a batch of homemade jelly that’s bursting with character and perfect for any occasion.
Whether you’re serving it at a party, gifting it to friends, or enjoying it in your kitchen, this spicy-sweet jelly adds a gourmet flair to even the simplest dishes. The steps are straightforward, the customization options are endless, and the results are always impressive.
So roll up your sleeves, grab those peppers, and get jamming—you’re about to turn up the heat in the best way possible!