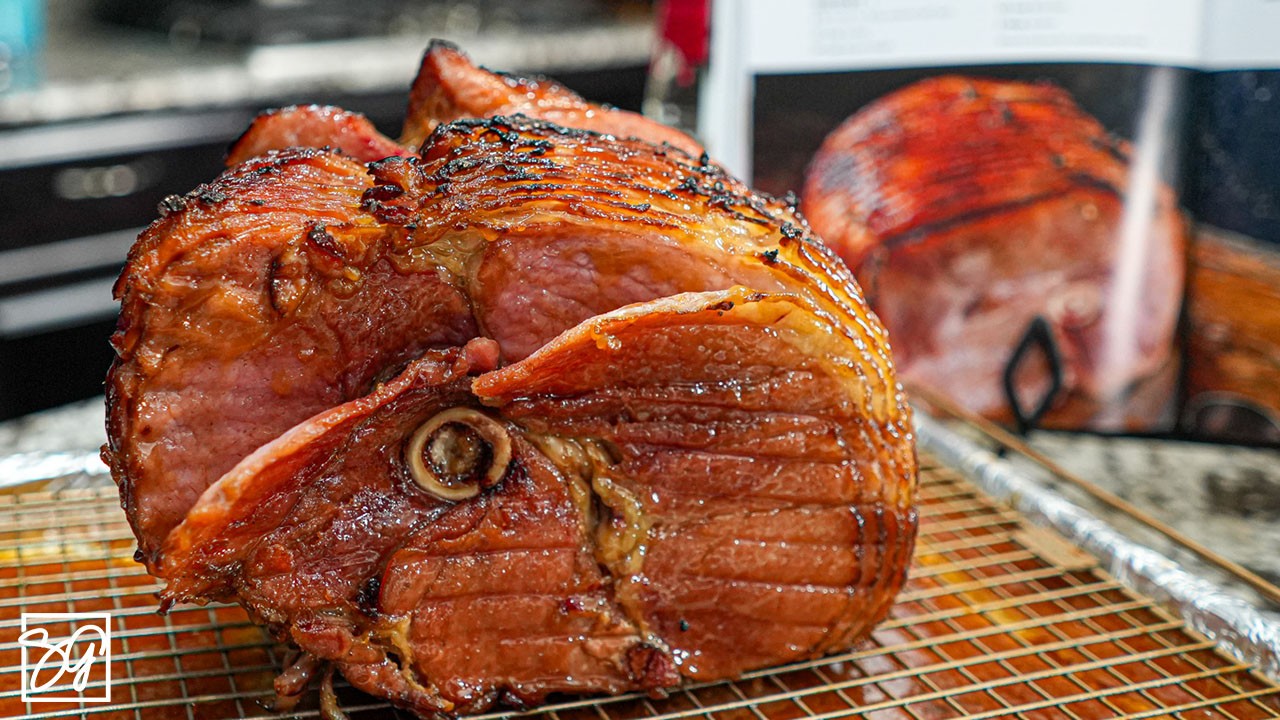
Honey Baked Ham Recipe: There’s something undeniably heartwarming about a honey baked ham. Whether it’s a festive Christmas dinner, Easter brunch, or a celebratory family meal, this dish steals the spotlight every time. With its golden, caramelized crust, juicy interior, and mouthwatering aroma, honey baked ham is more than just food—it’s tradition wrapped in flavor.
But here’s the deal: while the store-bought versions are popular, they’re often overpriced and loaded with preservatives. Making it at home is not only more economical, but it also gives you total control over the ingredients, flavor, and presentation. Plus, it’s easier than you might think. With the right guidance, anyone can master this classic recipe, turning a simple ham into a culinary masterpiece that people will talk about long after the plates are cleared.
In this guide, you’ll get a complete step-by-step walkthrough, from choosing the perfect ham to glazing it just right. Whether you’re a beginner in the kitchen or a seasoned cook looking to add a new showstopper to your repertoire, this guide has you covered. Let’s dive in.
Ingredients You’ll Need
Before we start baking, let’s talk ingredients. The success of your honey baked ham hinges on both quality and balance. Here’s what you’ll need:
Main Ingredients:
- 1 fully cooked bone-in ham (7 to 10 pounds)
- 1 cup honey
- 1/2 cup brown sugar
- 1/4 cup Dijon mustard
- 2 tablespoons apple cider vinegar
- 1/2 teaspoon ground cloves
- 1/2 teaspoon ground cinnamon
- 1/2 teaspoon paprika
Optional Add-Ins for Variation:
- Orange zest or juice (adds a citrusy brightness)
- Maple syrup (a richer, deeper sweetness)
- Ground ginger or nutmeg (for warmth and complexity)
- Crushed garlic (for a savory kick)
Tips for Ingredient Quality:
- Ham: Always go for a high-quality, fully cooked ham. Spiral-cut hams make carving easy, while whole hams offer more flexibility.
- Honey: Use raw or local honey for the best flavor. Cheaper honey can taste overly sweet or artificial.
- Brown Sugar: Dark brown sugar gives a deeper molasses flavor, perfect for a rich glaze.
- Spices: Freshly ground spices elevate the glaze, giving it a complex and enticing aroma.
Pro tip: Don’t be afraid to tweak the glaze ingredients based on your taste preferences. Like it spicier? Add a pinch of cayenne. Prefer a fruitier note? A splash of pineapple juice can do wonders.
Choosing the Right Ham
The first step in nailing this recipe is choosing the right cut of ham. Here’s a breakdown of what you need to know:
Bone-In vs. Boneless:
- Bone-in Ham: Retains moisture better, richer in flavor, and makes a beautiful presentation. It’s also great for leftover soups and stocks.
- Boneless Ham: Easier to slice and serve but may be less flavorful and can dry out more quickly.
Spiral-Cut vs. Whole:
- Spiral-Cut Ham: Comes pre-sliced, which saves time and effort. Ideal for serving a crowd and looks elegant on a platter.
- Whole Ham: Gives you more control over slicing and often retains moisture better during cooking.
How Much Ham Per Person?
Plan for about 1/2 pound per person for boneless ham, and 3/4 pound per person for bone-in. So for a 10-person gathering, a 7.5-pound bone-in ham should be just right.
It’s always better to have a little extra—leftovers make excellent sandwiches, breakfast hash, or even ham fried rice!
Prepping the Ham
Proper prep is crucial for getting that perfect blend of crispy glaze and juicy interior. Let’s break it down:
Step 1: Bring Ham to Room Temperature
Take the ham out of the fridge 1 to 2 hours before baking. This helps it cook evenly and prevents the outer layer from drying out before the center is warm.
Step 2: Score the Ham
Using a sharp knife, score the surface in a crisscross diamond pattern about 1/4 inch deep. This isn’t just for looks—it allows the glaze to penetrate and flavor the meat more thoroughly.
Step 3: Set the Oven
Preheat your oven to 325°F (165°C). This moderate temperature ensures the ham warms through without drying out.
Step 4: Prepare a Roasting Pan
Place the ham cut-side down in a roasting pan. Use a rack if you have one, or elevate the ham with a few balls of aluminum foil. Add a bit of water or broth to the pan to keep the ham moist during cooking.
Cover loosely with foil before placing it in the oven.
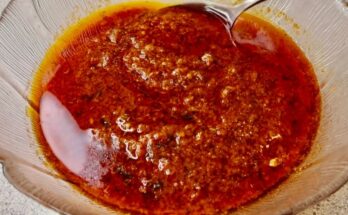
The Honey Glaze Magic
Here comes the star of the show—the glaze. A sticky-sweet mix of honey, spices, and just enough acidity to cut through the richness.
Ingredients for the Glaze:
- 1 cup honey
- 1/2 cup brown sugar
- 1/4 cup Dijon mustard
- 2 tablespoons apple cider vinegar
- 1/2 teaspoon each of cloves, cinnamon, and paprika
Step-by-Step Glaze Instructions:
- Combine Ingredients: In a small saucepan over medium heat, whisk together all glaze ingredients.
- Simmer: Let it simmer gently for 5–10 minutes until it thickens slightly. Stir often to prevent burning.
- Taste and Adjust: If it’s too sweet, add more vinegar or mustard. If too tangy, increase the honey.
When to Glaze the Ham:
- After the ham has baked for about 1.5 hours, remove the foil.
- Brush the glaze generously over the entire ham.
- Return to the oven uncovered and continue baking for another 30–45 minutes, basting every 10–15 minutes for a beautifully lacquered finish.
Pro tip: For a more caramelized crust, crank the heat to 400°F for the last 10 minutes or use the broiler briefly. Just watch it carefully to avoid burning.
Baking the Ham to Perfection
Once your glaze is ready and your ham is scored and prepped, it’s time to get cooking. Baking your ham correctly is the key to achieving that juicy, flavorful interior and beautifully caramelized crust.
Step-by-Step Baking Instructions:
- Initial Bake: With your oven preheated to 325°F (165°C), place the foil-covered ham in the oven. Plan to bake it for 15–18 minutes per pound. So a 9-pound ham will need around 2.25 hours in total.
- Midway Check-In: About halfway through the bake time, remove the ham and check its internal temperature. You’re aiming for about 120°F (49°C) before you start glazing.
- Glazing and Final Bake: Once the internal temp is reached, start brushing on your glaze. Return the ham to the oven uncovered, and let it bake for 30–45 more minutes, glazing every 10–15 minutes for that sticky, shiny finish.
- Final Internal Temperature: Your ham is done when it reaches 140°F (60°C) for a fully cooked ham. If you’re using a precooked variety (which most are), this is your target.
Tips for Best Results:
- Avoid Dry Ham: Use a meat thermometer to prevent overcooking.
- Use a Roasting Pan with Liquid: Pouring ½ inch of broth or water into the pan helps keep the ham moist and adds flavor to any drippings.
- Tent If Necessary: If your glaze starts to brown too quickly, loosely tent the ham with foil to prevent burning.
This step might seem intimidating at first, but once you’ve done it once, it becomes second nature. The reward? A perfectly cooked centerpiece that smells divine and tastes even better.
Letting It Rest
As tempting as it is to dive right in, resting your ham is non-negotiable. Think of this as the moment your ham relaxes and reabsorbs all those tasty juices.
How Long to Let It Rest?
Once out of the oven, let your ham rest at least 15–20 minutes before carving. For larger hams, 30 minutes isn’t overkill. Just tent it with foil and resist the urge to cut.
Why Resting Is Crucial:
- Juiciness: Cutting into a hot ham immediately lets all the juices escape. Resting lets them redistribute.
- Flavor: The glaze settles and melds into the meat, enhancing every bite.
- Ease of Carving: Rested meat is firmer and easier to slice cleanly.
During this time, use those aromatic juices in the roasting pan to create a quick gravy or drizzle. You’ve already done the hard part—now’s your moment to kick back and enjoy the anticipation.
Carving and Serving
Now for the fun part—turning that gorgeous baked ham into a platter of perfectly sliced portions ready to devour.
How to Carve a Spiral-Cut Ham:
- Place the ham flat-side down on a cutting board.
- Locate the bone and make vertical cuts along it to release the pre-sliced sections.
- Use a sharp knife to slide between slices, helping them fall apart naturally.
For Whole Hams:
- Cut a few thick slices from the wider side to create a flat base.
- Stand the ham on that base and slice thinly across the grain for tender pieces.
Serving Suggestions:
- Serve with sides like roasted potatoes, glazed carrots, mac and cheese, or a green bean casserole.
- Add a drizzle of leftover glaze or pan juices on top.
- Garnish with herbs like rosemary or thyme and fresh citrus slices for presentation flair.
Want to take it over the top? Add warm dinner rolls and a tangy mustard or cranberry sauce on the side. It’s all about the details.
Storage and Leftovers
One of the best things about honey baked ham? The leftovers are almost better than the main event.
Storing Leftovers:
- Refrigerate: Wrap tightly or store in an airtight container. Lasts up to 5 days in the fridge.
- Freeze: For longer storage, wrap slices in foil and place in a freezer bag. Good for up to 2 months.
Creative Ways to Use Leftover Ham:
- Breakfast Hash: Dice it up with potatoes, onions, and bell peppers.
- Ham and Cheese Sliders: Perfect for lunch or party snacks.
- Ham Fried Rice: Quick and flavorful dinner idea.
- Split Pea or Bean Soup: Use the ham bone for deep, smoky flavor.
- Pasta Carbonara: A twist using ham instead of bacon.
Ham is the gift that keeps on giving. These dishes are quick to make and add value to your holiday meal well beyond the day it’s served.
Final Thoughts Before the Feast
So, you’ve glazed, baked, carved, and now you’re ready to serve. Making honey baked ham at home isn’t just about putting food on the table—it’s about creating a memorable experience. With this step-by-step guide, you’ve not only saved money but also crafted a meal with care and love that no store-bought version can match.
And once you master it, you’ll want to make it part of every big celebration—or maybe even a few casual Sundays too.
Pairing Sides with Honey Baked Ham
Your ham is the star, no doubt—but every star needs a strong supporting cast. The right sides can take your honey baked ham from great to unforgettable. Here are some mouthwatering pairings that complement the sweet-savory notes of the ham perfectly.
Classic Side Dishes:
- Scalloped Potatoes: Creamy, cheesy, and just the right amount of indulgent.
- Green Bean Casserole: Earthy, crunchy, and topped with crispy onions for a texture contrast.
- Sweet Potato Casserole: The sweetness of the yams echoes the honey glaze in the ham.
- Mac and Cheese: A crowd-pleaser that adds a comforting, creamy balance.
- Dinner Rolls or Cornbread: Perfect for soaking up that extra glaze or pan sauce.
Fresh & Light Pairings:
- Roasted Brussels Sprouts: Toss with balsamic for a tangy twist.
- Citrus Salad: Fresh orange and arugula salad can cut through the ham’s richness.
- Steamed Asparagus or Green Beans: Bright, crunchy greens add freshness to your plate.
Gravy or Sauce Ideas:
- Pineapple Mustard Sauce: A tropical tang that complements the honey glaze.
- Cranberry Relish: Not just for turkey—it brings brightness to ham.
- Pan Gravy: Make it from the drippings in your roasting pan for a savory-sweet sauce.
The goal here isn’t to overload the table but to balance out the flavors and textures. Choose a few dishes that contrast and a few that complement, and you’ll have a well-rounded feast.
Tips and Tricks for Success
If it’s your first time making a honey baked ham—or even if it’s your tenth—these tips can help you avoid common pitfalls and ensure a smooth cooking experience.
Top Tips:
- Buy Ahead: Get your ham a couple of days before your event to avoid last-minute stress.
- Use a Thermometer: This tool alone can prevent overcooking and guarantee juicy results.
- Don’t Skip Scoring: It’s tempting to skip, but scoring makes a big difference in flavor infusion.
- Glaze in Layers: Multiple applications of glaze build a better crust and deepen flavor.
Avoid These Common Mistakes:
- Overcooking: Trust your thermometer over the clock.
- Using Too Much Glaze Too Soon: This can burn the sugar before the ham is properly heated.
- Serving Too Soon: Resting isn’t just for steak—ham needs that pause too.
- Neglecting Sides: A well-chosen side can elevate the entire meal.
Pro Presentation Tip:
Garnish your platter with fresh herbs, orange slices, or even pomegranate seeds for a festive and Instagram-worthy look.
Remember, cooking should be fun. Don’t stress if it’s not perfect—your guests will be too busy going back for seconds to notice!
Variations and Twists on the Classic Recipe
Love the idea of honey baked ham but want to try something new? Here are some delicious variations that keep the concept but change the flavor profile.
Flavor Twists:
- Spicy Honey Ham: Add crushed red pepper flakes or hot sauce to your glaze for a sweet-heat kick.
- Maple Bourbon Glaze: Swap honey for maple syrup and add a splash of bourbon for a smoky, adult version.
- Asian-Inspired Glaze: Use soy sauce, ginger, garlic, and hoisin for a savory-sweet fusion flavor.
- Pineapple Glazed Ham: Add pineapple juice and rings to your baking process for a fruity punch.
Cooking Method Variations:
- Slow Cooker Ham: A great option for set-it-and-forget-it cooking. Just pour glaze over the ham and cook on low for 4–6 hours.
- Smoked Ham: If you’ve got a smoker, this method adds an incredible depth of flavor. Use hickory or applewood chips for best results.
- Grilled Ham: Great for summer holidays—grill slices of already baked ham and brush with glaze for a charred finish.
Experimenting keeps the recipe fresh and lets you tailor it to different occasions or personal preferences.
Serving for Different Occasions
Honey baked ham is incredibly versatile—it’s equally at home on a formal holiday table as it is at a laid-back potluck or picnic.
For Holidays (Christmas, Easter, Thanksgiving):
- Go all out with multiple sides, an elegant table setting, and a full presentation.
- Include a glaze with a seasonal twist—think cranberry at Christmas or citrus in the spring.
For Casual Gatherings:
- Serve sliced ham with slider buns and a few simple condiments for an easy sandwich bar.
- Pair with potato salad, chips, and coleslaw for a relaxed backyard vibe.
For Meal Prepping or Weeknight Dinners:
- Bake a smaller ham and use leftovers for weekday meals.
- Keep it simple with roasted veggies and rice or quinoa.
A big ham can serve as the base for multiple meals throughout the week, making it a smart and satisfying option beyond just the main event.
FAQs about Honey Baked Ham Recipe
1. What is the best type of ham for this recipe?
Bone-in, fully cooked hams work best for honey baked ham recipes. They retain moisture well and deliver the most flavor.
2. Can I use spiral-cut ham?
Yes! Spiral-cut hams are convenient and absorb the honey glaze beautifully. Just be careful not to overcook them.
3. How long do I bake the ham?
Bake at 325°F (165°C) for about 15-18 minutes per pound. Always check with a meat thermometer—your ham should reach 140°F (60°C) internally.
4. Do I need to cover the ham while baking?
Yes, cover the ham with foil during the initial baking to keep it moist. Uncover during the final 15–20 minutes to allow the glaze to caramelize.
5. Can I make honey baked ham ahead of time?
Absolutely. You can bake the ham a day before and reheat gently. Store it in an airtight container and warm it in the oven at 275°F (135°C) before serving.
6. What side dishes go well with honey baked ham?
Classic options include mashed potatoes, roasted vegetables, mac and cheese, and green bean casserole.
7. How do I store leftovers?
Refrigerate leftovers in an airtight container for up to 4 days or freeze them for up to 2 months.
8. Can I make this recipe without a glaze?
You can, but the honey glaze adds signature sweetness and a rich caramelized finish. It’s highly recommended!
Conclusion
There you have it—the ultimate honey baked ham recipe and guide. With the right ingredients, a bit of prep, and a golden glaze that dreams are made of, you can create a dish that brings everyone to the table with a smile. Whether you’re hosting a holiday feast or just craving a hearty meal, this recipe delivers every single time.
From choosing the right ham to glazing, baking, carving, and serving, you now have everything you need to make your honey baked ham the star of any occasion. And once you taste that sweet, savory, juicy slice, you’ll never go back to the store-bought version again.
So go ahead—get cooking and make some delicious memories.