Homemade Pickle Recipe: Pickling is more than just a method of preserving food—it’s a flavorful journey that starts with fresh vegetables and ends with a tangy, crunchy delight that can jazz up any meal. Whether you’re a fan of spicy, sweet, or sour, making homemade pickles is incredibly satisfying. Here’s your ultimate step-by-step guide to crafting the perfect batch right in your kitchen.
What is Pickling?
Pickling is an age-old preservation technique that relies on either fermentation in brine or immersion in vinegar. This process inhibits the growth of bacteria and enhances the flavor of the vegetables over time. It’s an alchemy of sorts—transforming basic vegetables like cucumbers, carrots, or cauliflower into mouth-watering treats with a punch of flavor. Pickles can be sweet, sour, spicy, or even a mix of all three, depending on the spices and ingredients you use.
Why Make Pickles at Home?
Sure, store-bought pickles are convenient, but nothing beats the taste and satisfaction of a homemade jar. When you pickle at home, you control everything—from the level of spice to the crunchiness and the ingredients. There are no preservatives, no artificial flavors—just real, whole foods seasoned your way. Plus, it’s a great way to use up leftover produce or take advantage of a vegetable garden harvest.
Ingredients You’ll Need
Fresh Vegetables
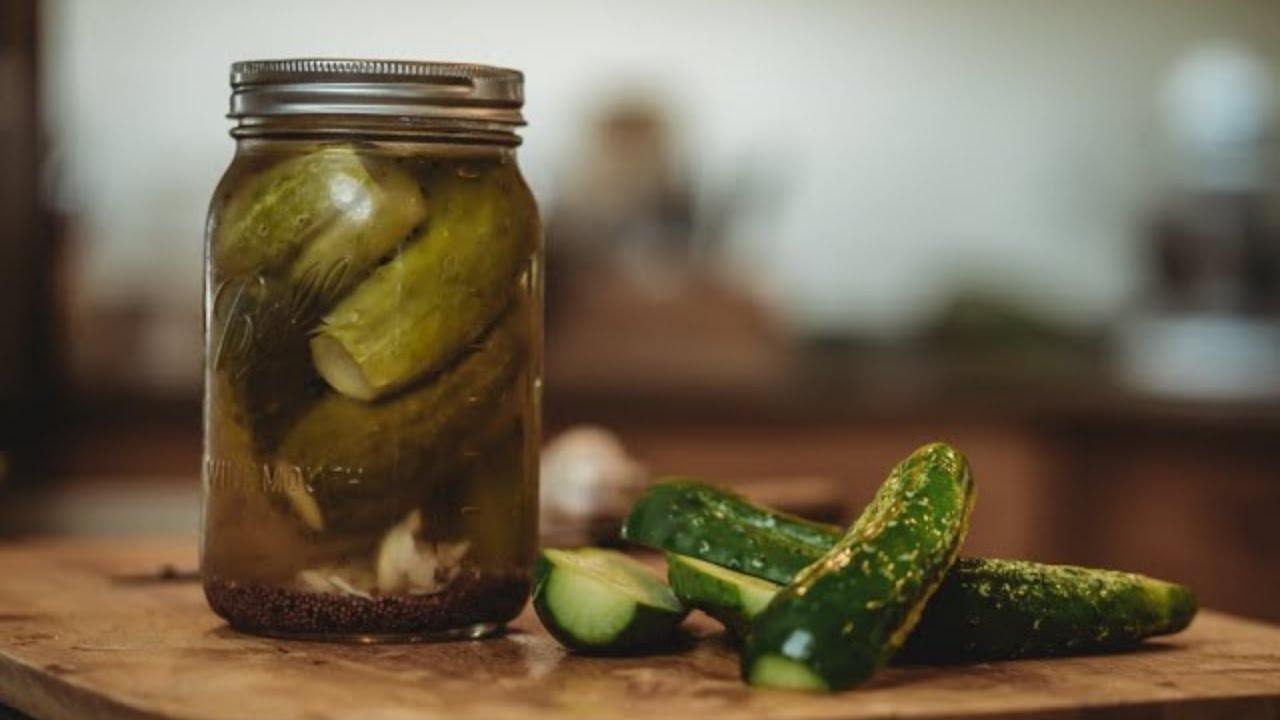
Pickles start with produce, so the fresher, the better. Some of the most popular vegetables for pickling include:
- Cucumbers (especially kirby or pickling cucumbers)
- Carrots
- Cauliflower
- Onions
- Green beans
- Jalapeños or other chili peppers
- Garlic cloves
Always choose firm, unblemished vegetables for the best results.
Essential Spices and Seasonings
Spices are where the magic happens. Here’s a basic list to get you started:
- Dill seeds or fresh dill
- Mustard seeds
- Peppercorns
- Bay leaves
- Red pepper flakes
- Coriander seeds
- Turmeric (for color and flavor)
You can get creative here—add your favorite herbs or spice blends to make your pickles truly unique.
Vinegar and Brining Solution
The backbone of any pickle is its brine. For quick pickles (a.k.a. refrigerator pickles), you’ll typically use:
- White distilled vinegar or apple cider vinegar
- Water
- Kosher salt or pickling salt (avoid iodized salt)
- Sugar (optional, for sweet pickles)
A basic brine ratio is 1 part vinegar to 1 part water, with about 1 tablespoon of salt per cup of liquid.
Equipment Required for Pickling
Jars and Lids
Mason jars are ideal for pickling—choose pint or quart sizes depending on your batch size. Make sure your jars are in good condition with no chips or cracks. Lids should seal tightly for proper preservation.
Sterilization Tools
Sterilizing your jars is crucial to prevent contamination. Boil them in hot water for 10 minutes, or run them through a hot dishwasher cycle right before use. Don’t skip this step—it’s the key to long-lasting, safe pickles.
Storage Essentials
You’ll need a cool, dark place to store your pickles while they cure. A pantry, basement, or fridge works well. If you’re making fermented pickles, they’ll need a warmer spot for a few days to get things going before refrigeration.
Step-by-Step Guide to Making Pickles
Step 1: Select and Prepare Your Vegetables
Start by washing and slicing your vegetables. For cucumbers, cut off the blossom end to prevent mushiness. Carrots can be cut into sticks or rounds, cauliflower into small florets, and garlic peeled whole. The shape doesn’t matter as much as the consistency—uniform sizes ensure even pickling.
Want spicy pickles? Add sliced jalapeños. Love garlic? Throw in a few extra cloves. This is your chance to personalize your recipe.
Step 2: Make the Brine
In a saucepan, combine your vinegar, water, salt, and optional sugar. Bring it to a boil and stir until the salt and sugar dissolve completely. Let the brine cool slightly before pouring—this helps maintain the crunch of the veggies.
For a basic brine:
- 2 cups water
- 2 cups vinegar (white or apple cider)
- 2 tablespoons kosher salt
- 1 tablespoon sugar (optional)
Adjust the recipe depending on how many jars you’re making.
Step 3: Pack the Jars
Place your spices and seasonings at the bottom of the sterilized jar—this includes garlic, dill, mustard seeds, etc. Next, pack your veggies in tightly but not too forcefully. You want them snug so they don’t float, but not crushed.
Layer different veggies for variety and color. This makes the jars look beautiful and also gives you a mix of flavors in each bite.
Step 4: Pour the Brine and Seal
Carefully pour the warm brine over the vegetables, making sure they’re fully submerged. Leave about 1/2 inch of headspace at the top. Tap the jars gently to release any air bubbles, then wipe the rim clean and seal with the lid.
Let them cool to room temperature before storing. If you’re making refrigerator pickles, place them directly into the fridge. For shelf-stable pickles, a hot water bath canning method is necessary.
Step 5: Store and Wait
Now comes the hardest part—waiting. Refrigerator pickles are usually ready in 24–48 hours, but the flavor deepens over time. For fermented pickles, allow them to sit at room temperature for 5–7 days, then refrigerate. Shelf-stable pickles should be stored in a dark, cool place and can last for up to a year unopened.
Want crunchier pickles? Add grape leaves or a pinch of alum to your jars—both help maintain texture.
Creative Pickle Variations to Try
Classic Dill Pickles
The quintessential favorite, dill pickles are sharp, garlicky, and packed with that bold, vinegary bite we all love. Use pickling cucumbers, fresh dill, garlic, mustard seeds, and white vinegar. For extra zip, toss in some red pepper flakes. They pair perfectly with sandwiches, burgers, or even as a solo snack.
Sweet Bread and Butter Pickles
These pickles bring a sweet and tangy flavor that’s totally addicting. Typically made with sliced cucumbers and onions, bread and butter pickles use apple cider vinegar, sugar, mustard seeds, turmeric, and celery seeds. They’re amazing with grilled cheese sandwiches or charcuterie boards.
Spicy Pickled Jalapeños
If you love heat, you’ll adore spicy jalapeño pickles. Slice fresh jalapeños and brine them with white vinegar, garlic, peppercorns, and a touch of sugar. Add habaneros or chili flakes for an even bigger kick. Use them as a topping for tacos, nachos, or burgers.
Pickled Carrots and Cauliflower
These are great for adding crunch and color to your meals. Blanch the vegetables lightly before pickling to maintain their vibrant hue. Add cumin seeds, coriander, and garlic for a Middle Eastern flair, or go the curry route with turmeric and mustard seeds.
Fermented Pickles
For a traditional twist, skip the vinegar and use a saltwater brine to ferment your veggies naturally. This method relies on time and temperature, producing that old-fashioned, tangy flavor full of gut-healthy probiotics. Store them in a crock or jar with a fermentation weight to keep veggies submerged.
Pickle Troubleshooting Tips
Even experienced pickle-makers run into hiccups. Here’s how to fix the most common issues:
- Pickles are soft or mushy – This usually happens when the blossom end of cucumbers isn’t removed or if they were overripe. Always trim the ends and use young, firm cucumbers.
- Cloudy brine – Could be from using table salt (which contains anti-caking agents) or due to fermentation. For quick pickles, use pickling salt; for fermented pickles, cloudiness is normal.
- Pickles are too salty or too vinegary – Adjust the ratio in your brine next time, or soak pickles in cold water for 30 minutes before eating to mellow the flavor.
- Lids didn’t seal properly – Always use fresh lids and follow proper canning techniques. If a lid doesn’t seal, store the jar in the fridge and eat within a few weeks.
How to Store and Preserve Pickles
Storing pickles correctly ensures they remain safe and delicious for months. Here’s what you need to know:
- Refrigerator pickles should be kept cold and eaten within 2–3 months. They’re not shelf-stable but develop excellent flavor over time.
- Water bath canned pickles are shelf-stable for up to a year. Store in a dark, cool place and always check the seal before opening.
- Fermented pickles should be stored in the fridge after fermentation is complete and consumed within 4–6 months.
Always label jars with the date and contents. This makes it easier to track freshness and organize your pantry.
Serving Suggestions for Pickles
Pickles aren’t just for burgers—there’s a whole world of delicious ways to enjoy them:
- Add to sandwiches or wraps for extra crunch and tang.
- Serve alongside cheese boards, cured meats, or savory pies.
- Chop and mix into tuna, egg, or potato salads.
- Use as a pizza topping or layer in tacos for a zingy twist.
- Puree into a pickle relish or dip for unique flavor.
The best part? You’re never limited. You can experiment endlessly with pairings and new ways to enjoy your homemade pickles.
Health Benefits of Homemade Pickles
Homemade pickles are more than just a tasty treat—they come packed with surprising health perks, especially when made using traditional fermentation methods.
Rich in Probiotics
Fermented pickles, in particular, are loaded with probiotics—those good-for-you bacteria that help keep your gut happy. These beneficial microbes improve digestion, boost immunity, and may even support mental health. Unlike store-bought pickles, which are often pasteurized and stripped of probiotics, your homemade batch retains all that natural goodness.
Packed with Antioxidants and Nutrients
Pickles preserve much of the vitamins and antioxidants found in fresh vegetables. Carrots retain beta-carotene, cucumbers offer vitamin K, and garlic brings powerful anti-inflammatory compounds. These nutrients help support heart health, reduce inflammation, and strengthen your immune system.
Low-Calorie Snack
Craving something crunchy? Pickles are a guilt-free option. They’re low in calories but high in flavor—making them the perfect midday snack or a clever way to curb unhealthy cravings.
Support Hydration and Electrolyte Balance
The sodium in pickles can be beneficial after intense physical activity, helping replenish lost electrolytes. Just be mindful of salt levels if you’re watching your sodium intake.
Common Mistakes to Avoid When Making Pickles
As with any homemade project, a few common mistakes can ruin your pickles. Here’s how to avoid them:
1. Using the Wrong Salt
Not all salt is created equal. Iodized table salt can make your brine cloudy and affect the taste. Stick to kosher salt or pickling salt—they dissolve well and don’t contain additives.
2. Skipping Sterilization
This is a big one. Dirty jars are a recipe for spoiled pickles. Always sterilize your jars and lids before use. Boil them or run them through a hot dishwasher cycle right before you pack them.
3. Overcrowding the Jars
While it’s tempting to cram in as many veggies as possible, overcrowding leads to uneven pickling. Leave enough space so brine can fully surround each piece for a consistent taste and texture.
4. Inadequate Sealing
If your jars aren’t sealed properly, your pickles can spoil quickly. Always wipe the rims clean, ensure the lids are tight, and use a proper water bath canning method if you’re storing them outside the fridge.
The Joy of Sharing Homemade Pickles
Homemade pickles aren’t just a treat for yourself—they make amazing gifts. A well-packed jar with a custom label feels personal and thoughtful. Whether it’s for holidays, birthdays, or just because, a jar of your signature pickles can bring a smile to anyone’s face.
You could even turn your hobby into a small business or farmer’s market booth. Start with a few family recipes, experiment with flavor combinations, and before you know it, you’ve got a product people crave. With more people looking for locally made, preservative-free foods, homemade pickles have major market appeal.
FAQs about Pickle Recipe
1. How long do homemade pickles last?
Refrigerator pickles can last up to 2–3 months, while properly canned pickles can be stored for up to a year in a cool, dark place.
2. Can I reuse pickle brine for a second batch?
It’s best to make a fresh brine for each batch to ensure proper flavor and preservation. Reused brine loses acidity and can become unsafe over time.
3. What vegetables can I pickle?
Nearly any firm vegetable can be pickled—carrots, cucumbers, beets, green beans, onions, cauliflower, and more.
4. Do I need to boil my jars?
Yes. Sterilizing jars in boiling water or a dishwasher ensures that your pickles are safe to eat and prevents spoilage.
5. Why are my pickles not crunchy?
Soft pickles may result from overripe veggies or skipping the blossom-end trimming. You can also add grape leaves or alum to preserve crunchiness.
Conclusion
Homemade pickles are a timeless tradition that brings flavor, health benefits, and a touch of joy to everyday meals. With just a few simple ingredients and a bit of patience, you can create crunchy, tangy pickles that rival any store-bought brand. Whether you’re a fan of spicy jalapeños, classic dill spears, or sweet bread and butter chips, the process is fun, flexible, and deeply rewarding.
So roll up your sleeves, sterilize those jars, and start your pickling journey today. It’s one of the easiest and most satisfying kitchen projects you’ll ever tackle.