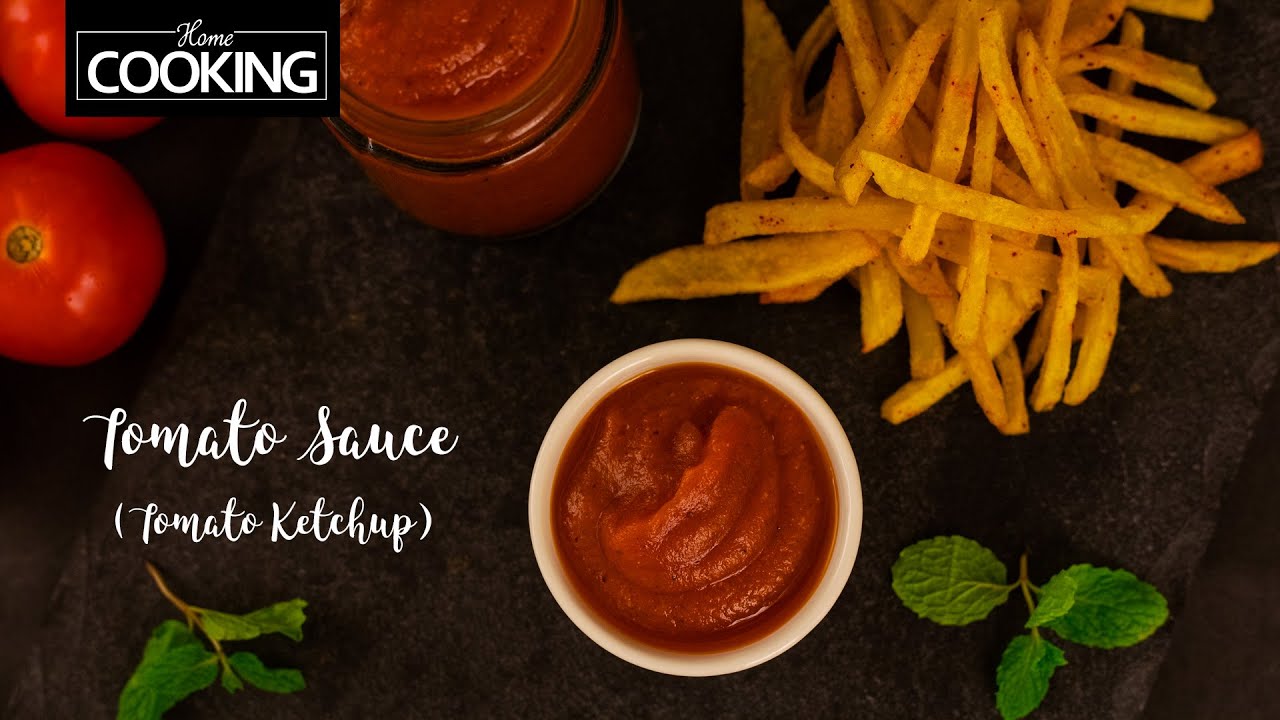
Homemade Ketchup Recipe: Let’s face it—ketchup is one of those must-have condiments that finds a home in almost every kitchen. Whether you’re dipping fries, layering a burger, or spicing up a sandwich, ketchup has become a household staple. But what if I told you that your favorite red sauce could taste even better when you make it at home?
Homemade ketchup is not only fresher and more flavorful, but it also allows you to control what goes in. No more hidden preservatives, excess sugar, or artificial flavors. You can tweak the spice level, reduce the sweetness, or go wild with exotic herbs if you like. The best part? It’s surprisingly easy to whip up!
In this detailed guide, we’ll walk you through a foolproof, step-by-step recipe to make delicious homemade ketchup from scratch. Perfect for beginners and culinary experimenters alike, this recipe promises rich, tangy flavor without the store-bought guilt.
Ingredients You’ll Need
The beauty of making ketchup at home lies in its simplicity. Most of the ingredients are already in your pantry. Here’s a breakdown of what you’ll need:
Essential Ingredients:
- Tomatoes (fresh or canned): The base of your ketchup. Roma or plum tomatoes are ideal for their lower water content.
- Vinegar (white or apple cider): Adds the tangy punch.
- Sugar (white or brown): Balances the acidity of tomatoes.
- Salt: Enhances all the flavors.
- Onion: Adds depth and umami.
- Garlic: Gives that savory kick.
- Spices: Typically includes cloves, allspice, cinnamon, and paprika.
Optional Add-ins:
- Honey or maple syrup: For natural sweetness.
- Chili flakes or cayenne: To turn up the heat.
- Smoked paprika: Adds a BBQ flair.
- Mustard powder: Gives a zesty edge.
- Celery salt: Boosts flavor complexity.
The great thing is—you can customize this recipe to suit your taste buds. Want it less sweet or more tangy? Go ahead. Prefer it spicier? Throw in some chili peppers. You’re in control!
Tools and Equipment Required
You don’t need any fancy gadgets to make homemade ketchup. Most of these tools are already in your kitchen drawer. Here’s what you’ll need:
Basic Kitchen Tools:
- Large saucepan or pot: For simmering your tomato base.
- Wooden spoon or spatula: Stirring is key.
- Cutting board and knife: To prep your veggies.
- Blender or immersion blender: For that silky-smooth texture.
- Fine-mesh sieve (optional): To strain for an ultra-smooth consistency.
- Jars or bottles: For storing the finished product.
Nice-to-Have Tools:
- Thermometer: To ensure proper pasteurization if storing long-term.
- Funnel: Makes bottling way less messy.
- Labels: Helps with tracking freshness and customizing.
Step-by-Step Instructions
Here comes the heart of the recipe—the actual cooking process. Ready to get saucy? Let’s dive into each step with clarity and detail.
Step 1: Gather Your Ingredients
Before you start anything, make sure you have all your ingredients laid out. Trust me—nothing is more frustrating than realizing you’re out of vinegar halfway through.
Measure everything beforehand:
- 2 lbs fresh tomatoes or 1 large can (28 oz) crushed tomatoes
- 1/2 cup white vinegar
- 1/4 cup sugar
- 1 tsp salt
- 1/2 onion, chopped
- 2 cloves garlic, minced
- 1/2 tsp ground cinnamon
- 1/4 tsp cloves
- 1/4 tsp allspice
- 1 tsp paprika
Prep your veggies—chop your onions and tomatoes (if fresh), and have your garlic ready to go.
Step 2: Prepare the Tomato Base
If you’re using fresh tomatoes, blanch them first by boiling them for 30 seconds, then plunging into ice water. This makes peeling easier. Remove skins and seeds, then chop roughly.
Now, heat a large saucepan over medium heat. Add the tomatoes (canned or fresh), onions, and garlic. Simmer for 20-25 minutes, stirring occasionally, until the mixture is soft and the tomatoes have broken down.
This step forms the heart of your ketchup. The longer you simmer, the more intense the flavor.
Step 3: Simmer with Spices
Now that your tomato mixture is soft and fragrant, it’s time to add the flavor bombs—your spices and vinegar. Add in the sugar, salt, vinegar, and all the dry spices (cinnamon, cloves, allspice, paprika). Stir well to combine everything.
Let this mixture simmer uncovered on low heat for another 30–45 minutes. This slow simmer helps deepen the flavors and thicken the mixture into that rich ketchup texture. Make sure to stir it occasionally so it doesn’t stick or burn at the bottom.
As it simmers, you’ll notice the color darken and the aroma intensify. This is where the magic happens—layers of flavor build with each minute. If the mixture gets too thick, add a splash of water or a little more vinegar to loosen it up.
Step 4: Blend for Smooth Texture
Once your ketchup base has thickened and cooked down beautifully, it’s time to transform it into that velvety-smooth condiment you love. Turn off the heat and let it cool slightly for safer handling.
Use a blender or immersion blender to puree the mixture until smooth. If you like your ketchup ultra-smooth (like the store-bought kind), go a step further—strain it through a fine-mesh sieve. This step removes any leftover skins or seeds, leaving you with a luxuriously smooth sauce.
Pro tip: Blend in batches if you’re using a standard blender, and always remove the center cap to let steam escape. Otherwise, the heat could build up and create a mess—or worse, a kitchen disaster.
Step 5: Taste and Adjust Seasoning
At this stage, your ketchup should already taste pretty amazing—but there’s always room for a little fine-tuning. Give it a taste and adjust the flavor to your liking.
- Too tangy? Add a touch more sugar or honey.
- Too sweet? Splash in some extra vinegar.
- Needs more punch? A dash of mustard powder or chili flakes can do wonders.
- Lacking depth? A pinch more salt or a spoon of tomato paste could elevate it.
This step is all about personalizing your ketchup. Don’t be afraid to get creative. After all, that’s the whole point of making it at home—you’re the boss of the flavor.
Step 6: Bottle and Store Properly
Once you’re satisfied with the taste and texture, it’s time to bottle it up. Make sure your jars or bottles are clean and sterilized to extend shelf life. Use a funnel for easy and mess-free transfer.
Seal the containers and let them cool to room temperature before popping them into the fridge. Homemade ketchup will thicken slightly as it chills and can be enjoyed immediately, but the flavors meld beautifully after 24 hours.
Stored in an airtight container in the fridge, your ketchup should last 2–3 weeks. If you want to make a larger batch and store it longer, consider canning or freezing it in small portions.
Tips for Perfect Homemade Ketchup
Want to take your homemade ketchup to the next level? These tips will help you avoid common pitfalls and refine your technique:
- Use ripe tomatoes: For the freshest flavor, choose ripe Roma or plum tomatoes. They have less water and more sweetness.
- Simmer slowly: Low and slow brings out the best in your ingredients.
- Balance is key: Always adjust for the perfect sweet-sour-salty-spicy balance.
- Strain for smoothness: For that professional touch, always blend and strain.
- Don’t overcook: Once thickened, take it off the heat. Overcooking can darken the flavor too much.
Avoid shortcuts like using pre-made sauces or ketchup as a base—go from scratch to really appreciate the difference.
Variations of Homemade Ketchup
Want to give your ketchup a twist? These variations will have your tastebuds singing.
Spicy Ketchup:
Add 1 tsp cayenne pepper, chili flakes, or a fresh jalapeño during simmering. For a smoky heat, try chipotle powder.
Smoky BBQ Ketchup:
Use smoked paprika, a splash of Worcestershire sauce, and molasses instead of sugar. Perfect for grilled meats.
Sugar-Free or Low-Carb Ketchup:
Replace sugar with a keto-friendly sweetener like erythritol or stevia. Use apple cider vinegar for a milder tang.
Herbed Ketchup:
Add fresh basil, oregano, or thyme while simmering. Blend with the mix and strain. This version pairs well with roasted vegetables.
Each variation gives you a new way to experience this everyday condiment.
Storing and Shelf Life
One of the perks of making ketchup at home—besides the amazing flavor—is knowing exactly how long it’ll stay fresh. With the right storage method, you can enjoy your homemade ketchup for weeks.
Refrigeration:
Once your ketchup has cooled and been bottled, store it in the fridge. Always use an airtight container—preferably a glass jar or bottle. This keeps out unwanted moisture and air that could spoil the sauce. Homemade ketchup typically lasts 2 to 3 weeks in the refrigerator.
If you’re planning to use it over a longer period, make sure to always use clean utensils when scooping it out to prevent contamination. Also, check for signs of spoilage like mold, off smell, or separation.
Freezing:
Yes, you can freeze ketchup! Pour it into ice cube trays or small containers, freeze, then transfer to a freezer bag. These ketchup cubes are perfect for popping into recipes or defrosting small amounts as needed.
Frozen ketchup can last up to 6 months without losing quality. Just be aware that it may slightly change in texture upon thawing—just give it a good stir.
Canning (Advanced Option):
If you’re experienced in home canning, ketchup is a great candidate for water bath canning. By boiling sealed jars, you can make your ketchup shelf-stable for up to a year. This method is ideal if you’re making large batches and want long-term storage.
Serving Suggestions
So, now you’ve got a jar full of fresh, tangy, homemade ketchup. What should you do with it? The possibilities go way beyond burgers and fries.
Classic Pairings:
- Fries and sweet potato wedges
- Burgers, hot dogs, and grilled sandwiches
- Eggs—yes, it’s amazing with scrambled or fried eggs!
- Grilled cheese—add ketchup inside for a flavor boost
Creative Uses:
- Glaze for meatloaf or grilled chicken – Brush it on during the last few minutes of cooking.
- Ketchup-based BBQ sauce – Just add brown sugar, vinegar, and Worcestershire.
- Dip for chicken tenders or tofu nuggets
- Topping for baked potatoes or hash browns
- Pizza sauce substitute in a pinch—it’s sweet, tangy, and flavorful.
You can also mix it into mayo or mustard to create custom dipping sauces. It’s one of the most versatile condiments in your kitchen, so don’t hesitate to get creative!
FAQs about Ketchup Recipe
1. Can I use canned tomatoes instead of fresh?
Yes! Canned crushed or whole peeled tomatoes work great and save time. Just make sure to choose high-quality, no-salt-added tomatoes for better flavor control.
2. How long does homemade ketchup last?
Stored in a sterilized jar in the fridge, it lasts up to 3 weeks. You can also freeze it for up to 6 months or can it for year-long storage.
3. Is homemade ketchup healthier than store-bought?
Definitely! You control the sugar, salt, and ingredients—no preservatives or additives. You can even make it sugar-free or low-sodium.
4. What kind of vinegar is best?
White vinegar gives a clean, classic tang. Apple cider vinegar adds depth and a slight sweetness. Feel free to experiment with both!
5. Can I make it without sugar?
Absolutely. Replace sugar with honey, maple syrup, or sugar alternatives like erythritol or stevia for a healthier version.
Conclusion
Making your own ketchup at home is not only rewarding, it’s also shockingly simple and incredibly delicious. With just a few ingredients and a little simmer time, you can ditch the processed store-bought stuff and whip up a version that’s healthier, tastier, and totally customizable.
Whether you like it spicy, sweet, smoky, or tangy, homemade ketchup gives you full control over your flavor profile. And the best part? Once you’ve made it, you’ll never look at that grocery store bottle the same way again.
So go ahead—grab those tomatoes, fire up the stove, and start creating your own signature ketchup today. You might just become the go-to ketchup guru in your household!