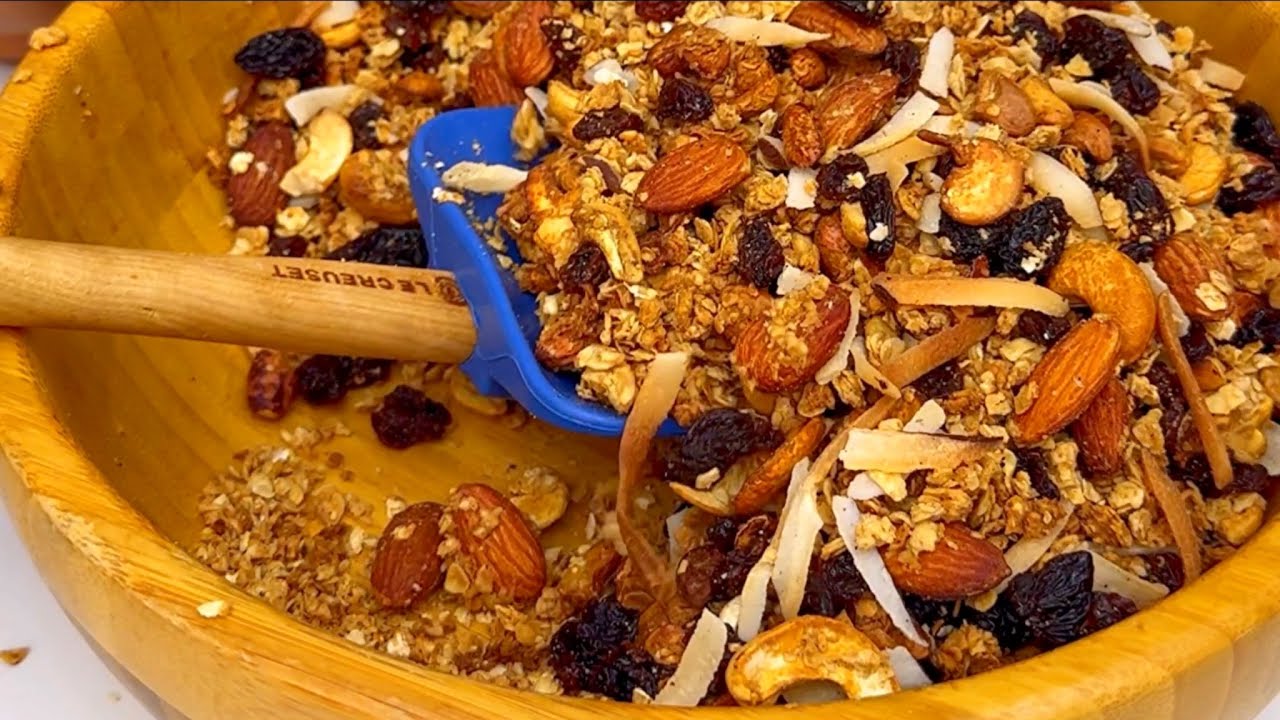
Homemade Granola Recipe: If you’ve ever found yourself wandering the cereal aisle, overwhelmed by the endless options, you’re not alone. Store-bought granola might seem convenient, but it’s often loaded with hidden sugars, unhealthy oils, and mystery preservatives. Making granola at home, on the other hand, lets you control every single ingredient, making it fresher, healthier, and infinitely customizable. Plus, the smell of freshly baked granola wafting through your kitchen? Absolutely unbeatable!
When you whip up your own batch, you’re doing your body and taste buds a favor. You can tailor the sweetness, switch up the nuts, or go completely seed-heavy if you’re feeling it. It’s perfect for people with dietary restrictions too—whether you’re aiming for gluten-free, vegan, low-sugar, or paleo. Homemade granola checks all the boxes!
And let’s not forget the cost savings. Buying premium granola can be ridiculously expensive. Making it yourself slashes that price dramatically while boosting quality and flavor. Trust me, once you try your own homemade granola, you’ll never go back to those overpriced bags again.
Ingredients You’ll Need
Here’s the beauty of granola: you start with a simple base and build it however you like. Here’s a solid list to get you rolling:
Basic Ingredients:
- 3 cups rolled oats (preferably old-fashioned, not quick oats)
- ½ cup nuts (almonds, pecans, walnuts—whatever you love)
- ½ cup seeds (sunflower, pumpkin, chia, or flaxseeds)
- ½ teaspoon salt
- 1 teaspoon cinnamon (optional but recommended)
Wet Ingredients:
- ⅓ cup coconut oil (or any neutral oil like avocado)
- ⅓ cup honey or maple syrup
- 1 teaspoon vanilla extract
Optional Add-ins (after baking):
- ½ cup dried fruit (cranberries, raisins, chopped apricots)
- Chocolate chips
- Coconut flakes
Feel free to mix and match based on what you have at home. The beauty of granola is its flexibility—it’s like a choose-your-own-adventure book but tastier.
Equipment Required
You don’t need fancy gadgets to make granola. Honestly, that’s another win for this recipe. Here’s all you’ll need:
- Large mixing bowl
- Measuring cups and spoons
- Spatula or wooden spoon
- Baking sheet (preferably rimmed)
- Parchment paper (for easier cleanup)
- Airtight storage container
That’s it! With these basics, you’re ready to rock and roll.
Step-by-Step Guide to Making Homemade Granola
Now, the real fun begins. Let’s break it down:
Step 1: Preheat Your Oven
First things first, set your oven to 300°F (150°C). A low and slow bake is the key to getting that perfectly crisp, golden granola without burning it. It’s tempting to crank up the heat to speed things along, but trust me—good things come to those who wait.
While the oven is heating, go ahead and line your baking sheet with parchment paper. It’ll save you from a sticky mess later.
Step 2: Mix Dry Ingredients
In a large bowl, combine your oats, nuts, seeds, salt, and cinnamon. Stir them up so they’re evenly distributed. This step ensures every bite has a bit of everything, instead of random clusters of just oats or just nuts.
Pro tip: Toast your nuts separately beforehand for an even deeper flavor. Just pop them into a dry pan for a few minutes until fragrant—game changer.
Step 3: Combine Wet Ingredients
Now it’s time to bring the magic together. In a smaller bowl (or a measuring cup for easy pouring), whisk together your coconut oil, honey (or maple syrup), and vanilla extract until fully combined. If your coconut oil is solid, you might need to gently melt it first. Just pop it in the microwave for about 20 seconds or heat it over low on the stovetop.
This mixture acts as the “glue” for your granola, binding all the dry ingredients together while adding natural sweetness and moisture. The vanilla gives everything a dreamy, cozy aroma you’ll fall in love with even before baking.
Pro Tip: Want a richer flavor? Brown your butter (if using butter instead of oil) for a toasty, nutty twist. It’s next-level delicious!
Step 4: Mix Everything Together
Pour the wet ingredients over the dry ingredients and stir, stir, stir! Make sure every oat and nut gets coated in that delicious mixture. It should look shiny but not drenched.
Be thorough but gentle—you want a nice even mix without crushing all your nuts and oats into powder. Think of it like folding whipped cream into batter: confident but tender.
If you want big granola clusters (and who doesn’t?), press some of the mixture together lightly with your hands before baking. Clumps form where the mixture sticks together, so a little manual squishing works wonders!
Step 5: Spread on Baking Sheet
Dump the granola onto your prepared baking sheet and spread it out evenly. You want a nice even layer, not too thick. If it’s piled up too much, it won’t crisp up properly.
Press the granola down gently with a spatula to help it clump up and create those irresistible big chunks. Remember: flat = crispy, lumpy = chewy. A balance of both is perfect for that ultimate texture explosion.
If you’re baking a big batch, consider using two trays to avoid overcrowding. Air circulation is key for even browning and crunchiness!
Step 6: Bake to Perfection
Slide your tray into the preheated oven and bake for about 20–25 minutes, giving it a stir halfway through to ensure even baking. If you like chunkier granola, only stir very gently or not at all.
Keep a close eye during the last 5 minutes—the difference between golden brown and burnt can happen real fast! You’re aiming for a rich, toasty color and a heavenly smell that fills your whole house.
Want extra crunch? After turning off the oven, crack the door open and let the granola sit inside for another 10–15 minutes to dry out further without overbaking.
Step 7: Cool and Store
This part is tough but important: let the granola cool completely on the baking sheet before you touch it. As it cools, it firms up and gets that satisfying crunch.
Once it’s cool, break it into clusters and stir in your dried fruits or chocolate chips if using. Then transfer everything into an airtight container. Stored at room temperature, your granola will stay fresh for up to two weeks—if it even lasts that long!
For long-term storage, you can freeze granola in a zip-top bag for up to three months. Just thaw at room temperature for an hour before eating.
Tips for the Perfect Granola
- Low and slow wins the race: Baking at 300°F instead of a higher temperature gives you crispy granola without burning.
- Don’t skimp on oil and sweetener: They’re key to clumping and flavor.
- Cluster hacks: Press your granola tightly together on the baking sheet before and during baking if you want those delicious chunky clusters.
- Flavor bombs: Add a sprinkle of nutmeg, cardamom, or even ginger for a spiced-up batch.
Feeling experimental? Try adding cocoa powder for a chocolatey batch, swap honey for molasses for a deeper flavor, or add a pinch of cayenne pepper for a spicy-sweet version!
Storage and Shelf Life
You’ve just made a big beautiful batch of homemade granola—now you need to store it right to keep it crispy and fresh. Luckily, it’s super easy!
After your granola has completely cooled (this is crucial—any trapped heat can cause sogginess), transfer it into an airtight container. Mason jars, snap-lock containers, or even resealable bags work perfectly. Keep it stored at room temperature in a cool, dry place, away from direct sunlight.
Homemade granola usually stays fresh for up to two weeks. If you want it to last even longer, pop it into the freezer! Simply pack it into a freezer-safe zip bag, squeezing out as much air as possible. It can last for up to three months frozen, and you can grab handfuls straight from the freezer—no need to thaw unless you prefer it at room temp.
Quick Storage Tips:
- Avoid moisture: Moisture is granola’s enemy. Make sure it’s totally dry before sealing.
- Label the date: Write the making date on your container so you don’t forget how old it is.
- Keep portions small: If you freeze it, portion it out into smaller bags for easy grab-and-go breakfasts.
With the right storage, your crunchy, nutty creation will stay as delicious as the day you baked it!
Serving Suggestions
Sure, grabbing a handful and munching away is awesome, but why stop there? Granola is one of the most versatile foods out there. Here are some tasty ways to enjoy it:
- Breakfast Bowls: Sprinkle granola over Greek yogurt and top with fresh berries for a nutritious and filling start to your day.
- Smoothie Toppers: Add a crunchy topping to your smoothie or smoothie bowl for a satisfying texture contrast.
- Dessert Layers: Layer it with whipped cream and fruit for a quick parfait that looks and tastes gourmet.
- Oatmeal Upgrade: Stir some granola into your morning oatmeal for extra crunch and flavor.
- Snack Bars: Press your granola into a lined pan, refrigerate, and cut into bars for homemade granola bars.
- Ice Cream Sundae: Use it as a topping for vanilla ice cream with a drizzle of honey for a drool-worthy dessert.
Granola isn’t just a food; it’s a lifestyle. Once you have a batch handy, you’ll find yourself tossing it into just about everything!
Common Mistakes to Avoid
Even though granola is pretty forgiving, there are a few common pitfalls that can turn your crunchy dreams into burnt nightmares. Let’s save you the heartache:
1. Baking at Too High a Temperature: High heat can scorch your granola before it has time to properly dry out. Stick to a low oven—around 300°F—and be patient.
2. Overcrowding the Pan: If the granola layer is too thick, it won’t crisp up properly. Spread it out in a thin, even layer and use two baking sheets if needed.
3. Adding Dried Fruit Too Early: If you bake your dried fruit along with the oats and nuts, it will dry out too much and turn into little rocks. Always add dried fruit after baking.
4. Not Stirring (or Over-Stirring): If you never stir at all, parts of your granola might burn. Stir once halfway through. But if you want big clusters, stir gently or not at all after pressing the granola down halfway through baking.
5. Skimping on the Fat or Sweetener: These ingredients aren’t just for flavor—they help bind everything together and create that iconic crunch. If you cut back too much, you’ll end up with dusty, crumbly granola.
Avoid these mistakes, and you’ll be well on your way to granola greatness every single time.
FAQs about Homemade Granola Recipe
1. How long does homemade granola last?
Homemade granola can stay fresh for up to 2 weeks when stored in an airtight container at room temperature. For longer storage, you can freeze it for up to 3 months.
2. Can I make granola without using oil?
Yes, you can! Swap the oil with unsweetened applesauce, mashed banana, or nut butter for a healthier, oil-free version of granola.
3. Why is my granola not crunchy?
If your granola isn’t crunchy, it might need a bit more time in the oven. Bake it low and slow, and make sure to let it cool completely — it crisps up as it cools!
4. Can I customize my granola ingredients?
Absolutely! Granola is super flexible. Feel free to add nuts, seeds, dried fruits, spices, or even chocolate chips to suit your taste.
5. Is homemade granola healthier than store-bought?
Yes! Homemade granola lets you control the sugar, fat, and additives, making it a cleaner and often healthier choice compared to many store-bought options.
6. How do I make clumpy granola?
To get those delicious clusters, press the granola down firmly on the baking sheet and avoid stirring it while baking. Once it cools, you’ll have plenty of crunchy clumps!
7. Can I use honey instead of maple syrup?
Definitely! Honey works just as well. It gives the granola a slightly different but equally delicious flavor profile.
Conclusion
Homemade granola isn’t just delicious—it’s a way to bring a little bit of joy into your everyday life. From the cozy smell filling your kitchen to the satisfying crunch with every bite, making your own batch is pure magic. It’s healthier, cheaper, and way more customizable than anything you can buy at the store.
Once you master the basics, you can get wildly creative: different nuts, seeds, spices, fruits—you name it! Your granola, your rules. So grab your oats, warm up that oven, and get ready to transform simple ingredients into something truly special.
And hey, don’t be surprised if you find yourself making it every week. It’s that good.