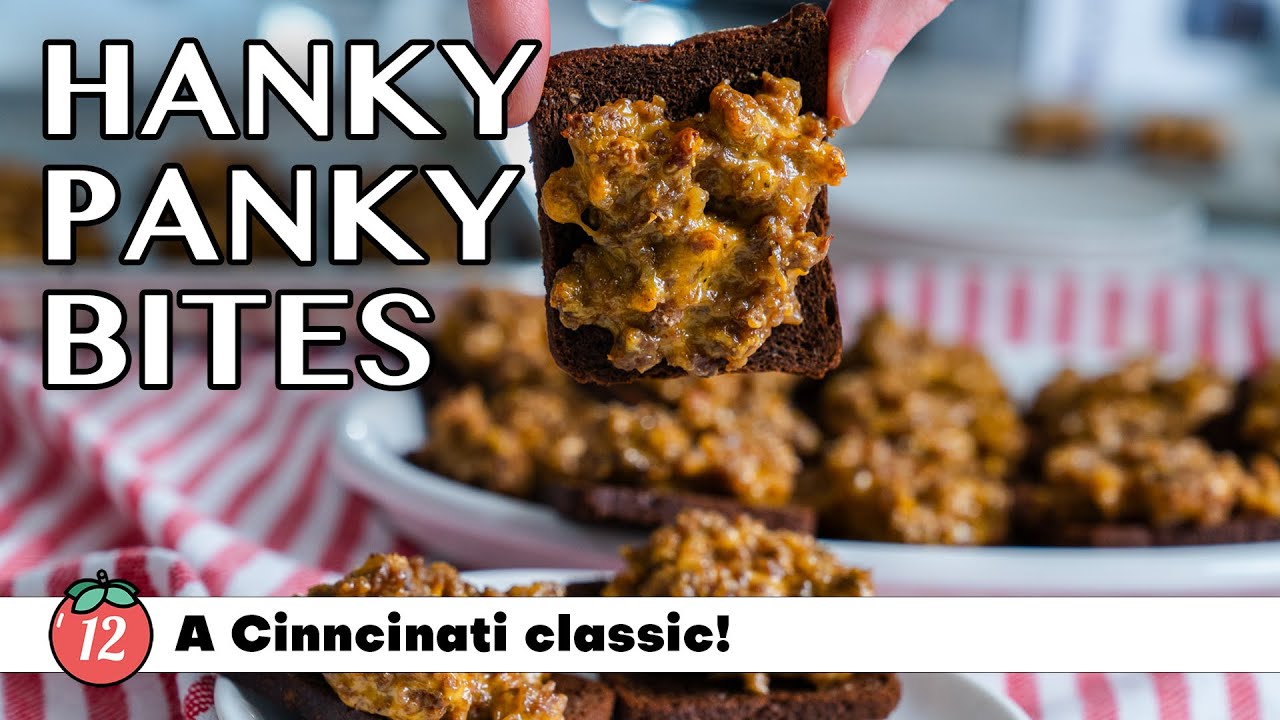
Hanky Panky Recipe: Hanky Panky might sound like a cheeky name, but in the culinary world, it’s a seriously delicious, crowd-pleasing appetizer that’s been passed down through generations. Picture this: gooey, melted cheese mingling with perfectly seasoned ground beef and spicy sausage, all perched on crisp party rye bread. It’s the kind of bite-sized comfort food that hits all the right notes—salty, spicy, savory, and irresistibly cheesy.
Typically served warm, Hanky Panky is a staple at gatherings, game nights, potlucks, and holiday parties. It’s known for being a nostalgic throwback to retro American cuisine, particularly popular in the Midwest. The best part? You can whip up a batch in under 30 minutes with minimal effort, and it’s guaranteed to disappear from any serving tray in record time.
Whether you’re new to the dish or it’s a family favorite, this guide will walk you through everything you need to know to make Hanky Panky from scratch. From ingredients to tips, and creative variations to serving suggestions—this is your go-to resource.
A Brief History Behind the Name
The origins of the name “Hanky Panky” are a bit unclear, but one thing’s for sure—it’s got personality. Some believe the term was coined in the 1940s or 50s when home cooks loved giving playful, catchy names to their culinary creations. It may not be the most conventional title, but it sticks in your mind, just like the dish itself.
The recipe is said to have strong roots in Midwest households, particularly in Ohio and surrounding states. Over time, it became a holiday staple, often handed down through families in handwritten recipe cards. While you may not find it in fancy cookbooks, Hanky Panky has earned its place in the hall of fame of comfort foods.
Why You’ll Love This Dish
Here’s why Hanky Panky should be on your next party menu:
- Quick and easy: You can make a full batch in less than 30 minutes.
- Make-ahead friendly: Prepare the topping in advance and assemble when ready to serve.
- Addictively delicious: The combo of sausage, beef, and melty cheese is hard to beat.
- Customizable: You can tweak it to fit your taste—spicy, mild, cheesy, or even vegetarian.
So, if you’re looking for a flavorful, finger-friendly snack that packs a punch and pleases every palate, Hanky Panky is your answer.
Ingredients You’ll Need
Main Ingredients
To get started on your Hanky Panky, you’ll need some basic ingredients that are easy to find at any grocery store. Here’s the core lineup:
- 1 lb ground beef: Choose an 80/20 blend for that juicy, meaty bite.
- 1 lb spicy pork sausage: Jimmy Dean or your favorite brand will work.
- 1 loaf cocktail rye bread: These mini slices are perfect for bite-sized snacks.
- 1 lb Velveeta cheese, cubed: This processed cheese melts beautifully and gives the mixture its signature gooey texture.
This simple combo is what makes Hanky Panky so comforting. You get the richness from the meat, the creaminess from the cheese, and the crunch from the toasted rye. Classic, bold, and satisfying.
Optional Add-Ins and Variations
Want to kick it up a notch? Here are some flavorful additions to consider:
- Red pepper flakes: For extra heat.
- Worcestershire sauce: Adds a deeper umami flavor.
- Diced jalapeños: Great for spice lovers.
- Minced garlic or garlic powder: For a richer base flavor.
- Shredded mozzarella or cheddar: If you want to blend cheeses for complexity.
Mix and match to your taste, and don’t be afraid to experiment. That’s the beauty of homemade Hanky Panky—it’s endlessly customizable.
Substitutes for Special Diets
Have dietary needs? No worries! Here are some swaps:
- Gluten-free bread: Use gluten-free cocktail rye or toast up your favorite gluten-free loaf cut into small squares.
- Low-fat cheese or lean meat: If you want to cut down on calories or fat, use lean ground turkey or low-fat cheese (though you may sacrifice some of that classic gooey texture).
- Vegan alternative: Try plant-based meat crumbles and dairy-free cheese. The flavor profile will be different, but the snack remains fun and shareable.
The key is to make it work for you—just keep that savory, cheesy, bite-sized joy intact.
Tools and Kitchen Equipment Required
Essential Kitchen Tools
You won’t need a lot of fancy gadgets to make Hanky Panky. A few basic kitchen tools will get the job done:
- Skillet or frying pan: To brown the meat and sausage.
- Wooden spoon or spatula: For stirring and breaking up the meat.
- Cutting board and knife: To cube the cheese and prep any additional ingredients.
- Baking sheet: To arrange and toast the bread slices.
- Oven or toaster oven: Needed for warming the assembled bites.
These tools are probably already in your kitchen, and they’ll make your cooking process smooth and easy.
Prep Tools That Make It Easier
Want to make things even more efficient? Here are a few helpful extras:
- Food chopper: To speed up garlic or onion prep.
- Microwave-safe bowl: If you want to melt the cheese separately for easier mixing.
- Storage containers: Great for prepping the mixture ahead of time.
When your tools are ready, the whole dish comes together seamlessly—so make sure your kitchen is set before you dive in.
Step-by-Step Instructions to Make Hanky Panky
Step 1: Browning the Meat
This is where the magic begins. Start by heating a large skillet over medium heat. Add your ground beef and spicy sausage (remove the casings if needed). Use a spatula to break the meat into small crumbles as it cooks.
Cook until the meat is fully browned, with no pink remaining—this usually takes about 8–10 minutes. Stir occasionally to prevent sticking and ensure even browning. Once done, drain any excess fat from the pan. This step is crucial to avoid a greasy topping.
Not only does browning the meat create a rich, savory base, but the combination of beef and sausage ensures every bite has layers of flavor and just the right amount of spice.
Step 2: Melting the Cheese
Now that your meat mixture is sizzling and aromatic, it’s time to add the cheesy goodness. Keep the skillet on low heat and toss in the cubed Velveeta cheese. You can also microwave the cheese separately in a microwave-safe bowl if you’re short on stove space, then combine it with the meat.
As the cheese starts melting, stir constantly to prevent it from sticking to the bottom or burning. Velveeta melts smoothly and creates a luscious, creamy texture that binds all the ingredients together.
This is also the stage where you can throw in your optional flavor enhancers—think a dash of Worcestershire sauce, some red pepper flakes for heat, or minced garlic for depth. Mix everything thoroughly until it’s fully incorporated and smooth. Once the cheese and meat mixture looks gooey and golden, remove it from heat.
The result? A savory, rich topping that smells absolutely mouthwatering—and trust us, it tastes even better.
Step 3: Mixing and Seasoning
With your cheesy meat base ready, it’s time to refine the flavor. This step is your chance to personalize the dish and make it your own.
Taste the mixture first. If you want more kick, toss in a pinch of cayenne or a few chopped jalapeños. Want a smokier profile? Add a splash of smoked paprika. Craving complexity? A teaspoon of Dijon mustard or a shake of Italian seasoning can add that layered flavor.
Make sure to mix everything well so each bite gets a consistent blend of cheese, meat, and spice. Once seasoned to your liking, you can let the mixture sit for a few minutes off the heat. It will thicken slightly, which makes it easier to spoon onto the bread later.
Here’s a quick tip: if you’re preparing for a party, this is the perfect time to transfer the meat mixture to a slow cooker to keep it warm until you’re ready to serve. It’ll stay perfectly scoopable for hours without drying out.
Step 4: Toasting the Bread
While your cheesy meat mixture is cooling just a bit, preheat your oven to 375°F (190°C). Lay out your cocktail rye bread slices on a baking sheet in a single layer. No overlapping! You want each slice to toast evenly.
Pop them into the oven for 4–5 minutes, just enough to get them slightly crispy. You don’t want them rock hard—just firm enough to hold up under the weight of the topping without getting soggy. This step is often skipped, but it’s a game-changer. Lightly toasting the bread ensures a perfect contrast between the crunchy base and gooey top.
Alternatively, you can toast the slices in a toaster oven or under the broiler if you’re watching them closely. Just don’t walk away—they can go from golden brown to burnt in seconds.
Once toasted, let them cool for a minute before topping. A warm but not scorching surface holds the mixture better and gives you more control during assembly.
Step 5: Assembling and Serving
Here comes the fun part—putting it all together. Take a generous spoonful of your cheesy meat mixture and place it right in the center of each toasted bread slice. Use the back of the spoon to spread it evenly toward the edges, but don’t overload them. You want a balanced bite, not a topping landslide.
Arrange the topped slices back on the baking sheet and return them to the oven for another 5–7 minutes. This reheating step lets the topping meld with the toast and helps everything lock together into a crispy, cheesy, savory bite.
When they come out of the oven, let them rest for a minute or two. They’ll firm up slightly, making them easier to handle. Then plate them up and serve warm—your guests will be circling back for seconds (and thirds).
If you’re serving them at a party, consider garnishing with a sprinkle of fresh parsley or a dash of hot sauce. And if you’re prepping for a potluck, wrap them in foil and keep them warm in an insulated carrier.
Pro Tips for Perfect Hanky Panky Every Time
Avoid These Common Mistakes
Even simple recipes can trip you up if you’re not careful. Here are a few things to watch out for when making Hanky Panky:
- Skipping the toast: Placing the meat mixture on soft, untoasted bread can lead to soggy bites that fall apart—no fun!
- Using too much grease: Make sure to drain the meat mixture well before adding cheese. Too much fat makes it oily and unpleasant.
- Overloading the bread: Piling on too much topping makes it messy and hard to eat. Keep it balanced for the best result.
- Not seasoning enough: Don’t forget to taste and adjust. A little extra spice or flavor can take your mixture from good to outstanding.
Flavor Enhancing Tricks
Want to really wow your guests? Try these tricks:
- Add a smoky touch: A dash of liquid smoke or smoked paprika can elevate the savory flavors.
- Mix up the cheese: Blend in sharp cheddar or pepper jack with the Velveeta for a deeper cheese profile.
- Use garlic butter toast: Brush your bread with garlic butter before toasting—it adds a gourmet twist that’ll have people asking for your “secret ingredient.”
- Top with pickled jalapeños or olives: A touch of acidity balances out the rich meat and cheese for a more complex bite.
Hanky Panky is one of those recipes where a little creativity can go a long way. Make it your own, and it’ll become your signature dish in no time.
Creative Variations of the Hanky Panky Recipe
Spicy Hanky Panky
Love a little fire in your food? Let’s turn up the heat. The standard Hanky Panky already has some kick thanks to spicy sausage, but you can take it further and make a version that’ll get your taste buds dancing.
Here are a few ways to spice it up:
- Use hot Italian sausage or even chorizo instead of regular spicy sausage.
- Add diced jalapeños or serrano peppers to the meat mixture during cooking.
- Throw in a pinch of cayenne or crushed red pepper flakes when melting the cheese.
- Top each piece with a slice of pickled jalapeño or a drizzle of hot sauce before baking for that final punch.
The spicy Hanky Panky isn’t just about heat—it’s about balance. You’ll still get the gooey cheese and savory meat, but now with a fiery twist that makes each bite more exciting. It’s the kind of appetizer that keeps people coming back for “just one more” until the tray is empty.
If you’re serving guests, consider offering both a spicy and mild version to keep everyone happy.
Veggie Lover’s Version
If you’re catering to vegetarians or just want to try a lighter, meat-free version of Hanky Panky, this one’s for you. It’s just as hearty, flavorful, and crowd-pleasing—minus the meat.
Here’s how to do it:
- Replace the ground beef and sausage with plant-based meat alternatives like Beyond Meat or crumbled tempeh.
- Add sautéed veggies such as mushrooms, bell peppers, and onions to build depth and texture.
- Use plant-based cheese or a blend of sharp cheddar and cream cheese to replicate that creamy consistency.
To really lock in the umami flavor, toss in a splash of soy sauce or Worcestershire (make sure it’s vegetarian), and season well with garlic, paprika, and Italian herbs. Even meat-lovers will be reaching for seconds when they taste this veggie-packed version.
This variation is not only satisfying, but it’s also a fantastic way to add some greens and color to your spread—without compromising on flavor.
Keto-Friendly Hanky Panky
Watching your carbs? You don’t have to miss out on this cheesy classic. The keto-friendly version of Hanky Panky swaps out the bread but keeps all the bold flavors intact.
Here’s how to keto-fy it:
- Ditch the rye bread: Instead, use slices of cucumber, bell pepper halves, or bake the mixture into mini portobello mushrooms or zucchini boats.
- Stick with full-fat cheese like sharp cheddar, cream cheese, or mozzarella. Velveeta can work, but double-check the carb content.
- Use grass-fed ground beef and sugar-free sausage for a healthier fat profile.
- Season boldly: Since keto recipes thrive on flavor, don’t be shy with garlic, pepper, and herbs.
Serve it up on a platter with low-carb toppings like sour cream, guac, or even crushed pork rinds for crunch. It’s a low-carb, high-flavor snack that satisfies without the guilt.
Serving Suggestions
Best Side Dishes to Pair
Hanky Panky might be the star of the show, but it shines even brighter with the right supporting cast. Whether you’re hosting a party or making it part of a hearty dinner, pairing it with the right sides can take things to the next level.
Here are some top picks:
- Crispy veggie sticks like celery, carrots, or bell peppers for a fresh crunch.
- Creamy coleslaw to balance the savory with a touch of tangy sweetness.
- Deviled eggs or stuffed mushrooms for variety on an appetizer tray.
- Chips and dip like queso or salsa if you’re building a game-day spread.
- A cold pasta salad or potato salad to round out a potluck table.
If you’re serving it as a main, consider adding a simple side salad with a light vinaigrette. The crisp greens help cut through the richness of the cheesy meat topping.
When pairing drinks, go for cold beer, sparkling water, or even a bold red wine to stand up to the rich, savory flavors.
Serving for Parties or Events
Hanky Panky was made for sharing. It’s easy to make in large batches, transport, and reheat—which makes it a top-tier choice for any kind of event. Whether it’s a birthday bash, football Sunday, or holiday feast, these bites are guaranteed to be a hit.
Here’s how to serve them like a pro:
- Make the topping in advance and keep it warm in a slow cooker.
- Toast the bread just before serving to keep it crisp.
- Offer a variety of toppings on the side—hot sauce, chopped scallions, or even shredded lettuce for those who want to customize.
- Use decorative toothpicks or cocktail picks for easy grab-and-go convenience at parties.
Want to impress? Serve them on a wooden charcuterie board with garnishes like pickles, olives, or cherry tomatoes. It adds color and elevates the presentation from casual to classy in seconds.
Storage and Reheating Instructions
Storing Leftovers Properly
If (and that’s a big “if”) you have any Hanky Panky leftovers, don’t worry—they store like a dream. Whether you’re planning to save them for later or prep in advance, here’s what to do:
- Cool them completely first so condensation doesn’t make them soggy.
- Place them in an airtight container in a single layer, or separate layers with parchment paper.
- Refrigerate for up to 3–4 days.
You can also store the cheese-meat mixture separately from the bread. This is especially helpful if you want fresh toast when reheating.
For longer storage:
- Freeze the meat-cheese mix in a freezer-safe container for up to 2 months.
- Freeze pre-assembled Hanky Pankies by flash freezing them on a tray, then storing in a freezer bag.
They’ll be ready to bake and serve whenever the craving hits—or when surprise guests show up.
Reheating Without Losing Texture
Reheating Hanky Panky is easy, but doing it right ensures they stay just as tasty as when fresh.
Here are a few foolproof methods:
- Oven method (recommended): Preheat to 350°F, place on a baking sheet, and warm for 10–12 minutes until hot and bubbly.
- Toaster oven: Perfect for reheating a small batch quickly without making them soggy.
- Microwave: Works in a pinch, but the bread may turn soft. Place a paper towel underneath to help absorb moisture.
If you’ve frozen the topping, thaw it overnight in the fridge or microwave it gently before spreading it on fresh toasted bread. Then bake as you would for a freshly made batch.
Want to make it feel new again? Add a little shredded cheese on top before reheating for an extra cheesy layer.
Nutritional Information and Health Considerations
Calories and Macronutrient Breakdown
Let’s be real—Hanky Panky is indulgent. It’s rich, meaty, cheesy, and served on bread. But if you’re watching your intake or just curious about what you’re eating, here’s a general breakdown for one serving (roughly 2 slices):
- Calories: 300–350 kcal
- Protein: 12–15g
- Fat: 20–25g
- Carbohydrates: 12–15g
- Sodium: 600–800mg
Note: These values can vary depending on the brand of sausage, cheese, and bread used.
While it’s definitely not a low-calorie snack, it’s satisfying enough that a couple of pieces can hold you over. And when made in moderation or with healthier alternatives, you can enjoy it guilt-free.
Want to cut down the fat and calories?
- Swap out regular sausage for lean turkey sausage.
- Use reduced-fat cheese or smaller portions of full-fat cheese.
- Serve on cucumber slices or low-carb crackers instead of bread.
Even with a few tweaks, Hanky Panky stays full of flavor—and sometimes, that’s what matters most.
Making It Healthier
You don’t have to give up taste to make Hanky Panky a little better for you. With just a few smart substitutions, you can lighten it up while keeping the comfort-food vibe strong.
Here’s how:
- Lean meat options: Use ground turkey or chicken sausage instead of pork. They’re lower in saturated fat but still flavorful.
- Low-sodium cheese and seasonings: Processed cheese can be loaded with salt. Look for reduced-sodium versions or use shredded mozzarella or cheddar instead.
- Veggie boost: Mix in diced mushrooms, spinach, or bell peppers for extra nutrients and texture.
- Whole grain or sprouted bread: If you’re sticking with bread, make it count nutritionally.
Balancing indulgent ingredients with smarter choices lets you enjoy your favorite comfort foods with a little less guilt—and a lot more goodness.
FAQs about Hanky Panky Recipe
What is Hanky Panky food made of?
Hanky Panky is a savory, cheesy appetizer made with ground beef, spicy sausage, and melty Velveeta cheese, all served on cocktail rye bread. It’s basically comfort food in bite-size form.
Why is it called Hanky Panky?
No one knows for sure, but the name adds a little mischief to the mix! It likely started as a fun, catchy name at Midwestern parties, and the vibe stuck.
Can I make Hanky Panky ahead of time?
Absolutely. Just prep the meat and cheese mixture in advance, refrigerate it, then heat and assemble when you’re ready to serve.
Can I freeze Hanky Panky?
Yes, you can! Freeze the cooked mixture or the assembled bites. Just reheat in the oven or air fryer and you’re good to go.
What are the best breads to use?
Classic cocktail rye is traditional, but you can switch it up with French baguette slices or even toasted sourdough rounds if you’re feeling fancy.
Conclusion
Hanky Panky is the kind of recipe that instantly transports you to warm kitchens, family gatherings, and comfort food heaven. It’s nostalgic, flavorful, and oh-so-easy to whip up. Whether you stick with the classic version or try one of the many variations, it’s guaranteed to be a hit with just about everyone.
From game-day snacks to holiday appetizers, this cheesy, meaty delight is your go-to crowd-pleaser. What makes it even better is how versatile it is—you can tweak it to fit dietary needs, spice preferences, or whatever you’ve got in your pantry.
So the next time you need something fast, tasty, and downright irresistible, remember: it’s always a good time for some Hanky Panky.