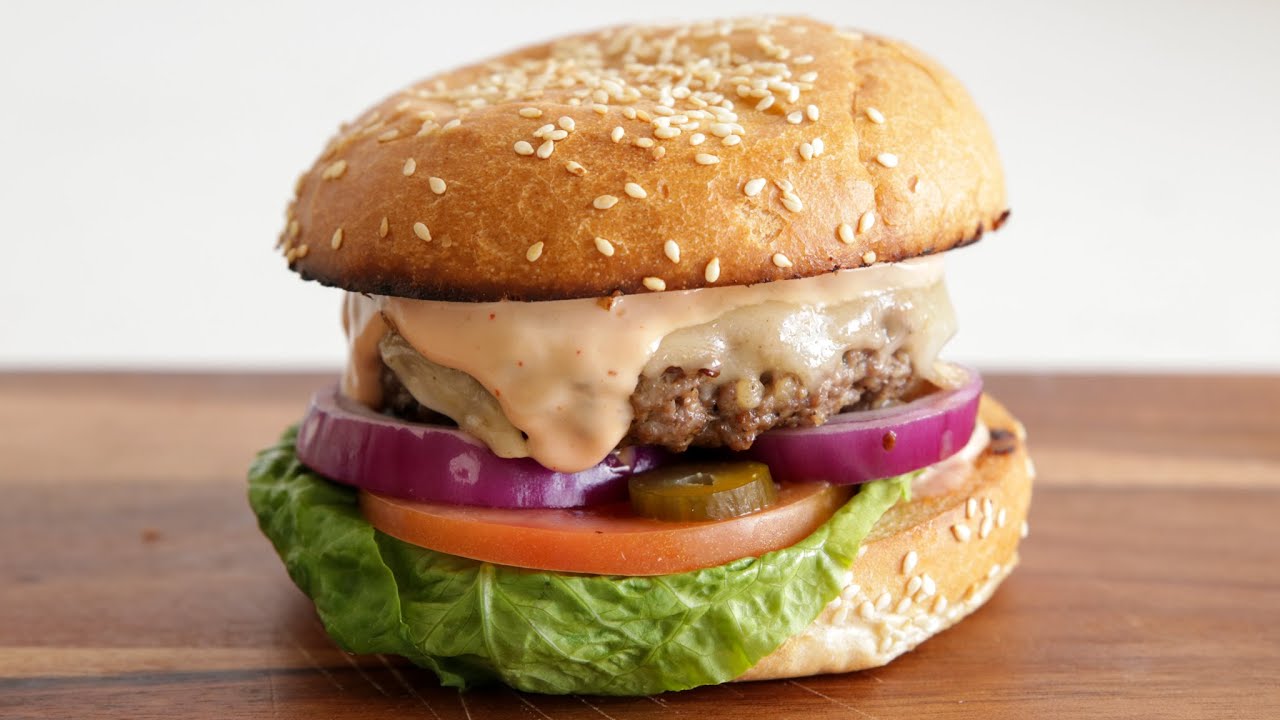
Hamburger Patties Recipe: There’s nothing quite like a juicy, homemade hamburger. Whether you’re firing up the grill for a weekend BBQ or whipping up a quick dinner for the family, learning how to make perfect hamburger patties can elevate your cooking game.
Forget the frozen grocery-store patties—this guide will walk you through everything you need to know to make juicy, flavorful burger patties from scratch.
Ready to become the burger boss? Let’s dive right in.
Introduction to Homemade Hamburger Patties
Why Make Your Own Patties?
Let’s be honest: homemade just hits different. When you make your own burger patties, you’re in full control of what goes into your food—no weird fillers, additives, or mystery meat. You get to customize everything to your taste, from the type of beef you use to the seasonings and extras you throw in. Plus, it’s a whole lot more satisfying to bite into a burger you built from the ground up.
And here’s the thing: it’s cheaper, too. With just a few simple ingredients and about 20 minutes of your time, you can create restaurant-quality burgers that’ll impress any guest. You’ll also notice the difference in texture. Homemade patties are tender, juicy, and packed with flavor—not like those dry, rubbery ones you get from the freezer section.
What Makes a Great Patty?
A great hamburger patty comes down to three key factors: the right meat, proper seasoning, and the perfect cooking method. The meat should have a good fat content—typically 80/20 (lean/fat) ground beef is the gold standard. Why? Because fat equals flavor and moisture.
Then comes seasoning. Salt and pepper are must-haves, but don’t be afraid to play around with other spices like garlic powder, onion powder, or even a splash of Worcestershire sauce for that extra umami punch.
Lastly, the method. A gentle touch is key when forming patties. Overworking the meat can lead to tough burgers. And don’t forget to chill the patties before cooking—this helps them hold their shape and stay juicy on the grill or skillet.
Ingredients You’ll Need
Best Meat for Juicy Patties
The foundation of any great hamburger is the beef. Ground chuck with an 80/20 ratio (80% lean, 20% fat) is the go-to choice for a reason—it strikes the perfect balance between flavor and texture. If you go leaner, your burgers might dry out. More fat, and they could fall apart or be too greasy.
You can also experiment with blends. A mix of chuck and brisket, or even short rib, can create a gourmet flavor profile. Some burger purists even grind their own meat at home to get the perfect texture and flavor, but pre-ground beef from a quality butcher works just as well.
If you’re into alternatives, ground turkey, chicken, or even plant-based meats can work too—just adjust your seasonings and cooking times accordingly.
Essential Seasonings
While salt and pepper are non-negotiable, don’t stop there. Garlic powder, onion powder, paprika, cayenne pepper (if you like heat), and dried herbs like oregano or thyme can take your patties to the next level.
Here’s a basic blend to start with for 1 pound of ground beef:
- 1 tsp salt
- ½ tsp black pepper
- ½ tsp garlic powder
- ½ tsp onion powder
- 1 tsp Worcestershire sauce (optional, but highly recommended)
The key is not to overpower the beef—seasonings should enhance, not mask, the flavor.
Optional Add-Ins for Flavor
Want to really impress your taste buds? Try mixing in some finely chopped onions, shredded cheese, or even a spoonful of Dijon mustard right into the meat. Some people swear by adding a bit of cold butter or cream to make their patties even juicier.
Here are some optional add-ins to consider:
- Chopped jalapeños for heat
- Shredded cheddar for a cheesy center
- Minced mushrooms for an umami boost
- BBQ sauce for a smoky twist
Just be careful not to go overboard—too many mix-ins can make the patties fall apart.
Equipment You’ll Need
Kitchen Tools for the Perfect Patty
Before you get into the nitty-gritty of patty making, you’ll want to gather a few essential kitchen tools. The good news? You don’t need anything fancy. Most of the tools you need are probably already in your kitchen drawer.
Here’s a basic list:
- Mixing bowl: A large bowl to combine your meat and seasonings.
- Burger press or your hands: A burger press helps create evenly shaped patties, but clean hands work just fine too.
- Kitchen scale (optional): Useful for ensuring uniform patty sizes. This helps them cook evenly.
- Wax paper or parchment paper: Keeps patties from sticking together when stacking or chilling.
- Grill or skillet: Cast-iron skillets are perfect for that crispy crust, while a grill gives you that smoky char.
- Spatula: For flipping patties without breaking them apart.
- Meat thermometer (optional): Helps you get the perfect doneness, especially for thicker patties.
Prepping Your Workspace
Organization is key. A cluttered kitchen slows everything down, so take a few minutes to get your workspace ready. Start by clearing off a section of your counter, cleaning your hands and tools, and setting out all your ingredients.
Pro tip: Use a tray or large plate lined with parchment paper to hold your formed patties before they go on the heat. This not only keeps things clean but also makes for an easy transfer to the grill or pan.
Having everything within reach—from seasonings to your mixing bowl to the spatula—will streamline your process and make patty prep a breeze. Trust me, this small step makes a huge difference in your cooking flow.
Step-by-Step Guide to Making Hamburger Patties
Step 1: Choose the Right Meat
We touched on this earlier, but it’s worth repeating: the quality and fat content of your meat will make or break your burger. Stick with ground chuck that’s 80/20 or 85/15. You want that fat because it bastes the meat from the inside as it cooks, creating a juicy, flavorful burger.
Avoid overly lean meats unless you’re deliberately going for a healthier version. They just don’t have enough fat to stay moist during cooking. If you’re buying meat at the butcher, don’t be afraid to ask for a custom grind—some will even grind fresh chuck on the spot.
Want to level up? Try a blend. A mix of ground brisket and short rib with your chuck? Chef’s kiss. The depth of flavor is unbelievable.
Step 2: Mix Seasonings and Add-Ins
Once your meat is in the bowl, it’s time to season. Sprinkle your chosen spices over the beef and gently mix them in with your hands. The goal is to distribute the seasoning without compacting the meat too much—overmixing leads to tough burgers.
If you’re adding onions, cheese, or other mix-ins, this is the time. Fold them in gently. You want everything to be well combined, but still light and airy.
A common rookie mistake? Adding too much salt directly to the mix and letting it sit. Salt breaks down the meat’s proteins, which can make your patties gummy if they rest too long before cooking. To avoid this, you can season the outside just before grilling instead.
Step 3: Form the Patties Properly
Here comes the fun part—forming your patties. Divide your meat into equal portions (a kitchen scale helps here if you want uniform burgers). Aim for about 4 to 6 ounces per patty for a hearty, diner-style burger.
Form each portion into a ball, then gently press into a disk shape, about ¾-inch thick. Don’t pack them too tightly! Keep it loose so the texture stays tender. Make a small indentation in the center with your thumb—this helps the burger cook evenly and prevents it from puffing up in the middle.
Lay each patty on a piece of parchment paper and repeat until you’ve used all your meat. If stacking them, put a sheet of paper between each one to keep them from sticking.
Step 4: Chill the Patties
Chilling might sound unnecessary, but it’s a crucial step that helps the fat solidify. Cold patties hold their shape better when they hit the hot grill or skillet. It also reduces the risk of the patty falling apart or becoming too soft during cooking.
Place the patties in the fridge for at least 15–30 minutes. If you’re prepping ahead, you can even store them in the fridge for up to 24 hours—just cover them tightly with plastic wrap.
Planning a BBQ? You can freeze patties between layers of parchment paper in a sealed bag or container. Just thaw in the fridge overnight before cooking.
Step 5: Cooking the Patties to Perfection
Now we’re talking. Whether you’re grilling, pan-frying, or broiling, high heat is your best friend when cooking burger patties. It creates that irresistible crust on the outside while keeping the inside juicy.
Here’s how to do it:
- Preheat your grill or skillet until it’s hot—like really hot.
- Add the patties and cook for about 3–4 minutes per side for medium-rare, 5–6 minutes for medium, and 7+ minutes for well-done.
- Flip once—no need to press them down. That just squeezes out all the juices.
- Add cheese in the last minute of cooking if you want a melt-in-your-mouth finish.
Use a meat thermometer for accuracy:
- 125°F for rare
- 135°F for medium-rare
- 145°F for medium
- 160°F for well-done (recommended for food safety)
Once done, let the patties rest for a few minutes before serving. This allows the juices to redistribute, keeping every bite tender and flavorful.
Tips for Juicy and Flavorful Patties
Avoiding Common Mistakes
Even the best intentions can go sideways if you make a few rookie mistakes while making hamburger patties. Here are some of the most common blunders and how to avoid them:
- Overworking the meat – This is the most frequent mistake. When you handle the meat too much, it becomes compact and chewy. Mix just until everything is combined and then stop.
- Using lean meat – Fat equals flavor. If you go too lean, your patties will be dry and flavorless. Always aim for 80/20 ground beef.
- Skipping the chill step – Not chilling the patties before cooking can lead to them falling apart on the grill. Letting them rest in the fridge for 15-30 minutes helps them stay firm and cook evenly.
- Pressing down while cooking – Smashing the patty with your spatula might make you feel like a pro, but it forces all the juices out. Resist the urge unless you’re going for a smashed burger style (which is a whole different recipe).
- Not seasoning enough – Underseasoned burgers can taste flat. Don’t be afraid to be generous with your salt and spices—just be careful not to over-salt before storing for a long time.
- Overcooking – Unless you’re specifically aiming for a well-done burger, don’t walk away from the grill. Use a thermometer and keep an eye on the patties to avoid drying them out.
A little attention to detail can make all the difference between a decent burger and a jaw-droppingly delicious one.
Tricks for Keeping Patties Moist
Want to level up your burger game? Try these professional tips for maximum juiciness:
- Add a cold fat – Mixing a small cube of cold butter or a spoonful of mayonnaise into your ground beef can keep it extra moist. As it melts during cooking, it bastes the meat from the inside out.
- Use wet ingredients – Ingredients like chopped onions or mushrooms naturally release moisture while cooking. Just be sure to chop them finely so they don’t break the patty apart.
- Avoid salt too early – Salt draws moisture out of the meat, which can lead to dry burgers if the patties sit too long before cooking. Either season right before cooking or just season the exterior.
- Cook on medium-high heat – This gives you a great sear on the outside while leaving the inside juicy. Too low and you’ll dry the burger out; too high and you’ll char the outside before the inside is cooked.
- Rest your patties after cooking – This one’s crucial. Let them sit for 5 minutes before serving to allow the juices to redistribute. If you cut or bite into them too soon, the juices will run out and you’ll be left with a dry burger.
Even with a simple recipe, a few extra tricks can make your burger stand out like something from a gourmet restaurant.
FAQs about Hamburger Patties Recipe
1. What is the best meat for hamburger patties?
Ground beef with 80/20 fat content (80% lean meat, 20% fat) is ideal. The fat keeps the patties juicy and flavorful.
2. Can I make hamburger patties without breadcrumbs or egg?
Yes! You can make simple patties with just ground beef and seasonings. Breadcrumbs and eggs are optional and help with binding, especially if you’re adding veggies or other ingredients.
3. How do I keep my patties from falling apart?
Avoid over-mixing the meat and chill the patties before cooking. If needed, add an egg or a tablespoon of breadcrumbs for better structure.
4. Should I press down on the patties while cooking?
No. Pressing removes the juices and dries out the burger. Instead, let it cook undisturbed for a few minutes on each side.
5. How long should I cook hamburger patties?
Cook for 3–4 minutes per side on medium-high heat for medium doneness. Adjust time based on thickness and desired doneness.
6. Can I freeze homemade hamburger patties?
Absolutely! Freeze them raw with parchment paper between each patty. Store in an airtight bag or container for up to 3 months.
7. What seasonings go best in hamburger patties?
Classic seasonings include salt, black pepper, garlic powder, onion powder, and Worcestershire sauce. You can also customize with paprika, chili powder, or herbs.
8. Can I make hamburger patties in the oven?
Yes, you can bake them at 400°F (200°C) for about 15–20 minutes, flipping halfway through for even cooking.
9. How thick should hamburger patties be?
Aim for about ¾-inch thick. Press a small indentation in the center with your thumb to help them cook evenly and prevent puffing.
10. Are homemade patties healthier than store-bought?
Yes. Homemade patties give you control over the ingredients, fat content, and seasoning, making them a healthier and tastier option.
Conclusion
Making your own hamburger patties at home isn’t just easy—it’s also incredibly rewarding. With the right meat, a few key seasonings, and some smart cooking techniques, you can create burgers that rival any restaurant. Whether you’re a grill master or a kitchen rookie, this step-by-step guide gives you all the tools and know-how you need to impress friends, family, or just treat yourself to a juicy, flavorful burger done right.
So next time you’re tempted by frozen patties, skip the shortcut. Trust your hands, trust your grill, and build your burger from the ground up. Your taste buds will thank you.


