Hamburger Gravy Recipe: Hamburger gravy is the ultimate comfort food. Think of it as the cozy cousin of the traditional brown or white gravy, infused with the rich, savory flavor of seasoned ground beef. At its core, it’s a simple dish made with ground beef, flour, and milk or broth, cooked together until you have a smooth, thick, and hearty sauce. While it’s incredibly easy to prepare, the depth of flavor it delivers is next-level.
This is the kind of recipe that takes you back to childhood — maybe it was a staple in your school cafeteria or a quick dinner mom used to whip up on busy nights. No matter how you were introduced to it, the warm, creamy texture and the umami-rich taste of the ground beef make it unforgettable. Whether you pour it over mashed potatoes, biscuits, noodles, or even toast, it’s always a satisfying meal that feels like a warm hug on a plate.
And here’s the kicker: it’s cheap, filling, and requires just a few pantry staples. So, if you’re in the mood for something hearty, quick, and nostalgic, this is your go-to dish.
Why You’ll Love This Recipe
- Fast & Easy: Ready in under 30 minutes, with just one skillet to wash.
- Budget-Friendly: Ground beef is affordable, and the other ingredients are likely already in your kitchen.
- Versatile: Serve it over anything — rice, pasta, toast, mashed potatoes, biscuits — you name it.
- Customizable: Make it your own by adding mushrooms, onions, garlic, or even hot sauce.
- Comfort Food Vibes: Rich, savory, and filling — perfect for chilly evenings or family dinners.
Trust me, once you try this homemade hamburger gravy, you’ll wonder how you ever lived without it.
Ingredients You’ll Need
Main Ingredients
Let’s break down the essentials that make this dish mouthwatering:
- Ground Beef: The star of the show. Opt for 80/20 ground beef for that ideal balance of flavor and fat. If you prefer a leaner option, 90/10 works too, but you may need to add a bit of butter or oil to compensate.
- All-Purpose Flour: This is your thickener — it soaks up all the delicious beef fat and forms the base of your gravy.
- Milk or Beef Broth: Depending on whether you want a creamier or meatier flavor, either will work. You can also use a mix of both!
- Salt & Pepper: Don’t underestimate the power of seasoning. Always taste and adjust.
- Butter (optional): If your beef is super lean, butter adds richness and helps create that silky roux.
- Onions (optional): Sautéed onions bring in natural sweetness and depth.
Here’s a quick ingredient table:
| Ingredient | Quantity | Notes |
|---|---|---|
| Ground beef | 1 lb | 80/20 preferred |
| Flour | 1/4 cup | For thickening |
| Milk/Broth | 2 to 2.5 cups | Adjust for desired thickness |
| Salt | 1 tsp (to taste) | Start small and adjust |
| Black Pepper | 1/2 tsp | Freshly ground is best |
| Butter | 2 tbsp (optional) | Only if beef is very lean |
| Onion | 1 small (optional) | Finely chopped |
Optional Add-Ins and Variations
Feel like jazzing it up a bit? Try these optional ingredients:
- Mushrooms: Add earthiness and an umami boost.
- Garlic: One or two cloves minced can elevate the entire dish.
- Hot Sauce or Red Pepper Flakes: For a bit of heat.
- Heavy Cream: Makes the gravy ultra-rich and creamy.
- Soy Sauce or Worcestershire: Enhances the savory profile.
The beauty of hamburger gravy is in its flexibility — mix, match, and make it your own!
Kitchen Tools Required
Basic Tools for Cooking
Before we start cooking, let’s make sure you’ve got everything on hand. The great part? You don’t need any fancy gadgets — just a few basics:
- Large Skillet or Sauté Pan: Preferably non-stick or cast iron for even browning.
- Wooden Spoon or Spatula: Helps break up the beef and stir the roux.
- Measuring Cups and Spoons: Accuracy matters when it comes to gravy consistency.
- Whisk: Essential for a lump-free gravy.
That’s it. No blenders, no mixers — just good old-fashioned stove-top cooking.
Tips on Choosing the Right Utensils
- Skillet Size Matters: A small skillet can crowd your beef, leading to steaming instead of browning. Go for a 10-12 inch pan.
- Use a Whisk, Not a Spoon for Gravy: A whisk breaks up flour clumps better, making your gravy smoother.
- Heat-Resistant Spatulas: These are great for scraping up browned bits without damaging your pan.
Having the right tools can make the difference between good and great. Trust the process.
Prepping the Ingredients
How to Properly Prepare Ground Beef
Getting the ground beef just right is step one. Here’s how to prep it like a pro:
- Thaw the Beef: If using frozen, thaw it completely before cooking. This ensures even browning.
- Break it Apart: As it cooks, break the beef into small crumbles. This increases surface area and caramelization.
- Don’t Overcrowd the Pan: This is crucial. If the pan’s too full, the meat will steam instead of brown.
You want that beef to develop a rich brown crust — that’s flavor gold.
Chopping and Measuring the Ingredients
- Onions: If using, dice them small so they cook down easily and blend into the gravy.
- Flour: Measure accurately; too much will make the gravy gluey, too little and it’ll be watery.
- Milk/Broth: Warm it slightly before adding — it helps avoid lumps.
Everything prepped and ready? Great — let’s get cooking!
Step-by-Step Cooking Instructions
Browning the Ground Beef
This is where the magic starts. Get your skillet hot over medium-high heat, then:
- Add your ground beef (and butter if the beef is lean).
- Let it sit for a minute or two before stirring — this allows it to brown properly.
- Break it up with a spatula or wooden spoon and cook until no pink remains.
- Drain excess fat only if there’s a lot; you’ll need some for the roux.
That’s your flavor base right there.
Making the Roux
Once your beef is browned to perfection, it’s time to create the roux — the thickening agent that brings the gravy together.
- Lower the Heat: Reduce to medium so you don’t burn the flour.
- Sprinkle the Flour: Evenly coat the cooked beef with the flour.
- Stir Constantly: Mix it all together for about 1–2 minutes. This step is crucial — you’re cooking the raw taste out of the flour.
- Golden Color: The flour should start to take on a light golden hue. That’s when you know it’s ready for liquid.
Think of this like the “glue” of your gravy. If you skip this or rush it, you’ll end up with lumpy or runny sauce — and nobody wants that.
Adding Milk or Broth
Here comes the creamy part! This is where your gravy begins to take shape.
- Gradually Pour In Milk or Broth: Start with about 2 cups, slowly pouring while whisking to avoid clumps.
- Whisk Continuously: This helps incorporate the roux into the liquid smoothly.
- Simmer Gently: Once it’s all in, let it bubble gently. Keep whisking every so often.
Want it creamier? Use more milk. Prefer a beefier flavor? Lean on broth. You can also do half-and-half for the best of both worlds.
The consistency will thicken as it simmers. Don’t panic if it looks thin at first — give it time.
Seasoning for Flavor
Now for the fun part — making it taste amazing.
- Salt and Pepper: Start with about 1 teaspoon of salt and half a teaspoon of black pepper.
- Optional Add-ins: Toss in garlic powder, onion powder, paprika, or even a dash of soy sauce or Worcestershire.
- Taste Test: Always, always taste before serving. Adjust as needed.
The seasoning is what turns this from a plain beef sauce into something you want to put on everything.
Simmering to Perfection
Let your gravy cook low and slow for about 5–10 minutes. Here’s what to look for:
- Thickness: It should coat the back of a spoon — not too runny, not too paste-like.
- Color: A light brown or creamy tan depending on your liquid.
- Texture: Smooth and velvety, with tender beef throughout.
If it gets too thick, splash in a bit more milk or broth. Too thin? Let it simmer uncovered a bit longer.
Once it reaches that perfect consistency, you’re ready to serve.
Serving Suggestions
Best Dishes to Pair With Hamburger Gravy
Alright, now that you’ve got a luscious pot of gravy, let’s talk about what to pour it on. Spoiler alert: almost everything.
Here are the classic and unbeatable combos:
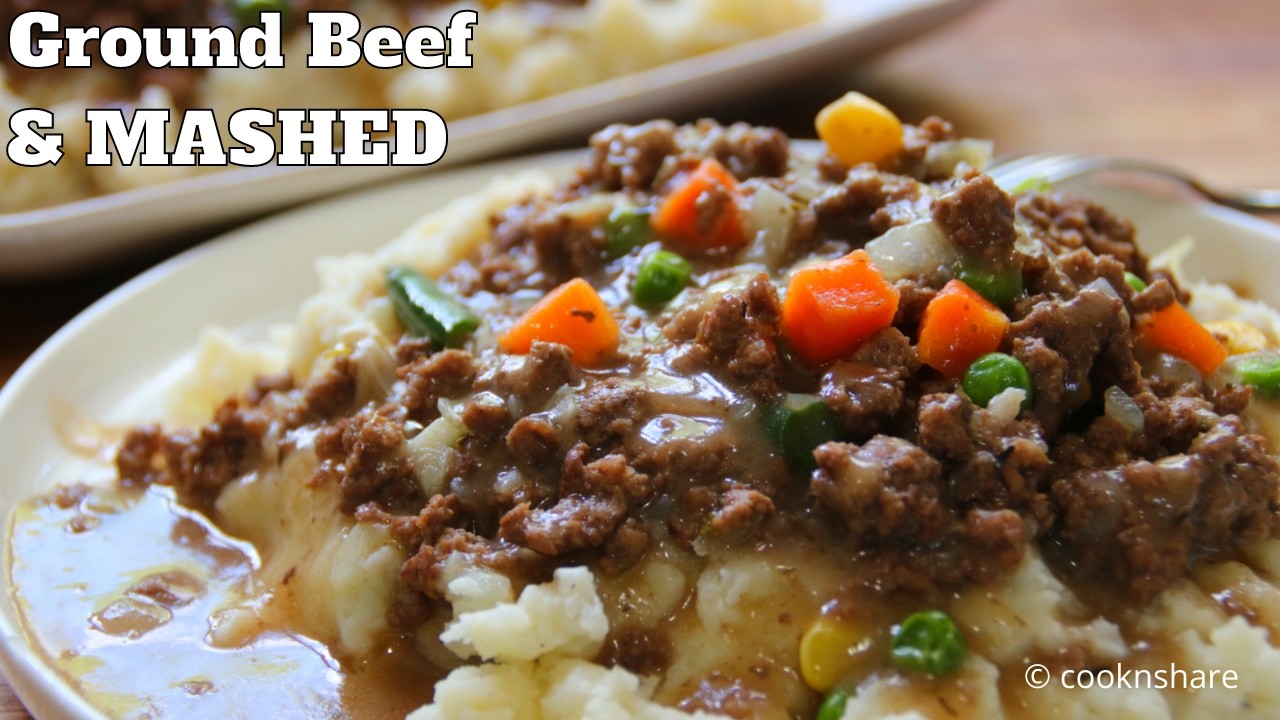
- Mashed Potatoes: This is the traditional go-to. Creamy spuds + beefy gravy = pure comfort.
- Egg Noodles: A hearty, filling combo that feels like a homemade stroganoff.
- Biscuits: Soft, fluffy biscuits sopped in gravy? Yes, please.
- White Rice: A budget-friendly favorite, especially good for meal prepping.
- Toast or Bread: Known as “SOS” (stuff on a shingle) in military slang — a nostalgic and quick meal.
Creative Serving Ideas
Let’s go beyond the basics and get a little creative:
- Loaded Fries: Think of it like poutine’s American cousin. Pour hamburger gravy over crispy fries and top with cheese.
- Stuffed Baked Potatoes: Hollow out a baked potato and fill it with hamburger gravy and your favorite toppings.
- Breakfast Bowl: Layer scrambled eggs, hash browns, and gravy for a southern-style breakfast.
- Gravy Pizza: Use the gravy as a “sauce” base on a flatbread, top with cheese and bake.
Whatever you decide, this gravy will elevate it. The beauty is in its flexibility — it pairs beautifully with nearly any carb or starch.
Storage and Reheating Tips
Refrigeration Guidelines
One of the best things about hamburger gravy is how well it stores. Whether you made too much (on purpose, we hope) or you’re planning ahead for future meals, it holds up beautifully in the fridge.
- Cool Completely First: Don’t throw it into the fridge while it’s still steaming. Let it cool at room temperature for about 20–30 minutes.
- Use Airtight Containers: Transfer the gravy into a glass or BPA-free plastic container with a tight-fitting lid.
- Storage Time: Properly stored, hamburger gravy can last in the refrigerator for up to 4 days.
Pro tip: If your gravy thickens too much in the fridge, just add a splash of milk or broth when reheating to loosen it up.
Freezing and Reheating
Want to freeze it? Go for it! Hamburger gravy freezes like a champ with just a few minor considerations.
- Freeze in Portions: Spoon it into single-serving containers or zip-top freezer bags. This way, you only thaw what you need.
- Lay Flat: If using bags, lay them flat for space-saving freezer storage.
- Label Clearly: Include the date so you know when you froze it. It’s good for up to 3 months.
To reheat:
- Microwave: Use medium power and stir every 30–60 seconds until hot.
- Stovetop: Warm it slowly in a saucepan over low heat, adding a splash of liquid as needed.
Avoid boiling it too hard — that can cause the dairy to separate, making the texture grainy.
Nutritional Information
Calories and Macros
Let’s talk numbers. While hamburger gravy isn’t exactly a “diet” food, it’s possible to enjoy it in moderation or tweak it to suit your goals.
Here’s an approximate breakdown per serving (based on 6 servings total):
| Nutrient | Amount |
|---|---|
| Calories | 280–350 |
| Protein | 18–22g |
| Carbs | 12–18g |
| Fat | 20–25g |
| Fiber | 0–1g |
| Sugar | 3–6g |
These numbers will vary depending on the fat content of your beef and whether you use milk, broth, or cream.
Making It Healthier
Want to lighten things up? Here are a few tricks:
- Use Lean Beef: Swap 80/20 for 90/10 or even ground turkey.
- Go for Low-Fat Milk: Instead of whole milk or cream, try 1% or skim.
- Add Veggies: Bulk it up with chopped mushrooms, onions, spinach, or zucchini for more fiber and nutrients.
- Reduce the Roux: Use less flour and fat if you’re cutting carbs or calories.
Healthy doesn’t mean boring. With a few swaps, you can still enjoy this classic without guilt.
Common Mistakes to Avoid
Overcooking the Beef
One of the easiest ways to mess up hamburger gravy? Overcooking the meat. Here’s what happens:
- Dry Texture: Beef becomes chewy instead of tender.
- Burned Flavor: If you cook it too hot for too long, it can get bitter.
- No Crust: Stirring too much while browning will prevent that beautiful caramelization.
Tip: Cook the beef just until it’s no longer pink, then move on to the roux.
Skipping the Roux Step
The roux is the glue of your gravy — don’t skip it. If you just throw in flour and liquid without letting it cook, you’ll end up with:
- Lumpy Gravy: Flour needs to be fully mixed with fat to dissolve properly.
- Floury Taste: Raw flour has a chalky, unpleasant flavor that doesn’t belong in comfort food.
Fix: Cook the flour for at least 1–2 minutes before adding liquid, whisking constantly to form a smooth base.
Following these steps keeps your gravy smooth, rich, and restaurant-worthy.
Expert Tips for Perfect Gravy
Achieving the Right Consistency
Consistency can make or break a gravy. You don’t want soup, and you don’t want paste. Here’s how to nail it:
- Measure Your Liquid: Stick to around 2 cups of milk or broth per 1/4 cup flour for a medium-thick gravy.
- Simmer, Don’t Boil: Let it cook gently so it thickens gradually without breaking.
- Adjust as Needed: If it’s too thick, add more milk. Too thin? Let it simmer longer or whisk in a cornstarch slurry (1 tbsp cornstarch + 2 tbsp water).
Flavor Enhancers You Can Use
Take your gravy from basic to next-level by adding just one or two of these flavor bombs:
- Worcestershire Sauce: Adds depth and a little tang.
- Soy Sauce: Boosts umami — go light or use low-sodium.
- Mustard Powder: Just a pinch adds a surprising zing.
- Herbs: Fresh thyme or rosemary add fragrance and earthiness.
- Hot Sauce: A few drops can make it pop without being too spicy.
Taste as you go, and don’t be afraid to get creative — gravy is forgiving.
Hamburger Gravy Recipe Variations
Classic Southern Style
If you’re craving that deep, southern comfort flavor, the classic Southern-style hamburger gravy has your name written all over it. This variation typically uses a cream-based gravy with a touch of sausage seasoning or even sausage mixed in with the ground beef.
Here’s how to make it Southern-style:
- Add a pinch of sage or poultry seasoning to the beef as it browns.
- Use whole milk or heavy cream for a rich, creamy texture.
- Mix in crumbled breakfast sausage with the ground beef for a more traditional Southern flavor.
- Serve over buttermilk biscuits or cheddar grits for the full experience.
The Southern version is hearty, bold, and downright soul-warming. If you’ve never tried it this way, you’re in for a real treat — the kind that makes you want seconds (and thirds).
Creamy Mushroom Hamburger Gravy
Want a little gourmet twist? Adding mushrooms gives the gravy an earthy, umami-rich flavor that feels fancier but is just as easy to whip up.
Here’s how to level up your hamburger gravy with mushrooms:
- Sauté sliced mushrooms in butter before adding the ground beef. Cremini or baby bella mushrooms work great.
- Add a splash of white wine or beef broth to deglaze the pan before making your roux.
- Stir in a dash of cream or sour cream toward the end for an ultra-smooth finish.
- Finish with fresh thyme or parsley for a pop of color and freshness.
This version feels like a cross between beef stroganoff and classic hamburger gravy. It’s perfect for date nights or when you want to impress — without too much fuss.
Gluten-Free and Dairy-Free Options
Substituting Ingredients
Dietary restrictions? No problem. With a few simple swaps, you can make hamburger gravy gluten-free, dairy-free, or both without sacrificing flavor.
For Gluten-Free Gravy:
- Use gluten-free all-purpose flour or cornstarch as a thickener.
- Make sure your broth and any sauces (like soy or Worcestershire) are gluten-free certified.
For Dairy-Free Gravy:
- Replace milk with unsweetened almond, oat, or soy milk.
- Use olive oil or vegan butter instead of dairy butter.
- Coconut milk can also work, but be aware it will change the flavor slightly.
These swaps are super easy and totally doable, whether you’re cooking for someone with allergies or just trying to clean up your ingredients list.
Maintaining Flavor Without Allergens
Losing gluten or dairy doesn’t mean losing flavor. Here are a few ways to keep things tasty:
- Add nutritional yeast for a cheesy, umami flavor (especially in dairy-free versions).
- Use aromatic veggies like onions, garlic, or leeks to add richness.
- Boost savoriness with liquid aminos or gluten-free tamari.
Hamburger gravy can still be cozy and indulgent — even with a cleaner, allergen-free ingredient list.
Budget-Friendly Meal Planning
Cost-Effective Ingredients
Hamburger gravy is a dream come true for budget-conscious cooks. Most of the ingredients are pantry staples, and it stretches far, especially when served over inexpensive carbs like rice or pasta.
- Ground beef: Still one of the most affordable protein options.
- Flour and milk: Common, low-cost kitchen essentials.
- Rice, potatoes, or noodles: Super affordable sides that fill out the meal.
- Leftover veggies: Toss in what you’ve got — carrots, peas, corn — to bulk it up.
You can feed a family of four for just a few dollars. That’s the magic of meals like this: they taste rich, but don’t cost a fortune.
Making Large Batches
Want to meal prep or stock your freezer? Hamburger gravy is perfect for that.
- Double or triple the recipe and divide into portions.
- Cook large batches of mashed potatoes or rice to serve with it.
- Store in reusable containers and label with the date.
Meal prepping this way saves you time, money, and stress — especially on those busy weeknights when cooking feels like a chore.
History and Origin of Hamburger Gravy
American Roots
Hamburger gravy is a dish born out of necessity, simplicity, and the American spirit of making something delicious from whatever’s in the kitchen. It rose to popularity in the mid-20th century as a budget-friendly, filling option that could feed large families.
You’ll often hear people refer to it as “hamburger SOS” — short for “stuff on a shingle” — a name that comes from its military roots. Soldiers during WWII were often served a version of this dish over toast, and while the nickname may not sound glamorous, the taste left an impression.
How It Evolved Over Time
From army chow halls to school cafeterias to grandma’s stove, hamburger gravy evolved from survival food to beloved comfort food. Over the years, it’s been adapted in countless ways — some people add cheese, others mix in taco seasoning for a Tex-Mex vibe, and still others keep it old-school with just salt, pepper, and milk.
Despite all its variations, the heart of the dish remains the same: it’s humble, hearty, and made with love. It’s the kind of meal that brings people together, whether you’re around a family table or standing at the stove with a spoon, sneaking a taste straight from the skillet.
FAQs about Hamburger Gravy Recipe
What is hamburger gravy made of?
Hamburger gravy is a hearty mix of ground beef, flour, milk (or broth), and simple seasonings like salt, pepper, and garlic. Some versions include onions, mushrooms, or Worcestershire sauce for an extra punch of flavor.
Can I use ground turkey instead of ground beef?
Yep! Ground turkey is a leaner alternative and still tastes great. Just be sure to season well, since turkey is milder in flavor than beef.
What do you serve hamburger gravy with?
Classic go-to? Mashed potatoes. But it’s also amazing over biscuits, rice, egg noodles, or even toast—think old-school diner vibes.
How do I thicken hamburger gravy?
A flour-and-fat roux is the traditional way. Brown the flour in the beef drippings before adding your liquid. If it’s still too thin, let it simmer a bit longer or whisk in a cornstarch slurry.
Can I make it ahead of time?
Definitely. Hamburger gravy keeps well in the fridge for up to 3–4 days. Reheat on the stove over low heat, and add a splash of milk or broth if it’s too thick.
Can I freeze hamburger gravy?
Yes, but with caution. If it’s milk-based, the texture might get a little weird when thawed. Stir it well when reheating to bring it back to life.
Conclusion
Hamburger gravy is more than just a quick, cheap meal — it’s a warm memory, a comfort classic, and a canvas for creativity. With just a handful of ingredients and a few simple steps, you can whip up a dish that feels like home.
Whether you serve it over mashed potatoes, biscuits, or noodles, this versatile gravy has a place in every kitchen. It’s budget-friendly, family-approved, and easy enough for even the busiest weeknight.
So next time you’re staring into your fridge wondering what to make, remember: with a pound of ground beef and a little flour, you’re only minutes away from one of the most satisfying meals you’ll ever eat.