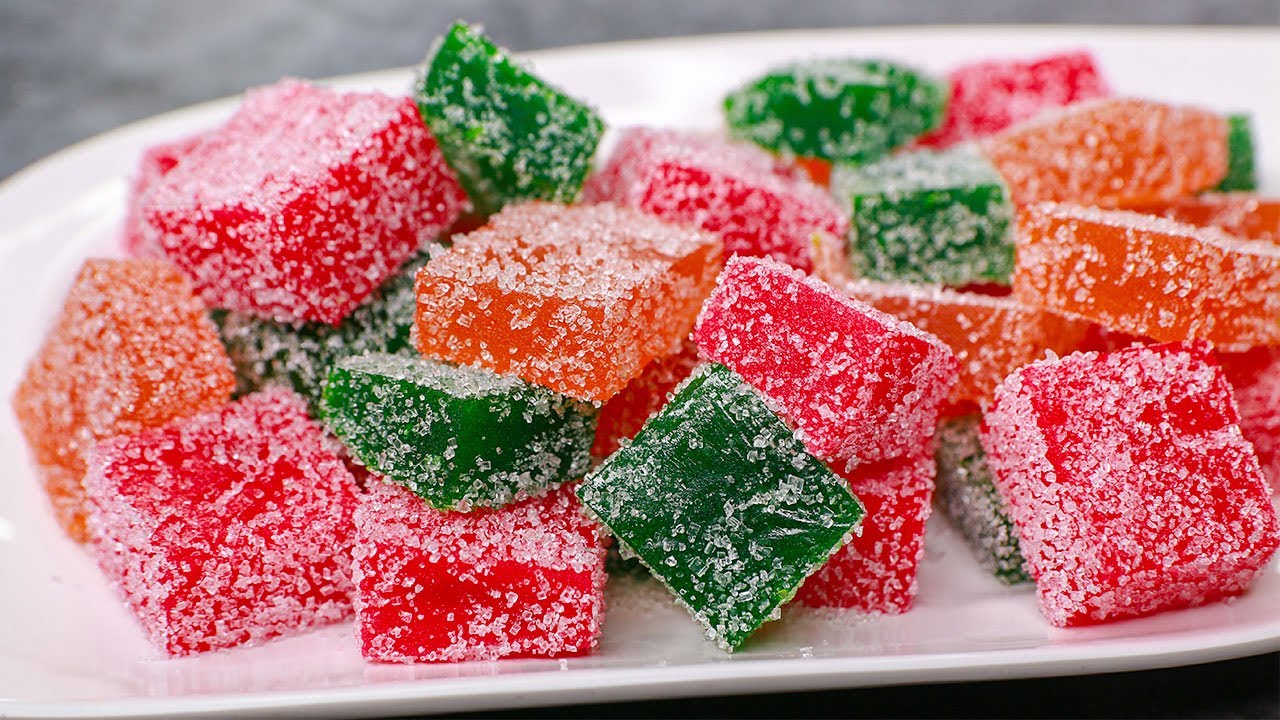
Gummy Candy Recipe: Who doesn’t love gummy candies? Those chewy, sweet, and colorful little treats have been a childhood favorite for decades. Whether shaped like bears, worms, or even little stars, gummy candies are more than just candy – they’re a nostalgic experience. But what if I told you that you could easily make these delightful treats right at home, using real ingredients and your choice of flavors? That’s right—making your own gummy candy isn’t just possible, it’s fun, customizable, and surprisingly simple!
Think about it. Most store-bought gummy candies are packed with artificial colors, flavors, and preservatives. While they might taste good, they’re not always the best option, especially for kids or people with dietary restrictions. That’s why learning how to make gummy candy at home is a game-changer. Not only do you get to control exactly what goes into them, but you can also tweak the texture, flavor, and even add supplements like vitamins or CBD if you’re feeling fancy.
In this step-by-step guide, I’m going to walk you through everything you need to know to make your own gummy candies from scratch. Whether you’re going for classic fruit flavors, sugar-free versions, or vegan gummies using agar-agar, you’ll find all the info you need right here. So, grab your silicone molds and let’s get cooking (or should I say, “gummifying”?).
Benefits of Homemade Gummy Candies
Making gummy candy at home might sound like just a fun weekend project, but it actually comes with a bunch of real benefits. First off, you have total control over what goes into your candy. You can use fresh fruit juice instead of artificial flavoring, natural colorings instead of dyes, and even cut down on sugar by using honey or a sugar substitute. For people with allergies or sensitivities, this is a huge deal.
Secondly, homemade gummies are way more customizable. Want apple-blueberry flavor gummies shaped like dinosaurs? Done. Prefer a sour mango vegan gummy? Go for it. You’re only limited by your imagination. And let’s not forget the cost savings—if you’re someone who regularly buys vitamins or CBD-infused gummies, making them yourself can save you serious money over time.
Lastly, it’s just a lot of fun. Making gummies can be a great kitchen activity with kids, or even a unique DIY gift idea. And once you get the hang of it, you’ll start to see just how many directions you can take your gummy game. Whether you’re health-conscious, creative, or just craving a chewy treat, homemade gummies have something sweet for everyone.
List of Ingredients You’ll Need
Before diving into the gummy-making process, let’s talk ingredients. Here’s a breakdown of what you’ll need for a basic gummy recipe:
Basic Ingredients:
- Unflavored Gelatin – The base of your gummy texture. Usually comes in powdered form.
- Fruit Juice – Choose 100% juice for best flavor. Apple, grape, orange, and berry blends work great.
- Sweetener – Sugar, honey, agave syrup, or a sugar substitute like stevia or erythritol.
- Flavoring – Optional, but helps boost the taste. Think vanilla extract, lemon zest, or essential oils (food-grade).
- Citric Acid – Adds a sour tang and helps preserve the gummies.
- Food Coloring – Optional, for that vibrant gummy look.
Optional Add-ins:
- Vitamin Powders – For DIY supplements.
- CBD Oil – For calming or therapeutic gummies.
- Collagen Powder – For skin and joint benefits.
- Fruit Purees – For extra fruit flavor and texture.
Vegan Alternatives:
- Agar-Agar Powder – A plant-based alternative to gelatin, made from seaweed.
- Maple Syrup – As a natural vegan sweetener.
These ingredients are easy to find in most grocery or health food stores. Once you’ve got your ingredients in place, you’re halfway there.
Kitchen Tools Required
Just like baking a cake, making gummy candy is easier with the right tools. Luckily, most of what you need is probably already in your kitchen.
Essential Tools:
- Small Saucepan – For heating and dissolving your mixture.
- Whisk or Silicone Spatula – To keep everything smooth and lump-free.
- Measuring Cups and Spoons – Precision is key in candy-making.
- Dropper or Pipette – Helps pour the mixture neatly into molds.
- Silicone Molds – This is where the magic happens! You can find gummy bear, worm, fruit, or even alphabet-shaped molds online.
Optional but Helpful:
- Kitchen Scale – For more accurate measurements.
- Fine Mesh Strainer – Useful if you’re using fruit puree and want a smoother texture.
- Cooling Rack or Tray – Keeps your molds flat and easy to move in and out of the fridge.
The good news? Once you have these tools, you’re set for endless gummy-making adventures.
Understanding the Key Ingredients
Before we start cooking, it’s helpful to understand what each main ingredient does and why it’s important.
Gelatin:
This is what gives gummies their iconic chewy, springy texture. Gelatin is a protein derived from collagen, and it dissolves in hot liquid to form a gel as it cools. The amount you use directly affects how firm or soft your gummy turns out.
Sweeteners:
Sugar isn’t just for taste—it helps bind the mixture and affects the final texture. You can use white sugar, brown sugar, honey, maple syrup, or sugar-free alternatives like monk fruit or xylitol.
Juice or Puree:
This is where the flavor and color come from. The more vibrant and fresh the juice, the better your gummies will taste. Be cautious with very acidic or pulpy juices—they may interfere with how well the gelatin sets.
Flavorings and Add-ins:
You can boost your flavors using natural extracts (like peppermint or vanilla), zest, or even herbs. Just be sure to use food-safe, high-quality flavorings.
Understanding these basics gives you more freedom to experiment and customize your gummy recipe as you go.
Choosing the Right Gelatin
Not all gelatin is created equal. When you’re making gummies, the type and quality of gelatin you use can make or break your final product. Let’s break it down so you can choose the best option for your needs.
Types of Gelatin:
- Powdered Gelatin – The most common and widely available type. Sold in small envelopes or bulk jars. It’s easy to use and great for beginners.
- Sheet Gelatin – More common in professional kitchens and bakeries. It needs to be soaked before use and is known for producing a smoother texture.
- Grass-Fed or Organic Gelatin – If you’re health-conscious, you might want to look for gelatin made from grass-fed or pasture-raised animals for better quality and fewer additives.
What to Look For:
- Unflavored – Avoid flavored versions unless you’re sticking with that flavor throughout.
- Bloom Strength – This is a measure of how firm the gelatin will be when it sets. Higher bloom = firmer gummies. A typical gelatin bloom strength is between 200–250, which is perfect for gummies.
Vegan Substitutes:
If you’re skipping animal products, gelatin isn’t an option. But don’t worry—there are solid alternatives:
- Agar-Agar – Derived from red algae, agar sets at room temperature and creates a firmer, more jelly-like texture. It’s a bit trickier to work with than gelatin, but with a little trial and error, you’ll get the hang of it.
- Pectin – Commonly used in jams and jellies. It’s fruit-derived, so it’s a great plant-based option, though it may not give you that classic gummy chew.
Whichever option you choose, remember that each thickener behaves differently—so adjust your recipe accordingly!
Step-by-Step Guide to Making Gummy Candy
Alright, now for the part you’ve been waiting for: the actual process! Let’s break it down so you know exactly what to do, every step of the way.
Step 1: Prep Your Tools and Molds
Start by laying out all your ingredients and tools. Lightly spray your silicone molds with non-stick spray (optional, but helps release the gummies). Place them on a flat tray so you can easily transfer them in and out of the fridge.
Step 2: Mix the Ingredients
In a small saucepan, pour your juice (about 1 cup) and sprinkle the gelatin (3 tablespoons) evenly over the surface. Let it “bloom” for 5-10 minutes. This allows the gelatin to absorb moisture and swell.
If using agar-agar, you’ll skip the blooming and instead stir it into the juice while cold, then bring it to a boil.
Step 3: Heat and Dissolve
Place the saucepan over medium-low heat. Stir gently until the gelatin dissolves completely. You don’t want to boil the mixture—just warm it enough to fully dissolve the gelatin and blend everything smoothly. If you’re adding sweetener, stir it in now.
Once everything is fully dissolved, remove from heat. This is when you can add in any extracts, colorings, or additional supplements like vitamins or CBD. Stir well to combine.
Step 4: Pour into Molds
Using a dropper or small spoon, carefully pour the mixture into your prepared silicone molds. Work quickly, as the mixture can start to set as it cools.
Tap the mold tray gently on the counter to remove any bubbles.
Step 5: Chill to Set
Place the mold tray in the refrigerator for at least 1–2 hours. The exact time will vary depending on the size and shape of your molds, but they should feel firm and bouncy to the touch when done.
Step 6: Unmold and Enjoy
Once the gummies have set, gently pop them out of the molds. If they’re sticking, try pushing from the bottom or slightly twisting the mold.
That’s it—you just made homemade gummies! Store them in an airtight container in the fridge to keep them fresh.
Tips for Perfect Gummy Texture
So, how do you make sure your gummies turn out just the way you like them? The texture of a gummy is everything, and getting it right can take a bit of practice. Here are some pro tips:
Chewy or Soft – You Decide
- For Firmer Gummies: Add more gelatin (up to 4 tablespoons per cup of liquid).
- For Softer Gummies: Use less gelatin, or try blending in some fruit puree.
Avoid Grainy Textures
- Make sure the gelatin is fully dissolved. If it’s not, you’ll end up with grainy gummies.
- Don’t boil the gelatin. High heat can break it down and mess with the texture.
Get Rid of Bubbles
- Stir gently to avoid foam.
- Tap the mold tray gently after pouring to let bubbles rise and pop.
Want a Glossy Finish?
- Try brushing your finished gummies with a bit of vegetable oil or tossing them in a light coat of cornstarch or powdered sugar.
Perfect texture takes a little experimenting, but once you find your sweet spot, it’s gummy bliss from there on out.
Flavoring Ideas and Variations
The best part about making your own gummies? You can make any flavor your heart desires. Here are some fun and tasty ideas:
Fruit-Based Flavors:
- Strawberry + Lemon
- Mango + Passionfruit
- Apple + Cinnamon
- Raspberry + Lime
Soda Flavors:
- Cola gummies (using cola and a splash of vanilla)
- Root beer gummies
- Cream soda gummies
Vitamin-Infused Gummies:
- Add powdered vitamin C or multivitamin blends
- Elderberry syrup for immune support
- Collagen powder for skin and joints
Sour Gummies:
- Add a pinch of citric acid to the mix or dust the finished gummies with sour sugar
With endless combinations, you’ll never get bored with your homemade stash.
How to Color Gummy Candy Naturally
Artificial food coloring is easy to use, but if you’re trying to keep things natural, there are some amazing, vibrant alternatives:
Natural Coloring Options:
- Beet Juice – Red or pink
- Carrot Juice – Orange
- Spinach or Matcha – Green
- Blue Spirulina or Red Cabbage – Blue or purple
You can also use powdered forms of these ingredients to avoid adding extra liquid. Start with small amounts and build up until you get the color intensity you want.
Natural colors may be a little more muted than artificial ones, but they’re safer and give your gummies a wholesome touch.
Using Fruit Juice vs. Fruit Puree
When it comes to flavoring your homemade gummy candies, you’ll likely face a decision: should you use fruit juice or fruit puree? Both have their own unique perks, and the choice depends on the texture and flavor intensity you’re after.
Fruit Juice:
Pros:
- Smooth and easy to work with
- Sets more clearly, giving your gummies that translucent, store-bought look
- Great for more subtle or balanced flavors
Cons:
- Can be less flavorful, especially if the juice is diluted
- Lacks the fiber and nutrients from whole fruit
Juice is ideal if you’re going for that classic gummy candy appearance and want a lighter, more delicate flavor.
Fruit Puree:
Pros:
- Richer, more intense fruit flavor
- Adds natural thickness and texture to the gummies
- Includes fiber and nutrients from the fruit
Cons:
- May affect the setting of gelatin or agar—might need to adjust quantities
- Results in opaque or cloudy gummies
Fruit puree is the go-to option if you want chewy candies that are more like fruit snacks, packed with natural goodness.
Best Fruits to Use:
- Juice: Apple, grape, orange, pomegranate, cherry
- Puree: Mango, strawberry, raspberry, peach, banana (use sparingly as it can be too thick)
Whichever you choose, make sure your fruit base is fresh and free of added sugar or preservatives if you want that homemade-from-scratch taste.
Making Vegan Gummies
Don’t eat animal products? No worries—you can still enjoy delicious homemade gummies using plant-based alternatives like agar-agar and pectin. These ingredients create slightly different textures, but with a little tweaking, your vegan gummies will be just as tasty and satisfying.
Agar-Agar:
- Derived from seaweed, agar sets much firmer than gelatin and doesn’t melt at room temperature.
- To use it, combine the powder with your juice and bring it to a full boil (important!), then simmer for a couple of minutes to fully activate the gelling agent.
- The texture is more jelly-like and less stretchy than gelatin-based gummies, but it’s a great vegan option.
Pectin:
- Commonly found in jams and jellies, pectin is a natural fiber found in fruits.
- It works well in combination with an acid (like lemon juice) and sugar.
- Gives a softer, smooth chew, more like commercial fruit snacks.
Vegan Sweeteners and Add-ins:
- Maple syrup, agave, or coconut sugar make excellent vegan-friendly sweeteners.
- Vegan vitamins, essential oils, and natural fruit flavors can all be added as well.
Experimenting is key here—vegan gummies may require more trial and error to get the texture just right, but the results are absolutely worth it.
How to Store Homemade Gummies
Once you’ve made your gummies, how you store them can make a big difference in how long they stay fresh and tasty. Here’s how to keep your batch chewy and delicious.
Best Storage Methods:
- Airtight Containers: Store gummies in a sealed container to keep out moisture and air.
- Refrigeration: Keeps gummies firmer for longer and prevents mold. Especially important if you used fresh fruit puree.
- Parchment Paper: If gummies are sticking together, layer them between parchment or wax paper.
Shelf Life:
- With Preservatives (like citric acid or sugar): 2–3 weeks in the fridge
- Without Preservatives: Best consumed within 7–10 days
- Frozen: Yes, you can freeze gummies! Store in an airtight freezer bag for up to 2 months. Thaw in the fridge.
Avoid This:
- Storing at Room Temperature for Too Long: They may melt, especially gelatin-based ones.
- Leaving Uncovered: This leads to drying out and loss of flavor.
Keep them chilled and sealed, and your homemade gummies will stay tasty for weeks!
Troubleshooting Gummy Candy
Even the best cooks run into issues. Don’t worry if your first batch isn’t perfect—here’s how to solve the most common gummy-making problems.
Problem: Gummies Didn’t Set Properly
- Cause: Not enough gelatin or agar, or it wasn’t heated enough to activate.
- Fix: Reheat the mixture, add more thickening agent, and try again.
Problem: Gummies Are Too Hard or Too Soft
- Hard: You used too much gelatin or overcooked the mixture.
- Soft: Not enough gelatin or your fruit puree had too much moisture.
Problem: Gummies Are Cloudy or Lumpy
- Cause: Gelatin wasn’t fully dissolved.
- Fix: Always bloom gelatin first and stir gently over low heat.
Problem: Gummies Are Sticky
- Cause: Too much moisture, or stored improperly.
- Fix: Toss gummies in a small amount of cornstarch or powdered sugar before storing.
Pro Tip: Keep notes of what you did each time you make gummies. That way, you can tweak and perfect your personal recipe over time.
Creative Gummy Shapes and Molds
Why settle for boring cubes or blobs when you can have dinosaurs, stars, or even letters? The shape of your gummies makes them more fun—especially for kids!
Popular Mold Ideas:
- Gummy bears (classic)
- Worms (fun for kids)
- Dinosaurs, animals, hearts
- Alphabet molds (great for learning)
- Seasonal themes (pumpkins, snowflakes, etc.)
Where to Find Them:
- Online stores like Amazon, Etsy
- Baking supply stores
- Craft stores
Choose silicone molds—they’re easy to clean and make popping out gummies a breeze. And if you’re making supplements like vitamin gummies, consider using smaller molds for accurate dosing.
A fun mold can turn a simple candy into a creative experience.
Bonus: Adding Supplements (CBD, Vitamins, etc.)
Want your gummies to be more than just tasty? You can turn them into functional treats by adding vitamins, collagen, or even CBD. But proceed with caution—dosage and even mixing techniques matter here.
Adding CBD:
- Use high-quality CBD oil or isolate.
- Stir it in at the end of the cooking process to avoid degrading the active compounds.
- Use small molds to control dosage (e.g., 5mg per gummy).
Adding Vitamins or Collagen:
- Use powdered or liquid supplements.
- Stir them in when the mixture has cooled slightly—heat can destroy nutrients.
- Keep dosage in mind! Overloading can make your gummies taste chalky.
Safety Tip: Always clearly label your supplement-infused gummies, especially if kids are around.
Homemade gummies can go from snack to health booster with just a few smart additions.
FAQs about Gummy Candy Recipe
1. Can I freeze gummy candy?
Yes, you can! Freeze gummies in an airtight container for up to 2 months. Thaw in the refrigerator for best results.
2. Why are my gummies melting at room temperature?
You might not have used enough gelatin or your room is too warm. Refrigerate them to help them stay firm.
3. Can I use honey instead of sugar?
Absolutely! Honey works well and adds a unique flavor, just keep in mind it may affect the setting time slightly.
4. Are homemade gummies safe for kids?
Yes, especially since you control the ingredients. Just be cautious with supplements or choking hazards in small molds.
5. How long does it take for gummies to set?
Typically, 1–2 hours in the fridge is enough. Larger or thicker molds may take longer.
Conclusion
So there you have it—your complete, step-by-step guide to making homemade gummy candies! From choosing ingredients and tools to troubleshooting and adding fun supplements, you now have everything you need to become a gummy-making pro.
Making gummies at home isn’t just about the end result (though, let’s be honest, chewy candy is always a win). It’s about creativity, control, and even a little fun in the kitchen. Whether you’re customizing the flavor, sneaking in some vitamins, or making a colorful treat with the kids, there’s no wrong way to do it.
So go ahead, grab those molds, pour in the fruity goodness, and start cooking up your own batch of chewy, wiggly, smile-inducing gummy candy. Happy gummifying!