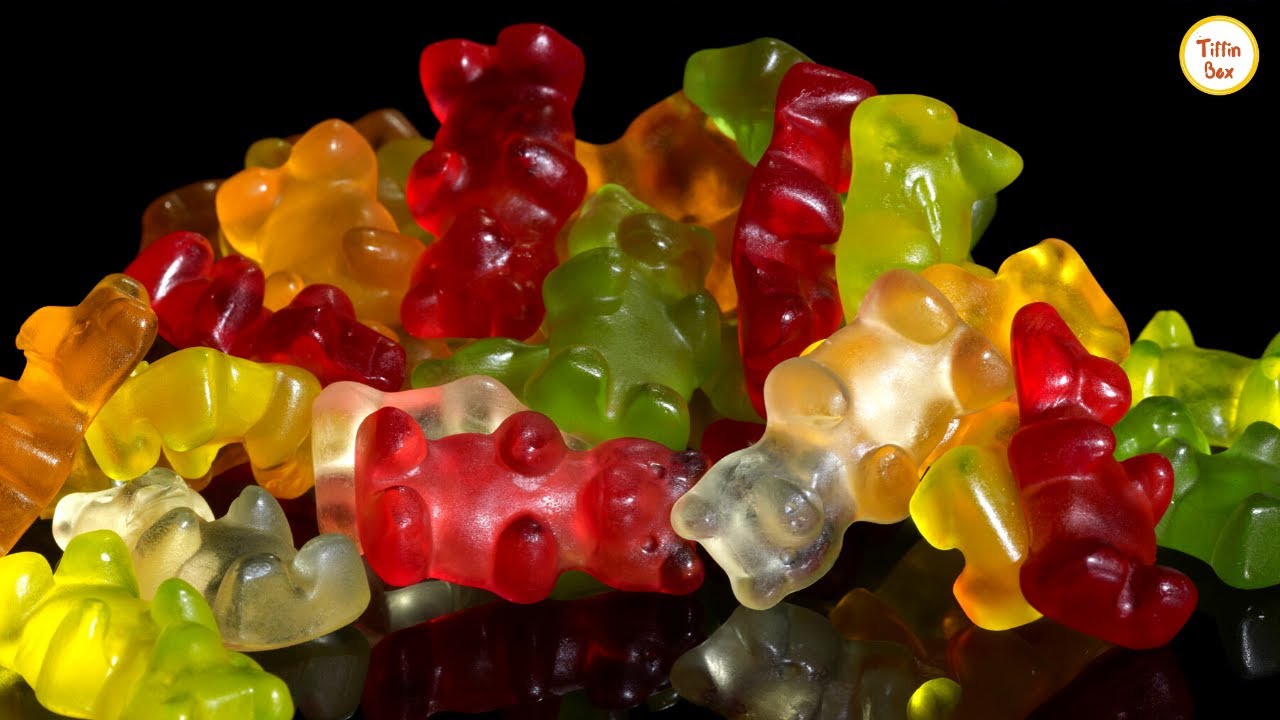
Gummy Bear Recipe: Who doesn’t love gummy bears? These chewy, colorful little treats have been a childhood favorite for decades. But here’s the fun part—you don’t have to buy them from the store. With just a few ingredients and some patience, you can make delicious gummy bears right in your kitchen. Making them at home not only allows you to control the flavors and sweetness but also gives you the chance to use healthier ingredients, like natural fruit juices and honey instead of artificial additives.
One of the biggest advantages of making gummy bears yourself is customization. You can play around with flavors, mix different fruit juices, or even sneak in vitamins to make them more nutritious. If you’re health-conscious, you can ditch the processed sugars and dyes and go for natural alternatives. Plus, homemade gummies are budget-friendly and a fun DIY project to do with kids.
Think about it—you’re in charge of everything. Want strawberry-flavored red bears and pineapple-flavored yellow ones? Done. Prefer softer or firmer gummies? You can adjust the gelatin. The possibilities are endless. Once you try making them at home, chances are you’ll never want to go back to the packaged version again.
Ingredients You’ll Need
To make classic gummy bears, you’ll need just a handful of basic ingredients. These are easy to find at most grocery stores, and you might already have some in your pantry. Here’s the breakdown:
Basic Ingredients for Classic Gummy Bears
- Gelatin (unflavored) – The main ingredient that gives gummies their chewy texture.
- Fruit juice or flavored liquid – Acts as the base flavor. Options include orange juice, apple juice, cranberry juice, or even lemonade.
- Sweetener – Honey, sugar, agave syrup, or maple syrup. This balances the tartness of fruit juice and adds sweetness.
Optional Ingredients for Flavor Variations
- Vitamin C powder – Boosts nutrition and adds a tangy kick.
- Citric acid – Adds that signature sour candy flavor.
- Flavored extracts – Vanilla, strawberry, lemon, or any extract for extra punch.
Natural Coloring Options
Instead of artificial food coloring, try these alternatives:
- Beet juice for red
- Spinach juice for green
- Turmeric for yellow
- Blue spirulina for blue
These options are perfect if you want healthy, kid-friendly gummies without chemical additives.
Pro tip: Always taste your juice-sweetener mix before adding gelatin. That way, you can adjust sweetness and tartness to match your preference.
Essential Tools and Equipment
You don’t need a fancy kitchen setup to make gummy bears. A few simple tools will do the job just fine.
List of Kitchen Tools Required
- Gummy bear molds – Silicone molds are best since gummies pop out easily.
- Measuring cups and spoons – For accuracy in ingredients.
- Small saucepan – To heat and dissolve gelatin properly.
- Whisk or spoon – For stirring the mixture.
- Dropper or pipette – Makes it easier to fill the tiny bear molds without spilling.
Substitutes if You Don’t Have Candy Molds
No mold? No problem. You can pour the mixture into:
- A shallow baking dish, then cut gummies into cubes once set.
- Ice cube trays or silicone mini muffin molds for fun shapes.
- Cookie cutters to make stars, hearts, or other shapes.
While gummy bear molds give the classic candy look, experimenting with different shapes can make the process even more enjoyable—especially if you’re doing it with kids.
Step-by-Step Guide to Making Gummy Bears
Now let’s dive into the fun part: actually making your gummy bears. Follow this step-by-step process, and you’ll have a batch of chewy, flavorful gummies ready in no time.
Step 1 – Preparing the Gelatin Mixture
Start by adding unflavored gelatin to a small saucepan along with a little cold water or fruit juice. Let it sit for a few minutes so the gelatin “blooms” (absorbs the liquid and swells). This step ensures smooth, chewy gummies instead of clumpy ones. Once bloomed, gently heat the mixture over low heat until the gelatin dissolves completely.
Step 2 – Adding Flavors and Sweeteners
Once the gelatin has melted, stir in your choice of flavorings. You can use fruit juice, flavored extracts (like strawberry, lemon, or orange), or even specialized candy flavor oils. Sweeten the mixture with sugar, honey, or corn syrup to balance the tartness of the gelatin. Stir well until the sweetener fully dissolves.
Step 3 – Choosing and Mixing Colors
To give your gummy bears that playful, candy-like look, add food coloring. You can stick to one color per batch or divide the mixture into smaller bowls to create multiple colors. Mix each one thoroughly so the color spreads evenly throughout.
Step 4 – Pouring into Molds
Carefully pour the flavored and colored gelatin mixture into gummy bear molds using a small dropper or spoon for precision. Fill each cavity to the top without overflowing. This step is easier if your molds are placed on a tray, which makes moving them into the fridge simpler.
Step 5 – Setting and Demolding the Gummies
Place the filled molds in the refrigerator for at least 1–2 hours, or until the gummies are completely firm. Once set, gently pop them out of the molds. Store them in an airtight container in the fridge to keep them fresh and chewy.
Tips for Perfect Gummy Bears Every Time
Making gummy bears is simple, but a few tricks can take your results from good to perfect. Here are some tips to help you get the best texture, flavor, and overall candy experience:
1. Texture and Consistency
The texture of your gummies depends on the ratio of gelatin to liquid. More gelatin gives firmer, chewier gummies, while less makes them softer and more jiggly. If your first batch isn’t quite right, adjust the ratio next time.
- For firmer bears: Use 3 tablespoons of gelatin per 1 cup of juice.
- For softer bears: Use 2 tablespoons of gelatin per 1 cup of juice.
2. Avoiding Sticky or Hard Gummies
If your gummies turn sticky, lightly dust them with cornstarch before storing. This prevents them from clumping together. On the other hand, if they’re too hard, it usually means too much gelatin was used, or they were overcooked. Stick to low heat and don’t let the mixture boil.
3. Balancing Flavors
Always taste the mixture before pouring it into molds. Fruit juices can vary in sweetness and acidity, so you may need to adjust the sugar or honey. Adding a squeeze of lemon juice can brighten flavors, while extracts (like vanilla or raspberry) can enhance them.
Another trick? Mix different juices together for unique flavor combos—like orange-pineapple, strawberry-lemon, or apple-cranberry. This is your chance to get creative!
4. Storage and Shelf Life
Homemade gummies don’t contain preservatives, so they don’t last as long as store-bought ones. Always store them in the fridge inside an airtight container. For longer storage, you can freeze them, but keep in mind they might lose some texture when thawed.
5. Fun Additions
Want to make your gummy bears extra special? Try these add-ins:
- A drop of food-grade essential oils like peppermint for a refreshing twist.
- A sprinkle of vitamin powder to turn them into healthy gummy supplements.
- Layers of different flavors for rainbow gummies.
With a little creativity, your homemade gummy bears can be as fun and exciting as any candy from the store—only better, because they’re made with love.
Creative Variations of Gummy Bears
The beauty of homemade gummy bears is that you can get as creative as you want. Once you master the basic recipe, the possibilities are endless. From fruity classics to boozy adult versions, here are some fun variations to try.
Fruit Juice Gummy Bears
Instead of using store-bought juice, try making gummies with freshly squeezed juice. Orange, lemon, or even watermelon juice gives the candy a fresh, natural taste. If you like tropical flavors, pineapple or mango works wonderfully too. Just strain the juice before using to avoid pulp chunks in your gummies.
Sour Gummy Bears
Love that tangy sour kick? After your gummies have set, roll them in a mix of citric acid and sugar. This creates that familiar sour coating found on store-bought candy. Adjust the ratio to control how sour you want them.
Vitamin-Packed Gummies
If you struggle to take vitamins daily, why not make gummy vitamins? Add powdered vitamin C, multivitamin mixes, or collagen powder to the gelatin mixture before pouring it into molds. It’s a tasty and fun way to boost your daily health routine.
Sugar-Free Gummies
For a keto- or diabetic-friendly version, use sugar-free sweeteners like stevia or monk fruit instead of honey or sugar. Pair this with unsweetened juice or flavored water, and you’ve got a guilt-free treat.
Boozy Gummy Bears (For Adults Only)
Hosting a party? Try making gummy bears with wine, champagne, or vodka. Simply replace the fruit juice with your drink of choice, but keep in mind that alcohol can affect how the gelatin sets. Using less alcohol and more gelatin ensures they stay firm.
With these variations, you can make gummy bears for kids, health-conscious adults, or even as a fun treat at your next gathering.
Common Mistakes to Avoid
Even though making gummy bears is fairly simple, small mistakes can affect the final product. Here are some common pitfalls and how to avoid them:
1. Overheating the Gelatin
Boiling the mixture can destroy the thickening power of gelatin and alter the flavor. Always keep the heat low and stir gently until dissolved.
2. Using Too Much Sweetener
Adding too much sugar or honey can make gummies overly sticky. Stick to small amounts and taste as you go.
3. Skipping the Blooming Step
If you don’t let gelatin bloom in the juice before heating, you’ll end up with clumps. Always let it rest for at least 5 minutes.
4. Storing at Room Temperature
Homemade gummies don’t contain preservatives, so they should always be refrigerated. Leaving them out can cause them to melt or go bad quickly.
5. Not Measuring Properly
Candy making requires precision. Too much gelatin = rock-hard gummies. Too little = jelly that won’t hold its shape. Use proper measuring tools for best results.
By avoiding these mistakes, you’ll get perfectly chewy, delicious gummy bears every single time.
Health Benefits of Homemade Gummies
Believe it or not, homemade gummy bears can actually be a healthier alternative to store-bought ones. Depending on your ingredients, they can be packed with nutrients.
- Collagen boost: Gelatin is rich in collagen, which supports skin, hair, and joint health.
- No artificial additives: Store-bought gummies often contain artificial colors, flavors, and preservatives. With homemade versions, you control what goes in.
- Vitamin-packed: Adding vitamin C or other supplements can turn your gummy bears into fun, healthy snacks.
- Natural sweeteners: Using honey, agave, or maple syrup makes them healthier than processed sugar-filled versions.
- Kid-friendly nutrition: For picky eaters, homemade gummies are a sneaky way to get kids to consume more vitamins or fruit-based nutrients.
So yes—gummy bears don’t have to be just candy. They can actually be a wellness-friendly treat when made thoughtfully.
How to Store Homemade Gummy Bears
Storage plays a big role in keeping your gummies fresh and chewy.
Short-Term Storage
Keep gummies in an airtight container in the fridge. They’ll stay good for about 1–2 weeks. If you notice them sticking together, dust lightly with cornstarch.
Freezing Gummies
Yes, you can freeze them! Spread them out on a baking tray first, freeze until solid, then transfer to a freezer bag. They’ll last up to 3 months, though the texture might be slightly softer after thawing.
Best Storage Practices
- Avoid leaving them out at room temperature.
- Store in single layers with parchment paper between if stacking.
- Keep away from direct sunlight or heat sources.
Good storage = longer-lasting, fresher gummies.
Fun Ways to Enjoy Gummy Bears
Sure, you can pop gummy bears straight from the container and enjoy them as-is—but why stop there? These chewy little candies can be used in all kinds of creative and fun ways.
1. Party Snacks
Put them in little candy bowls at birthday parties, baby showers, or even movie nights. Kids and adults alike can’t resist grabbing a handful.
2. Dessert Toppings
Sprinkle gummy bears over ice cream, frozen yogurt, or milkshakes for an extra burst of color and flavor. They add a playful touch to any dessert.
3. Cake and Cupcake Decorations
Use them to decorate cakes, cupcakes, or even cookies. Their bright colors make baked goods look fun and festive without any extra effort.
4. Trail Mix with a Twist
Mix gummy bears with nuts, pretzels, and chocolate chips to create a sweet-and-salty snack mix. It’s perfect for road trips or after-school snacks.
5. Drinks and Cocktails
Drop a few gummy bears into sparkling water, soda, or cocktails for a sweet surprise at the bottom of your glass. For adults, boozy gummy bears soaked in vodka or rum can be a fun party hit.
So, while gummy bears are a treat on their own, they also double as a versatile ingredient for desserts and snacks.
Kid-Friendly Gummy Bear Making Activity
Making gummy bears isn’t just fun for adults—it’s an amazing hands-on activity for kids.
Why Kids Love It
- They get to choose the flavors and colors.
- Filling the molds with droppers feels like a fun science experiment.
- The excitement of waiting for them to set builds anticipation.
Safety Tips
- Always supervise children around the stove when heating the mixture.
- Let adults handle the gelatin melting step, while kids can help with mixing, coloring, and pouring.
Learning Opportunity
This activity can even be educational. Kids can learn about measuring ingredients, experimenting with colors, and seeing science in action as liquids turn into solids.
It’s more than just candy-making—it’s memory-making.
FAQs about Gummy Bear Recipe
1. How long do homemade gummy bears last?
Homemade gummy bears usually last 1–2 weeks in the refrigerator when stored in an airtight container.
2. Can I make vegan gummy bears without gelatin?
Yes! Substitute gelatin with agar-agar powder. It sets differently (a bit firmer and less chewy), but it works perfectly for a vegan version.
3. Why did my gummies turn out too hard?
This usually happens if you used too much gelatin or overheated the mixture. Try reducing the gelatin amount next time and keep the heat low.
4. Can I make sugar-free gummy bears?
Absolutely. Use natural sugar substitutes like stevia, monk fruit, or erythritol with unsweetened fruit juice.
5. Do I have to use molds?
Nope! You can pour the mixture into a flat baking dish and cut it into cubes or use small cookie cutters for fun shapes.
Conclusion
Making gummy bears at home is easier than you might think—and so much more rewarding than grabbing a bag at the store. With just a few ingredients, you can create colorful, chewy candies that taste amazing and can even be healthy if you use natural juices and sweeteners. Whether you stick to the classic fruity flavors, go for sour varieties, or experiment with vitamin-packed or boozy versions, homemade gummy bears are endlessly customizable.
They’re fun to make, even more fun to eat, and perfect for both kids and adults. So grab your molds, get creative with flavors and colors, and start your own candy-making adventure today. Who knows? Your homemade gummy bears might just become a family favorite.