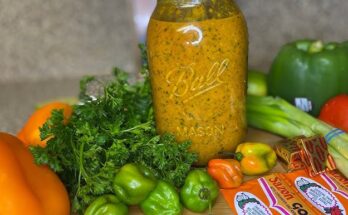
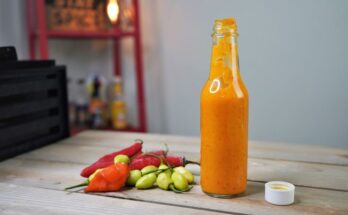
Guava Jelly Recipe: Guava jelly is one of the most flavorful homemade fruit preserves we can prepare in our kitchen. It has a bright, fruity aroma, a beautiful rosy color, and a smooth, glossy texture that spreads easily over bread, toast, pastries, and desserts. When prepared correctly, it delivers a pure guava flavor with the perfect balance of sweetness and gentle tartness. This recipe is ideal for anyone who wants a reliable method for making homemade guava jelly from scratch with simple ingredients and clear steps.
Unlike jam, which often contains fruit pulp or crushed fruit, jelly is valued for its smooth and clear consistency. That is exactly what makes this guava jelly recipe so appealing. We extract the fruit flavor into a rich juice, strain it carefully, then cook it with sugar until it reaches the perfect setting point. The result is a vibrant jelly that looks elegant, tastes fresh, and stores well.
Whether we want to preserve a seasonal guava harvest, create a special breakfast spread, or prepare a thoughtful homemade gift, this recipe gives us a dependable way to do it.
Why This Guava Jelly Recipe Works
This method works because it focuses on the essentials of proper jelly-making: ripe guavas, enough natural pectin, balanced sugar, and correct cooking time. Guava naturally contains pectin, especially when the fruit is not overly soft, so it is excellent for jelly. By simmering the fruit first and then straining the juice, we create a smooth base with concentrated flavor.
Another reason this recipe is so effective is that it avoids overcomplicating the process. We do not need an overly long ingredient list or difficult techniques. We only need patience, the right cooking approach, and attention to texture. That gives us a jelly that is clear, flavorful, and easy to spread.
Ingredients You’ll Need
To make this easy guava jelly recipe, we need the following ingredients:
- 2 kilograms fresh guavas
- 6 to 7 cups water
- 4 to 5 cups granulated sugar
(adjust slightly depending on the amount of extracted juice) - 2 tablespoons fresh lemon juice
These ingredients are enough for a generous batch, though the final yield depends on how much juice the guavas produce.
Best Guavas for Homemade Jelly
For the best results, we should choose firm ripe guavas. They should smell fragrant and sweet, but they should not be overly mushy. A mix of slightly underripe and ripe guavas often gives excellent results because slightly firm fruit contains more pectin, which helps the jelly set well.
If the guavas are too green, the flavor may be less developed. If they are too soft, the jelly may have a weaker set and a more cooked flavor. The best balance comes from fruit that is ripe, aromatic, and still holds its shape when sliced.
Kitchen Tools We Need
A good guava jelly recipe becomes much easier when we use the right tools:
- A large pot or saucepan
- A sharp knife
- A spoon or potato masher
- A fine mesh sieve, cheesecloth, or jelly bag
- A second pot for cooking the strained juice
- Clean glass jars with lids
- A ladle
- Tongs if handling hot jars
- A chilled plate for testing the set
These tools help us move smoothly from fruit preparation to bottling.
How to Prepare the Guavas
We begin by washing the guavas thoroughly under running water. Since the fruit will be cooked with the skin and seeds at first, it is important to remove any dirt or residue. Once washed, we trim off any damaged ends or bruised spots.
Next, we cut the guavas into medium pieces. There is no need to peel them. The peel, seeds, and core all contribute flavor and pectin during the simmering stage. This is one reason homemade guava jelly develops such a rich taste without requiring extra additives.
Step-by-Step Guide to Making Guava Jelly
Step 1 – Cook the Guavas Until Soft
Place the chopped guavas into a large pot and add enough water to cover them well. Usually, 6 to 7 cups of water is enough for 2 kilograms of guavas, though the exact amount can vary slightly depending on the size of the pot and the fruit.
Bring the mixture to a gentle boil over medium heat. Once it starts boiling, reduce the heat and let it simmer for about 35 to 45 minutes. Stir occasionally and lightly mash the fruit as it softens. The goal is to break down the guavas enough to release their flavor, juice, and natural pectin into the liquid.
At this stage, the kitchen will fill with the sweet tropical aroma of guava. The fruit should become very soft, and the liquid should turn fragrant and slightly pink.
Step 2 – Strain the Guava Mixture
Once the guavas are fully softened, remove the pot from the heat. Pour the mixture carefully through a jelly bag, cheesecloth-lined sieve, or fine strainer into a clean bowl or pot.
This is a very important step in creating a smooth guava jelly. We should allow the juice to drip through naturally. Pressing the pulp too hard can force cloudy solids into the liquid, which may affect the clear appearance of the jelly. For the clearest result, let the mixture strain slowly for several hours or even overnight in the refrigerator.
The strained liquid is the base of our jelly. It should be aromatic, slightly rosy, and full of pure guava essence.
Step 3 – Measure the Guava Juice
After straining, measure the amount of extracted juice. This helps us determine how much sugar to use. A common and reliable ratio is about 1 cup of sugar for every 1 cup of guava juice, though some prefer slightly less sugar for a fruitier taste.
If we extract 4 cups of juice, we can use about 4 cups of sugar. If the guavas are very sweet, we may reduce the sugar a little. The lemon juice should also be added at this stage, as it helps brighten the flavor and supports a better jelly texture.
Step 4 – Cook the Juice and Sugar
Pour the measured guava juice into a clean pot. Add the sugar and 2 tablespoons lemon juice, then place the pot over medium heat. Stir until the sugar dissolves completely.
Once dissolved, increase the heat and bring the mixture to a rolling boil. Continue boiling, stirring occasionally to prevent sticking. As it cooks, foam may rise to the surface. We can skim off excess foam with a spoon to improve the final appearance.
This stage usually takes 15 to 25 minutes, depending on the quantity and heat level. The liquid will gradually thicken and become glossier.
Step 5 – Test for the Jelly Setting Point
To know when the guava jelly recipe is ready, we need to test the set. One of the easiest methods is the chilled plate test.
Before cooking, place a small plate in the freezer. When the jelly begins to thicken, spoon a little onto the cold plate. Wait for a few seconds, then push it gently with a finger. If the surface wrinkles slightly and holds its shape, the jelly is ready. If it still runs like syrup, continue cooking for a few more minutes and test again.
We should avoid overcooking because that can make the jelly too stiff or produce a darker color than desired.
Step 6 – Pour Into Clean Jars
Once the jelly reaches the correct setting point, remove it from the heat immediately. Carefully ladle the hot jelly into clean, sterilized jars, leaving a little space at the top. Wipe the jar rims clean and seal with lids.
If we plan to store the jelly for longer periods, proper sterilization and safe sealing are important. If the jelly will be used soon, refrigeration is also an option after cooling.
As the jars cool, the jelly will continue to set. The final texture should be smooth, spreadable, and glossy.
How to Sterilize Jars Properly
To prepare jars for homemade guava jelly, wash them thoroughly with hot soapy water, rinse well, and place them in hot water or a warm oven for sterilization. Lids should also be cleaned according to their type. Using clean jars helps preserve freshness and reduces the risk of spoilage.
We should always fill jars while both the jelly and the jars are still hot. This helps create a better seal and protects the quality of the preserve.
Tips for Perfect Guava Jelly
A great guava jelly recipe depends on small details done well. These tips help improve the final result:
Use fresh, fragrant fruit
The better the guavas, the better the flavor of the jelly.
Do not rush the straining
Slow straining gives a clearer and smoother jelly.
Measure juice before adding sugar
This keeps the sweetness balanced and improves the set.
Watch the boil carefully
A rolling boil is necessary, but overheating can spoil the texture.
Test early and often
Checking the set prevents undercooking or overcooking.
Skim foam if needed
This gives the jelly a more polished and attractive appearance.
Common Mistakes to Avoid
Even a simple guava jelly recipe can go wrong if key steps are ignored. One common mistake is using too much water, which weakens the flavor. Another is undercooking the fruit during the first simmer, which reduces juice extraction. Pressing the pulp too hard during straining can also make the jelly cloudy.
Adding too little sugar may affect preservation and texture, while overcooking after the sugar is added can produce a thick, rubbery jelly. Careful measurement and close attention during cooking help avoid these problems.
How to Use Guava Jelly
This homemade guava jelly is very versatile. We can spread it over:
- Toast
- Bread rolls
- Biscuits
- Croissants
- Pancakes
- Waffles
It also works beautifully as a filling for pastries, thumbprint cookies, cakes, and layered desserts. We can even serve it alongside cheese and crackers for a sweet and savory contrast. Its bright tropical flavor pairs especially well with cream cheese, butter, and soft white cheeses.
How to Store Guava Jelly
Once sealed and cooled, jars of guava jelly can be stored in a cool, dry place. After opening, the jelly should be refrigerated and used within a reasonable time for best flavor and texture.
Always check the seal before storage. If a jar did not seal properly, it should be refrigerated and used first. A well-made jelly retains its color, shine, and fruity taste beautifully.
Can We Make Guava Jelly Without Commercial Pectin?
Yes, and that is one of the best parts of this recipe. Guava jelly can be made successfully without commercial pectin because guava naturally contains enough pectin to help the jelly set, especially when the fruit is not overripe. The lemon juice further supports this natural process and adds brightness to the flavor.
This makes the recipe simple, traditional, and highly practical for home cooks who want a cleaner ingredient list.
Why Homemade Guava Jelly Tastes Better
There is something special about making guava jelly from scratch. The flavor is fresher, the fruit character is stronger, and the sweetness can be controlled more precisely. Store-bought jelly often tastes overly sweet or artificial, while homemade jelly allows the true aroma of guava to shine.
The color is also more appealing when prepared carefully, and the texture feels more natural and luxurious. When we make it at home, we get a preserve that tastes authentic, rich, and satisfying.
FAQs about Guava Jelly Recipe
1. What is guava jelly?
Guava jelly is a sweet fruit preserve made from guava juice, sugar, and sometimes lemon juice. It has a smooth texture and a bright, fruity flavor.
2. What does guava jelly taste like?
It tastes sweet, slightly tangy, and fragrant, with the distinctive tropical flavor of guava.
3. What is the difference between guava jelly and guava jam?
Guava jelly is usually made from strained guava juice, so it is smooth and clear, while guava jam often contains fruit pulp and has a thicker texture.
4. Do we need ripe guavas for guava jelly?
Yes, ripe guavas are best because they have a stronger aroma, better sweetness, and more flavor.
5. Why is lemon juice added to guava jelly?
Lemon juice helps balance the sweetness, improve flavor, and support the setting process.
6. How do we know when guava jelly is ready?
It is ready when the mixture becomes slightly thick and glossy and can set properly after cooling.
7. Can we make guava jelly without added pectin?
Yes, guavas naturally contain some pectin, so many recipes set well without extra pectin if cooked properly.
8. How should we store homemade guava jelly?
We should keep it in a clean airtight jar in the refrigerator after it cools.
9. How long does guava jelly last?
Homemade guava jelly usually lasts about 2 to 3 weeks in the refrigerator, depending on how it is prepared and stored.
10. How can we use guava jelly?
We can spread it on bread, toast, biscuits, pastries, or use it as a filling, glaze, or sweet topping for desserts.
Final Thoughts
This guava jelly recipe is a classic method that turns simple fruit into a smooth, glossy, and delicious preserve. With fresh guavas, sugar, lemon juice, and the right technique, we can create a jelly that is perfect for breakfast tables, dessert fillings, and homemade gifts.
By following each step carefully, we achieve a jelly with excellent flavor, a beautiful set, and lasting freshness. Whether we are making it for everyday use or for a special seasonal batch, this recipe delivers a reliable and rewarding result every time.
A homemade jar of guava jelly is always worth it.