Ground Jerky Recipe: Have you ever craved jerky but found store-bought versions too expensive or packed with preservatives you can’t pronounce? You’re not alone. That’s where homemade ground jerky comes in! Making jerky at home is easier than you might think, especially when you’re working with ground meat. It’s faster, more flexible, and best of all, you can customize it to your heart’s content.
Ground jerky, unlike whole-muscle jerky, has a soft and chewy texture. It’s made by mixing ground meat with a flavorful marinade and then drying it out to create that delicious, protein-packed snack. And don’t worry—it’s not complicated! With just a few tools and some patience, you’ll be snacking like a pro.
So let’s roll up our sleeves and dive into this easy-to-follow guide. Whether you’re prepping trail snacks or stocking up for the week, this homemade ground jerky recipe is a game-changer.
Benefits of Making Homemade Ground Jerky
When you make jerky at home, you’re not just saving money—you’re also getting full control over the ingredients. Here’s why it’s worth the effort:
- Cost-Effective: Store-bought jerky can cost up to $2 per ounce. When you make it yourself, you’re saving big over time.
- Healthier: Say goodbye to hidden sugars, preservatives, and sodium overload. Use lean meats and control every spice and seasoning.
- Customizable: Want it spicy? Sweet? Smoky? You decide. Homemade jerky lets you experiment with flavors and textures.
- Kid-Friendly: Make a milder version for school snacks or a protein-rich addition to lunchboxes.
Plus, it’s satisfying! You’ll feel proud knowing you created something delicious from scratch.
Essential Tools and Equipment
Before we get started, here’s what you’ll need in your kitchen:
- Ground Meat: Choose lean beef (at least 90/10) or grind your own.
- Jerky Gun: This is the easiest way to shape your ground jerky into strips. Think of it like a caulking gun for meat.
- Dehydrator: Ideal for even drying at low temperatures. If you don’t have one, your oven will work just fine.
- Mixing Bowls: For combining meat and seasonings.
- Measuring Spoons and Cups: Precision matters for flavor.
- Parchment Paper: Makes cleanup a breeze.
- Cooling Racks and Airtight Containers: For storage once your jerky is done.
Having the right tools on hand ensures the process goes smoothly from start to finish.
List of Ingredients You’ll Need
Let’s talk ingredients. The beauty of ground jerky is its simplicity—you don’t need much to get that classic, craveable flavor.
Basic Ingredients:
- 1 to 2 pounds of lean ground beef (90/10 or leaner)
- 1 tablespoon soy sauce
- 1 tablespoon Worcestershire sauce
- 1 teaspoon onion powder
- 1 teaspoon garlic powder
- 1 teaspoon smoked paprika
- 1 teaspoon black pepper
- 1 teaspoon salt
- 1 tablespoon brown sugar or honey (optional for sweetness)
- ½ teaspoon curing salt (Prague Powder #1 – optional but recommended for safety)
Optional Add-ins:
- Crushed red pepper flakes (for heat)
- Liquid smoke (for a BBQ feel)
- Ground mustard seed
- Cayenne pepper
- Dried herbs like thyme or oregano
Feel free to play with flavors—just make sure the total liquid content stays low to avoid a soggy mixture.
How to Choose the Best Meat for Ground Jerky
The meat you choose will affect the final taste, texture, and fat content of your jerky. Here’s what to keep in mind:
- Beef is King: Ground beef (especially 90/10 or leaner) is the go-to for jerky. It’s affordable and easy to find.
- Turkey or Chicken: Lean options that work well, but require a gentler drying process to prevent over-drying.
- Venison: Excellent for a gamey twist, often mixed with beef or pork fat to keep it moist.
- Fat Matters: Too much fat makes jerky greasy and prone to spoilage. Aim for lean meats with under 10% fat.
Want to grind your own meat? Chuck roast and eye of round are top picks.
Step-by-Step Guide to Making Ground Jerky
This is where the magic happens. Follow this process carefully, and you’ll have perfect jerky every time.
Step 1: Prepare Your Meat
Start with lean ground meat such as beef, turkey, or venison (90–93% lean works best). Fat shortens shelf life, so avoid high-fat meat. Place the ground meat in a large mixing bowl and let it chill slightly so it’s easier to work with.
Step 2: Mix in the Seasoning
Add your jerky seasoning to the meat. This can include salt, black pepper, garlic powder, onion powder, smoked paprika, soy sauce, Worcestershire sauce, and a touch of sugar or honey if desired. Mix thoroughly with clean hands until the seasoning is evenly distributed. Proper mixing ensures consistent flavor in every strip.
Step 3: Load the Jerky Gun
Transfer the seasoned meat into a jerky gun. Pack it firmly to remove air pockets, which helps the jerky dry evenly and prevents crumbling during dehydration.
Step 4: Form Your Jerky Strips
Press the meat into long, even strips onto dehydrator trays or parchment-lined baking sheets. Leave a little space between strips so air can circulate freely during drying.
Step 5: Dehydrate or Bake the Jerky
For a dehydrator, set the temperature to 70°C (160°F) and dry for 4–6 hours. If using an oven, set it to the lowest temperature (usually 75–80°C / 170–175°F), prop the door slightly open, and bake for 3–5 hours, flipping once.
Step 6: Check for Doneness
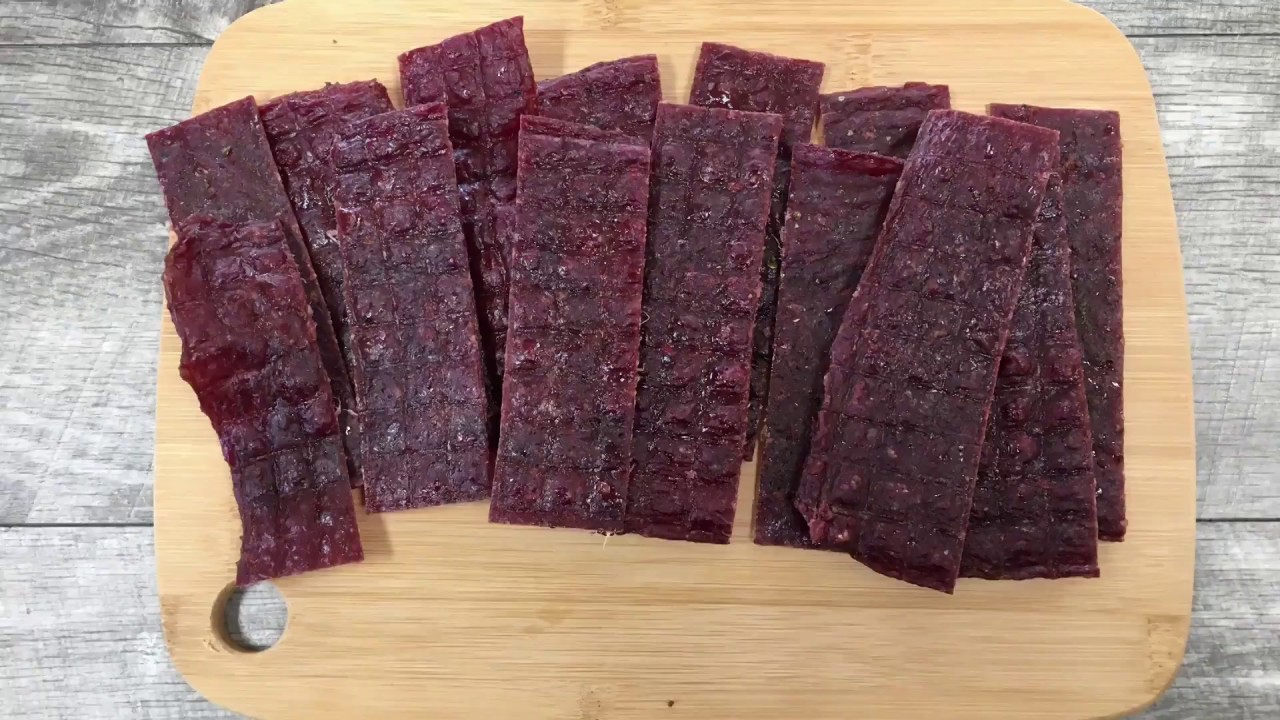
Jerky is done when it’s dry but still flexible. It should bend and crack slightly without snapping in half. There should be no visible moisture.
Step 7: Cool and Store Properly
Allow the jerky to cool completely before storing. Keep it in an airtight container or vacuum-sealed bag. Store at room temperature for short-term use or refrigerate for longer freshness.
Top Tips for Perfect Ground Jerky
Want to make your jerky even better? These tips can take your batch from good to awesome:
- Use Lean Meat: Too much fat can make jerky greasy and spoil faster.
- Marinate Overnight: Letting the meat rest with seasonings enhances flavor.
- Use a Jerky Gun: It gives cleaner, more uniform results than rolling and cutting.
- Rotate Trays: Especially in dehydrators or ovens to avoid uneven drying.
- Don’t Overdry: Jerky should be chewy, not rock hard.
Bonus Tip: Add ½ teaspoon of liquid smoke to your mix for a smoky BBQ flavor without a smoker.
Storage and Shelf Life
Proper storage is the difference between tasty jerky and a ruined snack.
- Room Temp: Store in an airtight jar or ziplock bag for up to 1 week.
- Refrigerated: Lasts up to 4 weeks.
- Freezer: Vacuum-sealed jerky can last 6+ months without losing flavor or texture.
Always inspect jerky before eating—if it smells off or feels slimy, toss it.
Variations of Ground Jerky
Once you master the basic recipe, the sky’s the limit! Try these flavor variations:
Spicy Jerky
- Add cayenne pepper, crushed red pepper flakes, and chipotle powder for a real kick.
Teriyaki Style
- Swap Worcestershire with teriyaki sauce, add a touch of ginger and honey.
Garlic & Herb
- Add minced garlic, thyme, rosemary, and cracked black pepper.
Smoky BBQ
- Use BBQ sauce, smoked paprika, and a touch of molasses or brown sugar.
Experimenting with flavors is half the fun—just don’t go overboard with liquids.
Nutritional Information
A single 1-ounce serving of homemade ground beef jerky (made with lean beef) typically contains:
| Nutrient | Amount |
|---|---|
| Calories | 100–120 kcal |
| Protein | 10–12g |
| Fat | 5g or less |
| Sodium | 300–600mg |
| Carbs | 2–4g |
Keep in mind this can vary based on the seasonings and type of meat you use. Homemade jerky is generally much lower in sugar and sodium than store-bought options.
Troubleshooting Common Issues
If something goes wrong, don’t stress! Here’s how to fix common problems:
- Jerky Too Dry: Next time, lower the heat slightly or reduce drying time.
- Jerky Crumbles: This may be due to too lean meat or over-drying. Mix in a bit of olive oil or water next time to help bind it.
- Uneven Texture: Ensure strips are uniform and rotate trays during drying.
Every batch is a learning experience—don’t give up!
Is It Safe to Make Jerky at Home?
Yes—but you need to follow food safety practices:
- Always use lean meat to prevent bacteria growth.
- Keep everything clean—sanitize tools and your hands.
- Heat jerky to at least 160°F internally to kill pathogens.
- Use curing salt if storing long-term at room temp.
Following these steps ensures your jerky is both tasty and safe to eat.
Serving Suggestions
Not sure how to enjoy your jerky? Here are a few ideas:
- On-the-Go Snack: Perfect for hiking, travel, or the gym.
- Protein Boost: Pair with cheese, nuts, or fruit.
- Crumbled Over Salad: Adds flavor and crunch.
- Packed in Lunchboxes: A fun and healthy treat for kids.
Jerky doesn’t have to be just a snack—it can be part of a meal too!
FAQs about Ground Jerky Recipe
1. Can I make ground jerky without a jerky gun?
Yes! You can roll the meat between two sheets of parchment paper and cut it into strips with a knife or pizza cutter.
2. How long does homemade ground jerky last?
Stored properly, it lasts 1 week at room temp, 1 month in the fridge, and 6 months in the freezer.
3. Can I use pork or chicken for ground jerky?
Yes, but make sure it’s lean and cooked thoroughly to a safe internal temperature.
4. What’s the best dehydrator temperature for jerky?
160°F is recommended for both safety and optimal texture.
5. Is ground jerky healthier than whole muscle jerky?
Both are healthy when made at home. Ground jerky can be easier to chew and customize, especially for flavor blending.
Conclusion
Making ground jerky at home is not only fun but also incredibly rewarding. From selecting your favorite meat to customizing the flavor and drying it to perfection, every step brings you closer to a tasty, healthy snack that blows store-bought options out of the water.
Whether you’re a jerky newbie or a seasoned snack master, this guide has everything you need to turn ground meat into savory, satisfying jerky. Just follow the steps, don’t rush the drying process, and most of all—have fun with it.
Happy jerky making!