Grilled Chicken Thighs Recipe: There’s something magical about the sizzle of chicken thighs hitting a hot grill. It’s the kind of sound that tells you something delicious is on the way. Grilled chicken thighs are juicy, flavorful, and incredibly easy to make, making them perfect for backyard BBQs, meal prep, or a simple weeknight dinner. This guide walks you through everything—from choosing your chicken to serving it up hot off the grill. If you’re tired of dry chicken breasts or bland grilling attempts, this is your go-to guide for mastering the art of grilling chicken thighs.
Whether you’re a grill master or just starting, this step-by-step approach will ensure your chicken thighs come out tender, crispy on the outside, and loaded with flavor. So, grab your tongs and fire up the grill—let’s get cooking!
Why Choose Chicken Thighs for Grilling?
Chicken thighs are a grilling game-changer, and here’s why. Unlike chicken breasts, thighs are naturally juicier thanks to their higher fat content. This means they’re much more forgiving on the grill—they won’t dry out as easily, and they absorb marinades like a sponge. Plus, that little bit of extra fat renders beautifully on the grill, creating crispy edges and mouthwatering flavor.
Think about it: if you’ve ever grilled chicken breasts and ended up with a tough, dry result, you know the struggle. Chicken thighs solve that problem. They have a richer flavor, a more satisfying bite, and they’re versatile enough for almost any flavor profile—from smoky BBQ to zesty lemon garlic.
And let’s not forget, they’re usually more affordable than breasts, making them a budget-friendly choice for feeding a crowd. Whether you’re planning a summer cookout or a quick weekday dinner, chicken thighs are the smart choice for grillers who want flavor, moisture, and satisfaction in every bite.
What Makes Grilled Chicken Thighs So Delicious?
The secret to amazing grilled chicken thighs lies in three things: the fat content, the marinade, and the grill’s heat. The thigh’s fat melts as it cooks, keeping the meat moist and rich in flavor. Marinades seep deeper into thighs than they do in leaner cuts, which means you get bold flavor throughout—not just on the surface.
Grilling adds a smoky char that no other cooking method can replicate. The heat caramelizes the natural sugars in the marinade or rub, creating that mouthwatering crust on the outside while locking in juices inside. The result? A perfect bite: crispy, juicy, and exploding with flavor.
It’s also the versatility. Want something spicy? Go for a chili-lime marinade. Craving something sweet and smoky? Try a honey BBQ glaze. You can change the vibe completely with a few tweaks to seasoning or sauces. This adaptability is part of what makes grilled chicken thighs such a hit across different cuisines and cultures.
Health Benefits of Grilled Chicken Thighs
While chicken thighs do have more fat than breasts, they’re still a great source of lean protein—especially when grilled. Grilling helps render out some of the fat, reducing the calorie load while keeping all that juicy goodness. Plus, when compared to fried or heavily sauced chicken, grilled thighs are a far healthier option.
Here’s the bonus: chicken thighs are packed with essential nutrients like iron, zinc, and B vitamins. These help boost your immune system, support metabolism, and keep your energy levels high. If you remove the skin, you cut back on saturated fat while still keeping that tenderness from the thigh meat.
And because grilling doesn’t require a lot of added oil or butter, it’s one of the healthiest cooking methods available. So yes, you can enjoy grilled chicken thighs guilt-free—just pair them with healthy sides like grilled veggies or a fresh salad and you’ve got yourself a balanced meal.
List of Ingredients You’ll Need
Let’s keep it simple but flavorful. Here’s what you’ll need for the perfect grilled chicken thighs.
Main Ingredients
- 6–8 chicken thighs (bone-in, skin-on or boneless—your choice)
- 3 tablespoons olive oil
- 2 tablespoons soy sauce
- 1 tablespoon lemon juice
- 1 tablespoon honey
- 4 cloves garlic, minced
- 1 teaspoon smoked paprika
- 1 teaspoon onion powder
- ½ teaspoon black pepper
- 1 teaspoon salt
Optional Marinade Add-ons
- 1 teaspoon crushed red pepper flakes (for heat)
- 1 tablespoon Dijon mustard (for tang)
- 1 tablespoon Worcestershire sauce (for umami)
- Fresh herbs (like rosemary, thyme, or parsley)
All of these ingredients work together to create a well-balanced marinade that’s sweet, savory, a little smoky, and absolutely packed with flavor.
Choosing the Right Chicken Thighs: Bone-In vs. Boneless
This decision comes down to personal preference—and cooking time.
Bone-in, skin-on thighs are a favorite for grill lovers. The bone adds flavor and helps retain moisture, while the skin crisps up beautifully over direct heat. These take a little longer to cook but reward you with unbeatable taste and texture.
Boneless, skinless thighs, on the other hand, cook faster and are easier to eat, especially if you’re prepping for meal plans or sandwiches. They also absorb marinade quicker since there’s no skin barrier.
If you’re short on time or feeding picky eaters, boneless is the way to go. But if you’re after rich, smoky, crispy-skin goodness, bone-in thighs should be your pick.
Prepping the Chicken Thighs for Maximum Flavor
Before you toss those thighs on the grill, a bit of prep work goes a long way. First, trim any excess fat or skin if you’re using bone-in thighs. Pat them dry with a paper towel—this helps the marinade stick better and the skin crisp up.
Next, mix your marinade ingredients in a bowl or large zip-lock bag. Toss in the chicken, making sure every piece is coated thoroughly. Massage it into the meat—yes, get your hands in there! It’s all about getting that flavor deep into the thighs.
Let the chicken marinate for at least 30 minutes, but for best results, aim for 4–6 hours. If you’ve got the time, an overnight soak in the fridge gives you unbeatable flavor. Just remember to bring the chicken to room temperature before grilling to ensure even cooking.
The Best Marinade for Grilled Chicken Thighs
A good marinade is where the magic begins. It’s not just about flavor—marinading tenderizes the meat, infuses it with moisture, and builds layers of taste that grilling alone can’t provide. The best marinades for chicken thighs strike a balance between acidity, fat, and seasoning.
Here’s a simple and powerful marinade formula that never fails:
- Acid (for tenderizing): Lemon juice, lime juice, vinegar, or yogurt
- Oil (for moisture and richness): Olive oil or avocado oil
- Salt (to enhance flavor): Soy sauce or sea salt
- Sweetness (to balance acidity and help caramelize): Honey, brown sugar, or maple syrup
- Aromatics (for flavor depth): Garlic, onion, ginger
- Spices & Herbs: Paprika, cumin, black pepper, rosemary, thyme, chili flakes
Example Marinade Recipe (per 6 thighs):
- 3 tbsp olive oil
- 2 tbsp soy sauce
- 1 tbsp lemon juice
- 1 tbsp honey
- 4 cloves garlic, minced
- 1 tsp smoked paprika
- 1 tsp onion powder
- ½ tsp black pepper
- Optional: 1 tsp chili flakes for heat
Mix all ingredients in a large bowl or ziplock bag. Add chicken and coat well. Cover and refrigerate.
How Long Should You Marinate Chicken Thighs?
Timing matters more than you think. While some flavor can soak in after just 30 minutes, to really let the chicken absorb those seasonings, aim for at least 4–6 hours. This allows the acid in the marinade to break down muscle fibers just enough to tenderize without turning mushy.
Here’s a general guide:
- Minimum: 30 minutes (if you’re in a rush)
- Ideal: 4 to 6 hours
- Max: Up to 24 hours (especially for bold marinades with spices or citrus)
Marinating too long, especially in highly acidic marinades, can actually break down the texture too much and give you a mushy or stringy bite. So don’t overdo it.
Essential Grilling Tools You’ll Need
Before you start grilling, make sure you’re equipped with the right tools. You don’t need a fancy outdoor kitchen, but these essentials make grilling easier, safer, and more effective.
Must-Have Tools:
- Grill (Gas or Charcoal) – Either works; charcoal adds a smokier flavor.
- Long-handled Tongs – For safely flipping and moving chicken.
- Meat Thermometer – Accuracy is everything when it comes to doneness.
- Grill Brush – To clean your grates before and after grilling.
- Basting Brush – Handy for adding sauces or extra marinade while grilling.
- Oil Spray or Paper Towels with Tongs – To oil the grates and prevent sticking.
Optional but helpful:
- Aluminum Foil or Grill Basket – For more delicate thighs or marinades that might drip.
- Drip Tray – Especially for charcoal grills to avoid flare-ups.
Having the right setup saves time and helps ensure your grilled chicken thighs turn out exactly how you want—crispy, flavorful, and cooked to perfection.
How to Grill Chicken Thighs – Step-by-Step Guide
Ready to fire things up? Here’s how to grill chicken thighs from start to finish.
Step 1: Preheat the Grill
Whether you’re using gas or charcoal, preheating is crucial. You want a medium-high heat—about 375°F to 450°F (190°C to 230°C). This allows for perfect searing without burning the outside too fast.
For gas grills: Turn burners to medium-high and close the lid. Let it heat up for 10–15 minutes.
For charcoal grills: Let the coals turn white-hot, and spread them evenly. If using a two-zone fire, bank coals to one side for indirect cooking later.
Step 2: Clean and Oil the Grates
A clean grill means better grill marks and less sticking. Use a grill brush to scrape off any residue from previous cookouts.
Then, oil the grates: dip a folded paper towel in vegetable oil, grab it with tongs, and rub it over the grates. This creates a non-stick surface for the chicken.
Step 3: Place the Chicken on the Grill
Place chicken thighs skin-side down (if using skin-on) directly over the heat. Arrange them evenly, leaving some space between each piece for heat circulation.
Don’t overcrowd. The grill should stay hot and smoky, not steam from overcrowded meat.
Step 4: Grill to Perfection
Grill each side for about 5–7 minutes, flipping once the first side has nice char marks and releases easily. If the chicken sticks, it’s not ready to flip.
After both sides are seared, move the chicken to indirect heat or lower the grill to medium-low. Cover the lid and continue grilling for another 10–15 minutes, depending on thickness.
Use a meat thermometer to check doneness—165°F (74°C) is the sweet spot. Bone-in thighs may take longer (20–25 minutes total), while boneless might be done sooner.
Step 5: Let It Rest
Once done, pull the thighs off the grill and let them rest for 5–10 minutes. This helps redistribute the juices and keeps the meat moist.
Resist the temptation to cut into them right away. Letting them rest makes a big difference in texture and flavor.
Grilling Tips for Juicy and Tender Chicken Thighs
Want to take your grilled chicken thighs from “good” to “can I get the recipe?” Here are the tips and tricks pros swear by to lock in juiciness, boost flavor, and avoid common grilling mistakes.
1. Don’t Skip the Rest Time
Seriously, this matters. Letting your chicken thighs rest after grilling allows juices to redistribute evenly through the meat. Cut too early, and all that goodness runs out onto the plate instead of staying in the chicken.
2. Use a Meat Thermometer
Guessing is for amateurs. Insert a thermometer into the thickest part of the thigh (but not touching the bone). You’re aiming for 165°F (74°C). For extra tenderness, some cooks prefer going slightly higher—around 175°F–180°F, especially for bone-in thighs, where a little extra heat breaks down connective tissue into juicy deliciousness.
3. Flip Only Once
Turning your chicken over and over makes it lose moisture and risks tearing the skin. Let it sear properly, then flip once halfway through cooking. You’ll get better grill marks and more even cooking.
4. Avoid Flare-Ups
Fat dripping onto hot coals can cause flare-ups that char the outside and leave the inside undercooked. To avoid this, move your chicken to indirect heat after the initial sear and close the lid to cook it through.
5. Marinate Right, Not Overnight
Yes, marinades are essential—but too much of a good thing can go wrong. If your marinade is acidic (contains lemon, vinegar, or yogurt), don’t marinate for more than 24 hours. The acid can start to break down the meat too much, making it mushy.
6. Oil the Grill, Not the Chicken
Instead of slathering oil on the meat (which can drip and cause flare-ups), oil your grill grates. This keeps the chicken from sticking and gives you those beautiful grill marks.
These small adjustments can make a world of difference and help you grill thighs that are juicy, flavorful, and totally crave-worthy every single time.
Internal Temperature: When Are Grilled Chicken Thighs Done?
This is the number one question people have when grilling chicken: When is it done?
The FDA recommends 165°F (74°C) for all poultry, and that’s a great baseline. But with chicken thighs—especially bone-in—you can safely go a little higher without drying them out. In fact, some chefs prefer thighs cooked to 175°F–180°F (79°C–82°C) because it breaks down collagen and makes the meat ultra-tender.
Here’s a quick temperature guide:
| Type of Chicken Thigh | Safe Internal Temp | Ideal for Juiciness |
|---|---|---|
| Boneless, Skinless | 165°F | 165°F–170°F |
| Bone-in, Skin-on | 165°F | 175°F–180°F |
How to check it properly:
- Use an instant-read thermometer.
- Insert into the thickest part, avoiding the bone.
- If juices run clear and the temp reads correctly, you’re good to go.
No thermometer? Slice into the thickest thigh. If there’s no pink and the juices run clear, it’s likely done—but this method isn’t foolproof. Investing in a digital thermometer will save you from guesswork.
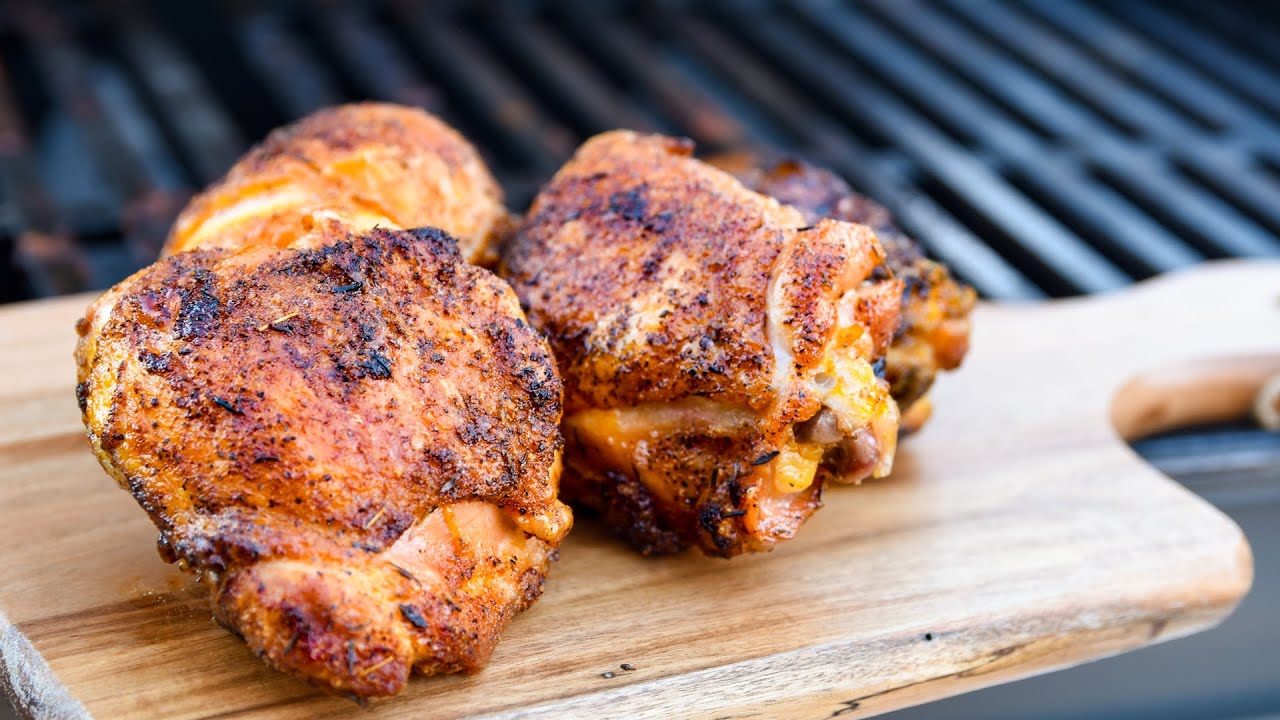
How to Get Crispy Skin on Grilled Chicken Thighs
Want that crackly, golden skin that crunches with every bite? You’re not alone. Crispy skin is chef’s kiss when it comes to grilled chicken thighs.
Here’s how to nail it:
1. Start Skin-Side Down Over High Heat
Get those thighs on the grill with the skin side down first. Medium-high heat is key here—not too hot or you’ll burn it before the meat cooks. Let it sit untouched for 6–8 minutes until the skin crisps up and easily releases from the grill.
2. Don’t Flip Too Soon
The biggest crispy-skin sin? Flipping too early. Wait until the chicken naturally releases from the grill before turning it over.
3. Dry the Skin Before Grilling
Use paper towels to pat the chicken skin dry before marinating or grilling. Moisture is the enemy of crispiness.
4. Avoid Sugary Marinades Early
Sugar burns fast. If your marinade has honey, brown sugar, or maple syrup, don’t brush it on until the last 5 minutes of grilling—or else the skin might char instead of crisp.
5. Finish with Direct Heat
Once your thighs are cooked through, give the skin one final sear over direct heat. It only takes a minute or two per side to crisp things up beautifully.
Following these tricks will give you that coveted crispy-on-the-outside, juicy-on-the-inside result that people rave about.
Serving Suggestions – What Goes Best With Grilled Chicken Thighs
Grilled chicken thighs are incredibly versatile, which means you can serve them up with just about anything. But if you’re aiming for a full, flavor-packed meal, these side options are winners every time.
Classic BBQ Pairings:
- Corn on the Cob – Grilled or boiled with a little butter and salt.
- Coleslaw – Crunchy, creamy, and refreshing.
- Potato Salad – A BBQ staple with a creamy or mustard-based dressing.
- Mac and Cheese – Because cheesy carbs never hurt anyone.
Light and Fresh Options:
- Grilled Vegetables – Zucchini, bell peppers, asparagus, and mushrooms.
- Garden Salad – Tossed in a light vinaigrette for balance.
- Quinoa or Couscous Salad – With herbs, lemon, and cherry tomatoes.
International Twists:
- Mexican Style: Serve with grilled corn, avocado, lime wedges, and tortillas.
- Asian Style: Pair with jasmine rice, steamed bok choy, and soy dipping sauce.
- Mediterranean Style: Go with hummus, pita bread, cucumber salad, and tzatziki.
And don’t forget the drinks! Whether it’s lemonade, iced tea, or a cold beer, the right beverage adds the final touch.
Storage and Reheating Tips
Grilled chicken thighs store and reheat beautifully, making them ideal for meal prep or leftovers.
Storing:
- Let chicken cool to room temperature before storing.
- Place in an airtight container and refrigerate for up to 4 days.
- For longer storage, freeze them (wrapped tightly or in freezer bags) for up to 3 months.
Reheating:
- Oven: Preheat to 350°F (175°C). Place thighs in a baking dish with a splash of broth or water. Cover with foil and heat for 15–20 minutes.
- Microwave: Quick and easy, but can dry out the meat. Add a damp paper towel on top and microwave for 1–2 minutes.
- Skillet: Add a touch of oil, cover, and heat over medium-low until warmed through.
Avoid reheating on high heat—that’s a fast track to dry chicken. Reheat low and slow to maintain juiciness.
Common Mistakes to Avoid When Grilling Chicken Thighs
Even experienced grillers make mistakes now and then. If your chicken thighs have ever turned out dry, bland, or burnt, chances are one of these common pitfalls was the culprit. Let’s break down what to avoid so you can grill like a pro every single time.
1. Not Preheating the Grill Properly
A cold grill leads to uneven cooking and soggy skin. Always let your grill come up to temp—aim for medium-high heat (375–450°F) before placing the chicken on. A well-heated grill sears the meat quickly, locking in juices and building flavor from the get-go.
2. Over-Marinating
Yes, you read that right—too much marinade time is a thing. Especially with acidic ingredients like vinegar, lemon, or yogurt, over-marinating (more than 24 hours) can turn chicken thighs mushy and rubbery. Stick to 4–6 hours for best results.
3. Using the Wrong Heat Zones
Trying to cook everything on high heat? You’ll end up with burnt outsides and raw insides. Start with direct heat to sear, then move to indirect heat to cook through gently. This two-zone method gives you perfect texture and prevents burning.
4. Pressing the Chicken Down
We’ve all done it—pressing the chicken with a spatula to “speed things up” or get grill marks. Don’t do it! All you’re doing is squeezing out the juices that make the meat tender and moist.
5. Not Checking Internal Temperature
Guesswork is your enemy. Chicken thighs may look done outside but still be undercooked inside. Always use a meat thermometer and aim for at least 165°F for safety (up to 180°F for bone-in thighs for maximum tenderness).
6. Skipping the Resting Period
Cutting into your chicken immediately after grilling releases all those flavorful juices onto the plate. Let the thighs rest for 5–10 minutes under foil. This keeps every bite moist and delicious.
7. Not Cleaning the Grill
Old grease, stuck-on bits, and ash can ruin the flavor and cause sticking. Clean those grates before you grill—your chicken (and your guests) will thank you.
By avoiding these mistakes, you’ll get flavorful, juicy, perfectly grilled chicken thighs every time.
FAQs about Grilled Chicken Thighs Recipe
1. Can I grill frozen chicken thighs?
It’s not recommended to grill frozen chicken thighs directly. The outside will cook too fast while the inside stays raw. Always thaw your chicken in the fridge overnight or use the defrost function on your microwave before grilling.
2. How long should I marinate chicken thighs?
For best results, marinate chicken thighs for 4 to 6 hours. If you’re in a pinch, even 30 minutes will add some flavor, but overnight gives you maximum infusion. Don’t exceed 24 hours for acidic marinades to avoid mushy texture.
3. What’s the best internal temperature for chicken thighs?
The safe internal temp is 165°F (74°C). However, for bone-in thighs, going up to 175°F–180°F results in more tender meat as the collagen breaks down, making the chicken extra juicy.
4. Should I grill chicken thighs covered or uncovered?
Start grilling uncovered for a great sear and those delicious grill marks. After searing both sides, move the chicken to indirect heat and cover the grill to finish cooking evenly and lock in smoke flavor.
5. Can I use the same recipe for chicken breasts?
You can, but remember: chicken breasts cook faster and can dry out more easily. If using this marinade, reduce the grill time and always check the internal temp to prevent overcooking.
Conclusion
Grilling chicken thighs might seem simple, but doing it right—with juicy insides, crispy skin, and bold flavor—takes just a little technique and planning. From choosing the best cut to prepping with a flavorful marinade, mastering the heat zones, and nailing the cook time, each step plays a role in delivering a mouthwatering result.
Chicken thighs are the MVP of the grill: forgiving, affordable, and insanely flavorful. Whether you’re whipping them up for a quick family dinner or impressing guests at a summer cookout, this guide gives you everything you need to grill with confidence.
So next time you fire up the grill, skip the guesswork. Follow this step-by-step method and you’ll get perfectly grilled chicken thighs that are juicy, smoky, and downright addictive. Happy grilling!


