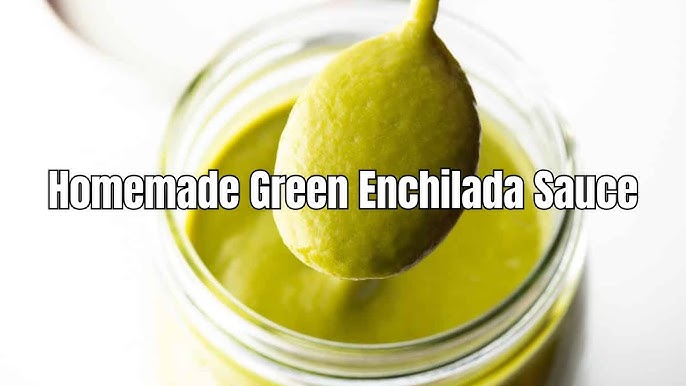
Green Enchilada Sauce Recipe: Green enchilada sauce is a flavorful, tangy, and zesty Mexican-inspired condiment primarily made with green chili peppers, tomatillos, garlic, onions, and a unique blend of herbs and spices. It’s the heart and soul of green enchiladas but also works great as a base for other recipes. Compared to its red counterpart, green enchilada sauce delivers a fresher, sharper flavor thanks to the use of tart tomatillos and spicy green chilies. The sauce’s versatility and vibrant flavor make it a favorite in many kitchens.
The beauty of green enchilada sauce lies in its perfect balance of heat, acidity, and depth. When made fresh, it captures the essence of traditional Mexican flavors, often lost in store-bought versions. Whether you’re layering it over enchiladas, spooning it over grilled chicken, or using it as a dip, this sauce adds a burst of flavor that elevates any dish.
Why Make It at Home?
Sure, you could grab a can off the shelf at the grocery store—but why settle for bland and overly processed? Making green enchilada sauce at home gives you complete control over the ingredients. Want it spicier? Add more jalapeños. Prefer a milder flavor? Tone down the chilies. Craving a hint of smokiness? Roast your veggies longer. The customization options are endless.
Homemade also means fresher ingredients, no preservatives, and a more nutrient-rich result. Plus, it’s cheaper than buying premium sauces regularly. If you cook Mexican dishes often, keeping a homemade batch in your fridge or freezer is a time-saving, flavor-boosting decision.
Key Ingredients You’ll Need
Fresh Produce Essentials
Your green enchilada sauce starts with a handful of wholesome, fresh vegetables. Here’s what you’ll need:
- Tomatillos: These small, green, tomato-like fruits are the backbone of the sauce. They add a tangy, slightly citrusy taste.
- Green chilies: Choose from poblano, Anaheim, or jalapeño peppers depending on your heat preference.
- Onions: White or yellow onions work best. They add sweetness and depth.
- Garlic: Fresh cloves offer a rich, aromatic undertone that’s hard to beat.
- Cilantro: For that unmistakable herbal brightness.
All of these fresh elements bring authenticity and boldness to your sauce. Roasting them before blending helps intensify their natural flavors and adds a smoky layer to the overall taste.
Herbs and Spices
Spices are the flavor boosters that make your sauce pop. Essential ones include:
- Ground cumin: For earthy depth.
- Oregano (preferably Mexican): Adds an aromatic, slightly peppery flair.
- Salt and pepper: To taste, of course.
- Lime juice: Brightens everything up and balances the heat with acidity.
Optional additions like coriander, smoked paprika, or a pinch of sugar (if your tomatillos are super tangy) can further refine your flavor profile.
Optional Add-ins for Custom Flavor
Want to play chef? Try these:
- Roasted green bell peppers for sweetness.
- Avocado for a creamy finish.
- Spinach or kale to boost the nutrition without altering the taste too much.
- Chicken or vegetable broth for a richer base instead of water.
Your green enchilada sauce can be as bold, rich, or mild as you like. Experimenting with different combos keeps things interesting every time you make it.
Tools and Equipment Required
Kitchen Tools for Perfect Consistency
Having the right tools can make the sauce-making process smoother and more enjoyable. Here’s what you’ll need:
- Blender or food processor: For blending everything to a smooth consistency.
- Large skillet or saucepan: Ideal for roasting and simmering.
- Tongs: Useful when turning the vegetables during roasting.
- Knife and cutting board: Basic but essential for chopping your produce.
- Baking sheet (if roasting in the oven): Helps get that char on your veggies for deeper flavor.
A high-speed blender will give you a silkier sauce, while a food processor can yield a chunkier, more rustic texture. Choose based on your preference.
Time-saving Tips for Beginners
If you’re short on time, opt for broiling your vegetables instead of roasting—cuts the time in half without sacrificing flavor. Also, consider chopping everything ahead of time or using pre-peeled garlic. Meal prep can go a long way in speeding up the process.
Step-by-Step Instructions
Step 1: Roast the Vegetables
Start by preheating your oven to 425°F (220°C). Husk your tomatillos, rinse them, and place them on a baking sheet alongside the green chilies, quartered onion, and unpeeled garlic cloves. Roast for about 20-25 minutes, or until everything is charred and softened. Flip halfway through for even roasting.
Roasting the vegetables is a game-changer. It caramelizes the natural sugars in the tomatillos and onions and brings out the smoky goodness in the chilies and garlic. This is where your sauce starts to develop those deep, complex layers of flavor.
Once done, let the veggies cool slightly. Peel the garlic and chilies (remove seeds for a milder sauce), then you’re ready to blend.
Step 2: Blend to Perfection
Once your roasted vegetables have slightly cooled, transfer them to a blender or food processor. Toss in a handful of fresh cilantro, a teaspoon of cumin, a pinch of oregano, and squeeze in some fresh lime juice. Add salt and pepper to taste. If you want a smoother sauce, pour in a bit of water or chicken/vegetable broth—just enough to help it blend easily.
Blend on high until the mixture becomes silky and smooth. If you’re aiming for a chunkier sauce, pulse it instead of blending continuously. Taste it. Need more salt? Want a tangier punch? Add another splash of lime juice. Want to turn up the heat? Throw in an extra chili.
Blending is your opportunity to customize the sauce exactly how you like it. Make sure to scrape down the sides to incorporate everything evenly. At this point, the raw blended flavor might still need mellowing, which leads us to the next step.
Step 3: Simmer and Season
Pour the blended sauce into a saucepan or skillet and bring it to a light simmer over medium heat. Let it bubble gently for 10–15 minutes. This simmering step thickens the sauce and helps the flavors meld together. It also deepens the taste, removing any raw edge from the ingredients.
You’ll notice the sauce becoming slightly darker and more concentrated. If it gets too thick, add a splash of broth or water to loosen it. Stir occasionally to avoid sticking.
Once you’re satisfied with the consistency and taste, turn off the heat. Your homemade green enchilada sauce is now ready to use or store!
Storing and Preserving Your Sauce
Refrigeration Tips
Freshly made green enchilada sauce can be stored in the fridge in an airtight container for up to a week. Let the sauce cool completely before transferring it to glass jars or containers. This helps preserve freshness and avoids condensation, which can lead to spoilage.
For daily use, a mason jar works great. Just make sure to use a clean spoon every time to avoid introducing bacteria. If you notice any changes in smell or color after a few days, it’s best to discard it.
Adding a layer of olive oil on top can also extend the shelf life by preventing oxidation. Always label the jar with the date you made it—trust me, you’ll thank yourself later!
Freezing for Long-term Use
Want to make a big batch and save some for later? Green enchilada sauce freezes beautifully. Pour it into freezer-safe bags or containers, leaving a little room for expansion. Ice cube trays work well for portioning if you only need a little at a time.
Label with the date and contents, then freeze for up to 3 months. When you’re ready to use it, thaw overnight in the refrigerator or use the defrost function on your microwave.
Pro tip: Blanch and peel tomatillos in advance and freeze them, too. This saves time next time you’re ready to whip up a batch.
Creative Ways to Use Green Enchilada Sauce
Traditional Enchiladas
The most obvious and delicious way to use green enchilada sauce? Smothering rolled tortillas filled with chicken, cheese, beans, or vegetables. Pour the sauce over the top, sprinkle with cheese, and bake until bubbly and golden. It’s the ultimate comfort food—warm, gooey, and packed with flavor.
Try chicken and cheese enchiladas with a generous ladle of your homemade sauce for a family dinner. Or mix things up with black beans, corn, and sweet potato for a hearty vegetarian twist.
Beyond Enchiladas: Other Delicious Dishes
Don’t stop at enchiladas! This sauce is so versatile:
- Tacos: Drizzle over grilled meats or veggies for extra zing.
- Burrito bowls: Layer with rice, beans, meat, and top with a splash of green sauce.
- Huevos rancheros: Swap the red sauce with green for a fresh morning spin.
- Soups and stews: Stir in a few tablespoons for added flavor depth.
- Pasta or zoodles: Use it as a spicy, tangy alternative to pesto or marinara.
Heck, you can even use it as a dipping sauce for tortilla chips. The options are endless when the flavor’s this good!
Health Benefits and Nutritional Value
Low-Calorie, Nutrient-Rich Choice
Green enchilada sauce isn’t just tasty—it’s healthy too! With fresh tomatillos, garlic, onions, and chilies, this sauce is packed with vitamins and minerals. Tomatillos are high in vitamin C and antioxidants, which boost your immune system and fight inflammation.
Unlike cream-based sauces, this one is naturally low in calories and fat, especially if you skip the oil or butter. One serving contains fewer than 50 calories, depending on the ingredients you use. That means you can pour it generously without guilt.
Plus, it’s naturally gluten-free and can be made vegan without sacrificing flavor. Just skip the chicken broth and use vegetable broth instead.
Gluten-Free and Vegan Options
Making a gluten-free and vegan green enchilada sauce is super easy. Stick to fresh veggies, herbs, and plant-based broth. Always double-check any spices or seasoning mixes to make sure they’re gluten-free.
Want to boost the health factor even more? Use olive oil instead of butter when roasting, and avoid added sugar or preservatives. You’ll get a clean, wholesome sauce that supports your healthy eating goals.
Common Mistakes to Avoid
Overcooking or Undercooking Ingredients
When making green enchilada sauce, cooking time matters more than you think. One of the biggest mistakes is over-roasting your vegetables. While a little char adds depth, too much can lead to bitterness, especially with tomatillos and garlic. On the flip side, under-roasting will leave you with bland, watery sauce lacking in flavor.
Timing is crucial—roast until the tomatillos are soft and slightly blistered, and the garlic is golden and fragrant. Avoid using raw onions or garlic straight in the blender without roasting; they add a harsh, overpowering taste.
Another common slip-up? Not allowing the blended sauce to simmer long enough. This step helps blend flavors and thickens the sauce, turning it from a thin, green puree into something rich, cohesive, and absolutely irresistible.
Not Tasting as You Go
This might sound obvious, but you’d be surprised how many people forget to taste their sauce as they cook. The difference between a good sauce and a great one often comes down to fine-tuning salt, lime, or spice levels.
The flavor of ingredients can vary—your tomatillos might be extra tangy, or your chilies spicier than usual. Tasting lets you adjust for that. Maybe you need an extra garlic clove, a touch more lime juice, or a splash of broth to tone things down. Don’t be afraid to tweak as you go. After all, you’re the chef here!
Flavor Variations You Can Try
Spicy Kick with Jalapeños
Love heat? Jalapeños are your best friends here. You can toss in one or two roasted jalapeños during the blending step for a bold, spicy green enchilada sauce. If that’s not hot enough, go wild with serrano or even habanero peppers—just remember, these pack a serious punch.
For more control, try adding the chili in small amounts, blending, and tasting as you go. Also, remember to remove seeds and membranes for a milder touch, or leave them in if you want that fire.
Want smoky heat? Use fire-roasted chilies or chipotle in adobo sauce for a deep, complex burn. A few dashes of hot sauce can also do the trick when you’re in a pinch.
Tangy Twist with Tomatillos
Tomatillos already give your green enchilada sauce a bright, tangy profile, but you can take it further. Add a splash of apple cider vinegar or more fresh lime juice to enhance that zing. A spoonful of Greek yogurt stirred in post-cooking gives the sauce a creamy texture and a tangy punch.
If your tomatillos are particularly tart, you can mellow them with a touch of honey or agave syrup. This balances the acidity and rounds out the flavor beautifully.
Expert Tips for Perfect Sauce Every Time
Balancing the Acidity
One of the key tricks to mastering green enchilada sauce is nailing the acidity level. Tomatillos are naturally tart, and while that’s a good thing, too much can make your sauce puckeringly sour. Balance that brightness with fat (like a drizzle of olive oil) or sweetness (a tiny bit of sugar or sweet bell pepper).
Adding broth instead of water can also smooth out the sharpness, while roasting ingredients longer will mellow out acidity and bring out natural sugars. Keep tasting throughout to ensure you hit that sweet spot.
Adjusting Thickness
No one wants watery enchilada sauce. After blending, your sauce might seem too thin—but don’t worry. That’s where simmering comes in. It reduces the liquid and concentrates the flavor.
If it’s still too runny, stir in a teaspoon of cornstarch mixed with water to thicken. If it’s too thick, thin it with broth or water until you reach your ideal texture.
Remember, the sauce should coat the back of a spoon—thick enough to cling to enchiladas but not gloopy.
Pairing Ideas with Green Enchilada Sauce
Best Proteins and Grains
Green enchilada sauce pairs like a dream with a wide range of proteins:
- Chicken: Classic and crowd-pleasing, especially when shredded.
- Pork: Think slow-cooked carnitas smothered in sauce.
- Tofu or Tempeh: For a plant-based twist.
- Shrimp: Light and fresh, perfect for summer dishes.
As for grains, rice is a natural match—especially cilantro-lime rice. You can also try:
- Quinoa for a protein-rich base.
- Cauliflower rice if you’re watching carbs.
- Brown rice for a nutty, wholesome flavor.
Layer the sauce over bowls, stuff into burritos, or spoon over tacos—it elevates any dish.
Complementary Sides
Round out your meal with some killer sides:
- Refried beans: Creamy and comforting.
- Mexican street corn (Elote): Grilled, cheesy, and tangy.
- Guacamole and chips: Always a good idea.
- Fresh salad: Something crisp to balance the rich enchiladas.
Adding a few lime wedges and chopped cilantro on the side never hurts either. Presentation matters, and these garnishes make your meal pop.
Making it Ahead and Meal Prep Tips
Batch Cooking Instructions
One of the best things about green enchilada sauce? It’s perfect for meal prepping. Double or triple the recipe and stash it in the fridge or freezer for future dinners. Trust me, future you will thank current you.
When scaling up, keep roasting in batches to maintain even cooking. Use a large blender or work in sections. After cooking, portion into labeled containers or freezer bags with the date. This saves time and keeps you organized.
Meal prepping with green enchilada sauce also means faster weeknight dinners. Pour over leftovers, mix into casseroles, or even use as a soup base.
Storage in Meal Portions
Want grab-and-go convenience? Freeze the sauce in single-serve containers or silicone molds. Once frozen, pop them into a freezer bag so you can defrost just what you need.
Each portion can be reheated on the stove or in the microwave. Just stir and warm gently. You’ll have delicious, homemade flavor in minutes—no chopping, no stress.
Kids-Friendly and Mild Version
Toning Down the Heat
When you’re cooking for little ones or folks with sensitive palates, heat needs to take a backseat. Thankfully, making a kid-friendly version of green enchilada sauce is super simple. Start by choosing mild green chilies—like Anaheim or poblano—rather than jalapeños or serranos. You can also reduce the number of chilies or completely deseed them before roasting.
Skip spicy seasonings like cayenne or hot paprika, and keep the cumin and garlic balanced but not overpowering. Some parents even sneak in a touch of honey to slightly sweeten the sauce—kids love that!
Another trick? Blend in a little avocado or plain Greek yogurt after cooking. This makes the sauce creamy, mild, and smooth, perfect for picky eaters. Serve it with cheesy enchiladas or over rice for a gentle introduction to big flavors.
Kid-Approved Recipes
Once you’ve toned down the heat, this sauce becomes a go-to for a bunch of kid-friendly meals:
- Mini enchilada cups using muffin tins and small tortillas.
- Quesadilla dip for lunchboxes or snack time.
- Rice bowls with shredded chicken and melted cheese.
- Dipping sauce for baked chicken tenders.
With its bright color and zesty, yet gentle flavor, this sauce might just turn your kids into Mexican food fans for life.
FAQs about Green Enchilada Sauce Recipe
1. What is green enchilada sauce made of?
Green enchilada sauce is typically made with green chilies (like Anaheim or jalapeño), tomatillos, garlic, onions, cumin, chicken broth or vegetable broth, and cilantro. Some versions include lime juice for extra zest.
2. Is green enchilada sauce spicy?
It can be! The spice level depends on the type and amount of green chilies used. You can control the heat by choosing milder peppers or removing seeds before blending.
3. Can I use canned tomatillos instead of fresh?
Yes, canned tomatillos are a convenient substitute and still deliver great flavor. Just be sure to drain them before use.
4. Is green enchilada sauce gluten-free?
Most homemade versions are gluten-free if you use gluten-free broth and thickeners. Always check store-bought sauces for hidden gluten-containing ingredients.
5. How long does homemade green enchilada sauce last?
Stored in an airtight container, it lasts up to 5 days in the refrigerator. You can also freeze it for up to 3 months.
6. What dishes can I use green enchilada sauce in?
Besides enchiladas, it’s delicious over burritos, tacos, chicken, rice bowls, eggs, or as a dip for chips.
7. Can I make it vegan?
Absolutely! Use vegetable broth instead of chicken broth and skip any dairy-based ingredients.
8. Why is my green enchilada sauce bitter?
Bitterness can come from raw tomatillos or overcooked garlic. Roast or sauté the ingredients before blending to mellow the flavors.
9. Can I make green enchilada sauce ahead of time?
Yes! Make a batch in advance and refrigerate or freeze it for quick use in meals throughout the week.
10. What’s the difference between green and red enchilada sauce?
Green enchilada sauce is made with tomatillos and green chilies, offering a tangy, fresh flavor. Red enchilada sauce is made from red chilies or chili powder and has a deeper, earthier taste.
Final Thoughts
Making it at home lets you skip the preservatives, dial in the flavors you love, and always have a delicious meal starter ready to go. Whether you’re new to Mexican cooking or a seasoned home chef, mastering green enchilada sauce opens the door to countless tasty possibilities.
So next time you’re tempted to grab a can from the store, remember how easy and rewarding it is to make your own. Your taste buds—and your dinner guests—will definitely thank you.


