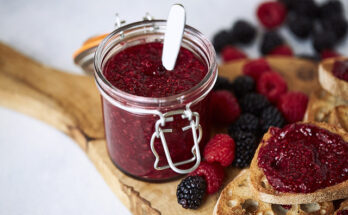
Grape Jelly Recipe: Who doesn’t love a spoonful of rich, glossy grape jelly slathered on toast in the morning? Whether you’re spreading it over peanut butter for the classic PB&J or spooning it onto fresh biscuits, homemade grape jelly is a pantry staple that’s surprisingly simple to make. With just a few ingredients and a little time, you can create your own jar of fruity goodness.
Let’s dive into this easy, step-by-step guide that will walk you through making delicious grape jelly from scratch.
Why Homemade Grape Jelly is the Best
Store-bought jelly is convenient, sure—but it just doesn’t compare to the depth of flavor you get from homemade grape jelly. Making it at home allows you to control the sweetness, avoid artificial preservatives, and experience that beautiful, fresh grape flavor. You’ll be amazed at how simple the process is and how much better it tastes. Homemade jelly is also an impressive gift for friends or family and a fun weekend project for food lovers.
Another big plus? You get to customize it. Want your jelly extra smooth? Prefer it a little tart? Love experimenting with herbs or spices? Go wild. Once you’ve made your own grape jelly, you’ll never go back to the supermarket aisle version.
Nutritional Benefits of Grapes
Grapes are more than just sweet little orbs—they’re nutritional powerhouses. Packed with antioxidants like resveratrol, grapes can help reduce inflammation, support heart health, and even aid in brain function. While jelly does involve cooking and sugar, it still retains some of these benefits. Plus, by making it at home, you can control how much sugar you use, making it a healthier option than store-bought alternatives filled with high-fructose corn syrup.
Grapes are also rich in vitamins C and K, and they provide fiber and hydration. Even when transformed into jelly, some of that grape goodness stays put. So while grape jelly is definitely a treat, it’s a treat with a few hidden perks.
Ingredients Needed
Choosing the Right Grapes
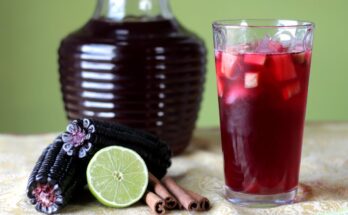
The secret to stellar grape jelly? It all starts with the grapes. Concord grapes are a classic choice, known for their deep purple color and bold, sweet-tart flavor. They produce a jelly that’s rich in color and full of that iconic grape taste.
You can also experiment with other varieties like Muscadine or Niagara grapes. Each brings its own flavor profile to the table—Muscadine grapes are more robust and earthy, while Niagara grapes give off a lighter, more floral sweetness.
Always opt for fully ripe, fresh grapes. Look for plump, firm grapes without wrinkles or mold. Organic grapes are best if you can find them, especially since we’ll be using the skins and juice in the process.
Other Essential Ingredients
Aside from grapes, your ingredient list is short and sweet:
- Sugar – Essential for sweetness and helping the jelly set.
- Pectin – This natural gelling agent gives your jelly its signature texture. You can use powdered or liquid pectin, but follow the package instructions closely.
- Lemon juice (optional) – Helps balance the sweetness and enhance the pectin’s effectiveness.
- Water – Used during juice extraction.
Depending on your grapes and personal taste, you may need to adjust the sugar or pectin ratio. But these core ingredients are the building blocks of any classic grape jelly.
Equipment You’ll Need
Basic Kitchen Tools
Before you start, make sure your kitchen is stocked with a few key tools. Here’s what you’ll need:
- A large stockpot
- Potato masher or spoon for crushing grapes
- Cheesecloth or a fine-mesh strainer
- Measuring cups and spoons
- A candy thermometer (optional but helpful)
- Wooden spoon for stirring
- Skimmer or ladle
Having everything ready before you start will make the process smoother and more enjoyable. Cooking jelly involves some precise timing, so a little prep goes a long way.
Canning Equipment for Storage
Once your jelly is made, proper canning ensures it stays fresh for months (or even years!). You’ll need:
- Sterilized glass jars (typically 8 oz. or 16 oz.)
- Lids and screw bands
- A canning funnel for easier pouring
- Jar lifter or tongs
- A boiling water bath canner (or a large pot with a rack)
Sterilizing your jars and equipment is crucial to prevent bacteria or mold from ruining your jelly. Make sure everything is hot and clean before you begin filling the jars.
Step-by-Step Grape Jelly Recipe
Step 1: Preparing the Grapes
First things first—let’s get those grapes ready. Start by washing them thoroughly under cold water. Grapes can carry dust, pesticides, or natural residue, so give them a good rinse. Remove any stems, leaves, or spoiled grapes as you go.
Once clean, transfer your grapes to a large stockpot. This is where the magic starts. Use a potato masher or a spoon to gently crush the grapes. Don’t worry about completely mashing them—you just want to break the skins and release the juice. The crushing helps jumpstart the extraction process.
Place the pot over medium heat and let the grapes simmer for about 10–15 minutes. Stir occasionally to prevent sticking or burning. As they cook, the grapes will release more juice and the mixture will become fragrant and colorful. You’ll end up with a juicy, pulpy mess—and that’s exactly what you want.
Step 2: Extracting the Juice
Now it’s time to separate the juice from the pulp and skins. Line a large bowl with cheesecloth or use a fine-mesh strainer. Carefully pour the hot grape mixture into the cloth or strainer and let it drain naturally. Do not press or squeeze if you want a clear jelly—squeezing can lead to cloudy results.
Let the juice strain for at least an hour. For the clearest jelly, some people let it drip overnight in the fridge. You’ll need about 4 cups of juice for a standard jelly recipe, so measure it out before moving on. If you end up with less juice than expected, you can top it off with a bit of water or grape juice to reach the desired volume.
Once the juice is strained and measured, discard the solids or compost them. Now you’ve got the base for your jelly—pure, fresh grape juice.
Step 3: Cooking the Jelly
In a clean stockpot, combine your grape juice, sugar, and pectin. How much sugar? That depends on your pectin type. Standard recipes usually call for equal parts juice and sugar—so if you have 4 cups of juice, add 4 cups of sugar. But always read the pectin package instructions; some low-sugar or no-sugar pectins require different ratios.
Add lemon juice if using, which helps with flavor and gelling. Stir everything together and bring the mixture to a full, rolling boil over high heat. This means a boil that doesn’t stop even when you stir. Once boiling, stir constantly to prevent scorching.
Boil for 1–2 minutes, or as directed by your pectin instructions. Some recipes call for skimming off the foam that forms on top—this helps your jelly stay clear and pretty in the jar.
Once done, remove the pot from heat and get ready to test the jelly for doneness.
Step 4: Testing for Doneness
How do you know when your jelly is ready? There are a few tried-and-true methods to test for doneness:
- Spoon Test – Dip a cold metal spoon into the hot jelly and hold it over the pot. If the jelly drips off in sheets instead of a single stream, it’s ready.
- Thermometer Test – Jelly sets at around 220°F (104°C) at sea level. Use a candy thermometer for accuracy.
- Plate Test – Place a small plate in the freezer before cooking. Drop a spoonful of hot jelly onto the chilled plate and return it to the freezer for a minute. Push it with your finger—if it wrinkles, it’s done.
If the jelly isn’t setting, continue to boil and test again after a minute or two. Don’t overcook it though—overboiling can make the jelly too thick or alter the flavor.
Once you’re satisfied, move on to the final and most satisfying step.
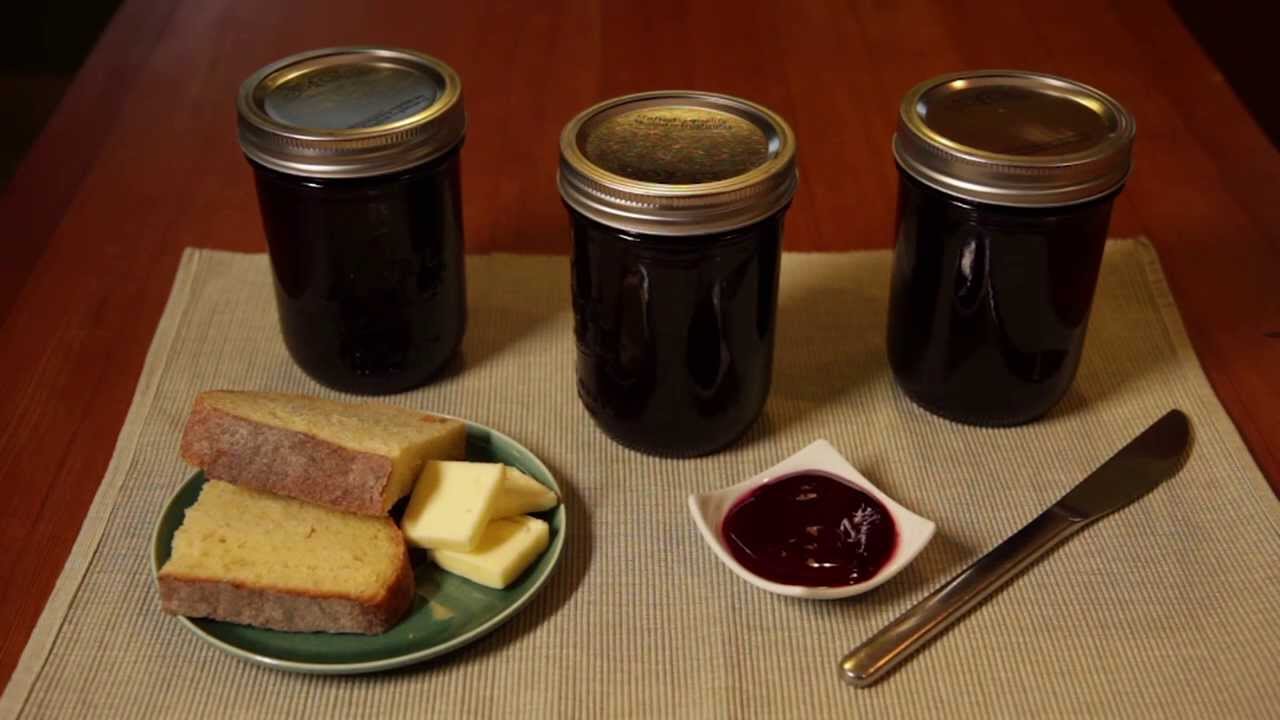
Step 5: Canning and Storing
Pour the hot jelly into sterilized jars using a funnel to avoid spills. Leave about 1/4 inch of headspace at the top. Wipe the rims clean, place the lids on, and screw the bands finger-tight.
Process the jars in a boiling water bath for 10 minutes to ensure a proper seal and long shelf life. Make sure the jars are fully submerged and the water is at a full boil before starting the timer.
After processing, remove the jars and let them cool undisturbed for 12–24 hours. You’ll hear the satisfying “pop” of the lids sealing—music to a jelly-maker’s ears. Once cool, check that the lids are sealed by pressing the center. If it doesn’t pop back, you’re good.
Store sealed jars in a cool, dark place. Opened jars should be kept in the fridge and used within a few weeks.
Tips for Perfect Grape Jelly
Common Mistakes to Avoid
Making jelly might sound easy, but even seasoned cooks can run into a few hiccups. Avoiding these common mistakes can make the difference between a flawless batch of jelly and a kitchen disaster.
1. Not using enough pectin: Pectin is key to that classic jelly texture. If you skimp on it or use expired pectin, your jelly may end up runny. Always check the expiration date and follow the exact measurements on the package.
2. Using underripe or overripe grapes: Ripe grapes yield the best juice, but too-ripe ones can have less natural pectin. Under-ripe grapes may taste too tart. A balanced mix is ideal.
3. Skipping the boil time: Reaching a full rolling boil is crucial. If your mixture doesn’t boil hard enough, it won’t set properly, and you’ll be left with syrup instead of jelly.
4. Not sterilizing jars properly: Dirty or unsterilized jars can ruin your jelly with bacteria or mold. Always sanitize your jars before filling and make sure they seal completely during canning.
5. Squeezing the juice from pulp: As tempting as it is to squeeze out every last drop of juice, doing so can make your jelly cloudy. Let gravity do the work for a clear, pristine finish.
Learning from these slip-ups will help you craft perfect jelly every single time. It’s all part of the process!
Adjusting for Sweetness and Texture
One of the biggest benefits of making your own grape jelly is having full control over the flavor and consistency. Don’t like it too sweet? Want a firmer set? You can tweak things to suit your taste.
To reduce sweetness:
- Try using a low-sugar or no-sugar pectin.
- Reduce the amount of sugar slightly, but remember that sugar also helps the jelly set. Don’t cut it too drastically unless your pectin supports it.
For softer jelly:
- Use less pectin or a high-juice-to-pectin ratio.
- Avoid overcooking—it can cause the jelly to harden.
For firmer jelly:
- Increase pectin slightly or add a bit more lemon juice.
- Ensure you’re boiling at the right temperature (220°F or 104°C) for long enough.
Everyone’s taste buds are different, so don’t be afraid to experiment with small batches to find your perfect recipe. You can even infuse your jelly with herbs like rosemary or mint for a gourmet twist.
FAQs about Grape Jelly Recipe
Can I use store-bought grape juice instead of fresh grapes?
Yes, you can use store-bought 100% grape juice, but opt for unsweetened and preferably organic juice. You’ll still need pectin and sugar, and the flavor might not be as vibrant as using fresh grapes, but it’s a solid shortcut.
How long does homemade grape jelly last?
Properly canned grape jelly can last up to a year in a cool, dark pantry. Once opened, store it in the fridge and use it within 3–4 weeks for the best taste and texture.
Can I reduce the sugar in this recipe?
Absolutely—but make sure to use a low-sugar pectin specifically designed for that purpose. Regular pectin relies on sugar to set, so cutting back without adjusting the pectin will result in a runny jelly.
What grapes work best for jelly?
Concord grapes are the traditional choice, known for their bold flavor and dark color. However, you can also use Muscadine, Niagara, or even a mix for a unique twist.
Why didn’t my jelly set properly?
Common causes include not reaching the correct temperature, not enough pectin, or using too much juice relative to sugar. If it doesn’t set after cooling, you can reboil it with more pectin or use it as a delicious grape syrup!
Conclusion
And there you have it—a homemade grape jelly that’s as rich in flavor as it is in satisfaction. Whether you’re spooning it over toast, dolloping it onto cheese platters, or gifting jars to loved ones, this jelly brings a touch of homemade magic to any table.
The process might seem detailed, but once you’ve done it, you’ll see how easy and rewarding it truly is. You’ll never look at store-bought jelly the same way again. Grab some fresh grapes, gather your tools, and get ready to enjoy the sweet rewards of a kitchen well used.