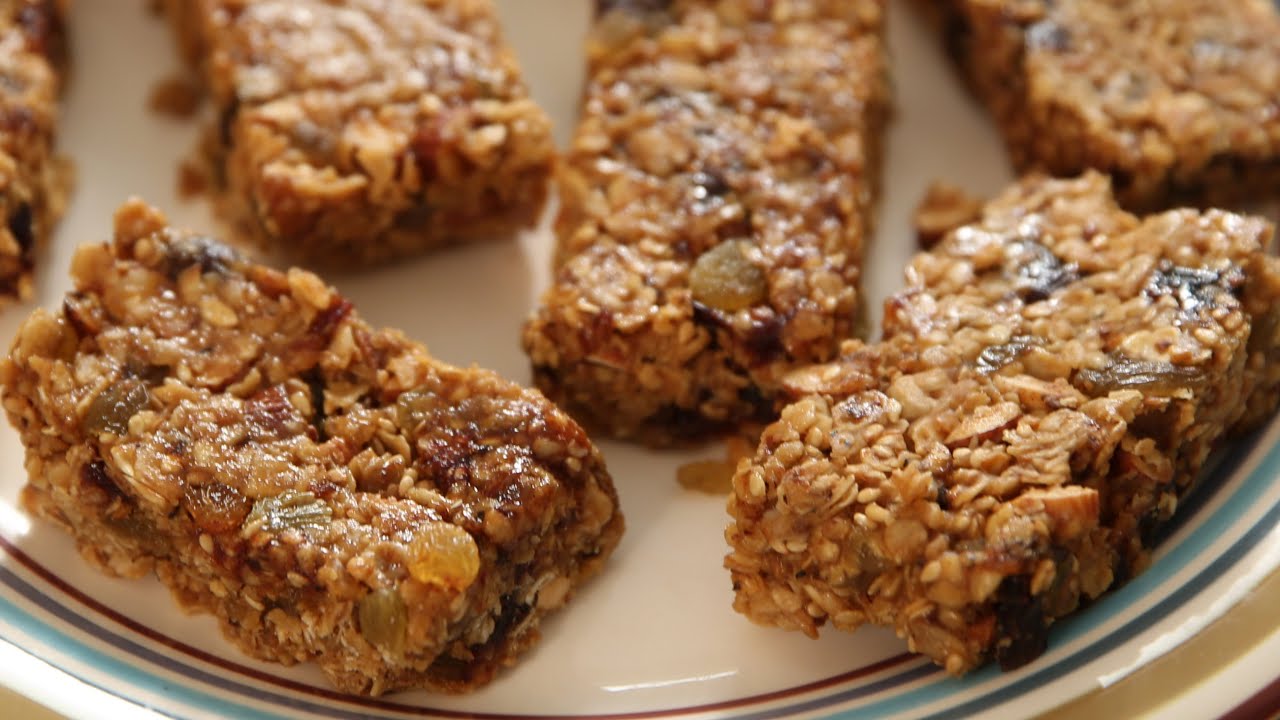
Granola Bars Recipe: Who doesn’t love a good granola bar? Whether you’re rushing out the door, packing lunchboxes, or just need a quick snack to get you through the day, granola bars are an easy go-to. But let’s be real: store-bought versions often come with a laundry list of ingredients you can’t pronounce. That’s where homemade granola bars come in.
Not only are they insanely easy to make, but they’re also customizable, budget-friendly, and way healthier than most packaged options. Making granola bars at home puts you in control. You choose the sweetener. You decide how crunchy or chewy you want them. You even get to pick your add-ins—from dark chocolate chunks to dried mango pieces.
And the best part? No fancy kitchen skills required. If you can stir and press something into a pan, you’re more than qualified to make these. We’re going to walk through this simple, foolproof recipe together, step by step. Stick around, and by the end of this guide, you’ll have a stash of delicious, wholesome bars ready for snacking any time of day.
Ingredients You’ll Need
Let’s talk ingredients. The beauty of granola bars is how adaptable they are. But first, you’ll want a solid base. Here’s what you’ll typically need:
Basic Ingredients:
- Rolled oats (2 cups): The heart and soul of the bar. Old-fashioned oats give the best texture.
- Nut butter (1/2 cup): Acts as a binder and adds creaminess. Peanut butter is classic, but almond or cashew works great too.
- Honey or maple syrup (1/3 to 1/2 cup): Your sweetener and glue. Maple syrup for vegan; honey for a thicker stick.
- Vanilla extract (1 tsp): Just a splash for flavor depth.
- Salt (1/4 tsp): Balances the sweetness perfectly.
Optional Add-ins:
Here’s where the magic happens. Pick and mix your faves:
- Chopped nuts: Almonds, walnuts, pecans – for crunch and protein.
- Dried fruit: Cranberries, raisins, apricots, cherries – chewy sweetness.
- Seeds: Chia, flax, sunflower, pumpkin – for fiber and healthy fats.
- Chocolate chips or cocoa nibs: A must if you’re a chocoholic.
- Coconut flakes: Toasted or plain for a tropical twist.
- Spices: Cinnamon, nutmeg, or even a dash of cayenne for a kick.
Want them protein-packed? Toss in some protein powder or collagen peptides. Want a fiber boost? Add some psyllium husk or ground flax.
Think of this like building your own snack board—except in bar form.
Kitchen Tools Required
Before you dive in, let’s make sure your kitchen is ready for granola greatness. Thankfully, this recipe doesn’t require much. In fact, if you’ve got the basics, you’re golden.
Must-Have Tools:
- Mixing bowls (at least one large): You’ll need space to stir everything together.
- Measuring cups and spoons: Precision helps with consistency.
- Spatula or wooden spoon: For stirring and spreading the mixture evenly.
- Baking dish or sheet pan (8×8 or 9×9 preferred): This is where the bars come to life.
- Parchment paper: Helps prevent sticking and makes cleanup a breeze.
- Sharp knife or pizza cutter: For cutting the bars once they’ve set.
Nice-to-Have (but optional):
- Food processor: Useful if you want a finer texture or are working with dates.
- Rolling pin or bottom of a cup: To press down the mixture firmly into the pan.
- Wire rack: For cooling, if you’re baking them.
No stand mixer. No fancy gadgets. Just good ol’ kitchen basics and a little enthusiasm.
Step-by-Step Instructions to Make Granola Bars
Let’s roll up our sleeves and get into the fun part—making your own granola bars. This is a no-stress, no-fail process that’s totally beginner-friendly.
Step 1 – Preparing the Ingredients
First things first: lay out your ingredients and prep your station. Granola bars come together quickly, so it’s best to have everything ready to go.
Start by measuring your oats into a big mixing bowl. If you’re using any nuts or large dried fruits, chop them up into bite-sized pieces. Toasting the oats or nuts lightly in a pan beforehand can boost their flavor, but it’s totally optional.
Next, grab your nut butter and sweetener. If they’re too thick to mix easily, warm them slightly in the microwave or over the stove until they’re pourable but not hot. This makes mixing a breeze and ensures everything sticks together beautifully.
From here, you’re ready to build your base and mix in the fun.
Step 2 – Mixing the Base
Now that your ingredients are prepped, it’s time to build the foundation of your granola bars. Start by combining your warmed nut butter and sweetener in a separate small bowl. Stir them together until you get a smooth, glossy mixture. This combo acts like edible glue—binding all your delicious ingredients into firm, chewy bars.
Once you’ve got your wet mix ready, pour it over the oats in your large mixing bowl. Now’s a good time to toss in your pinch of salt and splash of vanilla extract for that flavor magic.
Grab your spatula or spoon and stir everything until the oats are well coated. You’re looking for an even, sticky consistency—every bit of oat should be hugging the sweet, nutty mixture. If it’s too dry, add a touch more sweetener or nut butter. Too wet? Toss in a handful more oats. It’s all about balance.
At this point, your base is ready. Taste it. You’re the chef—adjust sweetness, saltiness, or texture as you like before you move on to the fun stuff.
Step 3 – Customizing Your Bars
Here’s where you take your granola bars from “yum” to “holy snack attack!” Once your base is mixed, it’s time to throw in all your add-ins.
Think of this step like building your own custom trail mix. Whether you want fruity, nutty, crunchy, or chocolaty—this is your chance to shine. Fold in chopped nuts for crunch, dried fruit for chew, chocolate chips for sweetness, or seeds for an energy boost.
Some fun combinations to inspire you:
- Nutty Delight: Almonds, cashews, sunflower seeds, and a drizzle of honey.
- Tropical Vibes: Dried mango, coconut flakes, and macadamia nuts.
- Berry Burst: Dried cranberries, blueberries, chia seeds, and a dash of cinnamon.
- Chocolate Crunch: Dark chocolate chips, cocoa nibs, and toasted walnuts.
Don’t go overboard though—about 1 to 1.5 cups of mix-ins total is ideal. Too many extras, and your bars might not hold together well.
Stir everything gently until it’s all evenly distributed. You should still see the oats, but the add-ins should peek through like gems in cookie dough.
Step 4 – Pressing the Mixture into a Pan
Got your mixture ready? Perfect. Now it’s time to shape your bars.
Line your baking pan with parchment paper, leaving some overhang on the sides. This trick makes it super easy to lift the bars out later.
Dump your granola mix into the pan and spread it out evenly with a spatula. The goal is to create a smooth, level surface from corner to corner. Once it’s evenly spread, take something flat—like the bottom of a measuring cup or glass—and press down firmly. This is crucial. The more compact your mix is, the better your bars will hold together after setting.
Pressing it tightly also makes your bars denser, chewier, and way less crumbly. Don’t rush this step—go over it a few times to make sure it’s solidly packed.
When it’s all smoothed and pressed, you’re ready for the final step: baking or chilling.
Step 5 – Baking or Chilling
Now, the million-dollar question: bake or no-bake?
Baked Granola Bars:
- Preheat your oven to 350°F (175°C).
- Bake the pan for about 15–20 minutes until the top is lightly golden.
- Baking gives the bars a crispy edge and slightly toasted flavor.
No-Bake Granola Bars:
- Simply pop the pan into the fridge for 1–2 hours or until firm.
- No-bake bars are softer, chewier, and often sweeter since they rely solely on the syrup/nut butter combo to hold together.
Choose whichever suits your vibe. Both methods work beautifully—it just depends on the texture you’re after.
Once baked or chilled, let the pan sit at room temp for 10 minutes before lifting the mixture out using the parchment paper. Then you’re on to the fun part: slicing and snacking!
Cooling and Cutting the Bars
You’ve made it through the hard part—now it’s time to turn your slab of granola gold into actual bars.
First, make sure your bars are fully cooled or chilled. If they’re still warm or soft, they’ll fall apart as you cut them. If baked, give them 10–15 minutes in the pan, then let them cool fully on a wire rack.
Once cooled, lift the whole thing out by the parchment paper and transfer to a cutting board. Grab a sharp knife or pizza cutter and slice into rectangles, squares, or even triangles—whatever shape you love.
For cleaner cuts:
- Use a serrated knife for tough add-ins like nuts.
- Wipe the blade between slices for neat edges.
- Cut them into 10–12 even bars or 20 mini snack bites.
Want to take things up a notch? Wrap each bar in parchment paper or plastic wrap for grab-and-go convenience. They look store-bought but taste homemade—because they are.
Storage and Shelf Life
You’ve cut your granola bars and admired your handiwork—now it’s time to store them like a pro. Luckily, granola bars are just as convenient to store as they are to make.
Room Temperature:
If you’re planning to eat them within a week, storing them at room temp works just fine. Place the bars in an airtight container or zip-lock bag, and they’ll stay fresh for up to 7 days. Keep them in a cool, dry spot—no direct sunlight or warm kitchens.
Fridge:
Want to extend their shelf life or firm them up a bit more? Store them in the fridge. They’ll keep for 2–3 weeks in a sealed container. Chilling them also makes them firmer and easier to grab-and-go without breaking apart.
Freezer:
Need a longer-term snack stash? These bars freeze beautifully. Wrap each bar individually in parchment paper or plastic wrap, then toss them into a freezer-safe bag. Label with the date and they’ll be good for up to 3 months. When you’re ready to eat, just thaw for 10–15 minutes at room temp or microwave for a few seconds.
Pro tip: If you’re freezing different flavors, use labels. No one wants to bite into “chocolate chip” only to get “cranberry surprise.”
Nutrition Breakdown
One of the biggest perks of making your own granola bars? You know exactly what’s going in them.
Let’s break down some of the common nutritional highlights of your homemade batch (based on a standard oat/nut/honey bar with nuts and fruit):
| Nutrient | Per Bar (approx.) |
|---|---|
| Calories | 180–220 kcal |
| Protein | 5–7g |
| Carbs | 20–25g |
| Sugar | 8–12g (depending on sweetener) |
| Fiber | 3–5g |
| Healthy Fats | 7–10g |
Health Benefits:
- Oats are packed with fiber and can help regulate blood sugar.
- Nuts and seeds provide protein, omega-3s, and a satisfying crunch.
- Dried fruits offer natural sweetness and antioxidants.
- Honey/maple syrup adds sweetness without refined sugar.
Best of all, these bars are free of preservatives, fillers, and mystery ingredients. You’re fueling your body with real food—customized to your taste and dietary needs.
Granola Bar Flavor Variations
Want to keep things interesting? Once you’ve mastered the basic recipe, the possibilities are endless. Here are a few flavor combos to jazz up your snack game:
1. Peanut Butter Banana:
- Peanut butter + mashed banana + walnuts + dark chocolate chips
- Tip: Add a pinch of cinnamon and use rolled oats for texture
2. Chocolate Coconut Crunch:
- Cocoa powder + shredded coconut + almond slivers + mini chocolate chips
- Drizzle melted dark chocolate over the top for a dessert-style finish
3. Cranberry Almond:
- Dried cranberries + sliced almonds + vanilla + honey
- Add orange zest for a bright, zippy flavor
4. Tropical Trail Mix:
- Dried pineapple + mango + coconut flakes + macadamia nuts
- Optional: lime zest and a tiny bit of ginger for island vibes
5. Espresso Energy Bar:
- Instant espresso powder + dark chocolate chunks + cashews + oats
- Great morning snack to replace your second coffee
Mix, match, and experiment! These combos are just the start—you can even go savory with herbs, seeds, and a touch of sea salt.
Common Mistakes and How to Avoid Them
Even simple recipes can go sideways if you’re not careful. Here are a few of the most common granola bar blunders—and how to fix them:
1. Bars Crumbling Apart:
- Why: Not enough binder or not pressed firmly enough
- Fix: Add a bit more honey or nut butter, and press down harder in the pan
2. Too Sweet or Not Sweet Enough:
- Why: Sweetener amounts can vary with taste and ingredients
- Fix: Taste your mixture before pressing and adjust accordingly
3. Hard as a Rock:
- Why: Overbaked or cooled too long in the fridge
- Fix: Bake a little less or let them sit at room temp before cutting
4. Sticky Mess:
- Why: Not cooled completely before slicing
- Fix: Always chill no-bake bars and cool baked ones before handling
5. Soggy Bottoms:
- Why: Too much wet ingredient, especially in no-bake bars
- Fix: Balance wet/dry ratio. Add more oats or dry mix-ins to absorb moisture
Don’t worry if your first batch isn’t perfect. Even the crumbled bits taste amazing on yogurt or smoothie bowls. Granola bar fails are still edible wins.
FAQs about Granola Bars Recipe
Q1: Are homemade granola bars healthier than store-bought ones?
Yes! Homemade granola bars typically contain fewer preservatives, less sugar, and no artificial additives. You can control the ingredients to suit your dietary needs.
Q2: How do I make granola bars stick together?
Using a sticky binder like honey, maple syrup, or nut butter helps hold your bars together. Pressing the mixture firmly into the pan before chilling also ensures they don’t fall apart.
Q3: Can I make granola bars without baking?
Absolutely! No-bake granola bars are easy to prepare. Simply mix your ingredients, press into a lined pan, and chill until firm.
Q4: How long do homemade granola bars last?
They typically last up to 7 days in an airtight container at room temperature, or up to 2 weeks in the fridge. You can also freeze them for up to 3 months.
Q5: Can I make granola bars without oats?
Yes, you can substitute oats with puffed rice, crushed cereal, or quinoa flakes for a different texture while still keeping them delicious and nutritious.
Q6: What are some fun mix-ins for granola bars?
Try chocolate chips, dried fruit, shredded coconut, chia seeds, or even mini marshmallows for a twist. The options are endless!
Q7: Are granola bars good for weight loss?
They can be—if made with wholesome ingredients and eaten in moderation. Look for high-protein, low-sugar versions to keep you full longer.
Conclusion
Making granola bars at home is a total game-changer. Not only do you save money and skip the sketchy additives, but you also get to create something that’s truly yours. You control the sweetness, the crunch, the chew, the flavor—it’s like being your own snack CEO.
The steps are simple, the tools are basic, and the results? Better than store-bought every single time. Plus, there’s just something satisfying about grabbing a homemade bar that you know is good for you and tastes amazing.
So next time you’re tempted to toss a box of bars into your cart, think twice. With this guide, you’ve got all the tools to make better ones right in your kitchen.
Snack smarter, save money, and flex those kitchen skills—one granola bar at a time.