Graham Crust Recipe: Graham cracker crust is like the unsung hero of the dessert world. It’s sweet, simple, and wildly versatile. Whether you’re layering it with a creamy cheesecake, filling it with a tangy key lime custard, or going old-school with a banana cream pie, this golden crust holds everything together—literally and flavor-wise.
You’ve probably bought a premade one from the store before. But homemade? That’s where the magic happens. It tastes fresher, feels crunchier, and gives you that satisfying “I made this from scratch” feeling without much effort. It’s the easiest way to elevate your dessert game with just three basic ingredients and about 15 minutes of work. Sound good? Let’s dive into why it deserves a place in your baking rotation.
Why Choose a Graham Crust?
Here’s the deal—traditional pie crusts can be a pain. There’s dough to chill, roll, and pray doesn’t shrink or tear in the oven. Graham cracker crust? None of that drama. It’s foolproof, stress-free, and totally beginner-friendly.
But convenience isn’t the only reason to choose a graham crust. Flavor is another huge win. That slightly nutty, honey-kissed taste of graham crackers pairs beautifully with creamy, fruity, or chocolaty fillings. Plus, you can easily play around with it—add spices, swap in flavored crackers, or toss in some chopped nuts. It’s like a blank canvas for sweet masterpieces.
Need another reason? You don’t even need to bake it if your recipe doesn’t call for it. That’s right—no oven, no sweat. Perfect for summer desserts when you can’t bear turning the oven on.
Perfect Uses for Graham Crust
Graham crust is like the little black dress of baking—classic, always in style, and works with almost everything. You’ll find it most often in:
- Cheesecakes – creamy and dreamy with a sweet, crunchy base
- Key lime pies – that tart filling loves the sweet balance
- Icebox pies – no-bake favorites for warm days
- Chocolate mousse pies – ultra-decadent and rich
- Mini tarts or cups – perfect for parties or portion control
It also works beautifully for layered bars, s’mores desserts, and even some frozen treats. Once you know how to make this crust, the possibilities are truly endless.
Types of Graham Crackers to Use
Not all graham crackers are created equal, but the good news is most will work just fine. You’ve got choices, and they all bring something a little different to the table.
- Original graham crackers – the classic go-to, lightly sweet and perfect for most recipes
- Honey graham crackers – add a bit more sweetness and a warm honey note
- Cinnamon graham crackers – bring a spicy twist that works great for fall flavors
- Chocolate graham crackers – because chocolate crusts are never a bad idea
If you’re gluten-free, no worries. There are solid gluten-free graham options on the market that still give a great texture and taste.
Pro tip: Avoid low-fat graham crackers—they often taste dry and lack the richness you want in a crust.
List of Ingredients You’ll Need
The beauty of this recipe is in its simplicity. You only need a handful of pantry staples to pull it off, and you might already have everything at home.
Graham Crackers
You’ll need about 1 ½ cups of graham cracker crumbs, which comes from roughly 10 to 12 full crackers. You can crush them in a food processor or place them in a zip-top bag and smash them with a rolling pin. Either way, you want fine crumbs, not chunky pieces.
Butter (Melted)
Butter acts as the binder and adds rich flavor. Go for 6 tablespoons of unsalted butter, melted. If you only have salted, reduce or skip the added salt. Don’t skimp on butter—it’s what keeps the crust together.
Granulated Sugar
Sugar sweetens the deal and adds a slight crunch after baking. 3 tablespoons of white sugar is a good baseline, but you can adjust to taste. Brown sugar also works if you want a deeper, caramelized note.
Optional Flavor Enhancers
Want to spice things up? Try adding:
- A pinch of salt (especially if you’re using unsalted butter)
- ½ teaspoon of cinnamon for warmth
- ¼ teaspoon of nutmeg or ginger for holiday pies
- Crushed nuts for added crunch
Tools and Equipment You’ll Need
Before you start, gather your tools. Here’s what you’ll need to make the crust-making process smooth and mess-free:
- Food processor or zip-top bag and rolling pin (for crushing)
- Medium mixing bowl
- Fork or spatula for mixing
- 9-inch pie pan, springform pan, or tart pan
- Measuring cups and spoons
- Oven (if baking)
Optional but helpful: measuring scale (for precision), offset spatula (to press the crust evenly)
Having everything prepped ahead of time makes the whole process feel easy, even therapeutic.
Tips for Choosing the Right Pan
The pan you use can totally change how your crust performs, so choose wisely depending on your dessert:
- Pie dish (9-inch) – great for classic pies and no-bake desserts
- Springform pan – ideal for cheesecakes; lets you remove the crust cleanly
- Tart pan with removable bottom – gives beautiful edges and easy release
- Mini muffin tins – perfect for bite-sized desserts and personal servings
Make sure to lightly grease the pan if it’s not nonstick—especially if you’re planning to bake the crust.
Step-by-Step Guide to Making Graham Crust
Step 1: Crush the Graham Crackers
Place graham crackers in a zip-top bag and crush them with a rolling pin, or pulse them in a food processor. Aim for fine, even crumbs—no large chunks. You’ll need about 1½ cups of crumbs for a standard pie crust.
Step 2: Mix the Crumbs, Sugar, and Butter
In a bowl, combine the graham cracker crumbs with granulated sugar. Add melted butter and stir until the mixture resembles wet sand. The butter helps bind the crust and gives it that classic rich flavor.
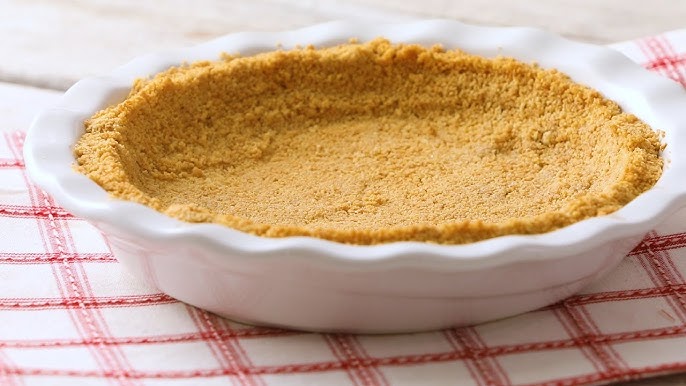
Step 3: Press the Mixture into the Pan
Pour the crumb mixture into your pie dish. Use the bottom of a glass or measuring cup to press it firmly and evenly across the bottom and up the sides. Proper packing ensures a sturdy crust that won’t crumble.
Step 4: Chill or Prebake the Crust
For a no-bake dessert, chill the crust for at least 1 hour. For cheesecakes or pies, prebake at 350°F (175°C) for 8–10 minutes. Let cool before filling. Enjoy!
Baking vs. No-Bake Graham Crusts
Let’s talk strategy. Should you bake your graham crust, or just chill it? Here’s how to decide.
When to Bake:
- You’re making a baked cheesecake or custard pie.
- You want extra crunch and toasty flavor.
- You’re using a very moist filling and need a firmer base.
When to Chill:
- You’re making a no-bake pie.
- The filling is light, creamy, or frozen.
- You want to avoid using the oven (hello, summer!).
There’s no one-size-fits-all rule here, but as a general guideline—if your dessert is going into the oven, so should your crust (at least for a few minutes). Otherwise, chilling is perfectly fine.
How to Avoid a Crumbly Crust
Few things are more disappointing than a crust that falls apart when you slice your pie. Here’s how to make sure yours stays together:
- Use enough butter. The fat acts as glue—if your crust is too dry, it won’t hold.
- Press it firmly. Don’t just sprinkle the mixture in the pan—really press it down so it’s compact.
- Chill or prebake properly. Giving the butter time to set (in the fridge) or melt and reform (in the oven) locks everything in place.
- Let it cool before filling. Pouring filling into a warm crust can soften it too much.
Bonus tip: If your crust still seems too loose, mix in a tablespoon of sugar syrup or honey for added binding power.
How to Store Graham Crust
You made a crust and you’re not quite ready to fill it? No problem—it stores like a champ.
If Unbaked:
- Wrap it tightly with plastic wrap or foil.
- Store in the fridge for up to 3 days.
- Or freeze it for up to 2 months. Just thaw in the fridge before using.
If Baked:
- Let it cool completely.
- Cover tightly and refrigerate for up to 5 days.
- It can also be frozen. Just be sure it’s well-wrapped to prevent freezer burn.
When you’re ready to use it, no need to rebake—just fill it and go.
Common Mistakes to Avoid
Even simple recipes have their pitfalls. Here are some classic graham crust mistakes to dodge:
- Too little butter: Your crust won’t hold together and may crumble apart.
- Over-pressing the crust: This can make it hard and dense, not pleasantly crisp.
- Underbaking (for baked crusts): It can get soggy once the filling is added.
- Overbaking: Leads to a dry, crumbly, or even burnt crust.
- Using low-fat crackers: These lack the flavor and structure for a great crust.
Double-check your measurements, and don’t rush the process. A great crust needs love and attention—just like any good recipe.
Creative Variations of Graham Crust
Want to give your graham crust some personality? Here are a few creative spins:
Chocolate Graham Crust
Swap classic graham crackers for chocolate ones. Add 1 extra tablespoon of sugar, and you’ve got a crust perfect for chocolate or peanut butter pies.
Spiced Graham Crust
Add ½ teaspoon cinnamon, ¼ teaspoon nutmeg, and a dash of clove or ginger. Perfect for fall pies like pumpkin or apple cream.
Nutty Graham Crust
Mix in ¼ cup of finely chopped pecans, almonds, or walnuts. Adds texture, flavor, and an upscale bakery vibe.
Try mixing in shredded coconut, crushed pretzels, or even a little espresso powder for gourmet-level customization.
Recipes You Can Make with Graham Crust
Now that you’ve got your graham cracker crust perfected, let’s talk about what you can actually do with it. Spoiler alert: there are so many delicious possibilities. Whether you’re craving something rich and indulgent or light and refreshing, this crust is the base you need. Here are a few tried-and-true classics to inspire your next dessert:
Cheesecake
Let’s start with the obvious—cheesecake. This is arguably the most iconic dessert that uses a graham cracker crust. Whether you’re going for the traditional New York-style with a thick, creamy filling or a no-bake cheesecake topped with fruit, this crust handles it beautifully. Its sweet crunch perfectly balances the dense and creamy filling.
Want to take it up a notch? Add a chocolate ganache topping or swirl some caramel into the cheesecake batter. The crust keeps it all grounded (literally and flavor-wise).
Key Lime Pie
There’s something magical about the way tart key lime filling pairs with the sweet, buttery graham crust. It’s like summer in every bite. Most key lime pie recipes call for a baked crust and a custard-like filling that sets up beautifully with a quick oven bake. Serve it with whipped cream and lime zest for a refreshing, zesty treat.
Pro tip: Use honey graham crackers for a slightly sweeter crust that balances the tartness even more.
S’mores Bars
Think s’mores—but way easier, and no campfire required. Use a graham cracker crust as your base, then layer on melted chocolate and toasted marshmallows. You can bake them for a gooey texture or keep them chilled if you’re going for a bar-style dessert. Either way, it’s a guaranteed crowd-pleaser.
These are perfect for kids’ parties, potlucks, or when you’re just craving something nostalgic.
Banana Cream Pie
Banana cream pie and graham crust? A match made in dessert heaven. The creamy vanilla pudding, fresh banana slices, and whipped topping all rest beautifully inside that crisp, slightly sweet shell. You don’t even need to bake the crust—just chill it before assembling the pie. Add crushed peanuts or chocolate shavings for an extra pop of flavor.
Peanut Butter Pie
This no-bake wonder is a favorite among peanut butter lovers. Picture this: a graham crust filled with a silky, peanut butter cream filling, topped with whipped cream and chocolate drizzle. It’s rich, decadent, and wildly easy to make.
This one works especially well with a chocolate graham crust for that classic chocolate-peanut butter combo.
FAQs about Graham Crust Recipe
1. Can I make a graham cracker crust ahead of time?
Absolutely! You can make and store it in the refrigerator for up to 3 days or freeze it for up to 2 months. Just wrap it tightly to keep it fresh.
2. What if I don’t have graham crackers?
No problem! You can use digestive biscuits, vanilla wafers, gingersnaps, or even crushed pretzels for a salty-sweet twist.
3. Why is my graham crust falling apart?
This usually means there wasn’t enough butter or the mixture wasn’t pressed firmly enough into the pan. Be sure to follow the ratios and pack it tightly.
4. Can I use margarine instead of butter?
You can, but it may slightly change the flavor and texture. Butter is preferred for the richest taste and best binding.
5. Do I need to bake the crust for a no-bake dessert?
Not necessarily. Chilling the crust in the fridge for at least an hour is usually enough for no-bake recipes. However, baking gives it a toasty flavor and firmer texture if you prefer that.
Conclusion
At the end of the day, a graham cracker crust is more than just a pie base—it’s a game-changer in your dessert-making toolkit. It’s quick, reliable, and endlessly versatile. With just three simple ingredients, you can whip up a foundation that turns ordinary desserts into something unforgettable.
Whether you’re crafting a creamy cheesecake, whipping up a summery key lime pie, or experimenting with your own unique twist, this crust will always have your back. And the best part? It’s easy enough for a beginner, but good enough for a professional baker. So next time you think about grabbing a store-bought crust, remember: you’ve got this.
Now, go forth and bake (or chill)—your graham crust dreams await!

