Gooey Butter Cake Recipe: Have you ever taken a bite of something so rich, buttery, and sinfully delicious that you had to pause for a moment to appreciate it? That’s exactly what gooey butter cake does. Born out of a baking mistake in St. Louis in the 1930s, this dessert became a staple in Missouri and eventually across the entire United States. A baker accidentally reversed the proportions of butter and flour while making a coffee cake. Instead of tossing the error, he baked it anyway—and voilà, the gooey butter cake was born.
What’s so special about it? Unlike traditional cakes, this dessert consists of two distinct layers. The bottom is a chewy, sweet cake-like crust, and the top is a rich, custard-like layer that remains gooey and indulgent even after baking. That texture is key—it’s not underbaked; it’s intentionally luscious and soft.
Over the decades, this cake has become synonymous with comfort and nostalgia. Whether served at holiday tables or casual potlucks, gooey butter cake wins hearts everywhere it goes. It’s a simple cake with a decadent twist, and best of all, it’s easy enough for even beginner bakers to pull off at home.
Why This Cake Has a Cult Following
Gooey butter cake isn’t just another dessert—it’s a full-on experience. From its slightly crisp top to the melting, custard-like middle, every bite is a joyride. People love this cake for several reasons:
- Simplicity: You don’t need to be a pastry chef to whip this up.
- Versatility: It can be customized with flavors like pumpkin, lemon, or chocolate.
- Shelf Appeal: It stores well and gets even better after a day.
- Crowd-Pleaser: It’s a hit at parties, brunches, or even a midnight snack session.
Let’s face it: gooey butter cake has that irresistible, homemade charm. It tastes like something Grandma used to make—but with an extra dose of decadence.
Ingredients You’ll Need
For the Base Layer
The base is essentially a buttery cake crust that sets the stage for the gooey goodness above. You can make it from scratch or use a boxed cake mix for convenience. Here’s what you’ll need:
- 1 box of yellow cake mix (or make your own dry mix)
- 1 large egg
- 1/2 cup (1 stick) unsalted butter, melted
Mix these ingredients together until they form a soft, pliable dough. This layer is pressed into the bottom of your baking dish to create a sturdy yet sweet foundation.
For the Gooey Topping
Now comes the star of the show—the gooey layer. This mixture bakes into a rich, soft top that contrasts beautifully with the firm bottom.
- 1 (8 oz) package of cream cheese, softened
- 2 large eggs
- 1 teaspoon vanilla extract
- 1/2 cup (1 stick) unsalted butter, melted
- 3 to 4 cups powdered sugar (depending on desired sweetness)
Cream cheese provides richness, while the eggs and butter give the topping its silky structure. Powdered sugar adds the essential sweetness and contributes to the gooey texture.
Tools and Equipment Required
Must-Have Kitchen Essentials
To make gooey butter cake, you don’t need fancy gear—just reliable basics:
- 9×13-inch baking dish
- Mixing bowls (medium and large)
- Hand mixer or stand mixer
- Measuring cups and spoons
- Rubber spatula or spoon for spreading
Make sure your baking dish is greased well with butter or non-stick spray to avoid sticking.
Optional But Helpful Tools
While not necessary, these items can enhance your baking experience:
- Offset spatula for even spreading
- Parchment paper for easy removal
- Sifter for dusting with powdered sugar post-bake
- Cooling rack to help prevent sogginess on the bottom
Having these on hand can make your life a bit easier, especially if you bake often.
Step-by-Step Preparation Instructions
Step 1: Preparing the Cake Base
Start by preheating your oven to 350°F (175°C). Grease your baking dish thoroughly and set it aside. In a large mixing bowl, combine your cake mix, melted butter, and one egg. The mixture will be thick and doughy—don’t worry, that’s exactly what you want.
Press the dough evenly into the bottom of your prepared pan using your fingers or a spatula. Make sure it’s compact and reaches all edges. This base layer is crucial because it holds up the gooey top layer without turning soggy.
Once the base is spread evenly, set it aside. You’re now ready to mix up the star ingredient: the gooey topping.
Step 2: Mixing the Gooey Topping
In a new bowl, beat the softened cream cheese until smooth and fluffy—about 2-3 minutes. Add in the eggs, one at a time, beating well after each addition. Pour in the vanilla extract and melted butter, continuing to beat until everything is well combined.
Gradually add the powdered sugar, one cup at a time, mixing until the topping is smooth and creamy. Be careful not to overbeat, as you want the mixture light, not dense.
Pour this topping mixture over the prepared crust in your pan. Use a spatula to spread it evenly. It should almost look like a cheesecake layer on top.
Step 3: Baking to Perfection
Pop the dish into your preheated oven and bake for 35 to 45 minutes. The top should be lightly golden and slightly firm, but still jiggly in the center when done.
Pro tip: Resist the urge to overbake. The middle will set as it cools, and that gooey center is exactly what makes this dessert magical.
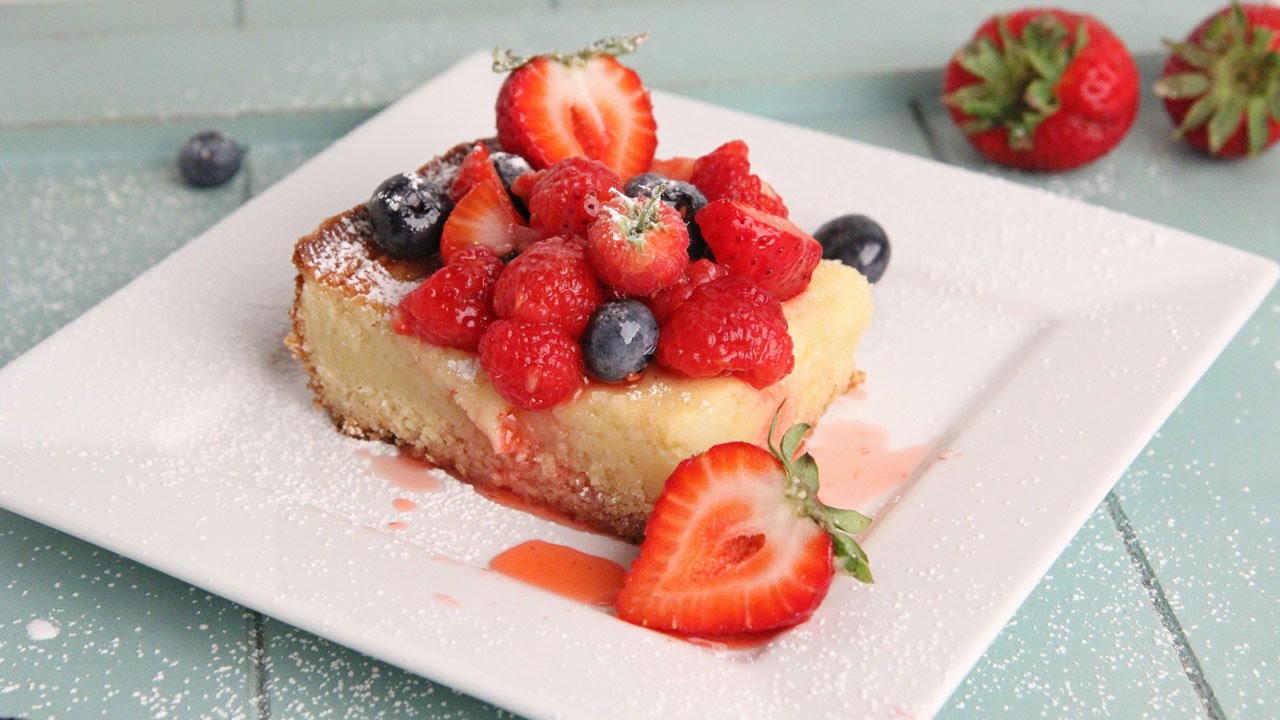
Once baked, let the cake cool completely in the pan before cutting. Dust the top with extra powdered sugar for a picture-perfect finish.
Pro Tips for the Perfect Texture
When baking a gooey butter cake, the key to achieving that signature rich and gooey consistency lies in the technique. Here are some pro-level tips to help you avoid dry, cakey results and nail the perfect texture every time:
- Don’t Overmix the Topping: While it’s important to combine all the ingredients until smooth, overbeating can incorporate too much air and change the texture from creamy to fluffy. Aim for a silky mixture.
- Room Temperature Ingredients: Cream cheese and eggs should be at room temperature. This ensures a smoother batter and more even baking.
- Watch the Bake Time Closely: The cake should be set around the edges but still jiggle slightly in the center when it’s done. It will firm up as it cools, so don’t worry if it seems underdone when you pull it out.
- Let It Cool Completely: Cutting into the cake too soon will cause it to collapse and lose its structure. Let it cool in the pan at room temperature for at least an hour before slicing.
- Dust After Cooling: If you’re adding a powdered sugar dusting, wait until the cake is completely cool. Otherwise, the sugar will melt into the surface and lose its snowy effect.
These little details might seem small, but they make a big difference when you’re striving for that gooey perfection.
Variations to Try
While the classic version is unbeatable, sometimes it’s fun to play around with flavors to surprise your taste buds or suit the season.
Pumpkin Gooey Butter Cake
This version is perfect for fall or Thanksgiving. You’ll use a spice cake base instead of yellow cake, and blend pumpkin puree into the topping along with traditional pumpkin pie spices like cinnamon, nutmeg, and cloves.
- Swap the yellow cake mix for spice cake mix.
- Add 1 cup of pumpkin puree to the topping mixture.
- Mix in 1 tsp cinnamon, 1/2 tsp nutmeg, and a pinch of cloves.
This twist tastes like pumpkin pie and gooey cake had a delicious baby.
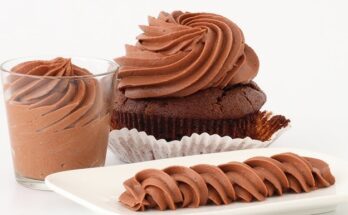
Chocolate Lover’s Version
If you’re a chocolate fiend, you’ll want to try this decadent variation.
- Use a chocolate cake mix as your base.
- Add 1/4 cup cocoa powder to the topping mixture for that extra chocolatey punch.
- Consider mixing in mini chocolate chips into the topping for texture.
Chocolate gooey butter cake is rich, indulgent, and perfect for birthdays or special celebrations.
Other creative variations include lemon (using lemon extract and zest), peanut butter (adding peanut butter to the topping), or even red velvet for a show-stopping dessert centerpiece.
How to Store and Reheat Gooey Butter Cake
One of the best things about this dessert is how well it stores, making it a great make-ahead option for parties or busy weeks.
- Room Temperature: Store the cake at room temperature in an airtight container for up to 3 days. Just make sure it’s in a cool, dry place.
- Refrigeration: For longer storage, wrap the cake in plastic or place it in a sealed container and refrigerate for up to a week. Bring it to room temp or microwave for 10-15 seconds before serving.
- Freezing: Want to stash some for later? Gooey butter cake freezes like a dream. Wrap individual pieces in plastic wrap and place them in a zip-top freezer bag. It’ll keep well for 2-3 months. To thaw, let it sit in the fridge overnight or reheat gently in the microwave.
These storage tips help maintain that gooey goodness without sacrificing taste or texture.
Common Mistakes to Avoid
Even though this cake is simple, a few missteps can ruin that heavenly texture. Here’s what you need to avoid:
- Overbaking: The most common error. If you wait until the center is fully firm, it’s already overdone.
- Using Cold Ingredients: This can cause lumpy batter and uneven baking.
- Not Greasing the Pan Properly: You’ll lose that beautiful bottom crust if the cake sticks to the pan.
- Cutting Too Soon: Let it cool first! If not, it may turn into a gooey mess instead of staying structured.
- Using Low-Quality Cream Cheese: Generic or low-fat versions don’t always melt as smoothly. Go for the good stuff like Philadelphia.
Avoiding these will help guarantee your cake comes out picture-perfect and party-ready.
FAQs about Gooey Butter Cake Recipe
Q1: Can I use homemade cake mix instead of boxed?
Absolutely. Just blend 2 cups flour, 1 ½ cups sugar, 1 tbsp baking powder, and a pinch of salt for a quick DIY mix.
Q2: Why is the center of my cake undercooked?
It’s supposed to be a little jiggly! That gooey center is intentional and will firm up as it cools.
Q3: Can I reduce the sugar in the recipe?
You can, but it may alter the gooey texture. Try cutting ½ cup at most to keep the richness intact.
Q4: Can I make it gluten-free?
Yes! Use a gluten-free yellow cake mix and check that all other ingredients are certified gluten-free.
Q5: How long can gooey butter cake sit out?
It’s safe at room temp for up to 3 days, as long as it’s stored in an airtight container.
Conclusion
Gooey butter cake isn’t just a dessert—it’s a mood, a memory, and a moment of pure indulgence. Whether you stick with the original or experiment with fun flavor twists, this cake has the power to impress without stress. With just a few basic ingredients and simple steps, you can create a rich, buttery treat that your friends and family will rave about. So, roll up your sleeves, preheat that oven, and treat yourself to a slice of this legendary cake. Trust us, once you’ve had gooey butter cake, there’s no going back.