Golumpki Recipe: Golumpki (also known as Gołąbki or Stuffed Cabbage Rolls) is a traditional Polish dish made by wrapping tender cabbage leaves around a savory mixture of ground meat and rice, then baking them in a tangy tomato sauce. Think of it as a cozy, carb-filled hug from Eastern Europe. It’s the kind of dish that’s been passed down from grandmothers to grandchildren for generations, packed with flavor and made to satisfy.
Whether you’re of Polish descent or just in the mood to try something hearty and comforting, Golumpki is a culinary trip worth taking. It’s one of those recipes that brings people together, often enjoyed during family dinners, holidays, and special occasions.
Cultural Origins and Importance
Golumpki is deeply rooted in Polish culture and cuisine. The name itself translates to “little pigeons,” which some believe references the small, rolled shape of the cabbage rolls. This dish is often associated with comfort food in Poland and Eastern Europe, and it’s found at many family gatherings, festive events, and Sunday dinners.
The beauty of Golumpki lies in its versatility—every family has their own spin, with variations in spices, meat ratios, or sauce consistency. It embodies the heart of traditional home-cooked meals, where simplicity meets flavor.
Why You’ll Love This Recipe
Here’s why this recipe is going to win your heart:
- Hearty and Filling: A few cabbage rolls are enough to keep you satisfied for hours.
- Flavor-Packed: The combination of spiced meat, tender cabbage, and rich tomato sauce is mouthwatering.
- Budget-Friendly: It’s made from simple, affordable ingredients that stretch into multiple meals.
- Great for Meal Prep: It reheats beautifully and actually tastes even better the next day.
Ingredients Needed
For the Cabbage Rolls
- 1 large head of green cabbage (or two small ones)
- Water (for boiling the cabbage leaves)
- Salt (to season the water)
For the Meat Filling
- 1 lb ground beef (or a mix of beef and pork)
- 1/2 cup uncooked white rice
- 1 small onion, finely chopped
- 2 garlic cloves, minced
- 1 egg
- Salt and pepper to taste
- Optional: fresh parsley, chopped
For the Tomato Sauce
- 1 (28 oz) can crushed tomatoes
- 1 (8 oz) can tomato sauce
- 1 tbsp tomato paste
- 1 tsp sugar (to balance the acidity)
- 1 tsp paprika
- Salt and pepper to taste
Kitchen Tools Required
Essential Utensils and Cookware
To make Golumpki without any hiccups, you’ll need:
- A large pot (for boiling cabbage)
- A sharp knife (to core and separate cabbage leaves)
- Mixing bowls
- A large baking dish or Dutch oven
- Aluminum foil
- Measuring cups and spoons
- Wooden spoon or spatula
Having these on hand will ensure your prep process is smooth and stress-free.
Step-by-Step Instructions
Step 1: Preparing the Cabbage
Start by coring your cabbage. Use a sharp knife to remove the tough core at the bottom. Bring a large pot of salted water to a boil, then place the whole cabbage head into the water.
As the cabbage cooks, the leaves will begin to soften and loosen. Use tongs to gently peel off each leaf as it becomes pliable—this usually takes 2-3 minutes per leaf. Set the leaves aside to cool. You’ll need about 12–15 whole leaves for rolling.
If the thick stem of each leaf seems too firm, you can shave it down with a knife to make rolling easier.
Step 2: Making the Filling
Now let’s move on to the heart of this dish—the filling. In a large bowl, combine the ground beef (or beef and pork mix), uncooked rice, chopped onion, minced garlic, egg, salt, and pepper. Mix everything together thoroughly using clean hands or a wooden spoon.
You want the mixture to be cohesive but not overly compact. Over-mixing can make the meat tough once cooked, so mix just until combined. The egg helps bind everything, while the raw rice will cook and expand inside the rolls, soaking up juices and adding texture.
Optional tip: Add a bit of chopped fresh parsley or dill for an herbal brightness. Some families even toss in a spoonful of tomato paste or a splash of Worcestershire sauce to deepen the flavor.
Once everything’s mixed, cover the bowl and set it aside while you prepare your sauce and cabbage leaves for rolling.
Step 3: Rolling the Cabbage Leaves
This is the fun part—rolling up your Golumpki!
Take a cabbage leaf and lay it flat on a clean surface. Scoop about 2–3 tablespoons of the meat mixture and place it near the bottom center of the leaf. Fold the sides of the leaf over the filling, then roll it up from the bottom to the top, like you’re making a burrito.
Be sure the rolls are tight enough to hold together during cooking, but not so tight that they tear. If you have any leftover filling, you can either freeze it or form mini meatballs to cook alongside the rolls.
Repeat this process until all your leaves are stuffed and rolled. If you have leftover cabbage leaves, you can line your baking dish with them before placing the rolls inside—this prevents sticking and adds flavor.
Step 4: Making the Tomato Sauce
Time to make the rich, tangy sauce that ties everything together.
In a saucepan, combine the crushed tomatoes, tomato sauce, tomato paste, sugar, paprika, salt, and pepper. Stir well and bring to a simmer over medium heat. Let it bubble gently for about 10–15 minutes, allowing the flavors to meld.
Taste your sauce and adjust the seasoning. Want a bit more depth? Add a splash of vinegar or a dash of Worcestershire sauce. Prefer a creamier sauce? Stir in a little sour cream or heavy cream at the end.
This homemade sauce is the key to Golumpki’s irresistible flavor, soaking into the cabbage and meat as it bakes.
Step 5: Assembling and Cooking the Golumpki
Now it’s time to put everything together and let the magic happen in the oven.
Start by spreading a thin layer of tomato sauce on the bottom of your baking dish or Dutch oven. Place the cabbage rolls seam-side down, snuggled in a single layer. Once your dish is full, pour the remaining sauce evenly over the top, making sure every roll is well-covered.
Cover the dish tightly with aluminum foil or a lid and bake at 350°F (175°C) for 1.5 to 2 hours. The rolls are ready when the cabbage is tender and the meat is fully cooked through.
Some cooks like to uncover the dish for the last 15–20 minutes to let the sauce thicken and the tops of the rolls caramelize slightly—that’s totally up to you.
Once done, let them cool for a few minutes before serving. The aroma is incredible, and the taste? Even better.
Serving Suggestions
What to Serve with Golumpki
Golumpki is filling enough to stand on its own, but pairing it with a few sides can make your meal truly unforgettable.
Here are some classic and creative serving ideas:
- Mashed Potatoes: A traditional pairing. The creaminess balances the tang of the tomato sauce perfectly.
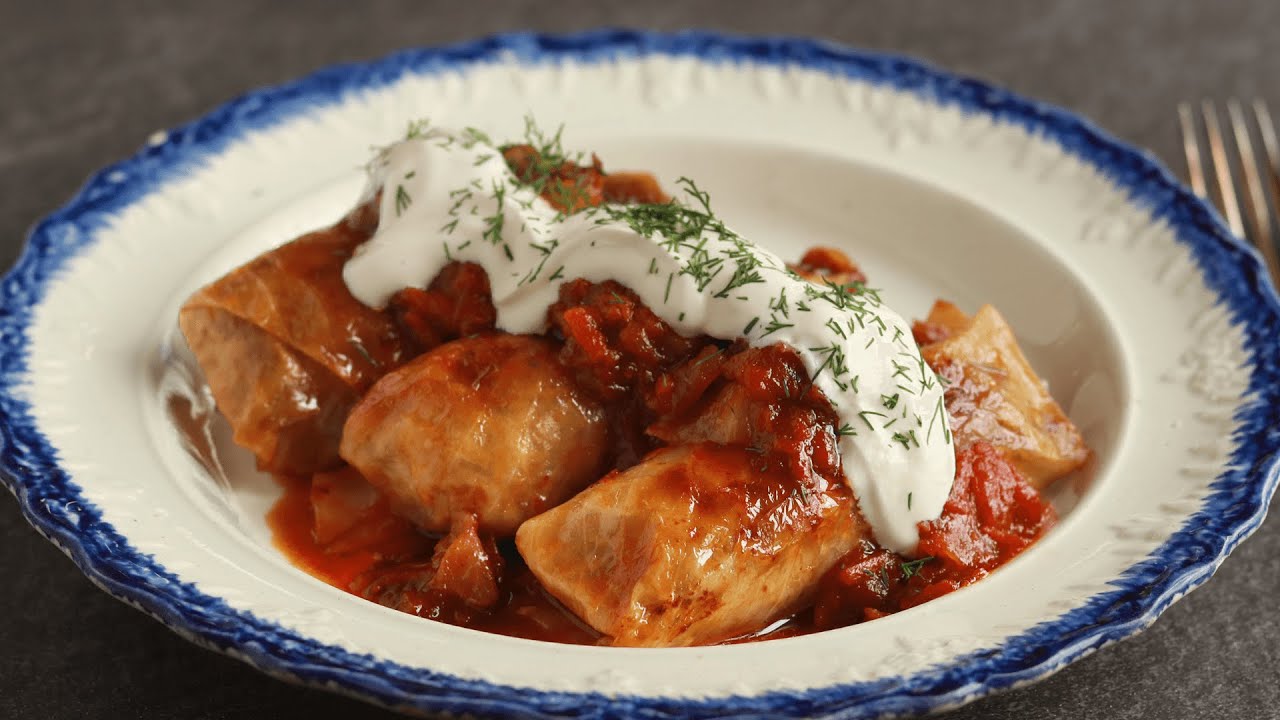
- Sour Cream: A dollop on top adds a cool, tangy contrast.
- Crusty Bread: Great for soaking up any leftover sauce.
- Pickled Beets or Cucumbers: Adds brightness and crunch.
- Simple Garden Salad: A light side to balance the hearty rolls.
No matter how you serve them, Golumpki brings comfort and flavor to any table.
Storing and Reheating Tips
How to Store Leftovers
One of the best things about Golumpki? It makes fantastic leftovers. In fact, many people say it tastes even better the next day as the flavors deepen and meld.
To store leftover cabbage rolls, first allow them to cool completely at room temperature. Then transfer them into an airtight container, preferably in a single layer. If you’re stacking them, add a layer of sauce in between to keep them moist.
Refrigerate your Golumpki for up to 4 days. Be sure to keep them well-sealed to prevent drying out or absorbing odors from other foods in your fridge.
If you’re planning to store them for longer, freezing is a great option. Wrap each roll individually in plastic wrap or aluminum foil, then place them in a freezer-safe bag or container. They can last in the freezer for up to 3 months.
When ready to use, thaw overnight in the refrigerator before reheating.
Best Reheating Practices
To reheat Golumpki while preserving its juicy, tender texture, follow these tips:
Oven Method (Best for Flavor and Texture):
- Preheat oven to 325°F (163°C).
- Place the rolls in an oven-safe dish and cover with sauce.
- Cover tightly with foil and heat for about 25–30 minutes, or until warmed through.
Microwave Method (Quick and Easy):
- Place 1–2 rolls on a microwave-safe plate.
- Add a spoonful of sauce to keep them moist.
- Cover with a microwave-safe lid or wrap loosely with a damp paper towel.
- Heat on medium power for 2–3 minutes, checking and stirring halfway through.
Stovetop Method (Great for Small Batches):
- Place the rolls and sauce in a covered skillet over low heat.
- Let them warm slowly for 10–15 minutes, stirring occasionally.
Avoid overheating, as this can cause the cabbage to break down and the meat to dry out. Gentle, slow reheating is key.
FAQs about Golumpki Recipe
1. Can I freeze Golumpki?
Yes, Golumpki freezes very well. Make sure they’re completely cooled, then wrap each roll tightly and store them in a freezer-safe container. They’ll keep for up to 3 months. To reheat, thaw overnight in the fridge and bake or microwave until heated through.
2. Can I make it vegetarian?
Absolutely! Swap out the ground meat for a mixture of mushrooms, lentils, or even plant-based meat alternatives. You can also use cooked quinoa or bulgur instead of rice for a different texture.
3. How do I prevent the cabbage leaves from tearing?
Boil your cabbage long enough to make the leaves pliable, but not mushy. Remove them gently with tongs as they loosen. If the stems are thick, shave them down with a knife to avoid ripping during rolling.
4. Can I use instant rice?
You can, but it’s not ideal. Instant rice may become mushy during baking. Regular long-grain or parboiled rice holds up better in the filling. If using instant, reduce the cooking time slightly to prevent overcooking.
5. How long can Golumpki be stored in the fridge?
Properly stored in an airtight container, Golumpki can last in the fridge for up to 4 days. Make sure they’re fully cooled before refrigerating, and reheat gently for the best texture and taste.
Final Thoughts
Golumpki is more than just a meal—it’s a celebration of tradition, flavor, and comfort. With every bite, you’re diving into a dish that has warmed kitchens and filled hearts for generations. Whether you’re new to Polish cuisine or revisiting a family favorite, this step-by-step guide makes it easy to bring authentic stuffed cabbage rolls to your table.
The best part? You don’t need any fancy equipment or exotic ingredients. Just simple, humble components brought together with care and patience.
So grab that cabbage, get rolling, and enjoy a taste of old-world comfort that never goes out of style.