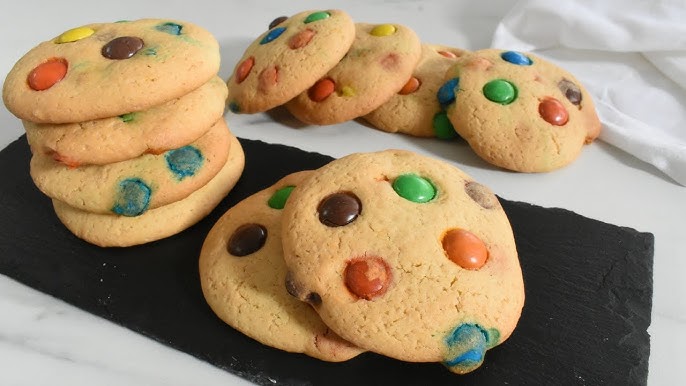
Gluten-Free Sugar Cookie Recipe: Let’s face it—we all love cookies. But when gluten is off-limits, finding the right recipe can be a bit of a mission. Gluten-free baking has come a long way in recent years, and now more than ever, we have access to incredible recipes that don’t sacrifice taste or texture. This gluten-free sugar cookie recipe is one of those golden finds. Whether you’re celiac, gluten-sensitive, or just experimenting with gluten-free options, these cookies are here to please.
Why go gluten-free, you ask? Well, beyond medical reasons, many find that reducing gluten can ease digestion and reduce inflammation. Plus, gluten-free diets are often cleaner, forcing you to be more aware of what you’re putting into your body. And trust me—these sugar cookies don’t taste “healthy” in that boring way. They’re soft in the center, crisp on the edges, and carry that classic sweet vanilla taste you expect from a perfect sugar cookie.
Baking at home brings another layer of goodness. You control the ingredients, the portion sizes, and the quality. No mystery preservatives or hidden allergens—just simple, wholesome, crave-worthy cookies.
So roll up your sleeves. This isn’t just a recipe—it’s an experience. By the end of it, you’ll not only have a dozen (or more) dreamy sugar cookies, but you’ll also have gained confidence in gluten-free baking from scratch.
Ingredients Needed
The foundation of any good cookie lies in its ingredients. For gluten-free baking, choosing the right flour is key. Not all gluten-free flours are created equal, and a poor choice can result in crumbly, dry, or flavorless cookies. But don’t worry—I’ve got the perfect lineup for you.
Dry Ingredients:
- 2 ½ cups gluten-free all-purpose flour (with xanthan gum if your blend doesn’t include it)
- ½ tsp baking powder
- ¼ tsp salt
The gluten-free flour blend should ideally contain a mix of rice flour, potato starch, and tapioca flour for the best texture. Brands like Bob’s Red Mill or King Arthur’s gluten-free blend work beautifully here.
Wet Ingredients:
- 1 cup unsalted butter, softened
- 1 cup granulated sugar
- 1 large egg
- 1 ½ tsp pure vanilla extract
- ½ tsp almond extract (optional but delicious)
These are classic cookie ingredients. Butter gives richness, sugar adds sweetness and structure, while the extracts bring the flavor home. You can use dairy-free butter or coconut oil if needed, but traditional butter gives the richest taste.
Optional Ingredients for Decorating:
- Powdered sugar
- Milk (or dairy-free alternative)
- Natural food coloring
- Sprinkles (gluten-free certified)
Keep it simple or go wild—it’s your kitchen, your rules.
Kitchen Tools You’ll Need
A great recipe also calls for the right tools. You don’t need a fancy kitchen setup, but a few essentials will make your baking smooth and mess-free.
Basic Tools:
- Mixing bowls (at least two sizes)
- Hand mixer or stand mixer
- Measuring cups and spoons
- Silicone spatula
- Rolling pin
- Cookie cutters (any shape!)
- Baking sheet
- Parchment paper or silicone baking mat
- Cooling rack
Pro tip: If you bake regularly, invest in a digital scale for accurate flour measurement. Gluten-free flour blends can vary greatly by weight, and using too much or too little can affect your final cookie texture.
Having your tools prepped ahead of time also helps the process feel effortless. And who doesn’t want a stress-free baking day?
Step-by-Step Instructions
Here’s where the magic happens. Follow these steps closely, and you’ll end up with beautifully golden, soft, and slightly crisp sugar cookies that no one will guess are gluten-free.
Step 1: Preheat and Prep
Start by preheating your oven to 350°F (175°C). Line your baking sheet with parchment paper or a silicone mat. This prevents sticking and ensures even baking.
Also, get your butter out early so it can soften at room temperature. If you’re in a hurry, cube it and microwave for 10-15 seconds—not melted, just softened.
Step 2: Mix Dry Ingredients
In a medium bowl, whisk together the gluten-free flour, baking powder, and salt. Make sure it’s well combined. This ensures even distribution of leavening agents and salt throughout your dough.
Using a flour blend with xanthan gum is crucial—it replaces gluten’s binding power and helps hold everything together.
Step 3: Cream Butter and Sugar
In a large mixing bowl, cream together the softened butter and granulated sugar. Use a hand mixer or stand mixer on medium speed for 2-3 minutes, until the mixture is light, fluffy, and pale yellow.
Add the egg, vanilla extract, and almond extract if using. Beat until everything is well incorporated and smooth.
Creaming isn’t just mixing—it’s about adding air into the dough for a lighter cookie texture. Don’t skip or rush this step!
Step 4: Combine Wet and Dry
Now it’s time to bring everything together. Gradually add the dry ingredients into the wet mixture. You can do this in two or three additions, mixing on low speed after each one until it’s fully combined.
You’ll notice the dough starts to come together nicely. It might feel a bit softer than traditional dough—that’s totally fine. If it seems too sticky, add 1-2 tablespoons of gluten-free flour, but don’t overdo it. Gluten-free dough can quickly turn dry if too much flour is added.
Once combined, use a rubber spatula to scrape down the sides and ensure everything is evenly mixed. You’re aiming for a smooth, pliable dough that holds its shape.
Step 5: Chill the Dough
This step is non-negotiable. Chill the dough for at least 1 hour in the refrigerator. Wrap it in plastic wrap or place it in a covered bowl.
Why chill? It allows the flour to hydrate, firms up the butter for better shape retention during baking, and makes the dough easier to roll out without sticking. Skipping this can result in flat, greasy cookies.
If you’re in a rush, pop it in the freezer for 25-30 minutes instead. Just don’t skip this step unless you want sugar cookie soup.
Step 6: Roll and Cut Cookies
After chilling, remove the dough and let it sit at room temperature for about 5-10 minutes to soften slightly. Lightly flour a clean surface with gluten-free flour and roll out the dough to about ¼ inch thick.
Use your favorite cookie cutters—stars, hearts, snowflakes, or just classic rounds. Cut out as many as you can, and re-roll the scraps to use up all the dough.
Pro tip: Dip your cookie cutters in flour before each cut. It helps prevent sticking and keeps your shapes clean.
Place the cut-out cookies on your prepared baking sheet about 2 inches apart. They won’t spread much, but it’s better to give them some room.
Step 7: Bake to Perfection
Slide your baking sheet into the preheated oven and bake for 9-11 minutes. You’re looking for edges that are just starting to turn golden while the centers stay soft.
Do not overbake—gluten-free cookies continue to cook a bit even after you take them out. Pull them when they’re just set and lightly golden underneath.
Let the cookies sit on the baking sheet for 5 minutes, then transfer them to a cooling rack. They will firm up as they cool, developing that perfect texture.
Step 8: Cooling and Decorating
Once your cookies are completely cool, it’s time to decorate!
Make a simple icing using:
- 1 cup powdered sugar
- 1-2 tablespoons milk (or dairy-free milk)
- ½ teaspoon vanilla extract
Mix until smooth. Add more sugar for thicker icing or more milk for a thinner drizzle. Separate into bowls if using multiple colors and mix in your food coloring of choice.
You can drizzle, spread, or pipe the icing using a zip-top bag with the corner snipped off. Add gluten-free sprinkles or sanding sugar for sparkle.
Let the icing dry at room temperature for a few hours or speed things up in the fridge.
Decorating is where the fun happens—get creative, and don’t worry about perfection. Homemade charm is what makes them special.
Tips for Perfect Gluten-Free Cookies
Gluten-free baking isn’t always straightforward, but a few expert tips can make all the difference between disappointment and deliciousness.
1. Don’t Overmix the Dough
Once the dry ingredients are added to the wet, mix only until combined. Overmixing can make your cookies tough instead of tender—especially when using rice flour blends, which can turn grainy.
2. Measure Flour Carefully
Too much flour is the number one reason gluten-free cookies come out dry. Use a digital scale if possible, or spoon the flour into your measuring cup and level it off with a knife (never scoop directly from the bag).
3. Chill, Chill, Chill
We can’t say it enough: chilled dough leads to cookies that hold their shape and bake evenly. If your dough gets too warm while cutting, pop it back in the fridge for 10 minutes.
4. Use Parchment or Silicone Mats
These prevent sticking and promote even browning on the bottoms of your cookies. Plus, clean-up is a breeze!
5. Don’t Expect a 1:1 Swap for Gluten Recipes
Gluten-free flour behaves differently. This recipe is designed specifically for gluten-free baking, so resist the urge to adapt a wheat-based sugar cookie recipe—you’ll get better results following one that’s been tested and tailored.
6. Taste Test Different Flour Blends
Every brand has a unique mix. Some are starchier, some denser. Try a few (like Cup4Cup, King Arthur, or Bob’s Red Mill) and pick your favorite based on taste and texture.
Storage and Freezing Instructions
One of the best parts about sugar cookies is how well they store. You can make a big batch ahead of time for holidays, parties, or just late-night cookie cravings.
Storage Tips:
- Store baked cookies in an airtight container at room temperature.
- Layer them with parchment paper to prevent sticking.
- They’ll stay fresh for up to 5 days, but honestly, they probably won’t last that long.
Freezing Dough:
- Roll the dough into a disc, wrap it tightly in plastic wrap, then seal in a freezer bag.
- Freeze for up to 2 months.
- Thaw overnight in the fridge before rolling and baking.
Freezing Baked Cookies:
- Allow cookies to cool completely.
- Place them in a single layer on a baking sheet to freeze, then transfer to a freezer bag.
- Freeze decorated or undecorated cookies for up to 2 months.
Perfect for prepping ahead of time for a cookie exchange or simply stockpiling your favorites!
Fun Decorating Ideas
Decorating gluten-free sugar cookies is where your inner artist gets to play. Whether you’re making treats for a birthday, holiday, or just because—it’s all about having fun.
Holiday Themes:
- Christmas: Trees, snowflakes, candy canes with red, green, and white icing
- Valentine’s Day: Hearts in shades of pink and red with edible glitter
- Halloween: Pumpkins, ghosts, or spiderwebs using black and orange icing
- Easter: Bunnies, eggs, and pastel patterns
Birthday Fun:
Use cookie cutters shaped like balloons, stars, or letters to spell names. Use bright icing and colorful gluten-free sprinkles.
Kids’ Craft Day:
Set up a decorating station with bowls of icing, sprinkles, mini candies, and give kids their own blank cookie “canvases.” Less mess than painting—and way tastier.
Special Occasions:
Customize cookies for baby showers, weddings, graduations—whatever you’re celebrating.
Remember: the simpler the cookie shape, the more room for creativity with icing and toppings. Let your imagination lead the way.
Gluten-Free Substitutions
Sometimes gluten isn’t the only ingredient you need to avoid. The good news? This sugar cookie recipe can be adjusted to fit nearly every dietary need.
Dairy-Free Option:
- Replace butter with a vegan butter alternative or refined coconut oil.
- Check your flour blend and decorations to ensure they’re also dairy-free.
Egg-Free Substitute:
- Use a flax egg (1 tbsp ground flax + 3 tbsp water, let sit 5 minutes).
- Applesauce or chia egg can also work but may slightly change texture.
Low Sugar/Sugar-Free:
- Swap granulated sugar with a 1:1 sugar substitute like monk fruit sweetener or Swerve.
- Just know that sugar not only sweetens—it affects texture and browning.
Nut-Free:
Skip the almond extract if you have nut allergies—use all vanilla extract instead for a classic flavor.
By swapping just one or two ingredients, you can make this cookie recipe work for nearly every guest or family member. No one should miss out on a perfect cookie!
FAQs about Gluten-Free Sugar Cookie Recipe
1. Can I make this dough ahead of time?
Yes! The dough can be stored in the fridge for up to 3 days or frozen for up to 2 months.
2. Why are my cookies spreading too much?
This usually means your dough is too warm. Always chill before baking, and don’t skip the flour measurement step.
3. Can I use almond flour instead of gluten-free blend?
No, almond flour behaves very differently. Stick to a balanced gluten-free flour blend for best results.
4. Is this recipe safe for celiac disease?
Yes, as long as all ingredients (especially flour and decorations) are certified gluten-free.
5. How do I know when they’re done baking?
Edges should be just golden, and centers set but not browned. Let them rest on the pan—they’ll firm up as they cool.
Conclusion
Baking gluten-free sugar cookies doesn’t have to be intimidating. With the right ingredients, some simple techniques, and a little patience, you can create cookies that rival any traditional recipe. These cookies are buttery, sweet, and perfectly crisp on the edges—just like they should be.
Whether you’re baking for the holidays, a party, or just because, this gluten-free sugar cookie recipe will quickly become a go-to in your kitchen. And once you’ve mastered it, you’ll find endless ways to customize, decorate, and enjoy them all year round.
So grab your apron, preheat that oven, and get ready to fall in love with gluten-free baking. Your cookies—and everyone who tastes them—will thank you.


