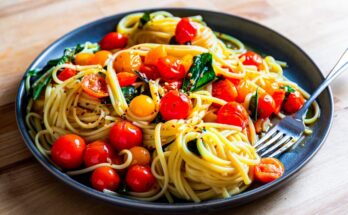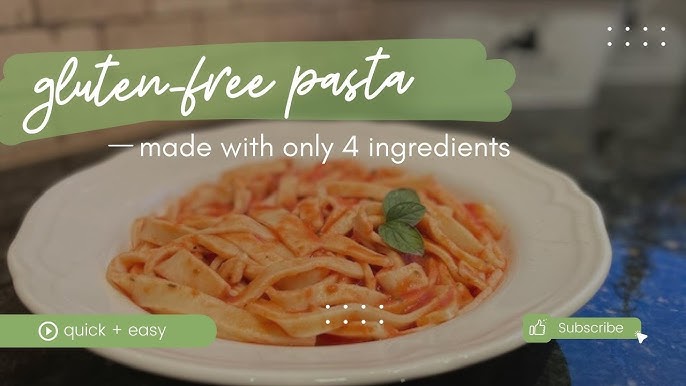
Gluten Free Pasta Recipe: Going gluten-free isn’t just a diet fad—it’s a lifestyle shift that can significantly improve digestion, energy levels, and overall health, especially for those with celiac disease or gluten sensitivity. But let’s face it, giving up pasta sounds like a crime for food lovers. Luckily, gluten-free pasta is here to save the day. It’s made without wheat, barley, or rye but still delivers the comforting, chewy texture and rich flavor we crave.
So, what is gluten-free pasta made of? Instead of traditional flour, it uses alternatives like rice flour, almond flour, chickpea flour, or a mix of starches like tapioca and potato. And here’s the kicker: it’s not just a substitute—it can actually taste amazing. Plus, making it at home means you get to skip preservatives, mystery ingredients, and overpriced store-bought brands.
This guide will walk you through how to make fresh, homemade gluten-free pasta step by step. Whether you’re craving spaghetti, fettuccine, or ravioli, we’ve got you covered with techniques and tips that’ll make you wonder why you didn’t try this sooner.
Ingredients You’ll Need
To make gluten-free pasta from scratch, your ingredient list is surprisingly short, but quality is key. The secret lies in the right flour blend and some moisture-holding ingredients to give it that classic pasta texture.
Basic Ingredients:
- 2 cups gluten-free flour blend (a mix of rice flour, tapioca starch, and potato starch works well)
- 1 tsp xanthan gum (acts like gluten to bind the dough)
- 3 large eggs (room temperature is best)
- 1 tbsp olive oil
- 1/2 tsp salt
- 1–2 tbsp water (only if the dough feels too dry)
Optional Add-ins:
- Finely chopped spinach or beetroot powder for color and nutrients
- Herbs like basil or oregano for flavor
- Garlic powder or onion powder for a savory kick
Each ingredient plays a role. The xanthan gum gives your dough elasticity, and the eggs provide moisture and richness. The olive oil smooths the texture, while the salt enhances the taste. Optional ingredients let you customize your pasta for different flavors or colors.
You can also buy pre-mixed gluten-free pasta flour from brands like Bob’s Red Mill or King Arthur Baking, which already contain the right balance of flours and gums. But if you’re into DIY, combining your own flour mix is a rewarding (and often tastier) approach.
Essential Equipment for Making Gluten-Free Pasta
Making pasta at home isn’t rocket science, but having the right tools can turn your kitchen into a pro-level pasta lab. Here’s what you’ll need to make the process smooth and fun:
1. Mixing Bowl: You’ll need a large, sturdy bowl to combine your ingredients and work the dough.
2. Rolling Pin or Pasta Machine: If you want uniform thickness and save time, a pasta roller is ideal. Otherwise, a rolling pin does the trick—it just takes more elbow grease.
3. Knife or Pasta Cutter: For cutting into shapes like fettuccine or lasagna sheets. A pizza cutter works great too!
4. Parchment Paper or Baking Sheets: For laying out cut pasta to dry or rest before cooking.
5. Pot and Strainer: A large pot with salted boiling water and a fine mesh strainer is essential for cooking and draining pasta without it falling apart.
6. Measuring Cups and Spoons: Precision matters with gluten-free recipes, so measuring your ingredients properly can make or break the dough.
Bonus Gear:
- A food processor for mixing if you don’t want to knead by hand.
- A drying rack if you’re planning to store pasta for later.
With these tools, you’ll not only speed up the process but also improve the quality of your final pasta—especially when it comes to consistency and texture.
Step-by-Step Guide to Making Gluten-Free Pasta
Let’s roll up those sleeves and dive into the heart of this recipe. Making gluten-free pasta takes some patience, but once you get the hang of it, it’s just like riding a bike.
Step 1: Choose Your Gluten-Free Flour Blend
Not all gluten-free flours are created equal. For pasta, you want a mix that provides both structure and stretch. A good starting blend is:
- 1 cup white rice flour
- 1/2 cup tapioca starch
- 1/2 cup potato starch
You can also use pre-made blends labeled specifically for pasta. Just make sure your mix contains some kind of binder like xanthan gum or guar gum. These help replace the gluten’s elasticity.
Step 2: Create the Dough
On a clean surface or in a bowl, make a well in the center of your flour. Crack your eggs into the well, add the olive oil and salt, and gradually start mixing it with a fork or your fingers. Work from the center outward, slowly incorporating the flour into the egg mixture until a dough starts to form.
If the dough feels too dry or crumbly, add water a teaspoon at a time. Gluten-free dough tends to be more delicate, so be gentle and patient during this process.
Once it forms a ball, transfer it to a floured surface (using more of your gluten-free blend) and prepare to knead.
Step 3: Knead the Dough Properly
Kneading gluten-free pasta dough is a bit different from kneading traditional dough. Since there’s no gluten to develop, you’re not trying to build elasticity—you’re aiming for a smooth, cohesive dough that holds together without cracking. Expect the dough to feel slightly more crumbly or gritty than wheat-based pasta at first, but don’t worry, that’s normal.
Start by gently folding the dough over itself and pressing down with the heel of your hand. Rotate the dough and repeat the process for about 3 to 5 minutes. If it begins to stick to your hands, lightly dust your work surface with more gluten-free flour. Conversely, if it seems too dry, dampen your hands slightly and knead again.
Your finished dough should be soft but not sticky, and it should hold its shape when pressed. If you poke it and it doesn’t crack, that’s a good sign you’re ready for the next step. Wrap the dough in plastic wrap or place it in a sealed container and let it rest for at least 30 minutes at room temperature. This gives the ingredients time to hydrate and makes the dough easier to roll out.
Step 4: Roll Out the Dough
Once your dough has rested, divide it into smaller portions to make it easier to handle. Flatten one portion slightly with your hands, then begin rolling it out using a rolling pin or pasta machine. Gluten-free dough tends to be delicate, so work slowly and evenly, aiming for a thickness of about 1/8 inch (3 mm) or thinner depending on the pasta shape you want.
If using a pasta machine, start at the widest setting and gradually roll it through to thinner settings. Dust the dough lightly with gluten-free flour as needed to prevent sticking. If the dough tears, patch it gently with your fingers and keep going.
When rolling by hand, it helps to roll from the center outward in all directions. You’ll want to flip the dough a couple of times and re-flour the surface to prevent sticking. Try to maintain even pressure so the sheet is uniform in thickness.
Don’t worry if the edges look rough—homemade pasta isn’t supposed to be perfect. The rustic look just adds to its charm and flavor!
Step 5: Cut and Shape Your Pasta
Now for the fun part: shaping your pasta. Depending on what style you want, use a knife, pizza cutter, or pasta machine attachments to slice the dough. Here are a few common types you can make:
- Fettuccine or Tagliatelle: Cut long strips about 1/4 inch wide.
- Lasagna Sheets: Cut large rectangular pieces.
- Ravioli: Place filling on one sheet, cover with another, and seal the edges with a fork.
- Spaghetti: Use a pasta cutter or machine attachment.
After cutting, dust the pasta with a bit of flour to prevent sticking. Lay the pieces on parchment paper or a floured surface to dry for about 10–15 minutes before cooking. This step helps prevent them from falling apart in the pot.
If you’re storing for later, allow the pasta to dry for at least 1–2 hours (or up to 24 hours) and then place it in an airtight container in the fridge or freezer.
Step 6: Cooking the Pasta
Cooking gluten-free pasta is slightly different than cooking traditional wheat pasta. It’s more sensitive to overcooking and can become mushy if left in boiling water for too long.
Bring a large pot of salted water to a boil. Add a splash of olive oil to help prevent sticking. Gently drop the pasta into the water and stir immediately to avoid clumping. Fresh gluten-free pasta cooks quickly—usually within 3 to 5 minutes. You’ll know it’s ready when it floats to the top and has a tender but slightly firm texture (al dente).
Drain the pasta in a fine mesh strainer (not a traditional colander, which might let smaller noodles slip through), then toss it with your favorite sauce. Gluten-free pasta pairs well with everything from classic marinara to creamy Alfredo or even just a drizzle of olive oil and fresh herbs.
Pro tip: Reserve a bit of the pasta water before draining. It contains starches that can help your sauce cling better to the noodles and improve texture.
Tips for Perfect Gluten-Free Pasta Every Time
Let’s face it—gluten-free pasta can be a bit temperamental. But with a few tried-and-true tips, you’ll be whipping up bowls of perfect noodles that would make even an Italian nonna proud.
- Use a Balanced Flour Blend: Don’t rely on just one flour. Combining rice flour, tapioca, and potato starch gives you a better texture and flavor.
- Don’t Skip the Binder: Xanthan gum or psyllium husk is essential for holding the dough together. Otherwise, you’ll end up with a crumbly mess.
- Rest Your Dough: Letting the dough sit for 30 minutes allows the flours to absorb moisture fully. Skipping this step will make rolling a nightmare.
- Go Easy on the Water: Add moisture gradually. It’s easier to fix dry dough than wet dough.
- Use Fresh Ingredients: Especially with eggs—room temperature eggs blend more smoothly into the dough.
- Roll in Stages: Don’t try to flatten your dough all at once. Start thick and roll gradually thinner.
- Cook Immediately or Dry Properly: Fresh pasta is best cooked within 10–15 minutes. If storing, make sure it’s fully dried and stored in an airtight container.
- Don’t Overcook: Gluten-free pasta can go from perfect to mush in seconds. Stay close and test it often.
Mastering these tips will save you time, stress, and lots of trial and error. Plus, once you get it right, gluten-free pasta becomes just as easy and delicious as the regular kind.
Gluten-Free Pasta Recipe Variations
One of the best parts about making gluten-free pasta at home is how easily you can customize it. Whether you’re looking to boost nutrition, add some color, or just mix things up, these pasta variations will bring new life to your recipes.
Spinach Gluten-Free Pasta
If you’re trying to sneak more greens into your meals, spinach pasta is a great way to do it. It adds a beautiful green hue and a subtle earthy flavor.
To make it:
- Steam or sauté a handful of fresh spinach leaves until wilted.
- Blend into a puree and let it cool.
- Mix the spinach puree into your dough with the eggs before combining with flour.
You may need to reduce the amount of added water since the spinach brings moisture. This version pairs perfectly with lemony sauces, ricotta, or garlic butter.
Chickpea Pasta
Chickpea flour is rich in protein and fiber, making it a great option for a heartier, more nutritious pasta. It has a slightly nutty flavor and works well for shorter pasta shapes like penne or fusilli.
To make it:
- Use chickpea flour as your base, mixed with a bit of tapioca starch for elasticity.
- Add eggs, olive oil, and a touch of xanthan gum.
This dough will be slightly denser but holds up well to bold sauces like spicy tomato or creamy tahini blends.
Sweet Potato Pasta
Looking for something a little sweeter? Sweet potato pasta offers a vibrant orange color and a subtly sweet taste.
To make it:
- Roast and mash a sweet potato.
- Mix it into your dough, using less egg or water to compensate for moisture.
- Combine with a gluten-free flour mix and knead as usual.
Sweet potato pasta is a hit with brown butter sauces, sage, and toasted nuts. It’s a fantastic fall-inspired dish that feels gourmet with very little effort.
Experimenting with these variations keeps things exciting in the kitchen and lets you create pasta that fits your flavor preferences and nutritional needs.
Storing and Reheating Gluten-Free Pasta
Once you’ve put in the effort to make homemade gluten-free pasta, the last thing you want is to waste any of it. Luckily, gluten-free pasta can be stored and reheated effectively with the right techniques.
Storing Fresh Pasta
If you’re not cooking your pasta right away, here’s how to keep it fresh:
- Short Term (1–2 days): Dust the pasta lightly with flour and store it in an airtight container in the refrigerator. Place parchment paper between layers to prevent sticking.
- Long Term: Allow the pasta to dry completely at room temperature (12–24 hours), then store it in an airtight container in a cool, dry place for up to a week. For longer storage, freeze the pasta in portioned bags for up to 2 months.
Reheating Cooked Pasta
Reheating gluten-free pasta without turning it into a sticky mess takes a bit of finesse:
- Boiling Water Method: Drop the pasta into boiling water for 30–60 seconds to reheat. Drain and serve.
- Microwave: Add a splash of water or sauce, cover loosely, and heat for 1–2 minutes, stirring halfway through.
- Pan Fry: Toss with a little oil or butter in a skillet and heat on low until warmed through.
Avoid overcooking during reheating to preserve the pasta’s texture. Adding a bit of sauce or olive oil can also help restore moisture and improve the flavor.
Common Mistakes and How to Avoid Them
Even experienced home cooks can struggle with gluten-free pasta. Here are the most common mistakes and how to fix them:
1. Dough is Too Dry or Too Wet
Gluten-free flours absorb liquid differently. If your dough crumbles, add a few drops of water or a bit more egg. If it’s sticky, dust it with more flour until it’s manageable.
2. Skipping the Rest Time
This step is crucial. Without resting, the dough doesn’t hydrate properly and becomes difficult to roll and shape. Always give it at least 30 minutes.
3. Overworking the Dough
While traditional pasta benefits from lots of kneading, gluten-free dough does not. Over-kneading can break it down, making it sticky and hard to shape.
4. Rolling Too Thin or Unevenly
If your dough is too thin, it may tear when cooking. Roll gradually and evenly, and don’t go thinner than 1/8 inch unless you’re experienced.
5. Overcooking
Gluten-free pasta cooks fast. Always test it after 3 minutes and aim for al dente. Mushy noodles are often the result of cooking just a minute too long.
By keeping an eye on these common issues, you’ll set yourself up for success every time you make a batch.
FAQs about Gluten-Free Pasta Recipe
1. Can I freeze gluten-free pasta?
Yes! Freeze uncooked gluten-free pasta in airtight bags or containers for up to 2 months. Cook from frozen or allow to thaw before boiling.
2. How do I make it vegan?
Simply swap the eggs with 1/4 cup of water mixed with 1 tablespoon of olive oil per egg. You can also use flaxseed meal as a binder (1 tbsp flax + 3 tbsp water = 1 egg).
3. What’s the best gluten-free flour for pasta?
A blend of rice flour, tapioca starch, and potato starch works great. Chickpea flour and sorghum flour can also be used for added nutrition.
4. Is gluten-free pasta healthier than regular pasta?
It depends on the ingredients. Gluten-free pasta made with whole grains or legumes can be higher in fiber and protein, making it a nutritious alternative.
5. Can I dry homemade gluten-free pasta?
Yes, let it dry completely in a cool, dry place for 12–24 hours. Store in an airtight container for up to a week, or freeze for longer storage.
Final Thoughts
Making gluten-free pasta from scratch may seem intimidating at first, but once you get the hang of it, it’s incredibly rewarding. Not only do you get full control over ingredients and flavors, but you also gain the confidence of knowing exactly what’s going into your food. Plus, the taste and texture of fresh pasta—especially when it’s gluten-free and made with love—simply can’t be beaten.
So, next time you’re craving a hearty pasta dish, skip the store-bought box and whip up your own batch at home. Your stomach—and taste buds—will thank you.