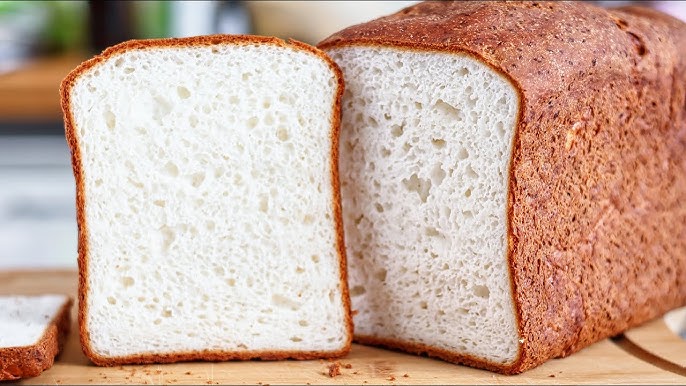
Gluten Free Bread Recipe: Baking your own gluten-free bread can feel like uncovering a culinary treasure. Whether you’re managing celiac disease, gluten sensitivity, or simply exploring healthier options, homemade gluten-free bread offers a world of taste and texture that’s hard to find in store-bought loaves. This guide will walk you through every step, ensuring your bread turns out light, fluffy, and full of flavor.
What is Gluten-Free Bread?
Gluten-free bread is a bread alternative made without wheat, barley, or rye, catering to individuals with gluten intolerances or allergies. Unlike traditional bread, it uses specialized flours like rice, almond, or sorghum, along with binders like xanthan gum to replicate the elasticity gluten provides. The result? A loaf that’s just as satisfying and versatile.
Essential Ingredients for Gluten-Free Bread
- Gluten-Free Flours: Choose from rice, almond, sorghum, or oat flours for a solid base.
- Binders: Xanthan gum or psyllium husk helps maintain structure and elasticity.
- Yeast or Baking Powder: These agents give the bread its rise and fluffiness.
- Liquids: Use water, milk (or non-dairy alternatives), and oil to moisten the dough.
- Sweeteners and Salt: Balancing the flavor with sugar or honey and a pinch of salt.
Necessary Equipment
To create your gluten-free masterpiece, you’ll need:
- A medium-sized loaf pan.
- Measuring cups and spoons for precise measurements.
- A stand or hand mixer to combine the ingredients.
- Parchment paper for lining the pan.
- A thermometer to ensure baking perfection.
Step-by-Step Instructions for Making Gluten-Free Bread
- Prepare Your Workspace
Clean your countertop and gather all the ingredients and tools to avoid interruptions. Preheat your oven to 375°F (190°C) and lightly grease your loaf pan. - Measure Ingredients Carefully
Gluten-free baking is precise, so measure flours, liquids, and binders using a scale or measuring cups. - Mix the Dough
Combine your dry ingredients (flours, salt, binder) in a bowl. In a separate bowl, activate the yeast by mixing it with warm water and a teaspoon of sugar. Once frothy, add it to the dry mix along with your wet ingredients. - Let the Dough Rise
Cover the bowl with a damp cloth and let the dough rise in a warm place for 30-45 minutes. Gluten-free dough won’t double in size like traditional dough but should expand slightly. - Bake to Perfection
Transfer the dough to your prepared pan, smoothing the top with a spatula. Bake for 45-50 minutes, or until the crust is golden brown and a thermometer inserted into the center reads 200°F (93°C).
Tips for Achieving the Perfect Texture
Crafting the ideal gluten-free bread texture can be tricky but rewarding. Here’s how you can get a soft, airy loaf every time:
- Balance Moisture: Gluten-free flours absorb more liquid than wheat flours. Add extra liquid gradually to avoid a dry or crumbly dough.
- Sticky Dough is Normal: Don’t expect a firm dough like traditional bread. Gluten-free dough is often sticky and more batter-like.
- Rest Time is Key: Allow the dough to rest before baking so the flours fully hydrate. This step also helps improve the bread’s texture.
If you live in a high-altitude or humid area, adjust the liquid content slightly and keep an eye on the baking time to account for environmental differences.
Common Mistakes and How to Avoid Them
Over-mixing the Dough: Unlike traditional bread, gluten-free dough doesn’t benefit from excessive mixing. Over-mixing can lead to a dense loaf.
- Solution: Mix just until all ingredients are combined and smooth.
Skipping the Binder: Binders like xanthan gum are crucial for structure. Forgetting them can make your bread fall apart.
- Solution: Always include a binder and stick to the recommended amount.
Inaccurate Measurements: Gluten-free baking demands precision. Using too much or too little flour can result in a loaf that’s either too dry or too wet.
- Solution: Use a kitchen scale for best results.
Customizing Your Gluten-Free Bread
One of the joys of baking at home is the freedom to experiment!
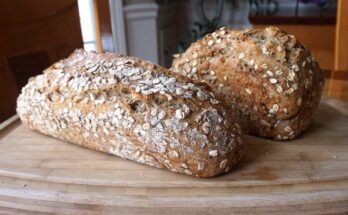
- Seeds & Herbs: Add sunflower seeds, sesame seeds, rosemary, or thyme for extra flavor and nutrition.
- Sweet Variations: Mix in raisins, cinnamon, or honey for a breakfast-worthy loaf.
- Savory Twists: Blend shredded cheese, garlic, or olives for a delicious side dish bread.
By customizing, you can transform a basic loaf into something uniquely yours.
Storage and Shelf-Life
Gluten-free bread tends to dry out faster than regular bread, so proper storage is essential:
- Short-Term Storage: Wrap the loaf tightly in plastic wrap or foil and store it at room temperature for up to 3 days.
- Freezing: Slice the bread before freezing, so you can thaw individual pieces. Wrap slices in parchment paper, place them in a freezer-safe bag, and freeze for up to 3 months.
- Reheating Tips: Reheat slices in a toaster or oven to restore softness and warmth.
Nutritional Benefits of Gluten-Free Bread
While gluten-free bread varies in nutritional content depending on the ingredients, here are some common benefits:
- Lower in Calories: Some gluten-free flours like almond or coconut are lower in calories than wheat.
- Rich in Nutrients: Many gluten-free recipes use nutrient-dense flours packed with protein, fiber, and vitamins.
- Improved Digestion: For those with gluten sensitivities, these breads can be gentler on the stomach.
Gluten-free bread is a versatile option that supports dietary preferences while delivering on taste and nutrition.
Serving Suggestions
Now that you’ve baked the perfect loaf, it’s time to enjoy it!
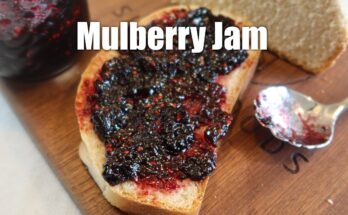
- Breakfast Ideas: Spread a slice with avocado or nut butter for a hearty start to the day.
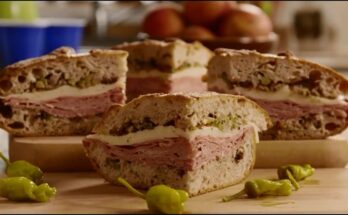
- Sandwich Base: Use it to make your favorite deli-style sandwiches.
- Dinner Companion: Serve alongside soups, salads, or pasta dishes.
Pro Tip: Toasting gluten-free bread enhances its flavor and texture.
FAQs About Gluten-Free Bread Recipe
1. What is Gluten-Free Bread?
Gluten-free bread is made without wheat, barley, or rye. It uses alternative flours like almond, coconut, rice, or tapioca to create a loaf suitable for individuals with gluten intolerance or celiac disease.
2. How Do I Make Gluten-Free Bread?
To make gluten-free bread, you’ll need gluten-free flour, xanthan gum, yeast, and liquid ingredients like milk or water. Mix the ingredients, allow the dough to rise, and bake in a preheated oven.
3. Can I Use Regular Yeast in Gluten-Free Bread?
Yes, regular yeast works well in gluten-free bread. Ensure it’s fresh and activated properly to help the dough rise effectively.
4. Why Does Gluten-Free Bread Need Xanthan Gum?
Xanthan gum acts as a binding agent, replacing gluten’s elasticity to provide structure and prevent crumbling.
5. How Do I Store Gluten-Free Bread?
Store gluten-free bread in an airtight container at room temperature for up to 2 days, or freeze it for longer storage. Avoid refrigeration as it can make the bread dry.
6. What Are Some Common Variations?
Popular variations include adding seeds, nuts, or herbs for extra flavor. Sweet versions can include cinnamon, raisins, or honey.
Conclusion
Congratulations on mastering the art of gluten-free bread! With the right ingredients, tools, and techniques, you can enjoy fresh, flavorful bread that suits your dietary needs. Baking at home not only saves money but also gives you full control over the flavors and nutrition. So go ahead, experiment, and savor every slice.


