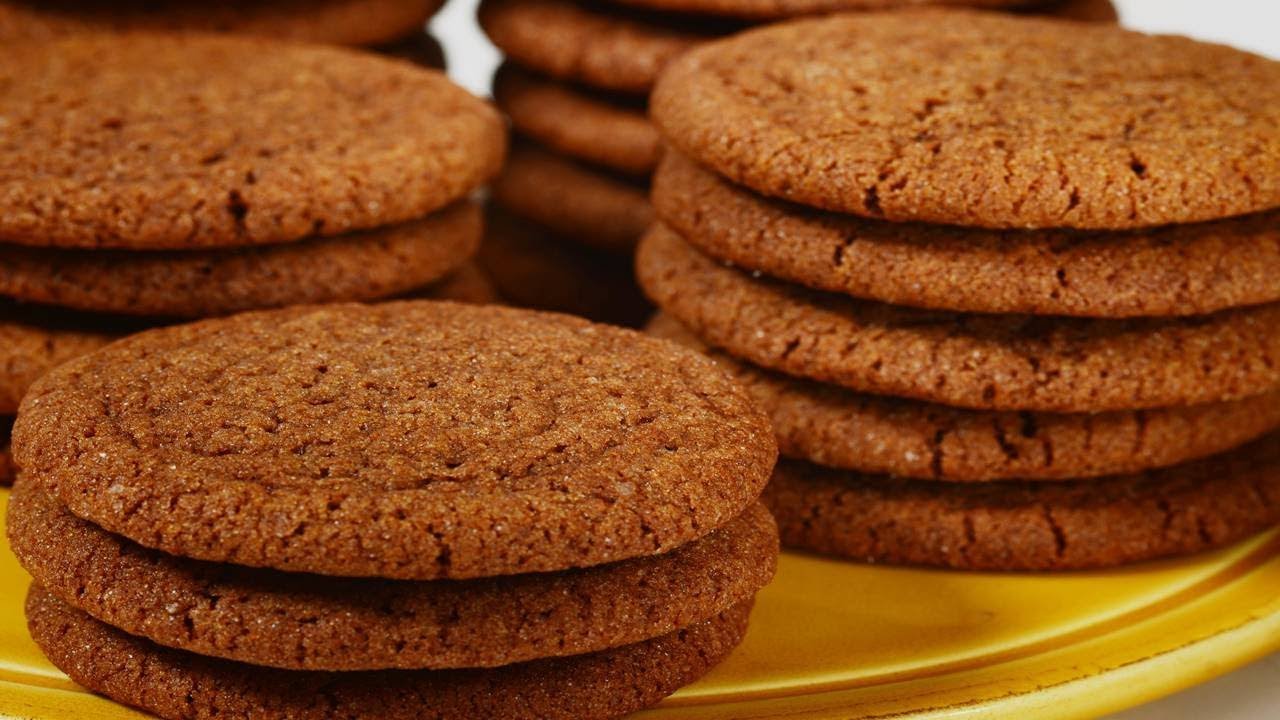
Gingersnap Cookies Recipe: There’s something truly magical about the warm, spicy aroma of freshly baked gingersnap cookies wafting through the kitchen. These cookies aren’t just a holiday treat—they’re an all-time favorite that can be enjoyed year-round. Known for their crisp texture, deep molasses flavor, and the perfect balance of spices, gingersnap cookies are a nostalgic comfort food for many people. Whether you’re baking them for Christmas, a family gathering, or simply to satisfy a craving, this step-by-step guide will help you create the best batch of gingersnap cookies ever.
In this recipe, we’ll go beyond the basics. We’ll talk about the ingredients, the right techniques, and little secrets that will make your cookies taste bakery-perfect every time. So, grab your apron, preheat your oven, and let’s dive into the delightful world of gingersnap cookies.
What Are Gingersnap Cookies?
Gingersnap cookies are a spiced cookie variety that gets its name from the characteristic “snap” you hear and feel when you break them in half. Unlike soft gingerbread cookies, these are thinner, crispier, and carry a slightly stronger punch of spice. The star ingredients—ginger, cinnamon, cloves, and molasses—combine to create a rich depth of flavor that feels warm and comforting, especially during the colder months.
They’re often confused with gingerbread, but the two are very different. While gingerbread cookies are soft and often decorated with icing, gingersnaps are meant to be crunchy with a caramelized edge. The texture makes them ideal for dunking into a hot cup of tea, coffee, or milk. Plus, they store extremely well, meaning you can bake a large batch and enjoy them for days without losing their crispness.
A Brief History of Gingersnap Cookies
The origins of gingersnap cookies can be traced back to Europe, particularly Germany and England, where ginger-based baked goods were incredibly popular in medieval times. Ginger was considered not only a spice but also a medicinal ingredient, believed to aid digestion and boost the immune system. Early versions of ginger cookies were dense and bread-like, but over time, bakers refined the recipe into something lighter and crunchier.
By the time gingersnap cookies made their way to America, they had already become a festive staple. Colonists embraced the cookie for its long shelf life and simple ingredients. Since sugar and spices were considered luxury items, baking gingersnaps was often reserved for holidays and special occasions. Today, they remain a timeless classic, particularly around Christmas when spiced cookies of all kinds dominate holiday dessert tables.
Why You’ll Love This Recipe
If you’ve never baked gingersnap cookies before, this recipe is perfect for beginners. If you’re a seasoned baker, you’ll still appreciate the subtle tweaks that make these cookies turn out flawless every time. Here’s why you’ll love it:
- Perfect Texture: Crisp edges with just the right amount of snap.
- Rich Flavor: Molasses adds depth while ginger and cinnamon bring warmth.
- Simple Ingredients: You probably already have most of these in your pantry.
- Make-Ahead Friendly: The dough can be prepared in advance and stored.
- Versatile Treat: Great on their own, with a hot drink, or as part of other desserts.
Whether you like them extra snappy or with a slightly chewy center, this recipe can be customized to your preference. Plus, nothing beats the homemade version—store-bought gingersnaps don’t even come close.
Ingredients You’ll Need
Essential Baking Ingredients
Every cookie recipe starts with a solid foundation of basic baking ingredients, and gingersnap cookies are no different. Here’s a breakdown of what you’ll need:
- All-Purpose Flour: The backbone of the cookies, providing structure.
- Granulated Sugar: For sweetness and that slight caramelization when baked.
- Baking Soda: Essential for helping the cookies spread and achieve a light texture.
- Salt: Just a pinch to balance the flavors.
- Egg: Acts as a binder and adds richness to the dough.
- Unsalted Butter: Brings flavor and helps with the crisp texture.
These everyday ingredients come together to form the base, but what really makes gingersnaps shine are the spices and molasses.
The Key Role of Spices
The defining feature of gingersnap cookies is their bold, aromatic spice profile. Without the right balance, your cookies might taste flat or overpowering. Here are the must-haves:
- Ground Ginger: The star of the show, giving the cookies their signature bite.
- Ground Cinnamon: Adds warmth and complements the ginger.
- Ground Cloves: A small amount goes a long way in deepening the flavor.
- Nutmeg (optional): For an extra layer of spice complexity.
The trick to nailing the perfect gingersnap is finding the right spice ratio. Too much ginger can make them overly sharp, while too little leaves them bland. A balanced blend ensures every bite is flavorful without being overwhelming.
Optional Add-ins for Extra Flavor
While traditional gingersnap cookies are wonderfully delicious on their own, you can easily elevate them with a few creative add-ins:
- Orange Zest: Brightens the flavor and pairs beautifully with spices.
- Chocolate Chips: For a sweet twist on the classic recipe.
- Candied Ginger: Adds chewiness and extra zing.
- Vanilla Extract: Enhances the overall sweetness and aroma.
These aren’t necessary, but if you’re someone who likes experimenting in the kitchen, they can make your batch of cookies stand out.
Kitchen Tools and Equipment
Mixing Tools
Having the right tools can make baking easier and more enjoyable. For mixing, you’ll need:
- A large mixing bowl for combining ingredients.
- A hand mixer or stand mixer to cream the butter and sugar until light and fluffy.
- A rubber spatula for scraping down the sides of the bowl.
While you can mix the dough by hand, using a mixer saves time and ensures even distribution of ingredients.
Measuring Essentials
Accuracy is everything in baking. Even a slight variation in measurement can affect the final outcome. Here’s what you’ll need:
- Dry measuring cups for flour, sugar, and spices.
- Liquid measuring cup for molasses and other wet ingredients.
- Measuring spoons for precise spice ratios.
Pro tip: Always level off dry ingredients with a knife to avoid using too much flour, which can make cookies dense.
Baking Equipment
When it comes to baking, the right equipment ensures consistent results:
- Baking sheets lined with parchment paper or silicone baking mats to prevent sticking.
- Cookie scoop for evenly portioned cookies.
- Cooling racks to allow air circulation and maintain crispness after baking.
With these tools, you’ll be able to bake with confidence and get cookies that look as good as they taste.
Step-by-Step Guide to Making Gingersnap Cookies
Step 1 – Preparing the Dough
This is where the magic begins. Start by creaming the butter and sugar together until the mixture is pale and fluffy. This step incorporates air, helping your cookies bake up with the right texture. Next, add the egg and molasses, mixing until well combined.
In a separate bowl, whisk together the dry ingredients—flour, baking soda, salt, and all the spices. Gradually add the dry mixture into the wet ingredients, mixing slowly to avoid overworking the dough. The result should be a slightly sticky dough that holds together well.
At this stage, you can chill the dough for at least 30 minutes. Chilling not only makes the dough easier to handle but also allows the flavors to meld together, intensifying the spice profile.
Step 2 – Rolling and Shaping
Once your dough has chilled, it’s time to roll and shape the cookies. This part is both fun and crucial to getting that classic gingersnap look. Scoop out small portions of dough (about one tablespoon each) and roll them into smooth balls using your hands. The dough might feel a little sticky, but that’s normal—molasses is naturally tacky.
To give the cookies their signature crackly top, roll each ball in a bowl of granulated sugar before placing them on the baking sheet. The sugar coating not only adds a touch of sparkle but also caramelizes slightly in the oven, giving the cookies that irresistible crisp bite.
When arranging the dough balls on your baking sheet, make sure to space them about 2 inches apart. Gingersnap cookies spread as they bake, and proper spacing ensures they don’t fuse together. If you prefer smaller bite-sized cookies, use a teaspoon-sized scoop instead. Larger cookies will spread more and have a slightly chewier center, while smaller ones will be extra snappy.
Rolling and shaping may sound simple, but it sets the stage for how your cookies will turn out. Take your time here, and you’ll be rewarded with evenly sized, perfectly round cookies that bake beautifully.
Step 3 – Baking to Perfection
Now comes the most important step: baking. Preheat your oven to 350°F (175°C) and slide the trays of cookie dough into the middle rack. Depending on the size of your dough balls, baking should take 8 to 12 minutes.
Here’s the key: keep a close eye on the cookies. For truly crispy gingersnaps, allow them to bake until the edges are dark golden brown and the tops are crackled. If you prefer them slightly chewy in the center, pull them out a minute or two earlier.
The aroma during this step is heavenly—ginger, cinnamon, and molasses combine to fill your kitchen with a cozy, holiday-like scent. You’ll know they’re ready when the cookies have spread, developed those signature cracks on top, and the edges look firm.
Pro tip: Always bake one test cookie first. This way, you can see how your oven handles the dough and make adjustments if needed. Every oven is slightly different, and a trial cookie can save you from an entire batch that’s underdone or overbaked.
Step 4 – Cooling and Serving
When the cookies are done baking, remove the tray from the oven but don’t touch them yet—they’re fragile when hot. Let them sit on the baking sheet for about 5 minutes before transferring them to a wire cooling rack. This short resting time allows them to set while still on the tray.
Once on the cooling rack, the cookies will continue to firm up, reaching that perfect snappy texture. Resist the temptation to eat them right away (though I won’t blame you if you sneak one while warm). Cooling not only improves texture but also intensifies the flavors.
For serving, you have endless options. Gingersnap cookies are fantastic on their own, but they’re also wonderful when paired with hot drinks like tea, coffee, or cocoa. They also make excellent companions to desserts—think crumbled over ice cream, layered in parfaits, or even used as a base for cheesecake crust.
Tips for Perfect Gingersnap Cookies
How to Get the Signature Snap
The defining feature of gingersnaps is that crisp “snap” when you break them in half. To achieve this, pay attention to three things:
- Dough Thickness – Roll your cookies evenly; thinner dough spreads better and bakes crispier.
- Baking Time – Bake them until the edges are firm and the tops are well-cracked. Overbaking by just a minute can turn chewy cookies into snappy ones.
- Cooling – Let them cool completely before storing. Warm cookies might feel soft but will harden as they rest.
If you love dunking your cookies in milk or coffee, aim for the crisp version—they hold up beautifully without getting soggy too quickly.
Preventing Overbaking
While a snappy cookie is the goal, overbaking can leave you with cookies that are more brittle than enjoyable. Here’s how to avoid it:
- Check early: Start checking at the 8-minute mark.
- Look for cracks: The tops should be crackled, and the edges slightly darker.
- Don’t trust the softness: Cookies continue to bake slightly even after being removed from the oven, so pull them out just as they set.
Remember, it’s better to have a slightly chewy gingersnap than one that’s rock hard.
Adjusting Spice Levels
One of the best things about gingersnap cookies is that you can customize the spice intensity. Some people love bold, fiery ginger flavors, while others prefer a milder cookie. Here’s how you can tweak:
- For more heat: Add an extra half teaspoon of ground ginger or even a pinch of cayenne pepper.
- For warmth: Increase the cinnamon slightly while keeping ginger the same.
- For depth: Add nutmeg or cardamom for an earthy, aromatic note.
Spices are the heart of this recipe, so don’t be afraid to experiment until you find your perfect blend.
Variations of Gingersnap Cookies
Chewy Gingersnaps
Not everyone is a fan of the crisp, snappy texture. If you prefer a softer bite, chewy gingersnaps are the way to go. The trick is in the baking time and a slight adjustment of ingredients. Instead of letting the cookies bake until fully firm, pull them out a little earlier—around 8 minutes—so the centers stay tender. Adding a bit more molasses also contributes to that chewy texture since it retains more moisture.
Another hack is to use brown sugar instead of only white sugar in the dough. Brown sugar contains more molasses, which locks in softness. Storing chewy gingersnaps in an airtight container with a slice of bread (yes, bread!) also keeps them moist longer. The bread releases just enough moisture to prevent the cookies from drying out without changing their flavor.
So, if you love cookies with a softer middle and slightly crisp edges, chewy gingersnaps will be your new favorite. They’re perfect for those who enjoy dipping cookies into milk or coffee without the crumbs.
Gluten-Free Gingersnaps
For those with gluten sensitivities, you don’t have to miss out on the joy of gingersnap cookies. Making them gluten-free is simpler than you might think. All you need is a good-quality gluten-free all-purpose flour blend that includes xanthan gum (which helps mimic the structure of gluten).
Aside from swapping the flour, the recipe stays the same. You’ll still get that delightful spice blend, crisp exterior, and molasses-rich flavor. Just remember to chill the dough a little longer since gluten-free flours can make it more delicate.
These cookies are a hit with everyone—gluten-free or not—because the spice and molasses really shine through. Nobody will even guess they’re made without wheat.
Holiday-Themed Gingersnaps
Gingersnaps are already a holiday favorite, but you can take them up a notch by adding festive twists. For example:
- Dipped in white chocolate: Once cooled, dip half the cookie in melted white chocolate and sprinkle with crushed peppermint for a Christmas treat.
- Shaped cookies: Use cookie cutters instead of rolling balls of dough to make festive shapes like stars, trees, or snowflakes.
- Decorated tops: Sprinkle coarse sugar or edible glitter before baking to make them sparkle on the holiday table.
These small tweaks make gingersnaps not just delicious, but also visually stunning for gifting or serving at parties.
Storage and Shelf Life
How to Store Fresh Cookies
The beauty of gingersnap cookies is that they stay fresh longer than many other baked goods. Once completely cooled, store them in an airtight container at room temperature. They’ll stay crisp for up to 2 weeks if kept in a cool, dry place.
If you made chewy gingersnaps, use the bread slice trick mentioned earlier to retain softness. Just be sure to replace the bread every couple of days.
Freezing the Dough
One of the best baking hacks is preparing gingersnap cookie dough ahead of time and freezing it. After rolling the dough into balls, place them on a tray and freeze until solid. Then transfer them into a freezer bag or airtight container.
When ready to bake, simply place the frozen dough balls on a baking sheet, roll in sugar, and bake as usual—no need to thaw. They might need an extra minute or two in the oven, but you’ll always have fresh cookies ready at a moment’s notice.
Reviving Stale Cookies
Even the crispiest cookies can lose their crunch over time, especially in humid climates. If your gingersnaps have gone soft, don’t toss them out. Instead, pop them into a 300°F (150°C) oven for 5–7 minutes. This light rebake removes excess moisture and restores their snap.
Alternatively, if you like them softer, place the cookies in a sealed container with a slice of apple. Within a few hours, the cookies will absorb just enough moisture to become tender again.
Serving Suggestions
Pairing with Beverages
One of the best ways to enjoy gingersnap cookies is alongside a warm drink. Their spiced flavor pairs beautifully with:
- Black tea – especially chai or Earl Grey.
- Coffee – rich espresso or creamy lattes enhance the spice.
- Hot chocolate – the sweetness balances the ginger bite.
- Warm milk – a nostalgic classic, especially for kids.
These pairings make gingersnaps the ultimate cozy companion for chilly evenings.
Using Gingersnaps in Desserts
Beyond eating them straight, gingersnap cookies can be transformed into incredible dessert bases. Crush them into crumbs and you have a versatile ingredient for:
- Cheesecake crusts – swap out graham crackers for a spiced kick.
- Pie crusts – works beautifully with pumpkin or sweet potato pies.
- Ice cream mix-ins – stir crushed gingersnaps into vanilla ice cream.
- Trifles or parfaits – layer with cream, fruit, or custard for a festive dessert.
Their bold flavor makes them a standout ingredient in many recipes.
Creative Presentation Ideas
If you’re baking gingersnaps for guests or gifting, presentation matters just as much as taste. Here are a few creative ways to serve them:
- Stack cookies in mason jars tied with ribbon for a homemade gift.
- Arrange them on a holiday platter with other spiced cookies.
- Serve alongside fruit and cheese for a unique sweet-and-savory snack.
- Create cookie sandwiches with a cream cheese or buttercream filling.
These small details turn simple gingersnaps into something extra special.
Nutritional Information
Calories and Macronutrients
Like most cookies, gingersnaps are a treat, but compared to many other desserts, they’re relatively light. On average, one medium-sized gingersnap cookie contains:
- Calories: 70–90
- Carbohydrates: 12–15 g
- Sugar: 6–8 g
- Fat: 2–3 g
- Protein: 1 g
The molasses provides trace minerals like iron, calcium, and magnesium, which is a nice bonus. While gingersnaps shouldn’t be mistaken for a health food, they do offer a little more nutritional value compared to plain sugar cookies.
Healthier Ingredient Substitutions
If you’d like to lighten up your gingersnap cookies without sacrificing flavor, here are a few easy swaps:
- Whole wheat flour: Replace half the all-purpose flour with whole wheat for added fiber.
- Coconut oil: Substitute butter with coconut oil for a dairy-free option.
- Coconut sugar or honey: Use instead of white sugar for a less processed sweetener.
- Reduced sugar: Cut the sugar by 25%—the molasses and spices still keep the flavor strong.
You can also experiment with adding ground flaxseed or oats for extra nutrients. These small changes won’t drastically alter the taste, but they’ll make your cookies a little more wholesome.
Common Mistakes to Avoid
Measuring Ingredients Incorrectly
Baking is a science, and precision matters. Using too much flour, for example, will result in dense, dry cookies. To measure flour correctly, spoon it into your measuring cup and level it off with a knife—don’t scoop directly from the bag. Likewise, be sure to measure molasses in a liquid measuring cup and lightly grease it first so it pours out easily.
Even small mistakes in measurements can affect how your cookies spread, their texture, and even their flavor. So take the extra few seconds to measure carefully—it’s worth it.
Overmixing the Dough
Once you’ve added the flour mixture to your wet ingredients, mix only until combined. Overmixing develops the gluten in the flour, which can lead to tough, overly chewy cookies. The dough should be smooth but not heavily worked. A few streaks of flour are okay—they’ll disappear as you roll the dough into balls.
Think of mixing cookie dough like folding a blanket: you want it to be even, but if you keep folding and shaking, you’ll wear it out. Keep it simple, and your cookies will thank you.
Baking Temperature Issues
Your oven plays a huge role in how your gingersnap cookies turn out. If the temperature is too low, the cookies may spread too much and turn soft. If it’s too high, the edges may burn before the centers are done.
Always preheat your oven fully before baking and consider using an oven thermometer to check accuracy. Most home ovens run hotter or colder than the dial says, and this small adjustment can make the difference between perfect cookies and disappointing ones.
FAQs about Gingersnap Cookies Recipe
Can I Make Gingersnap Cookies Ahead of Time?
Yes! The dough can be made up to 3 days in advance and stored in the refrigerator. Just let it soften slightly at room temperature before rolling into balls. You can also freeze dough balls for up to 3 months and bake straight from frozen.
Why Didn’t My Cookies Spread?
If your gingersnaps stayed puffy instead of flattening, you may have added too much flour or not enough butter. Chilling the dough too long can also make it stiffer. To fix this, press the dough balls slightly with your fingers before baking.
Can I Use Fresh Ginger Instead of Ground Ginger?
You can, but keep in mind that fresh ginger has a different moisture content and flavor intensity. If you substitute, use finely grated fresh ginger (about 1 tablespoon) and add it along with the wet ingredients. It will give the cookies a fresher, sharper ginger flavor.
How Do I Keep Gingersnaps Crisp?
The key is storage. Always cool cookies completely before storing, and keep them in an airtight tin or jar. If you live in a humid area, add a food-safe silica packet to absorb moisture.
Can I Turn Gingersnap Dough into Gingerbread Cookies?
Yes! The dough is versatile. Roll it out instead of shaping into balls, chill it well, and use cookie cutters to make shapes. The cookies will be slightly crisper than traditional gingerbread, but they’ll taste fantastic.
Conclusion
From the perfect spice blend to baking tips, storage methods, and creative serving ideas, gingersnaps are a cookie that truly shines all year round. The best part? They’re easy to make, require simple ingredients, and fill your home with a warm, comforting aroma that feels like a hug in cookie form.
So go ahead—gather your ingredients, preheat your oven, and start baking. You’re about to discover why gingersnap cookies have stood the test of time and why they’ll quickly become one of your go-to homemade treats.