Garlic Hummus Recipe: Garlic hummus is one of those dips that hits all the right notes—creamy, savory, garlicky, and incredibly satisfying.
Whether you’re scooping it with pita, spreading it on sandwiches, or using it as a veggie dip, it’s a must-have in any kitchen. This isn’t just any hummus recipe.
This is your ultimate, no-fail, flavor-packed guide to making garlic hummus that rivals your favorite Mediterranean restaurant. Let’s dive in!
What is Garlic Hummus?
Garlic hummus is a popular variation of traditional hummus, a Middle Eastern dip made primarily from chickpeas, tahini, lemon juice, and olive oil. What sets garlic hummus apart is—you guessed it—the bold addition of fresh or roasted garlic. This extra ingredient transforms a simple dip into a zesty, flavor-loaded experience that adds punch to any meal or snack.
The base is silky, nutty, and tangy, while the garlic adds warmth, spice, and complexity. It’s as delicious as it is nutritious. Perfect for vegans, vegetarians, or just about anyone looking for a healthier spread or dip.
Health Benefits of Garlic Hummus
Not only does garlic hummus taste amazing, it’s also packed with health benefits:
- Rich in protein and fiber: Thanks to chickpeas, this dip keeps you full and supports muscle health.
- Boosts immunity: Garlic is well-known for its antibacterial and antiviral properties.
- Heart health: Olive oil and tahini provide healthy fats that support cardiovascular health.
- Gut-friendly: The fiber content supports healthy digestion.
- Low in sugar: A great alternative to sugar-laden snacks and dips.
In short, garlic hummus isn’t just tasty—it’s smart eating.
Why Make Garlic Hummus at Home?
Sure, store-bought hummus is convenient, but once you taste the homemade version, there’s no going back. Here’s why:
- You control the ingredients: No preservatives, additives, or weird oils.
- Customize the flavor: Want more garlic? Less lemon? Extra spice? You’re in charge.
- Save money: Homemade is way more affordable, especially if you make big batches.
- Freshness: Store-bought can never match the flavor of freshly blended garlic and lemon.
Making your own garlic hummus is easy and rewarding—it’s a game-changer for your snack game.
Ingredients You’ll Need
Here’s your shopping list for the ultimate garlic hummus:
- 1 can (15 oz) chickpeas, drained and rinsed (or 1.5 cups cooked chickpeas)
- 2–4 cloves garlic, depending on your flavor preference
- 1/4 cup tahini
- 2 tablespoons fresh lemon juice
- 2 tablespoons olive oil, plus more for drizzling
- 2–4 tablespoons cold water
- 1/2 teaspoon ground cumin
- Salt to taste
- Paprika or parsley for garnish (optional)
Let’s break some of these down…
Fresh vs. Roasted Garlic
Fresh garlic gives a sharper, more intense flavor, while roasted garlic provides a sweet, mellow profile. Roasted garlic is perfect for those who want garlic without the bite.
Types of Chickpeas
Canned chickpeas are super convenient. But if you want extra creamy hummus, cook dried chickpeas from scratch. Adding a pinch of baking soda while cooking helps soften them beautifully.
Tahini Quality Matters
Always go for high-quality, well-stirred tahini—it should be smooth and not too bitter. This can make or break your hummus.
Optional Add-ins to Elevate the Flavor
Want to add a twist? Try one of these:
- Roasted red peppers
- Jalapeños or chili flakes
- Sun-dried tomatoes
- Fresh herbs (parsley, basil, cilantro)
- Extra lemon zest
- Pine nuts or sesame seeds for texture
Think of garlic hummus as a canvas—get creative!
Kitchen Tools You’ll Need
You don’t need a lot of fancy gadgets:
- Food processor or high-speed blender
- Garlic press (optional)
- Measuring cups/spoons
- Spatula
- Serving bowl
A good food processor is key for getting that ultra-smooth, creamy texture.
Step-by-Step Guide to Making Garlic Hummus
Here’s where the magic happens. Follow these steps and you’ll get perfect garlic hummus every time.
Step 1: Preparing the Chickpeas
Use canned chickpeas for convenience or cook dried chickpeas until very soft. For extra-smooth hummus, remove the skins by gently rubbing the chickpeas under water. Drain well and set aside.
Step 2: Roasting or Using Raw Garlic
For a mild, sweet flavor, roast whole garlic cloves wrapped in foil with a little oil at 180°C (350°F) for 20–25 minutes until soft. For a sharper bite, use raw garlic. Choose based on how strong you want the garlic flavor.
Step 3: Blending the Ingredients
In a food processor, combine chickpeas, garlic, tahini, lemon juice, olive oil, salt, and cumin (optional). Blend until thick and smooth, scraping down the sides as needed.
Step 4: Adjusting Consistency and Flavor
Add cold water or aquafaba (chickpea liquid) one tablespoon at a time while blending to achieve a creamy texture. Taste and adjust salt, lemon juice, garlic, or tahini to balance flavors.
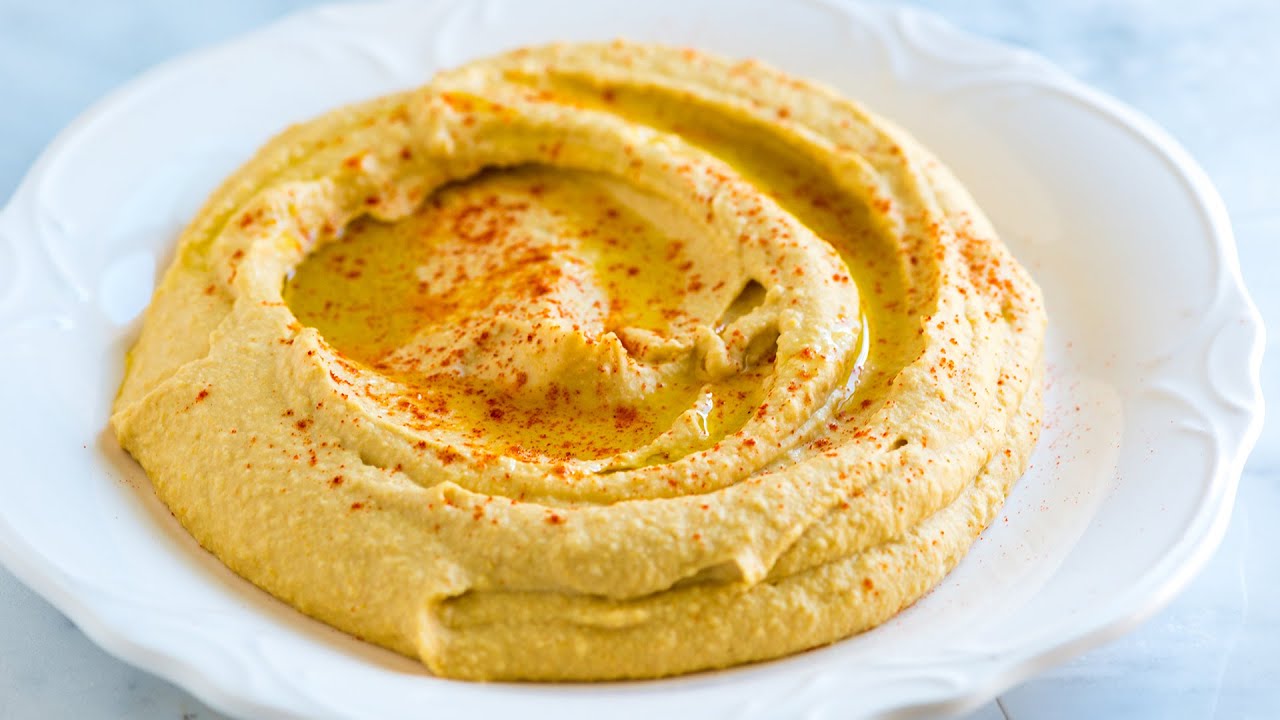
Step 5: Serving Suggestions
Transfer hummus to a bowl, drizzle with olive oil, and garnish with paprika, parsley, or chickpeas. Serve with pita bread, crackers, vegetables, or as a spread in wraps and sandwiches.
Tips for the Creamiest Garlic Hummus
Want that next-level restaurant texture? Here are some pro tricks:
- Peel the chickpeas: It takes time, but the skin-free chickpeas give you ultra-smooth hummus.
- Use ice-cold water: It helps whip the hummus into a fluffier texture.
- Blend in stages: First emulsify the tahini with lemon juice before adding other ingredients.
- Don’t rush blending: Let your food processor run for a couple of minutes—it makes a huge difference.
- Add a touch of baking soda when cooking chickpeas: It softens them and helps with digestion too.
These tiny tweaks make a huge difference in taste and texture.
How to Store Homemade Garlic Hummus
Garlic hummus stores really well, making it ideal for meal prep or snacks throughout the week.
- Fridge: Store in an airtight container for up to 5–7 days.
- Freezer: Yep, you can freeze it! Spoon it into freezer-safe containers or zip bags and freeze for up to 3 months.
To thaw: Let it sit in the fridge overnight. Give it a good stir and maybe a splash of olive oil or lemon juice to freshen it up.
Pro tip: Store it in small portions so you can defrost just what you need.
Variations of Garlic Hummus
Don’t be afraid to remix your garlic hummus! Here are a few fun ideas:
Spicy Garlic Hummus
Add red chili flakes, cayenne, or a roasted jalapeño for a fiery kick. Perfect for those who love heat!
Lemon Garlic Hummus
Dial up the lemon for a zesty, tangy punch that balances out the garlic perfectly.
Herb-Infused Garlic Hummus
Toss in some fresh parsley, cilantro, or basil for an herby twist. Great with grilled veggies or wraps!
Each version brings a different vibe to your table—and they’re all easy to make from the base recipe.
Common Mistakes to Avoid
Even though making garlic hummus is pretty simple, there are a few common pitfalls that can mess with the final result. Let’s go over what not to do:
1. Using Low-Quality Tahini
This is a big one. Cheap tahini can be bitter or chalky, and that bitterness will carry through the whole dish. Always go for good-quality, well-stirred tahini with a smooth, nutty flavor.
2. Not Cooking Chickpeas Properly
If you’re using dried chickpeas, undercooking them will lead to gritty hummus. Always cook until they’re super soft—mashable between your fingers. You can even overcook a bit if you’re after ultra-smooth texture.
3. Not Peeling Chickpeas (When Needed)
While this step is optional, if you’re aiming for the creamiest texture, peeling the chickpeas helps remove that grainy texture. If you have time, it’s totally worth it.
4. Skipping the Tahini and Replacing with Olive Oil Alone
Some people try to skip tahini altogether, but it’s a core ingredient in traditional hummus. It gives that deep, nutty richness that olive oil alone can’t replicate.
5. Overpowering with Garlic
Yes, this is garlic hummus, but there’s a fine line between flavorful and overpowering. Start with less and build your way up—you can always add more, but you can’t take it out.
6. Blending Everything at Once
Mixing everything together in one go often leads to a lumpy, inconsistent texture. Emulsify the lemon juice and tahini first, then slowly add the other ingredients. It makes a huge difference!
Avoid these mistakes and you’ll have a smooth, flavorful garlic hummus every time.
How to Serve Garlic Hummus
This dip is incredibly versatile. Sure, you can eat it with pita chips, but that’s just the beginning. Here are some creative serving ideas:
Dipping Options
- Fresh veggies like cucumber, carrots, celery, and bell peppers
- Warm pita bread or pita chips
- Crackers or pretzel sticks
As a Spread
- On sandwiches or wraps (try it instead of mayo!)
- Spread over toast and topped with avocado, tomato, or eggs
- Layered into a grain bowl or salad for a creamy, flavorful base
In Meals
- Pair with grilled chicken or beef
- Add it to a mezze platter with olives, cheese, and falafel
- Swirl it into soups or stews for a creamy garlic finish
There’s no wrong way to enjoy it—garlic hummus plays well with just about everything.
Garlic Hummus in Middle Eastern Cuisine
While hummus is now a global favorite, it has deep roots in Middle Eastern and Mediterranean food cultures. In many Arab, Israeli, and Levantine homes, hummus is more than just food—it’s a tradition. It’s served fresh, warm, and generously drizzled with olive oil.
Garlic hummus is a modern twist, catering to the bolder flavor preferences of global kitchens, especially in Western countries. But the beauty of it is that it still honors the simplicity and richness of its original form.
Eating garlic hummus is like taking a flavorful journey through cultures and kitchens that value fresh, whole foods and bold, balanced flavors.
Nutritional Breakdown
Here’s a general look at the nutrition per 2-tablespoon serving of garlic hummus:
| Nutrient | Amount |
|---|---|
| Calories | ~80 |
| Protein | 2–3g |
| Fat | 5–6g |
| Carbohydrates | 6–7g |
| Fiber | 2g |
| Sugar | <1g |
| Sodium | Varies by salt |
Key Takeaways:
- Rich in plant-based protein
- High in fiber, great for digestion
- Contains healthy fats from olive oil and tahini
- Low in sugar and naturally gluten-free
It’s a smart snack option for just about any diet.
FAQs about Garlic Hummus Recipe
1. Can I freeze garlic hummus?
Yes, garlic hummus freezes well. Store it in airtight containers and thaw in the fridge overnight. Stir before serving and maybe add a little olive oil to freshen it up.
2. Is garlic hummus good for weight loss?
It can be! It’s high in protein and fiber, which help keep you full. Just be mindful of portion sizes and the amount of oil you use.
3. Can I make garlic hummus without tahini?
You can, but it will change the flavor and texture. If you need a substitute, try sunflower seed butter or even plain Greek yogurt, though it won’t taste quite the same.
4. How long does garlic hummus last in the fridge?
Stored in an airtight container, it typically lasts 5–7 days. Always check for freshness before eating.
5. What can I eat with garlic hummus?
Just about anything! Use it as a dip, spread, or dressing. Pair it with veggies, pita, wraps, meat, or even mix into salads or bowls.
Conclusion
There you have it—the ultimate guide to making garlic hummus at home. It’s creamy, bold, and packed with real, wholesome ingredients. Whether you like it classic or with a spicy or lemony twist, garlic hummus is a flavorful, healthy dip that belongs in your fridge at all times.
Making it yourself means more flavor, better texture, and total control over what goes into it. Plus, it’s super satisfying to whip up a batch in just a few minutes.
So grab your food processor, stock up on garlic, and get blending. Once you’ve tried homemade garlic hummus, there’s no going back to the store-bought stuff.


