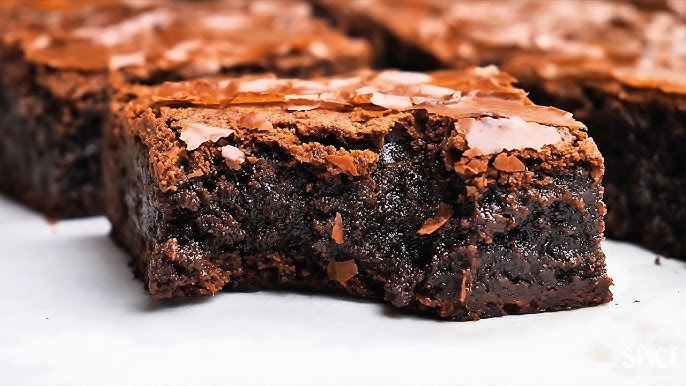
Fudge Brownies Recipe: Few desserts deliver the same deep satisfaction as a tray of rich, fudgy brownies. When made properly, brownies should have a glossy top, a soft and dense center, crisp edges, and an intense chocolate flavor that feels indulgent in every bite. A great fudge brownies recipe is not complicated, but it does require the right ingredients, the right method, and close attention to texture.
In this guide, we will prepare homemade fudge brownies with a concentrated chocolate taste and the moist, chewy interior that makes this classic dessert irresistible. Whether we are baking for family, guests, celebrations, or personal cravings, this method creates brownies that look beautiful, slice cleanly, and taste bakery-quality.
Why This Fudge Brownies Recipe Works
The beauty of this fudge brownies recipe lies in its balance. We use enough fat for richness, enough sugar for that delicate shiny crust, and enough chocolate to create a deep cocoa profile without turning the brownies cakey. Unlike lighter brownie styles, fudgy brownies rely on a relatively low flour ratio. That keeps the crumb dense and moist instead of airy.
The result is everything we want in a premium brownie: a soft middle, bold chocolate depth, and a luxurious texture that stays satisfying even the next day. This recipe is especially useful when we want brownies that hold their shape yet remain wonderfully gooey inside.
Ingredients You’ll Need
To make a classic batch of fudge brownies, gather the following ingredients:
- 200g unsalted butter
- 200g dark chocolate, chopped
- 250g granulated sugar
- 100g brown sugar
- 3 large eggs
- 1 egg yolk
- 2 teaspoons vanilla extract
- 95g all-purpose flour
- 50g unsweetened cocoa powder
- 1/2 teaspoon salt
- 100g chocolate chips or chocolate chunks (optional, for extra richness)
These ingredients are carefully chosen to create the best fudgy brownie texture. The butter adds richness, the dark chocolate provides body and flavor, the cocoa intensifies the chocolate notes, and the extra egg yolk contributes more softness and density.
Best Chocolate for Fudge Brownies
Chocolate is the heart of any serious brownie recipe. For the most satisfying result, we should use good-quality dark chocolate with a smooth melt and rich flavor. A chocolate range between 50% and 70% cocoa works especially well. This creates a balanced taste that feels intense without becoming bitter.
Unsweetened cocoa powder also matters. A high-quality cocoa powder adds depth and helps strengthen that unmistakable brownie character. When both melted chocolate and cocoa powder are used together, the final texture becomes more complex, and the flavor becomes fuller and more luxurious.
Essential Equipment for Brownie Baking
Before we begin, it helps to prepare the tools needed for smooth baking:
- Medium saucepan or heatproof bowl
- Mixing bowls
- Whisk
- Spatula
- 8×8-inch or 9×9-inch baking pan
- Parchment paper
- Sieve or fine mesh strainer
- Toothpick or skewer
Lining the pan with parchment paper is especially important. It allows us to lift the brownies out easily and slice them neatly without sticking or crumbling.
How to Make Fudge Brownies – Step by Step
Step 1: Prepare the Baking Pan and Oven
Preheat the oven to 175°C (350°F). Line an 8×8-inch baking pan with parchment paper, leaving some overhang on the sides so the brownies can be lifted out after baking.
Proper preparation at this stage helps the brownies bake evenly and prevents them from sticking. If we want slightly thicker brownies, an 8×8-inch pan is ideal. A 9×9-inch pan works too, but the brownies will be a bit thinner and may bake slightly faster.
Step 2: Melt the Butter and Chocolate
Place the butter and chopped dark chocolate in a heatproof bowl over gently simmering water, or melt them slowly in a saucepan over low heat. Stir until smooth and glossy, then remove from the heat and let the mixture cool slightly.
This step forms the rich base of the brownies. The mixture should look silky and fully combined. We do not want it too hot when adding the eggs later, because excessive heat can affect the structure of the batter.
Step 3: Combine the Sugars
Add the granulated sugar and brown sugar to the melted chocolate mixture. Whisk until fully combined.
The sugar does more than sweeten the brownies. It also contributes to the crackly top that makes fudge brownies visually appealing. Brown sugar adds a subtle moisture and a deeper caramel note that enhances the overall flavor.
Step 4: Add the Eggs and Vanilla
Add the 3 eggs and 1 egg yolk, one at a time, whisking well after each addition. Then add the vanilla extract and continue whisking until the batter becomes smooth, glossy, and slightly thickened.
This stage is important for texture. Whisking the eggs properly helps create that signature shiny top layer while maintaining the dense interior. The batter should look rich and polished before the dry ingredients are introduced.
Step 5: Sift in the Dry Ingredients
In a separate bowl, combine the flour, cocoa powder, and salt. Sift them into the wet mixture, then gently fold with a spatula until no dry streaks remain.
We should avoid overmixing here. Once the flour is added, too much mixing can develop excess gluten and make the brownies firmer than desired. The goal is a batter that is thick, dark, and evenly blended without unnecessary stirring.
Step 6: Fold in Chocolate Chunks
If using, fold in the chocolate chips or chocolate chunks. This adds small pools of melted chocolate throughout the brownies and makes every bite even more indulgent.
This step is optional, but it brings extra richness and visual appeal. For those who love intensely gooey brownies, it is a worthwhile addition.
Step 7: Transfer to the Pan
Pour the brownie batter into the prepared pan and spread it evenly into the corners using a spatula. Smooth the top lightly.
At this point, the batter will appear thick and luxurious. That is exactly what we want from a solid fudge brownie recipe. A dense batter usually leads to a more intense and satisfying final texture.
Step 8: Bake Until Perfectly Fudgy
Bake for 28 to 35 minutes, depending on the pan size and oven performance. The edges should look set, while the center should still have a slight softness. A toothpick inserted near the center should come out with moist crumbs, not wet batter.
This is the most important part of brownie baking. Overbaking is the fastest way to lose that prized fudgy texture. Brownies continue to cook slightly as they cool, so it is better to remove them when the center is just set rather than fully dry.
Step 9: Cool Before Slicing
Allow the brownies to cool completely in the pan before lifting them out. For even cleaner cuts, chill them for 30 to 60 minutes after cooling.
This resting time gives the structure a chance to settle. Warm brownies are delicious, but fully cooled brownies slice more neatly and reveal the dense interior that defines the best homemade fudge brownies.
Tips for Ultra Fudgy Brownies
Great brownies are often the result of small details done correctly. To achieve the richest outcome, keep these points in mind.
Use room temperature eggs so they blend more smoothly into the chocolate mixture. Do not reduce the sugar too much, since it affects both texture and crust. Measure flour carefully, because too much flour creates a cakier brownie. Most importantly, remove the pan from the oven before the center becomes fully dry.
Another valuable tip is to use a sharp knife for slicing and wipe it clean between cuts. This helps create attractive squares with smooth, defined edges, especially when serving guests or presenting brownies for special occasions.
Common Mistakes to Avoid
A strong brownie recipe can still fail when simple errors happen during preparation. One common issue is overheating the butter and chocolate. If the mixture becomes too hot, the batter may lose balance when the eggs are added. Another mistake is overmixing after the flour goes in, which can make the brownies tougher than intended.
Using the wrong baking time is another frequent problem. Many people wait for a completely clean toothpick, but for fudgy brownies, that usually means the batch is overbaked. We should look for moist crumbs instead. Skipping the cooling time is also unhelpful because it makes slicing messy and prevents the final texture from settling properly.
Delicious Variations for Fudge Brownies
One of the best things about fudge brownies is how easy they are to customize. We can stir in chopped walnuts or pecans for crunch, swirl in peanut butter for added richness, or sprinkle flaky sea salt on top to intensify the chocolate flavor.
For a more luxurious dessert, we can fold in white chocolate chunks or top the brownies with a smooth chocolate ganache after baking. Espresso powder is another excellent addition when we want to deepen the chocolate taste without making the brownies taste like coffee.
These simple variations allow us to create a more personalized batch while preserving the dense, indulgent structure that defines a true fudgy brownie.
How to Store Brownies Properly
Once fully cooled, store the brownies in an airtight container at room temperature for up to 4 days. They remain soft and flavorful, especially when sealed well. For longer storage, refrigerate them for up to a week, though it is best to let them sit at room temperature before serving for the most satisfying texture.
Brownies also freeze well. Wrap individual portions tightly and freeze for up to 3 months. When ready to enjoy, thaw at room temperature or warm briefly for a softer, freshly baked feel.
Serving Ideas for Homemade Fudge Brownies
These homemade fudge brownies are excellent on their own, but they can also be elevated into an impressive dessert. Serve them slightly warm with vanilla ice cream, drizzle with chocolate sauce, or pair them with whipped cream and fresh berries for contrast.
For gatherings and celebrations, brownies can be cut into smaller squares and arranged on a dessert tray. Their rich flavor makes them suitable for birthdays, holidays, dinner parties, and casual treats alike. They also make a thoughtful homemade gift when wrapped neatly and presented in a simple box.
FAQs about Fudge Brownies Recipe
1. What makes brownies fudgy instead of cakey?
Fudgy brownies contain more fat and less flour than cakey brownies. Ingredients such as butter, chocolate, and eggs create a dense, moist texture, while a smaller amount of flour keeps them rich and soft.
2. Can we use cocoa powder instead of melted chocolate?
Yes. Cocoa powder works well in fudge brownies and gives a deep chocolate flavor. Using good-quality cocoa powder can make the brownies even richer.
3. Why did my brownies turn out dry?
Dry brownies are often caused by overbaking or adding too much flour. For the best results, remove them when the center is just set and still slightly soft.
4. How do we know when fudge brownies are done?
Insert a toothpick into the center. It should come out with a few moist crumbs, not wet batter. This helps keep the brownies soft and fudgy after cooling.
5. Can we add nuts or chocolate chips?
Absolutely. Walnuts, pecans, or chocolate chips are popular additions. They add texture and make the brownies even more delicious.
6. Why should we let brownies cool before cutting?
Cooling allows the brownies to firm up properly. If we cut them too early, they may fall apart and lose their neat shape.
7. Can we store fudge brownies for later?
Yes. We can keep them in an airtight container at room temperature for a few days, or refrigerate them for longer storage.
8. What goes well with fudge brownies?
Fudge brownies pair wonderfully with vanilla ice cream, whipped cream, fresh berries, chocolate sauce, or a dusting of powdered sugar.
Final Thoughts
A truly memorable fudge brownies recipe is about texture, intensity, and balance. With the right chocolate, the right flour ratio, and careful baking, we create brownies that are dense, moist, and deeply flavorful. Every element in this method supports that goal, from the melted chocolate base to the gentle folding technique and the controlled baking time.
When we want a dessert that feels classic yet indulgent, fudge brownies remain one of the best choices. They are easy enough for everyday baking, impressive enough for special moments, and rich enough to satisfy serious chocolate cravings. With this step-by-step method, we get beautifully glossy tops, irresistibly soft centers, and a result that feels polished, decadent, and reliably delicious every single time.