Fried Apple Recipe: If you’ve ever had warm, cinnamon-scented fried apples straight out of the skillet, you already know how comforting and delicious they are. Whether you’re making them as a side dish for pork chops, topping your pancakes, or just craving something sweet, fried apples hit the spot every single time. They’re simple to make, super satisfying, and bring a cozy, homemade feel to any meal.
In this guide, you’re going to learn how to make the best fried apples from scratch, step by step. We’ll walk through the ingredients, tools, cooking process, serving ideas, and even give you tips for storing, freezing, and reheating. So grab some apples, and let’s get cooking!
Why You’ll Love This Fried Apple Recipe
So what makes this recipe stand out from the rest? It’s all about simplicity and flavor. You don’t need fancy tools or gourmet ingredients—just a handful of pantry staples and a few juicy apples. With the right technique, you’ll get apples that are tender but not mushy, perfectly caramelized, and packed with flavor.
Here’s why this recipe deserves a permanent spot in your kitchen:
- Quick and Easy: It takes less than 30 minutes from prep to plate.
- Versatile: Serve as dessert, breakfast, or a side dish.
- Kid-Friendly: The natural sweetness of apples and cinnamon makes this a favorite for all ages.
- Customizable: Add nuts, raisins, or even a splash of bourbon for an adult twist.
- Naturally Gluten-Free: No flour or breading needed.
Whether you’re a beginner in the kitchen or a seasoned home cook, this fried apple recipe is foolproof and totally satisfying.
Ingredients You’ll Need
Let’s talk ingredients. The best part about fried apples is you likely have most of the ingredients in your kitchen already. Here’s the list of what you’ll need:
Main Ingredients:
- 4–5 medium apples (like Fuji, Honeycrisp, or Granny Smith)
- 4 tablespoons unsalted butter
- ½ cup brown sugar (light or dark, depending on how rich you want it)
- 1 teaspoon ground cinnamon
- ¼ teaspoon ground nutmeg (optional but adds depth)
- 1 teaspoon vanilla extract
- Pinch of salt (balances the sweetness)
Optional Ingredients:
- 1 teaspoon cornstarch mixed with 2 tablespoons water (if you prefer a thicker sauce)
- Chopped nuts or raisins (for texture and added flavor)
These simple ingredients come together to create a dish that’s sweet, buttery, and spiced just right.
Choosing the Right Apples for Frying
The apple you choose can make or break your fried apple dish. Some apples get mushy when cooked, while others hold their shape and texture perfectly. Here’s what you need to know:
Best Apple Varieties:
- Granny Smith – Tart, firm, and holds shape beautifully.
- Fuji – Sweet and crisp; a great all-rounder.
- Honeycrisp – Sweet-tart balance and firm texture.
- Braeburn – Slightly tart with a hint of spice.
- Gala – Sweeter and softer, great for a more dessert-like version.
Tips for Prepping Apples:
- Peel them unless you prefer the texture of the skin.
- Core and slice evenly so they cook at the same rate.
- Keep slices about ¼ inch thick—thin enough to soften quickly, but thick enough to hold structure.
Combining two apple types (like Granny Smith and Honeycrisp) adds depth of flavor and texture, making your fried apples even more irresistible.
Tools & Equipment Needed
You don’t need a high-end kitchen setup for this recipe, but a few basics will make the process smoother and more enjoyable:
- Large skillet or cast iron pan – Non-stick or well-seasoned cast iron works great for even cooking.
- Apple peeler and corer – Speeds up prep time.
- Sharp knife – If you’re going the manual route.
- Cutting board
- Mixing bowl – For combining sugar and spices before adding to apples.
- Measuring cups and spoons – Accuracy helps with balance in sweetness and spices.
- Wooden spoon or silicone spatula – For stirring without scratching your pan.
That’s it! Simple tools, simple prep.
Step-by-Step Guide to Making Fried Apples
Now let’s get to the heart of this post—the step-by-step recipe that brings those sweet, buttery apples to life.
Step 1: Wash, Peel, Core, and Slice the Apples
Start by washing your apples thoroughly. Then peel them (unless you prefer the skin on), core, and slice them into uniform wedges or rounds. Aim for slices that are about ¼ inch thick so they cook evenly and hold their shape without becoming mushy.
Step 2: Melt Butter in the Skillet
Place your skillet on medium heat and add the butter. Let it melt completely, swirling it around the pan to coat the bottom evenly. You want it gently sizzling—not browning.
Step 3: Add Apples and Start Cooking
Once the butter is melted and hot, add your sliced apples to the skillet. Stir them gently to coat each slice in butter. Let them cook for about 5–7 minutes, stirring occasionally, until they start to soften and take on a golden hue.
Step 4: Mix in Brown Sugar and Spices
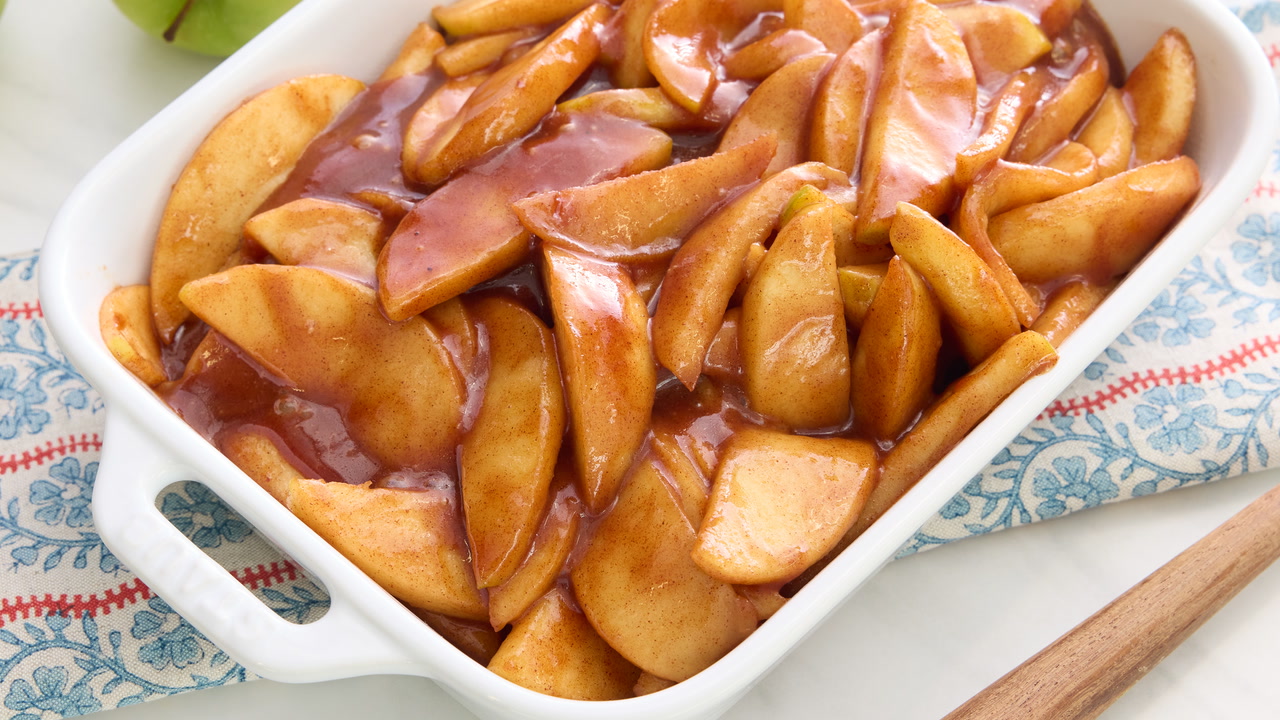
Sprinkle in the brown sugar, cinnamon, nutmeg (if using), and a pinch of salt. Stir everything together so the sugar and spices evenly coat the apples. You’ll notice the sugar beginning to melt and mix with the butter to create a delicious syrup.
Step 5: Simmer and Soften the Apples
Reduce the heat slightly and let the apples cook for another 8–10 minutes. Stir occasionally, making sure nothing sticks or burns. The goal here is to soften the apples until they’re tender but still hold their shape.
Step 6: Optional – Thicken the Sauce
If you like your fried apples to have a thicker glaze, this is the time to add your cornstarch slurry (1 tsp cornstarch + 2 tbsp water). Stir it in and let it simmer for another 2–3 minutes. The sauce will thicken and cling beautifully to the apples.
Step 7: Add Vanilla and Final Stir
Turn off the heat and stir in the vanilla extract. This step enhances the overall flavor and adds a warm, fragrant finish. Let everything rest for a minute or two before serving.
Step 8: Cool Slightly Before Serving
You don’t want to serve molten apples! Let them sit for a few minutes to cool slightly. This helps the sauce settle and intensifies the flavor.
How to Serve Fried Apples
There’s something incredibly satisfying about finding multiple ways to enjoy a single dish. Fried apples are the Swiss army knife of comfort food—they go with almost everything! Whether you’re planning a fancy dinner or just want a cozy breakfast, these golden gems will not disappoint.
As a Side Dish
One of the most traditional ways to serve fried apples is as a side dish, especially with savory meals. In Southern cooking, fried apples are often paired with pork chops, ham, or roasted chicken. The sweetness of the apples complements the savory flavors beautifully, offering a perfect balance of taste and texture.
- Try them with grilled pork loin or baked sausage.
- They also go surprisingly well with barbecue dishes.
- Want to get fancy? Plate them with a drizzle of pan gravy alongside roast duck or turkey.
With Breakfast
If you’re a breakfast lover, fried apples will quickly become your best friend. They add a touch of sweetness and warmth to any morning meal.
- Serve them over pancakes, waffles, or French toast for an instant upgrade.
- Top your oatmeal or yogurt bowl with warm fried apples and a sprinkle of granola.
- Add them to breakfast burritos for a sweet-and-savory twist.
As a Dessert Topping
They’re practically dessert on their own, but you can take it to the next level by using them as a topping.
- Spoon them over vanilla ice cream or cheesecake.
- Use them to fill crepes or dessert tacos.
- Add whipped cream and crushed nuts for a quick apple sundae.
Inside Pies or Turnovers
Got leftovers? Turn them into a whole new dish.
- Use fried apples as a pie filling—just pour into a crust, top with another, and bake.
- Wrap them in puff pastry or crescent dough for easy apple turnovers.
- Combine with cream cheese for a rich apple danish filling.
Basically, you can never go wrong with fried apples. They make everything better.
Storage and Reheating Tips
Let’s face it—fried apples rarely last long enough to store, but on the off chance you have leftovers, here’s how to keep them tasting fresh.
Refrigerator:
- Allow the apples to cool completely.
- Transfer to an airtight container.
- Store in the fridge for up to 4–5 days.
Reheating Options:
- Stovetop: Heat in a pan over medium-low heat until warm. Add a tiny splash of water or butter to loosen up the sauce.
- Microwave: Place in a microwave-safe bowl, cover with a lid or paper towel, and heat in 30-second intervals, stirring in between.
- Oven: Place in a covered baking dish and warm at 300°F (150°C) for about 10–15 minutes.
Avoid overcooking when reheating, or the apples will become mushy.
Can You Freeze Fried Apples?
Yes, you absolutely can!
Fried apples freeze surprisingly well, making them great for meal prep or saving leftovers.
How to Freeze:
- Let the apples cool completely after cooking.
- Portion them into freezer-safe containers or zip-top bags.
- Label with date and store for up to 3 months.
To Reheat:
- Thaw in the fridge overnight or use the defrost setting on your microwave.
- Reheat gently on the stovetop or microwave until warmed through.
Pro Tip: Freeze them in individual portions for quick breakfasts or desserts throughout the week.
Tips and Tricks for the Best Fried Apples
Getting fried apples just right is part art, part technique. Here are some secrets that will take your apples from good to unforgettable:
- Use real butter – It adds unmatched richness and depth of flavor.
- Don’t overcrowd the pan – Too many apples at once can lead to steaming instead of frying.
- Low and slow – Cooking over medium or low heat gives the sugar time to caramelize and the apples time to soften evenly.
- Deglaze the pan – A splash of apple juice, cider, or bourbon can lift up all those caramelized bits and deepen flavor.
- Let them rest – Giving them a minute off the heat lets the sauce thicken and the flavors intensify.
Experiment until you find the sweet spot that works for your taste buds!
Common Mistakes to Avoid
Even the simplest recipes have room for error. Here’s what to watch out for:
- Slicing apples too thin or too thick – Thin slices fall apart; thick slices stay crunchy. Aim for ¼-inch consistency.
- High heat – This can burn the sugar and overcook the apples on the outside while leaving them raw in the center.
- Skipping the salt – It might seem unnecessary in a sweet dish, but salt actually enhances the flavor and balances the sweetness.
- Using the wrong apples – Soft apples like Red Delicious will turn to mush. Stick with firmer varieties.
- Not stirring enough – This can cause sticking or uneven cooking. Stir gently and often.
Stick to these guidelines and you’ll be rewarded with perfect fried apples every time.
Healthier Fried Apple Variations
Trying to lighten things up? You can still enjoy fried apples without compromising your health goals. Here are a few ways to make them healthier:
Reduced Sugar Version
- Use only 2–3 tablespoons of brown sugar or swap it with maple syrup or honey.
- Add natural sweetness with raisins or chopped dates.
Dairy-Free Alternative
- Swap out butter for coconut oil or plant-based margarine.
- Use non-dairy vanilla extract if you’re avoiding animal products completely.
Gluten-Free Version
- This recipe is already naturally gluten-free—just make sure all your spice brands and vanilla extract are certified gluten-free if needed.
Bonus: Add some chia seeds or flaxseed for a nutritional boost!
Fried Apples for Meal Prepping
Fried apples are a dream for meal preppers. Make a big batch, store them in individual containers, and enjoy them all week long.
Ideas for Meal Prep Use:
- Add to overnight oats
- Layer into mason jar parfaits
- Reheat for lunchbox sides
- Serve over grain bowls for a sweet contrast
Make it part of your Sunday meal prep ritual—you won’t regret it.
Southern Fried Apples vs. Fair Style Apples
Ever wonder what the difference is between Southern-style and fair-style fried apples?
Southern Fried Apples:
- Skillet-cooked
- Heavy on butter, cinnamon, and sugar
- Tender, soft texture
- Served as a comfort food side dish
Fair Style Fried Apples:
- Usually battered and deep-fried
- Crunchy on the outside, soft on the inside
- Often coated in powdered sugar or caramel
- A carnival dessert classic
Both are delicious, but Southern fried apples are far easier to make at home without special equipment.
FAQs about Fried Apple Recipe
1. Can I use green apples for frying?
Absolutely! Green apples like Granny Smith are ideal because they’re firm and tart, which balances the sweetness of the sugar and spices.
2. What kind of pan is best for frying apples?
A heavy-bottomed skillet or cast-iron pan is best. It distributes heat evenly and allows for nice caramelization without burning.
3. Are fried apples healthy?
They can be, especially if you reduce the sugar and butter. Apples are full of fiber and vitamins, and with a few tweaks, this recipe can fit into most healthy eating plans.
4. How do I keep fried apples from getting mushy?
Use firm apple varieties and avoid overcooking. Stick to medium heat and stir gently to maintain texture.
5. Can I make fried apples ahead of time?
Yes! They store well in the fridge for up to 5 days and freeze beautifully. Perfect for meal prep or quick meals.
Conclusion
Fried apples are one of those simple pleasures that bring big rewards. They’re sweet, warm, and buttery, with just enough spice to make your kitchen smell like a dream. Best of all, they’re incredibly versatile—you can serve them for breakfast, lunch, dinner, or dessert, and they’re always a hit.
Whether you’re cooking for the family or making something comforting just for yourself, this fried apple recipe is your go-to. It’s fast, easy, and absolutely irresistible.