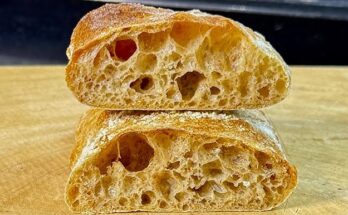
Fluffy Biscuit Recipe: Biscuits are one of those comfort foods that instantly bring warmth and joy to the table. Whether you enjoy them with butter and honey at breakfast, as a side to soups and stews, or as the foundation for classic biscuits and gravy, there’s something magical about a biscuit that is golden on the outside yet soft and fluffy on the inside. Unlike store-bought versions, homemade biscuits carry a rich aroma, a buttery taste, and that irresistible flaky texture you can only get from fresh baking.
What Makes Biscuits Fluffy?
The secret to fluffy biscuits lies in the balance between fat, flour, and liquid. Cold butter is essential—it creates steam as it melts, which forms pockets of air, giving biscuits their light and airy texture. Another key factor is handling the dough gently. Overworking it can make biscuits tough instead of soft. Finally, the right baking temperature ensures the biscuits rise quickly, locking in that fluffy goodness.
Why Homemade Biscuits Taste Better
Homemade biscuits win every time because you control the quality of ingredients. You can use real butter, fresh buttermilk, and unbleached flour for a richer flavor compared to processed mixes. Plus, when you bake at home, you can customize biscuits to your liking—whether you prefer them buttery, cheesy, or slightly sweet. The satisfaction of pulling warm biscuits straight out of the oven and enjoying them fresh cannot be compared to pre-packaged options.
Ingredients You’ll Need
Making biscuits requires only a handful of simple pantry staples, but each one plays a crucial role in texture and taste.
Basic Pantry Ingredients
- All-Purpose Flour – The foundation of the biscuit, providing structure.
- Baking Powder – The leavening agent that makes biscuits rise.
- Salt – Balances flavor and enhances the buttery taste.
- Unsalted Butter (cold and cubed) – Creates layers and fluffiness.
- Buttermilk (cold) – Adds tanginess and helps with tender texture.
Optional Add-ins for Extra Flavor
- Cheddar Cheese – For savory, cheesy biscuits.
- Garlic Powder or Fresh Herbs – Adds aroma and flavor depth.
- Honey or Sugar – For a touch of sweetness.
Each of these ingredients can transform a basic biscuit into something uniquely delicious, giving you endless variations to try.
Tools and Equipment for Perfect Biscuits
You don’t need fancy gadgets to make biscuits, but having the right tools can make the process smoother and more enjoyable.
Must-Have Kitchen Tools
- Mixing Bowl – A large one to mix dry and wet ingredients easily.
- Pastry Cutter or Fork – To cut butter into the flour without melting it.
- Rolling Pin – For rolling out dough evenly.
- Biscuit Cutter (or round glass) – To shape biscuits.
- Baking Sheet – For baking biscuits to golden perfection.
Helpful Extras for Better Results
- Silicone Baking Mat or Parchment Paper – Prevents sticking.
- Pastry Brush – For brushing melted butter on top before or after baking.
- Cooling Rack – Helps biscuits cool without getting soggy.
With these tools, you’ll set yourself up for success every time you bake biscuits.
Step-by-Step Guide to Making Fluffy Biscuits
This recipe is designed to be beginner-friendly while delivering bakery-quality results. Follow these steps carefully, and you’ll have warm, golden, and fluffy biscuits in under 30 minutes.
Step 1 – Preparing Your Ingredients
Before you start mixing, gather all your ingredients and tools. Preheat your oven to 425°F (220°C). Measure out your flour, baking powder, and salt into a bowl. Cut cold butter into small cubes and keep it refrigerated until ready to use. Cold ingredients are crucial for biscuit success, so avoid letting the butter soften.
Step 2 – Mixing the Dough Correctly
In a large mixing bowl, combine the dry ingredients. Use a pastry cutter or fork to cut the cold butter into the flour until the mixture looks like coarse crumbs. Make a well in the center and pour in the cold buttermilk. Stir gently with a wooden spoon until the dough just comes together. Avoid overmixing—it’s okay if the dough looks a little shaggy.
Step 3 – Kneading and Shaping the Dough
Once your dough has just come together, it’s time to bring it to life on a lightly floured surface. Turn the dough out onto the counter and gently pat it into a rectangle about an inch thick. Here’s where many bakers go wrong—they knead too much. Remember, biscuits don’t need heavy kneading like bread. Instead, fold the dough over itself a few times, gently pressing down after each fold. This technique creates layers that bake into beautifully flaky biscuits.
Think of it like stacking papers—you want layers, not one thick slab. After folding 3 to 4 times, shape the dough into a smooth rectangle again. Keep your hands light to avoid warming the butter inside the dough. Once the dough is ready, you’re on your way to perfect biscuits.
Step 4 – Cutting and Placing Biscuits on the Baking Sheet
Now comes the fun part—cutting those biscuits! Use a round biscuit cutter or even the rim of a glass. Press straight down without twisting. Why? Twisting seals the edges and prevents biscuits from rising fully, leaving you with flat discs instead of tall, fluffy beauties. Gather leftover dough, gently reshape, and cut more biscuits until you’ve used it all.
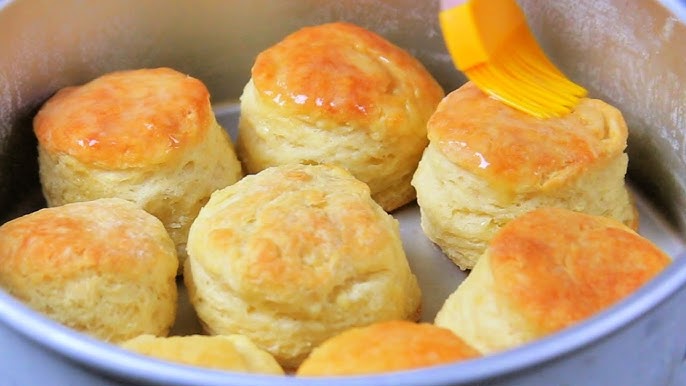
Place the biscuits on a baking sheet lined with parchment paper. For taller biscuits, place them close together so they “help” each other rise. If you want crispier sides, give them more space apart. Before baking, brush the tops lightly with melted butter or buttermilk for a golden finish.
Step 5 – Baking to Golden Perfection
Slide your tray into the preheated oven at 425°F (220°C). The high heat is important—it gives the biscuits a powerful rise right away. Bake for 12–15 minutes or until the tops are golden brown. Keep an eye on them; overbaking can dry them out.
Once they’re ready, remove from the oven and let them rest for a couple of minutes. Brush the tops with melted butter if desired for extra flavor and shine. Serve warm for the ultimate biscuit experience. Fresh biscuits straight out of the oven are fluffy clouds of goodness—crispy outside, soft inside, and irresistibly buttery.
Tips for Achieving the Fluffiest Biscuits
Even though biscuits are simple, little details can make the difference between bakery-quality fluffiness and dense, disappointing results.
Common Mistakes to Avoid
- Using warm butter – Always use cold butter for fluffy layers.
- Overmixing the dough – Stops biscuits from being tender.
- Not preheating the oven – Biscuits need instant heat for a strong rise.
- Twisting the cutter – Prevents biscuits from rising properly.
- Adding too much flour while kneading – Can make biscuits dry.
Pro Tips from Bakers
- Chill your mixing bowl and flour before starting—extra cold ingredients make fluffier biscuits.
- Grate frozen butter into the flour for even distribution.
- For extra rise, let the unbaked biscuits rest in the fridge for 10 minutes before baking.
- Brush with melted butter immediately after baking to keep them soft.
By following these small but powerful tips, you’ll transform your biscuits from good to unforgettable.
Variations of Biscuit Recipes
One of the best things about biscuits is how versatile they are. Once you’ve mastered the classic recipe, you can experiment with flavors to suit any meal.
Buttermilk Biscuits
The gold standard of biscuits. Tangy buttermilk gives the dough a rich flavor while keeping the texture soft. These pair beautifully with gravy or fried chicken.
Cheddar Cheese Biscuits
Add shredded cheddar cheese (or even a mix of cheeses) to your dough for savory, cheesy biscuits. Perfect with soups, stews, or just on their own.
Herb and Garlic Biscuits
Mix in fresh herbs like rosemary, parsley, or thyme, plus a touch of garlic powder. These fragrant biscuits are wonderful for dinner sides and pair especially well with roasted meats.
Serving Ideas for Fluffy Biscuits
Biscuits are far more versatile than many people realize. They’re not just a breakfast treat—you can enjoy them at any time of the day. Here are some mouthwatering ways to serve your fluffy biscuits:
Breakfast Combinations
Biscuits shine at breakfast. Split one open, spread on butter and honey, or drizzle with homemade jam for a sweet start. For something heartier, make a breakfast sandwich with eggs, bacon, and cheese tucked between two warm biscuit halves. And of course, you can’t forget the Southern classic: biscuits smothered in creamy sausage gravy. It’s comfort food at its finest.
Lunch and Dinner Pairings
Biscuits aren’t just for mornings. Serve them alongside fried chicken, roasted turkey, or barbecue for a true Southern-style feast. They’re also fantastic with soups and stews—perfect for soaking up flavorful broths. Want to get creative? Use biscuits as a bread base for mini sliders or pulled pork sandwiches.
Sweet Toppings and Dessert Options
Biscuits also double as dessert. Brush them with butter, sprinkle with cinnamon sugar, and bake until golden. You can also use biscuits as the base for strawberry shortcake—layer them with whipped cream and fresh strawberries for a simple yet elegant dessert. A warm biscuit with melted chocolate spread? Absolutely irresistible.
Storing and Reheating Biscuits
Fresh biscuits are always best, but sometimes you’ll want to store leftovers or prepare a batch in advance. Luckily, biscuits keep well when stored properly.
How to Keep Biscuits Fresh
After cooling completely, store biscuits in an airtight container at room temperature for up to 2 days. To keep them soft, wrap them in foil or place a piece of parchment paper between them.
Freezing for Later Use
Biscuits freeze beautifully. Once baked and cooled, wrap them individually in plastic wrap and place them in a freezer-safe bag. They’ll last up to 3 months. To reheat, simply pop a frozen biscuit in the oven at 350°F (175°C) for about 10 minutes. You can also freeze unbaked biscuits—just cut them out, freeze on a tray, then store in a bag. Bake straight from frozen, adding a few extra minutes.
Reheating biscuits is simple. A quick warm-up in the oven restores their crisp edges and soft centers better than microwaving. If you must use a microwave, wrap the biscuit in a damp paper towel to keep it from drying out.
FAQs about Fluffy Biscuit Recipe
1. Can I make biscuits without buttermilk?
Yes! If you don’t have buttermilk, you can make a substitute by adding 1 tablespoon of lemon juice or vinegar to 1 cup of milk. Let it sit for 5 minutes before using.
2. Why did my biscuits turn out dense?
Dense biscuits usually mean the dough was overmixed or the butter wasn’t cold enough. Always handle the dough gently and keep ingredients chilled.
3. Can I use self-rising flour instead of all-purpose?
Absolutely! If you use self-rising flour, skip the baking powder and reduce the salt.
4. How do I get tall biscuits?
Cut straight down with your biscuit cutter, don’t twist. Place biscuits close together on the baking sheet so they rise upward instead of spreading out.
5. Can I make biscuit dough ahead of time?
Yes, you can prepare the dough, cut the biscuits, and refrigerate them overnight. Bake the next day for fresh, fluffy biscuits without the morning hassle.
Conclusion
Fluffy biscuits are the perfect mix of simple ingredients, careful technique, and a little bit of love. With the right method, you’ll create biscuits that are buttery, golden, and irresistibly soft inside. Whether you enjoy them with gravy at breakfast, alongside a savory dinner, or dressed up with sweet toppings for dessert, these biscuits will quickly become a staple in your kitchen.
Baking biscuits is as much about tradition as it is about taste. They’re a reminder of comfort, warmth, and homemade goodness that can be shared with family and friends. So roll up your sleeves, grab that cold butter, and get ready to bake biscuits that will impress every time.