Flour Tortillas Recipe: Flour tortillas are a cornerstone of countless beloved dishes, from soft tacos and burritos to quesadillas and wraps. But let’s be honest—nothing beats the taste of fresh, homemade tortillas. Those pliable, soft rounds of joy bring a touch of authenticity and heart to your meal. Store-bought versions? They’re convenient, sure, but they often fall flat—literally and figuratively—on taste and texture.
Why go homemade? Because it’s surprisingly easy, incredibly satisfying, and the flavor? Unbeatable. Once you learn the steps and give it a go, you might never go back to the plastic-packaged kind again.
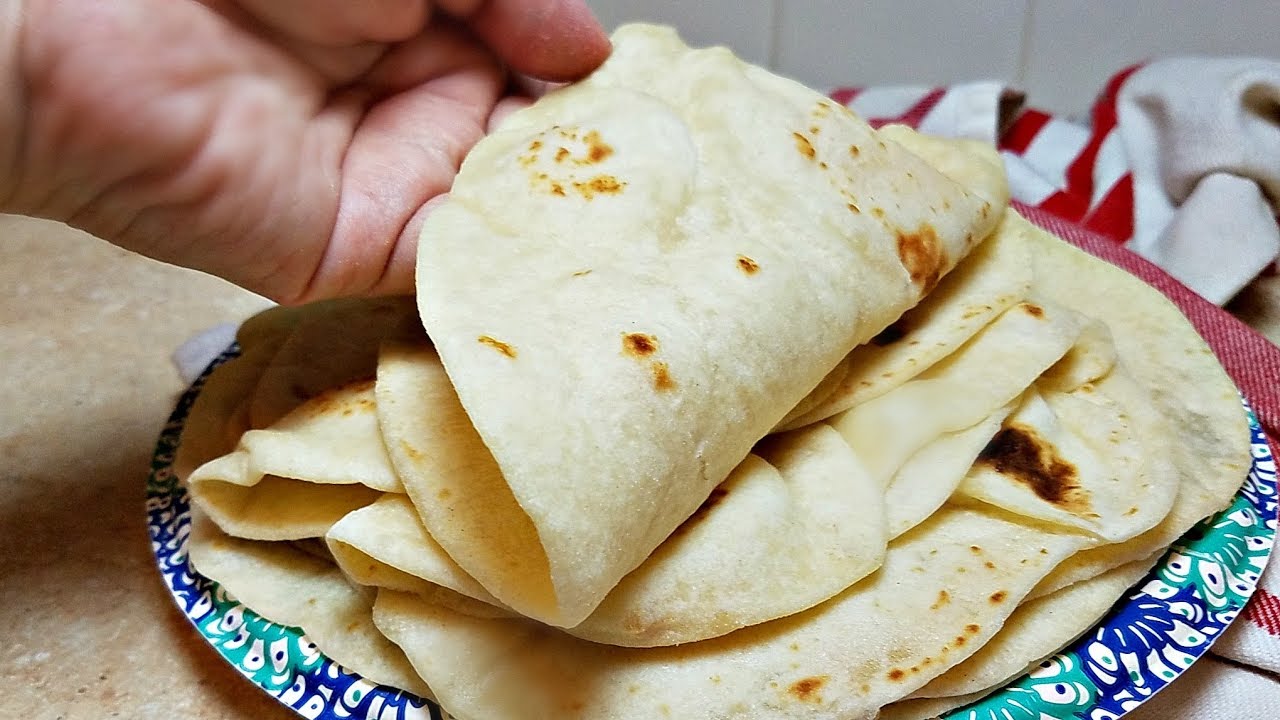
This guide walks you through every step of making flour tortillas—from mixing the dough to that satisfying puff in the pan—so you can bring a little more homemade magic into your kitchen.
Ingredients Needed
You don’t need a pantry full of exotic ingredients to make delicious flour tortillas. In fact, the simplicity of the ingredients is what makes this recipe so approachable.
Basic Ingredients:
- 2 ½ cups all-purpose flour: This is the foundation. You can also use bread flour for a slightly chewier texture.
- 1 tsp salt: Enhances the flavor.
- 1 tsp baking powder: Gives the tortillas a slight puff.
- 3 tbsp vegetable oil or lard: This adds the soft, flexible texture.
- ¾ cup warm water: Helps the dough come together nicely.
Optional Ingredients for Flavor:
- Garlic powder or herbs: Add a pinch to give your tortillas a gourmet twist.
- Whole wheat flour: Replace half the all-purpose flour for a nuttier taste and more fiber.
No preservatives, no additives—just pure, wholesome ingredients.
Tools and Equipment
While making tortillas is simple, the right tools make it even easier and more enjoyable. Here’s what you’ll need to create restaurant-quality tortillas right in your own kitchen.
Essential Tools:
- Mixing bowl: To combine your ingredients.
- Rolling pin: For flattening the dough into thin circles.
- Cast iron skillet or heavy pan: For that signature golden-brown spotting.
- Spatula or tongs: For flipping tortillas safely and easily.
Handy Extras:
- Tortilla press (optional): If you make tortillas often, this tool can be a game changer. It saves time and gives you perfectly round results.
- Damp kitchen towel: Helps keep cooked tortillas warm and soft.
That’s all—no expensive appliances, no baking required. This is the kind of recipe that works just as well in a dorm kitchen as it does in a gourmet home setup.
Step-by-Step Instructions
Making flour tortillas from scratch might sound intimidating at first, but once you do it once or twice, it becomes second nature. Follow these steps, and you’ll be churning out soft, warm tortillas like a pro.
Step 1: Mixing the Dough
Start by combining the dry ingredients in a large bowl. Add the flour, salt, and baking powder and give it a quick whisk to evenly distribute everything. Then, pour in the oil and warm water gradually. Mix with a spoon or your hands until it comes together into a shaggy dough.
You’re aiming for something that’s not too sticky but not dry either. If it feels too dry, add a tablespoon of water at a time. If it’s too wet, sprinkle in a bit more flour. The goal here is a soft, pliable dough that doesn’t cling to your fingers.
This step lays the foundation. Get it right, and you’re more than halfway there.
Step 2: Kneading the Dough
Turn the dough out onto a lightly floured surface. Knead for about 8–10 minutes. Think of kneading like giving your dough a massage—it builds gluten, which gives your tortillas their chewy, stretchy quality.
Use the heel of your hand to push the dough away, then fold it back over itself. Rotate and repeat. You’ll notice the dough becoming smoother and more elastic as you go. When it springs back slightly when poked, you’re good.
Kneading not only develops texture, it also ensures an even distribution of ingredients. Skimp on this, and your tortillas might cook unevenly or turn out tough.
Step 3: Resting the Dough
This is one of the most overlooked yet crucial steps in making flour tortillas. After kneading, cover the dough with a clean kitchen towel or plastic wrap and let it rest for at least 30 minutes. Why? Because resting allows the gluten strands to relax, which makes the dough easier to roll out. It also helps with moisture distribution, giving your tortillas that soft, tender bite.
If you’re in a rush, a 20-minute rest might do the trick, but for best results, aim for the full 30. You can even let it rest longer—up to 2 hours at room temperature or overnight in the fridge. Just make sure to bring it back to room temp before rolling.
This simple pause in the process sets you up for success later on. Skipping it can lead to shrinkage while rolling and a tougher texture after cooking.
Step 4: Dividing and Rolling Out
Once rested, divide the dough into equal portions—about 8 to 10 balls depending on how large or small you want your tortillas. Use a kitchen scale if you want them exactly even, but eyeballing works just fine for casual cooking.
Shape each portion into a ball by tucking the edges underneath and rolling it in your hands. Let these balls rest again for 10 minutes, covered with a damp towel to keep them from drying out.
Now comes the fun part—rolling! Lightly flour your work surface and rolling pin, then roll each ball into a thin circle about 6–8 inches wide. Flip and rotate frequently to maintain a round shape and ensure even thickness. Don’t worry if they’re not perfectly circular—those “rustic” edges are the mark of homemade charm.
You want them thin but not see-through. If they’re too thick, they won’t cook evenly; too thin, and they might tear or become too crispy.
Step 5: Cooking the Tortillas
Preheat a cast iron skillet or a heavy-bottomed non-stick pan over medium-high heat. Once it’s hot (a sprinkle of water should sizzle instantly), carefully place your first tortilla in the pan. Don’t use oil—dry cooking is the way to go.
Let it cook for about 30-45 seconds or until bubbles start to form and the bottom has golden brown spots. Flip it using a spatula or tongs, and cook the other side for another 30 seconds. It should puff up a bit—that’s a good sign the dough was properly made and rested.
Place cooked tortillas in a stack wrapped in a clean kitchen towel to keep them warm and soft. Repeat with the remaining dough.
Keep an eye on your heat. Too hot, and the tortillas will burn before they cook through. Too cool, and they’ll dry out and become rubbery. Adjust as needed to maintain the right balance.
Common Mistakes to Avoid
Even the best cooks can make missteps when trying something new. Here are some common pitfalls to dodge when making flour tortillas:
1. Using Cold Water:
Cold water makes the dough harder to mix and slows gluten development. Always use warm water to help everything blend smoothly and create the softest dough possible.
2. Skipping the Rest Period:
We get it—you’re hungry. But not resting the dough can lead to rubbery, hard-to-roll tortillas. Think of it as giving the dough a nap before its big performance.
3. Over-Flouring While Rolling:
It’s tempting to go crazy with flour to prevent sticking, but too much can make your tortillas dry and tough. Use just enough to keep things moving.
4. Overcooking the Tortillas:
You’re looking for golden brown spots, not blackened blisters. Too much time in the pan and they’ll dry out. Cook quickly and confidently.
5. Stacking While Hot Without a Towel:
Always wrap your hot tortillas in a clean towel right after cooking. This helps trap steam and keeps them soft and pliable. Stacking without a cover turns them into crispy disks.
Avoid these, and you’ll be well on your way to tortilla perfection every time.
Tips for Perfect Tortillas Every Time
If you’re aiming to make tortillas that rival your favorite taqueria’s, then it’s all about mastering the little details. These pro tips will help take your flour tortillas from good to unforgettable.
Use Fresh Ingredients
It might sound obvious, but fresh flour, fresh oil, and active baking powder can make all the difference. Baking powder loses potency over time, so check that it’s still active—if it doesn’t fizz when mixed with warm water, it’s time to replace it.
Get the Dough Texture Just Right
Soft, slightly tacky dough is your sweet spot. Too dry, and the tortillas will crack; too wet, and they’ll be sticky and hard to roll. Don’t be afraid to tweak with a little extra flour or water during the mixing stage.
Rest and Re-Rest
Yes, rest your dough twice. Once after kneading and again after forming dough balls. The first rest relaxes gluten, making it easier to roll out. The second helps achieve a better shape and texture.
Control Your Heat
Pan too hot? You’ll get burnt spots without the fluff. Too cold? Your tortillas will be pale and dry. Medium-high heat is usually the sweet spot, and a cast iron skillet helps retain consistent temperature.
Flip Just Once
Each tortilla needs only one flip. Let it bubble up on the first side, flip once, and finish cooking. Flipping multiple times can disrupt the cooking and cause uneven results.
Stack and Steam
Wrap your cooked tortillas in a clean towel or place in a tortilla warmer to trap heat and moisture. This helps them stay warm and ultra-soft until you’re ready to serve.
Storage Tips
- Short-term: Store in an airtight container at room temperature for up to 2 days.
- Refrigerate: Up to 1 week in a sealed bag.
- Freeze: Stack with parchment between them, place in a freezer-safe bag, and store for up to 3 months. Reheat with a quick warm-up in a skillet or microwave.
These tips don’t just save your tortillas—they elevate them. Once you nail the routine, you’ll be making flour tortillas like it’s second nature.
Creative Ways to Use Flour Tortillas
Sure, you can use tortillas for tacos and burritos, but why stop there? Homemade flour tortillas are incredibly versatile and can star in a whole range of delicious recipes.
Savory Favorites
- Quesadillas: A quick pan-seared tortilla filled with gooey cheese and other goodies like mushrooms, chicken, or peppers.
- Wraps and Sandwiches: Ditch the bread and wrap up your deli meats, veggies, and spreads in a soft tortilla for a fresher twist.
- Tostadas: Bake or fry until crisp, then pile on beans, meat, lettuce, cheese, and salsa.
- Enchiladas: Roll up with fillings and bake smothered in a rich enchilada sauce.
- Breakfast Burritos: Scrambled eggs, sausage, cheese, and a dash of hot sauce all tucked into a warm tortilla? Yes, please.
Sweet Treats
- Dessert Wraps: Fill with Nutella, peanut butter, or fruit compote, then fold and toast lightly.
- Cinnamon Crisps: Cut into wedges, brush with butter, sprinkle cinnamon sugar, and bake until crispy.
- Sweet Crepes: Use ultra-thin tortillas as a quick crepe substitute for sweet toppings.
Other Genius Uses
- Tortilla Pizza: Toast with tomato sauce, cheese, and toppings for a lightning-fast snack.
- Chips: Cut into triangles, bake or fry, and dip in guacamole or salsa.
- Lasagna Sheets: Use tortillas instead of pasta in a baked casserole. Layers of sauce, meat, cheese, and tortillas = instant comfort.
Once you start thinking beyond tacos, the possibilities are endless. And with fresh homemade tortillas, the results are always next-level.
FAQs about Flour Tortillas Recipe
1. Can I make flour tortillas without a tortilla press?
Absolutely! While a tortilla press makes the process faster, you can easily roll out the dough with a rolling pin. Just make sure to keep them evenly thin for proper cooking.
2. Why are my tortillas not soft?
Tough tortillas often result from overcooking or adding too much flour while rolling. Make sure to cook them just until golden spots appear and keep them warm in a covered container to stay soft.
3. Can I freeze homemade flour tortillas?
Yes! Once cooled, stack them with parchment paper in between and freeze in a sealed bag. Reheat on a skillet or microwave as needed.
4. What type of flour is best for tortillas?
All-purpose flour works great for soft, pliable tortillas. For a healthier twist, try substituting with whole wheat flour, though the texture may vary slightly.
5. How long can I store flour tortillas?
Homemade flour tortillas can last up to 3–4 days at room temperature in an airtight container, or up to a week in the fridge. Always reheat before serving for best results.
Conclusion
The process might seem a little labor-intensive at first, but once you’ve gone through it a couple of times, it becomes second nature. And the payoff? Oh, it’s worth it. You get to enjoy warm, fresh tortillas that taste miles better than anything in a plastic bag.
Whether you’re making tacos, wraps, or even dessert, these flour tortillas will become your go-to base for creativity in the kitchen. So the next time you’re tempted to grab a pack off the grocery shelf, pause and remember—you’ve got the skills to make them better at home.