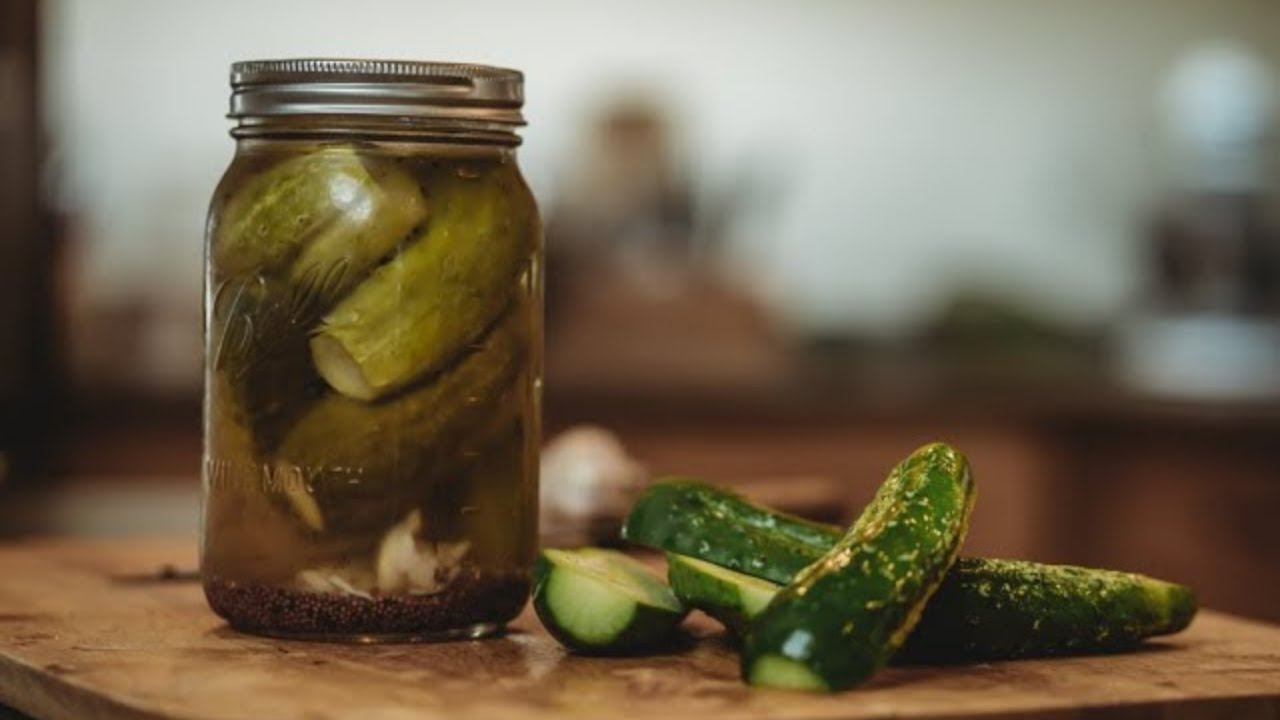
Fermented Pickle Recipe: Let’s face it—store-bought pickles just don’t cut it. They’re often too vinegary, overly processed, and lack that satisfying tang and crunch that real pickles should have. Enter: fermented pickles. These aren’t just your regular pickles soaked in vinegar; they’re alive with flavor, packed with probiotics, and made the old-fashioned way—through the magic of natural fermentation.
If you’ve never made pickles at home, don’t worry. This guide will walk you through the whole process step-by-step. Whether you’re a total beginner or a kitchen DIY enthusiast looking to try something new, making fermented pickles is simpler than you might think. Plus, they’re healthier and more flavorful than anything you’ll find on a supermarket shelf.
Why go the fermented route? Well, it’s all about the taste and the gut health benefits. Unlike vinegar pickles, fermented pickles are teeming with beneficial bacteria that support digestion and boost immunity. And once you get the hang of it, it’s super satisfying to make your own batch.
So, grab your cucumbers, dust off those mason jars, and let’s dive into the crisp, salty world of homemade fermented pickles.
Ingredients You’ll Need
Alright, let’s talk ingredients. Fermentation is super forgiving, but starting with the right stuff makes all the difference. You don’t need anything fancy—just a few basics that you probably already have.
Basic Ingredients List
Here’s what you absolutely need:
- Fresh cucumbers (Kirby or pickling cucumbers work best)
- Non-iodized salt (like sea salt or pickling salt)
- Filtered or distilled water (chlorine-free!)
- Garlic cloves (for that punchy flavor)
- Fresh dill (use both heads and fronds if you can)
- Black peppercorns
Optional Flavor Enhancers
Want to customize the flavor? Toss in any of these:
- Mustard seeds
- Bay leaves
- Red pepper flakes or whole dried chilies (for heat)
- Coriander seeds
- Horseradish leaves (help with crispness)
- Grape or oak leaves (natural tannins help keep them crunchy)
Recommended Tools and Supplies
- Wide-mouth mason jars (quart or half-gallon size)
- Fermentation weights (to keep cucumbers submerged)
- Fermentation lids or airlocks (optional but helpful)
- A large mixing bowl
- Wooden spoon or chopstick (for removing air bubbles)
Don’t worry if you don’t have fermentation-specific gear. You can still use regular jars and improvise with a small ziplock bag filled with water as a weight.
Understanding the Fermentation Process
Let’s demystify fermentation. You’re not just pickling—you’re creating a living environment where beneficial bacteria (mainly Lactobacillus) thrive. It’s nature’s way of preserving food and adding flavor, without the need for vinegar or heat.
What Is Lacto-Fermentation?
Lacto-fermentation is a process where Lactobacillus bacteria naturally present on vegetables convert sugars into lactic acid. This acid acts as a natural preservative, giving pickles their tangy taste and helping keep bad bacteria out.
Why Salt Is Essential
Salt does a few crucial things:
- Draws water out of the cucumbers to form a natural brine
- Inhibits harmful bacteria while letting the good ones flourish
- Helps keep the pickles crisp
Using the right salt-to-water ratio is key. Too little salt, and you risk spoilage. Too much, and your pickles might become too salty or not ferment properly.
How Brine Protects Your Pickles
The brine acts like a protective barrier. As long as your cucumbers stay submerged under the brine, they’re safe from mold, yeast, and other unwanted guests. That’s why weights are so important—you want every last cucumber fully dunked and drowning in deliciousness.
Choosing the Right Cucumbers
Not all cucumbers are created equal, especially when it comes to fermenting. Picking the right ones will make the difference between a crisp, satisfying crunch and a soggy disappointment.
Best Cucumber Varieties for Fermentation
- Kirby Cucumbers – The gold standard. Short, stubby, and super crunchy.
- Persian Cucumbers – Thin-skinned and crisp.
- Gherkins – Tiny but flavorful.
- English Cucumbers – Not ideal unless you remove the skin and seeds.
Avoid waxed cucumbers. That coating might make them shiny in the store, but it blocks the brine and ruins the ferment.
How to Prep Cucumbers
- Wash thoroughly but don’t scrub too hard—you want to keep some of the natural bacteria.
- Trim the blossom end of each cucumber (the end opposite the stem). It contains enzymes that can soften your pickles.
You can ferment cucumbers whole, halved, or quartered into spears. Smaller, whole cucumbers will stay crunchier and ferment more slowly, while cut ones ferment faster.
Step-by-Step Guide to Making Fermented Pickles
Time to roll up your sleeves and get hands-on. This is where the fun really begins. Follow this detailed guide, and you’ll have delicious, crunchy, probiotic-rich fermented pickles in just a few days to a couple of weeks.
Step 1: Clean and Prep Your Jars
Start by washing your jars with hot, soapy water and rinsing well. Sterilizing isn’t required for fermentation, but clean jars prevent unwanted bacteria from interfering with the process.
Step 2: Wash and Trim the Cucumbers
Rinse the cucumbers thoroughly to remove dirt. Trim off the blossom end (the softer end), as enzymes there can cause pickles to become mushy during fermentation.
Step 3: Make the Brine
Prepare a simple brine by dissolving non-iodized salt in filtered or boiled-and-cooled water. Salt concentration matters—typically 2–3% brine works best for crisp, safe fermentation.
Step 4: Add Spices and Flavorings
Place garlic, dill, peppercorns, mustard seeds, bay leaves, or any preferred spices into the bottom of your jar. These aromatics infuse your pickles with traditional, savory flavor.
Step 5: Pack the Cucumbers in the Jar
Tightly pack whole cucumbers or spears into the jar. The firmer the packing, the less they float, helping ensure even fermentation.
Step 6: Pour the Brine Over
Slowly pour the brine into the jar, covering the cucumbers completely. Leave a little space at the top for CO₂ buildup.
Step 7: Weigh Down the Cucumbers
Use fermentation weights, a small jar, or a clean stone to keep cucumbers submerged. Exposure to air can lead to mold.
Step 8: Cover and Store
Cover jars with a fermentation lid or a loose-fitting regular lid. Store at room temperature, away from direct sunlight.
Step 9: Fermentation Time and Tips
Ferment for 5–10 days. Bubbles, cloudiness, and a tangy aroma are normal signs of healthy fermentation. Check daily to ensure cucumbers stay submerged.
Step 10: Taste Testing and When It’s Ready
Start tasting around day 5. When the pickles reach your desired crunch and tang, refrigerate them to slow fermentation. Enjoy your crisp, homemade fermented pickles!
Storage and Shelf Life
Once your fermented pickles have reached the flavor you love, it’s time to think about how to store them properly. One of the greatest things about fermentation is that it naturally preserves your food, but storage still plays a crucial role in maintaining taste, crunch, and safety.
How to Store Fermented Pickles
As soon as you decide your pickles are ready, move the jar into the refrigerator. This cold environment dramatically slows down the fermentation process, locking in the flavor and preventing the pickles from becoming too sour or soft.
Here’s what to keep in mind:
- Leave them in the brine – Never drain the brine! It’s what keeps them preserved and flavorful.
- Use clean utensils – Always use clean tongs or a fork when grabbing pickles. Avoid touching them with your hands to prevent contamination.
- Refrigeration is key – Fermented pickles don’t need to be canned or sealed tightly. Just pop the lid on and store them in the fridge.
If you prefer to store them at room temperature for long-term use, you can, but you’ll need to monitor them closely, and they will continue fermenting over time. This means their flavor and texture will evolve—sometimes for the better, sometimes not.
Signs They’ve Gone Bad
Fermented pickles are pretty resilient, but things can still go wrong. Here’s what to watch for:
- Fuzzy mold growing on top (especially black, pink, or orange) – toss the batch
- Foul or rotten smell – not the usual sour, funky aroma? Trust your nose.
- Slimy texture – a little cloudiness is okay, but slimy brine is a red flag
- Pickles floating and shriveling – a sign they weren’t properly submerged
Remember, fermented foods should taste tangy, not spoiled. When in doubt, toss it out.
Extending the Shelf Life
Properly stored in the refrigerator, fermented pickles can last 6 months or longer. Some folks say they’ve had batches last a year and still taste great. To extend shelf life:
- Keep them submerged in brine
- Store them in smaller jars once fermentation is complete
- Avoid opening the jar too often—less oxygen = longer life
Want to take it even further? You can also pasteurize fermented pickles by heating the jar to 180°F for 10 minutes, but doing so will kill off the probiotics. Great for shelf storage, not so much for gut health.
Common Problems and How to Fix Them
Even though fermentation is a simple, ancient technique, it’s not foolproof. Sometimes things go wrong. Don’t worry—most issues are totally fixable, and many are just part of the learning curve.
Cloudy Brine – Is It Safe?
YES. Cloudy brine is actually a good sign. It usually means active fermentation is happening, especially if you also see bubbles and a slight tang in the air.
What causes it?
- Natural lactic acid production
- Minerals in salt or hard water
- Fine particles from spices or garlic
Cloudy brine is normal. If there’s no off smell or weird colors, you’re good.
Mold – What’s Normal and What’s Not
A thin white film (called kahm yeast) might appear on top of the brine. It’s common and usually harmless—just scoop it off.
Bad mold, on the other hand, looks like:
- Fuzzy patches in black, pink, blue, green
- Spread-out colonies
- Off-putting smells (rotten eggs, puke, etc.)
If you see this kind of mold, throw the whole jar away. Safety first.
Pickles Too Soft or Too Salty?
Nobody likes a limp pickle. Soft pickles usually result from:
- Using the wrong cucumber variety
- Not trimming the blossom end
- Too long in brine
- Too warm fermentation temps
Fix: Add tannin-rich ingredients like grape leaves, bay leaves, or even black tea to future batches for extra crunch.
If your pickles are too salty, try:
- Rinsing them before eating
- Cutting them into smaller pieces
- Diluting the brine in future batches (within safe limits)
Fermentation is part art, part science. Keep notes, tweak things, and improve with each batch.
Flavor Variations to Try
Once you’ve mastered the classic dill pickle, the real fun begins. You can experiment with tons of flavor combinations. Your pantry and spice rack become your fermentation playground.
Garlic Dill Pickles
The OG. Use extra garlic cloves, dill heads, and maybe a few mustard seeds. The longer it ferments, the more garlicky and savory it gets.
Spicy Pickles
Want heat? Try this:
- Add sliced jalapeños or dried red chilies
- Crushed red pepper flakes
- A clove or two of garlic for that bite
It’s perfect for spicy sandwich lovers or burger fans.
Sweet and Sour Pickles
Not traditional, but totally doable. Just add:
- A few teaspoons of honey or maple syrup (after fermentation)
- A cinnamon stick and a couple of cloves
- Thin slices of sweet onion
It’s like a bread-and-butter pickle with a probiotic twist.
Korean-Style Pickles (Oi Sobagi)
Craving something with an umami punch? Try these:
- Add sliced ginger, garlic, green onion, and Korean chili flakes (gochugaru)
- You can even stuff the cucumbers with a spicy kimchi-style filling before fermenting
Super bold, crunchy, and amazing with rice dishes.
Fermentation Tips for Success
Fermenting isn’t hard, but it does require a bit of awareness. Like baking bread or brewing beer, it’s about learning how to read the signs—smell, taste, temperature—and knowing what to tweak. If you want consistent, crunchy, flavor-packed pickles every time, keep these tried-and-true tips in mind.
Best Temperature for Fermentation
Temperature makes a huge difference in how your pickles ferment.
- 65°F to 72°F (18°C to 22°C) – the fermentation sweet spot
- Above 75°F (24°C) – fermenting too fast, leads to soft or mushy pickles
- Below 60°F (15°C) – fermentation slows dramatically or even stops
If your kitchen runs hot in summer, consider placing your jars in a basement or using a cooler with ice packs to maintain a lower, consistent temperature.
How Long to Ferment
There’s no one-size-fits-all answer because taste is subjective. Some people love super tangy, deeply fermented pickles. Others prefer a quick ferment with just a touch of sour.
Here’s a general guide:
| Fermentation Duration | Taste Profile | Texture |
|---|---|---|
| 2–3 days | Mild, slightly sour | Very crisp |
| 5–7 days | Tangy, balanced | Crisp |
| 10–14 days | Bold, punchy flavor | Slightly softer |
| 3+ weeks | Very sour, deep flavor | Softer but rich |
Taste every couple of days after Day 4 until they hit your sweet spot. Remember—once they’re where you like them, pop them in the fridge to stop the process.
Burping and Checking for Pressure
If you’re using a standard mason jar lid, you’ll need to “burp” the jar once daily during active fermentation to release built-up gas:
- Loosen the lid slightly for 1-2 seconds, then re-tighten.
- This helps prevent overflow or even breakage if pressure builds up too much.
Alternatively, using fermentation airlocks or silicone lids makes life easier by allowing gas to escape automatically without letting oxygen in.
Also, check for:
- Overflowing brine – a sign of active fermentation (place a tray under the jars).
- Pickles floating – they need more weight.
- Weird smells – use your senses; funky is okay, foul is not.
Nutritional Benefits of Fermented Pickles
Fermented pickles don’t just taste better—they are better. Unlike their vinegar-soaked counterparts, fermented pickles retain natural enzymes and are bursting with gut-friendly bacteria that do wonders for your health.
Probiotics and Gut Health
Lacto-fermentation populates your pickles with beneficial bacteria like Lactobacillus that:
- Help restore the balance of gut flora
- Improve digestion
- Support immune function
- May help with mood and mental clarity (hello, gut-brain connection!)
Eating fermented foods regularly is a simple way to add probiotics to your diet without needing expensive supplements.
Low Calorie, High Flavor
You’re getting tons of flavor without adding sugar or fat. Just crunchy cucumbers, salt, and spices.
- Calories per serving: Around 5–10
- Zero fat, almost no carbs
- Makes a great snack or side dish that’s actually good for you
Packed with Micronutrients
Because they’re raw and unpasteurized, fermented pickles retain many of their original vitamins and minerals, including:
- Vitamin K (great for bones)
- Vitamin A
- Small amounts of B-vitamins
- Trace minerals from the salt and spices
And because fermentation makes these nutrients more bioavailable, your body can absorb and use them more efficiently.
Using Fermented Pickles in Your Cooking
Sure, you can eat pickles straight out of the jar (and honestly, who doesn’t?). But they’re incredibly versatile, and there are so many creative ways to use them in everyday meals.
Sandwiches and Burgers
Slice up fermented pickles and layer them into:
- Grilled cheese sandwiches
- Pulled pork or BBQ chicken sandwiches
- Classic burgers and veggie burgers
- Breakfast bagels with egg and cheese
They add crunch, acidity, and a probiotic boost—what’s not to love?
Chop Into Salads
Fermented pickles bring brightness to:
- Potato salad
- Egg salad
- Tuna salad
- Green salads with creamy dressings
Pro tip: use the brine in your vinaigrette for a tangy probiotic twist.
Use the Brine for Dressings and Marinades
Don’t toss that golden liquid! Pickle brine is liquid flavor magic.
Use it to:
- Marinate chicken or tofu
- Add to salad dressings
- De-glaze a pan after cooking meat
- Splash into Bloody Marys or other cocktails
Plus, drinking a shot of pickle juice post-workout helps with hydration and cramp prevention. Seriously.
Making Pickles Year-Round
Think pickling is only for summer? Nope. With a bit of planning, you can enjoy fermented pickles all year long—no matter the season.
Seasonal Cucumber Tips
- Summer (Peak Season) – Best time to ferment in bulk. Cucumbers are crisp, fresh, and cheap.
- Fall/Winter – If cucumbers aren’t available, try fermenting carrots, radishes, turnips, or cauliflower using the same brine method.
- Spring – Early cukes are small and perfect for whole pickle batches.
Buy in bulk when they’re in season, and you’ll save a ton of money while getting the best flavor.
Small-Batch vs. Large-Batch Fermentation
Small batch (1-quart jars):
- Easier for beginners
- Less risk if something goes wrong
- Faster ferment times
Large batch (1-gallon+ crocks):
- Great for families or pickle fanatics
- More efficient
- Longer ferment = deeper flavor
Either method works—it just depends on your space, patience, and pickle cravings.
Eco-Friendly Pickling
Homemade pickling is already a more sustainable option than buying packaged store pickles, but you can go even greener.
Reusing Brine
After your pickles are gone, don’t pour the brine down the sink. You can:
- Use it in salad dressings
- Add to soups or stews
- Marinate hard-boiled eggs
- Start a new batch of pickles (only once or twice before it loses strength)
Sustainable Jar Storage
- Reuse old glass jars from sauces or jams—just make sure they’re cleaned well
- Skip single-use plastics by fermenting in bulk and transferring to reusable containers
Composting Scraps
- Cucumber ends, garlic peels, dill stems—toss them in your compost bin
- If you’ve got chickens or garden beds, they’ll thank you
Fermentation is ancient and low-waste by design—let’s keep it that way.
FAQs about Fermented Pickle Recipe
1. How long does it take to ferment pickles?
Most pickles take 5 to 14 days depending on temperature and how sour you like them. Start tasting around day 5 and refrigerate once they hit your ideal flavor.
2. Can I reuse the brine for another batch?
Yes, but only once or twice. The brine will lose strength and flavor after a couple of uses. Always bring reused brine to a boil and cool it before starting a new batch.
3. Why are my pickles too soft?
Soft pickles usually happen from fermenting too long, too warm, or using cucumbers that weren’t fresh. Trim the blossom ends and add tannin-rich leaves like grape or bay leaves next time.
4. Do fermented pickles need to be refrigerated?
Yes, after fermentation. Refrigeration slows the process and helps preserve texture and flavor. Before that, they should be stored at room temperature to allow fermentation.
5. What’s the difference between fermented and vinegar pickles?
Fermented pickles are naturally soured by beneficial bacteria through lacto-fermentation. Vinegar pickles use acetic acid (vinegar) for preservation and don’t offer the same probiotic benefits.
Conclusion
Fermenting pickles at home isn’t just a throwback hobby—it’s a delicious, nutritious, and empowering skill that connects you to your food in a whole new way. From choosing the right cucumbers to mastering the perfect brine, you now have everything you need to make crunchy, flavorful, probiotic-rich pickles that will make store-bought versions taste like soggy imposters.
Whether you’re keeping it classic with garlic dill or venturing into spicy, sweet, or Korean-inspired blends, the world of fermented pickles is full of flavor, health benefits, and good old-fashioned kitchen fun. Don’t be afraid to experiment, take notes, and tweak each batch to your taste. Before long, you won’t just be making pickles—you’ll be perfecting your own signature recipes.
Now go make some magic in a jar.

