Energy Balls Recipe: If you’re looking for a quick, healthy, and delicious snack, energy balls are the perfect choice! These bite-sized treats are packed with nutrients, making them an excellent on-the-go snack for busy days.
Energy balls have gained massive popularity due to their ease of preparation, natural ingredients, and versatility. Whether you need a pre-workout snack or a mid-afternoon energy boost, these little bites are perfect for satisfying your hunger and keeping you energized.
Why Make Energy Balls at Home?
- Healthier alternative to store-bought snacks
- No artificial preservatives or unhealthy additives
- Customizable to fit your taste and dietary needs
- Budget-friendly and easy to make
Now, let’s dive into the step-by-step guide to making these delicious energy balls!
Ingredients for Energy Balls
The best thing about energy balls is that they require only a handful of simple ingredients. Here are the most common ingredients used:
Basic Ingredients:
- Oats – A great source of fiber and energy
- Nut Butter (Peanut, Almond, or Cashew Butter) – Provides healthy fats and protein
- Honey or Maple Syrup – A natural sweetener to bind the ingredients
- Chia Seeds or Flaxseeds – Adds fiber and Omega-3s
- Chocolate Chips or Cocoa Powder – For a chocolatey taste
- Dried Fruits (Dates, Raisins, Cranberries, etc.) – Adds natural sweetness
- Vanilla Extract or Cinnamon – For extra flavor
Optional Add-Ins for Customization:
- Protein Powder – Boosts protein content
- Coconut Flakes – Adds texture and flavor
- Matcha Powder – Provides antioxidants and a mild caffeine boost
- Crushed Nuts – Adds crunch and extra nutrients
Step-by-Step Guide to Making Energy Balls
Step 1: Gather All Ingredients
Before you start, make sure you have all the necessary ingredients measured and ready. This will make the process smooth and efficient.
Step 2: Blend or Mix the Ingredients
- If using a food processor, blend the oats, nut butter, honey, and other ingredients until they form a sticky dough-like consistency.
- If mixing by hand, combine all ingredients in a large bowl and mix thoroughly with a spoon or your hands.
Step 3: Form the Dough into Balls
- Using a spoon or your hands, scoop small amounts of the mixture and roll them into bite-sized balls.
- If the dough is too sticky, you can slightly wet your hands or add more oats to thicken the mixture.
Step 4: Chill for Better Consistency
- Place the energy balls on a tray or plate and refrigerate for at least 30 minutes.
- This step helps the balls firm up and enhances their texture.
Step 5: Store and Enjoy
- Once chilled, store the energy balls in an airtight container in the refrigerator.
- Enjoy them as a snack whenever you need an energy boost!
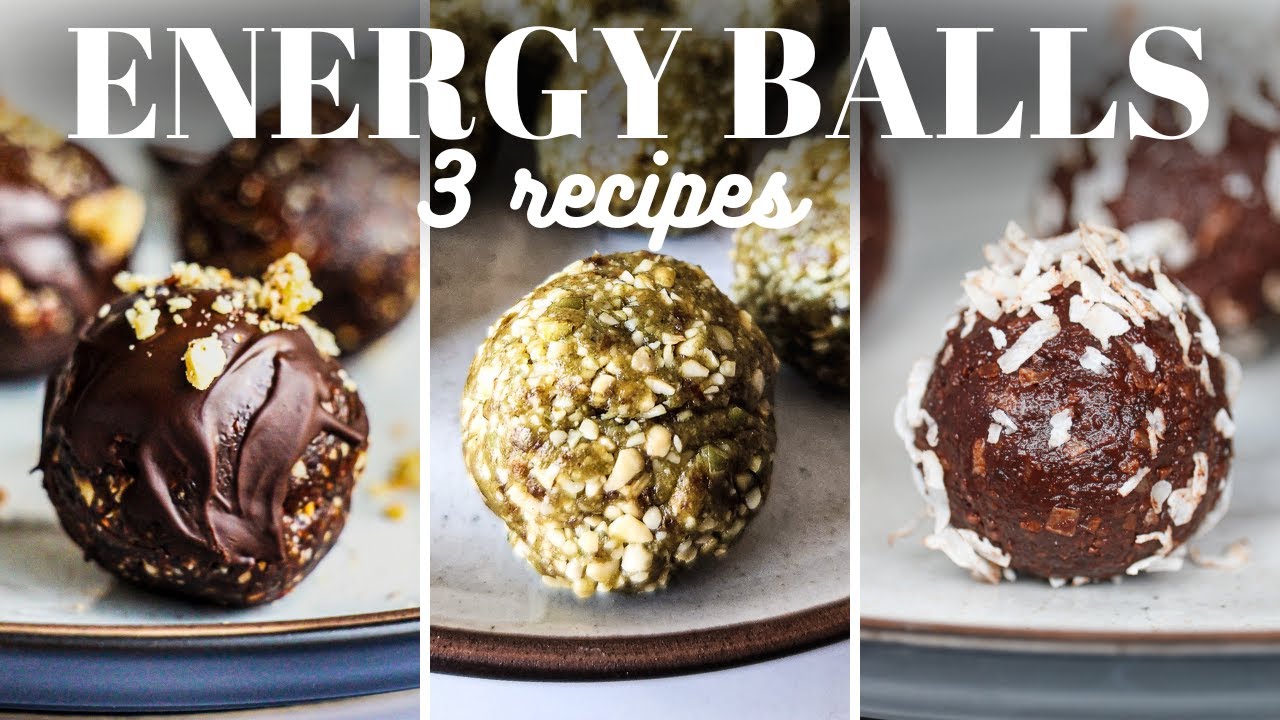
Different Variations of Energy Balls
Peanut Butter Chocolate Energy Balls
- Ingredients: Oats, peanut butter, honey, cocoa powder, chocolate chips, flaxseeds
- Flavor: Sweet, nutty, and chocolatey
Coconut Almond Energy Balls
- Ingredients: Oats, almond butter, honey, shredded coconut, vanilla extract
- Flavor: Nutty and tropical
Oatmeal Raisin Energy Balls
- Ingredients: Oats, almond butter, honey, raisins, cinnamon
- Flavor: Like an oatmeal raisin cookie but healthier!
Matcha Green Tea Energy Balls
- Ingredients: Oats, cashew butter, honey, matcha powder, shredded coconut
- Flavor: Mildly sweet with a slight earthy matcha taste
Health Benefits of Energy Balls
- High in Protein and Fiber – Keeps you full and satisfied
- Natural Source of Energy – No processed sugars, just wholesome ingredients
- Great for Weight Management – Helps control hunger and cravings
Tips for Making the Best Energy Balls
- Choosing the Right Consistency: If the dough is too dry, add more nut butter or honey. If it’s too sticky, add more oats.
- Storing for Freshness: Keep them refrigerated in an airtight container to maintain freshness for up to 2 weeks.
- Dietary Substitutions: Use seed butter instead of nut butter for a nut-free version.
Storage and Shelf Life
- Refrigerator: Lasts up to 2 weeks in an airtight container.
- Freezer: Can be frozen for up to 3 months.
When to Eat Energy Balls
- Pre-Workout Snack: Provides quick energy and stamina
- Midday Energy Booster: Helps you stay focused and full
- Healthy Dessert Alternative: Satisfies sweet cravings without the guilt
Common Mistakes to Avoid
- Adding Too Much Liquid: Makes the mixture too sticky to roll into balls
- Not Chilling the Mixture: Leads to soft, crumbly energy balls
- Using the Wrong Ingredients: Substituting dry ingredients improperly can affect texture
FAQs about Energy Balls Recipe
What are energy balls?
Energy balls are small, portable snacks made from a blend of ingredients like oats, nuts, seeds, and dried fruits. They’re often bound together with honey or peanut butter and are praised for their nutrient density and convenience.
How long do energy balls last?
Properly stored in an airtight container in the refrigerator, energy balls can last up to two weeks. You can also freeze them for up to three months, making them a perfect grab-and-go option for busy schedules.
Are energy balls healthy?
Yes, energy balls are a healthy snack option when made with whole, nutrient-rich ingredients. They offer a good mix of protein, healthy fats, and fiber, which can help in energy management and satiety.
Can I make energy balls without nuts?
Absolutely! For those with nut allergies, seeds like pumpkin or sunflower can be a great alternative. You can also use nut-free butters like sunflower seed butter to bind the ingredients together.
What’s the best way to make energy balls no-bake?
No-bake energy balls are not only simple but quick to make. Mix your dry ingredients with your binding agents like honey or syrup until the mixture is sticky enough to form into balls. Chill in the refrigerator to set, and enjoy!
Do energy balls need to be refrigerated?
While refrigeration is not mandatory, storing your energy balls in the fridge will keep them fresh longer and maintain their shape, especially in warm climates.
Conclusion
Energy balls are one of the easiest, healthiest, and tastiest snacks you can make at home. They’re customizable, require no baking, and are perfect for any time of the day. Try different flavors and experiment with ingredients to find your favorite combination!