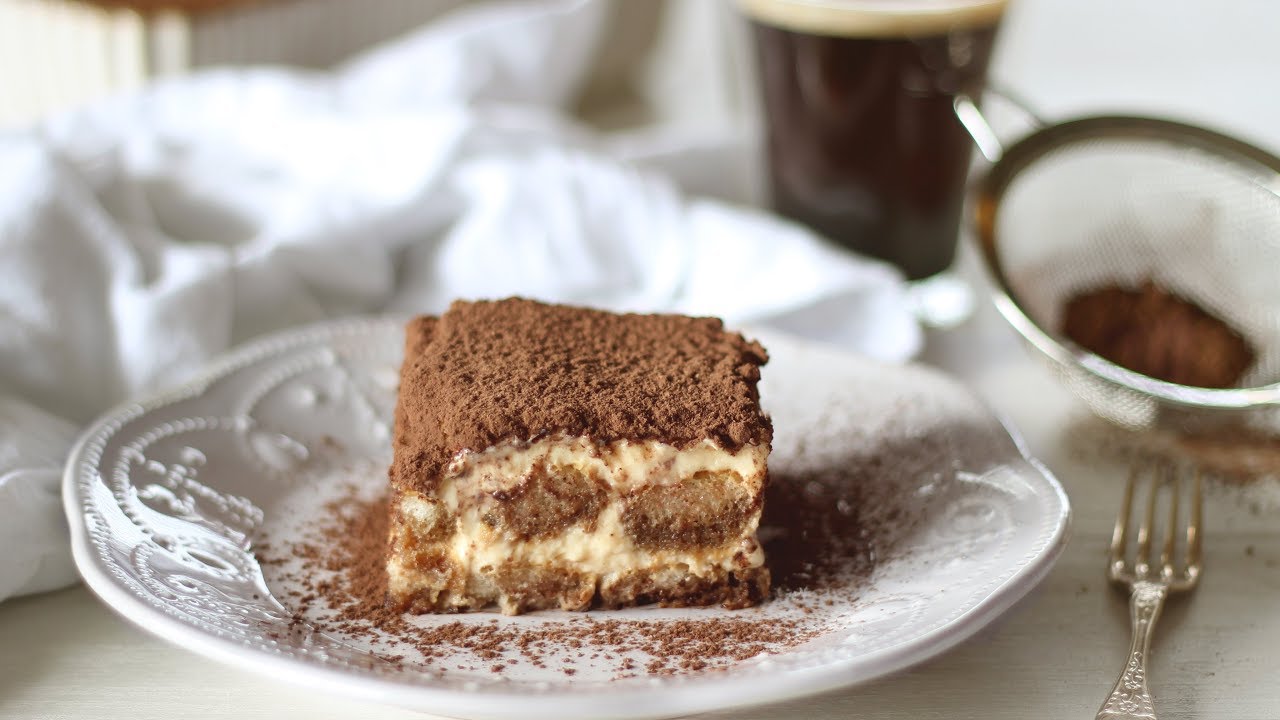
Easy Tiramisu Recipe: Tiramisu is that dreamy, coffee-flavored dessert that instantly transports your taste buds to an Italian café. This no-bake, chilled treat layers espresso-soaked ladyfingers with a light and creamy mascarpone mixture, topped off with a generous dusting of cocoa powder. It’s rich, yet light. Sweet, but not overwhelming. Originating in Italy, “tiramisu” literally means “pick me up”—and trust me, one bite is enough to lift your mood any day.
Whether you’re prepping for a cozy dinner party or just craving something decadent on a lazy Sunday, tiramisu delivers elegance with minimal effort.
Why You’ll Love This Recipe
This easy tiramisu recipe is beginner-friendly, doesn’t require any fancy equipment, and skips the raw eggs many traditional recipes include. It’s perfect if you’re after that classic taste without the complexity. Plus, it can be made ahead of time, which makes hosting a breeze.
What’s not to love? With simple ingredients and foolproof steps, this dessert is practically magic in a dish.
Ingredients You’ll Need
Essential Ingredients
Let’s keep it simple and delicious. Here are the basics you’ll need for a classic tiramisu:
- Ladyfingers (Savoiardi): These sponge-like cookies are the foundation. Don’t substitute them.
- Mascarpone Cheese (1 cup): The star of the show. Rich, creamy, and mild.
- Heavy Cream (1 cup): Adds lightness to the mascarpone mixture.
- Powdered Sugar (½ cup): For a smooth, sweet blend.
- Strong Brewed Coffee or Espresso (1½ cups): Cool it down before using.
- Vanilla Extract (1 tsp): Adds depth and aroma.
- Unsweetened Cocoa Powder: For dusting.
- Optional: Coffee liqueur (like Kahlúa) or dark rum (2 tbsp) to boost the flavor.
Optional Add-ins
Want to elevate your tiramisu even further? Try these optional extras:
- Chocolate shavings or chips between layers for a crunchy twist.
- Cinnamon sprinkled into the cream mixture for added warmth.
- Fresh berries on top for color and freshness.
Keep it classic or get creative—it’s all up to you!
Kitchen Tools Required
You don’t need a gourmet kitchen to pull this off. Here’s what you’ll want to have ready:
- A medium mixing bowl
- A hand or stand mixer
- A shallow dish (for dipping ladyfingers)
- A spatula
- A 9×9 inch glass or ceramic dish
- A fine-mesh sieve for dusting cocoa powder
- A refrigerator (yes, chilling is crucial!)
Nothing fancy—just kitchen staples.
Step-by-Step Guide to Making Tiramisu
Step 1 – Preparing the Coffee Mixture
Start with strong, freshly brewed coffee or espresso. Let it cool to room temperature. If you’re adding alcohol, mix in your Kahlúa or rum at this stage. Pour this blend into a shallow bowl, wide enough to dip your ladyfingers. You want the cookies to be soaked but not soggy—think of it like dunking an Oreo in milk.
Quick tip: Cold coffee prevents the ladyfingers from getting too mushy.
Step 2 – Making the Creamy Mascarpone Filling
In a bowl, beat the heavy cream until stiff peaks form—this means when you lift the beaters, the cream should stand up without collapsing. In another bowl, combine mascarpone, powdered sugar, and vanilla. Mix until smooth and fluffy. Gently fold in the whipped cream until well incorporated.
This creamy blend is the heart of your tiramisu. It should be velvety and light—like a cloud in dessert form.
Step 3 – Dipping the Ladyfingers
Time to get hands-on! One at a time, quickly dip each ladyfinger into the coffee mixture—just for a second on each side. Lay them flat in a single layer in your serving dish. Don’t over-soak, or you’ll end up with tiramisu soup. The trick is a fast dip and firm placement.
Step 4 – Layering Like a Pro
Spread half the mascarpone mixture evenly over the ladyfingers. Smooth it out with a spatula. Repeat the dipping process with another layer of ladyfingers and top it with the rest of the cream. It’s like building a coffee-flavored dream cake—no oven required.
Finish by dusting a thick layer of cocoa powder on top using a fine sieve.
Step 5 – Chilling and Setting
This is the hardest part—waiting! Cover your dish with plastic wrap and refrigerate it for at least 6 hours, or ideally overnight. This gives the flavors time to meld and the texture to firm up.
Resist the temptation to dig in early. The longer it rests, the better it tastes.
Tips for the Perfect Tiramisu
Tiramisu might seem fancy, but it’s actually super forgiving—especially with the right tricks up your sleeve. Here’s how to nail it every single time:
- Use high-quality mascarpone. This cheese is the soul of tiramisu. Cheap or off-brand versions can be watery or gritty, which ruins that dreamy texture.
- Don’t skip the chill time. The magic happens in the fridge. Chilling lets all the flavors blend and helps the dessert set up beautifully.
- Keep your ladyfinger dip quick. A fast dip on each side is all you need. Overdo it, and your layers will collapse into mush.
- Whip that cream just right. Soft peaks will make the filling too runny; stiff peaks hold their shape and make the texture super silky.
- Add cocoa right before serving. If you dust the cocoa on too early, it can absorb moisture and lose its pretty, powdery look.
- For extra flair, add chocolate shavings or espresso powder on top before serving—it’s simple and makes it look like a restaurant-quality dessert.
With these simple tips, even your first attempt can turn out like a pro made it.
Common Mistakes to Avoid
Even a simple recipe can go sideways if you’re not careful. Here’s what to watch out for:
- Using regular cream cheese instead of mascarpone. Nope. They’re not the same. Cream cheese is tangier and thicker, and it’ll completely change the taste.
- Over-soaking the ladyfingers. One of the biggest errors. They should be soft, not soggy.
- Not beating the cream enough. Under-whipped cream equals runny filling.
- Skipping the chill time. We’ve said it before, but it’s worth repeating. Let it set. Always.
- Layering too sloppily. Uneven layers can affect both the look and the balance of flavors.
Fix these mistakes, and you’re golden. Or, well, cocoa-dusted.
How to Store and Serve
Made too much tiramisu? First off, lucky you. Second, yes, you can store it:
- In the fridge: Keep it covered with plastic wrap or in an airtight container. It’s good for up to 4–5 days. In fact, it gets better after the first day.
- In the freezer: Yes, tiramisu freezes well! Just wrap it tightly in layers of plastic wrap and foil. It’ll keep for up to 2 months. Thaw it in the fridge overnight before serving.
- Serving tips: Serve tiramisu chilled, not frozen. Use a sharp knife or spatula to cut clean squares. Want to get fancy? Add a dollop of whipped cream or a drizzle of melted chocolate on top.
It’s a total crowd-pleaser whether you’re serving it at a party or hoarding it for your Netflix night.
Variations You Can Try
Feeling adventurous? Once you’ve nailed the classic version, you can mix it up in fun ways:
- Strawberry Tiramisu: Swap coffee for sweetened strawberry juice, and add fresh berries between layers.
- Chocolate Tiramisu: Add a layer of melted dark chocolate between the cream and ladyfingers. Cocoa lovers rejoice!
- Pumpkin Tiramisu: Perfect for fall. Mix pumpkin puree and pumpkin spice into the mascarpone blend.
- Lemon Tiramisu: Use lemon zest and lemon syrup for a refreshing twist.
- Alcohol-Free Version: Just use decaf coffee and skip the liqueur. It’s still heavenly.
Tiramisu is super versatile, so don’t be afraid to play around. It’s one of those desserts that welcomes creativity.
FAQs about Easy Tiramisu Recipe
Q1: Can I make tiramisu without alcohol?
Yes! You can substitute the coffee liqueur with more brewed espresso or use vanilla extract for a kid-friendly, non-alcoholic version.
Q2: How long does homemade tiramisu last?
Tiramisu stays fresh for up to 4 days in the refrigerator when stored in an airtight container.
Q3: Can I freeze tiramisu?
Absolutely. Wrap it tightly and freeze for up to 3 months. Thaw in the fridge overnight before serving.
Q4: What can I use instead of mascarpone cheese?
If mascarpone isn’t available, you can use a mix of cream cheese and heavy cream as a substitute.
Q5: Do I need to cook the eggs for tiramisu?
Traditional recipes use raw eggs, but you can use a double boiler to gently heat the eggs if you’re concerned about safety.
Q6: Can I use store-bought ladyfingers?
Yes, store-bought ladyfingers work perfectly and save time in the process.
Q7: Is tiramisu better the next day?
Definitely! Tiramisu tastes even better after chilling overnight, allowing the flavors to fully blend.
Conclusion
So there you have it—your ultimate step-by-step guide to making an easy, classic tiramisu right in your kitchen. From selecting the right ingredients to nailing the layering and mastering the chill time, it’s all about a few thoughtful steps and a bit of patience. Whether you’re making it for a dinner party or just for yourself (no judgment here), this dessert delivers flavor, elegance, and total satisfaction every time.
Don’t be surprised if people start requesting your tiramisu on repeat—it really is that good.