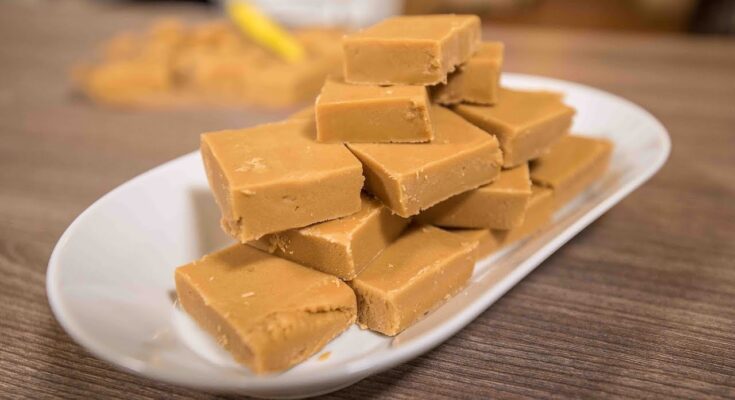
Easy Fudge Recipe: Who doesn’t love the creamy, rich sweetness of fudge? This beloved treat has been a favorite for generations, offering endless possibilities for flavors and textures. Fudge may seem like a dessert reserved for fancy candy shops, but it’s surprisingly easy to make at home.
Why bother making fudge yourself? First, it allows you to control the ingredients and customize flavors. Plus, there’s something so satisfying about crafting a dessert from scratch, especially one as indulgent as fudge. Homemade fudge is also an excellent gift option, perfect for holidays, birthdays, or just as a thoughtful treat for loved ones.
Essential Ingredients for Easy Fudge
Making fudge at home requires just a few basic ingredients. Here’s a list of essentials:
- Sweetened condensed milk: Acts as the base for your fudge, providing sweetness and creaminess.
- Chocolate chips or chopped chocolate: Choose milk, dark, or white chocolate depending on your preference.
- Butter: Adds richness to the fudge.
- Vanilla extract: Enhances the flavor profile.
Optional add-ins include nuts, dried fruit, marshmallows, or even a sprinkle of sea salt for a gourmet touch. Want to get creative? Consider peppermint extract, peanut butter, or caramel for flavor variations.
Tools and Equipment Needed
The beauty of making fudge is that it doesn’t require any fancy equipment. Here’s what you’ll need:
- A medium-sized saucepan.
- A mixing spoon or silicone spatula.
- Measuring cups and spoons.
- A baking dish (8×8 inches works well).
- Parchment paper or aluminum foil.
- Optional: Candy thermometer (helpful for perfect texture).
Having these tools ready will make the process smooth and enjoyable.
Preparing Your Workspace
Before diving into fudge-making, take a moment to prep your workspace. A clean, organized area ensures you can focus on the fun part—cooking!
- Clean your countertop: Clear away any clutter to make room for your ingredients and tools.
- Line your baking dish: Use parchment paper or foil, leaving a bit of overhang for easy removal later.
- Measure ingredients: Pre-measuring ingredients saves time and ensures accuracy.
Once your workspace is set, you’re ready to begin.
Step-by-Step Guide to Making Fudge
Step 1: Gathering Ingredients and Tools
Start by assembling all the ingredients and tools listed earlier. Double-check to ensure everything is measured and within reach. Trust me—this small step saves a lot of hassle!
Step 2: Melting the Base Ingredients
Place your saucepan over low heat and add the condensed milk, chocolate, and butter. Stir continuously to prevent burning. You can also use a double boiler for a gentler melting process. If you prefer a quicker method, microwave the mixture in 30-second intervals, stirring in between.
Step 3: Mixing and Cooking
Once the ingredients are melted and combined, stir the mixture until it’s smooth and glossy. At this point, you can use a candy thermometer to ensure the temperature is around 234°F (soft-ball stage). If you don’t have one, don’t worry—just watch for a thick, glossy texture.
Step 4: Adding Flavors and Add-Ins
This is where the fun begins! Stir in your vanilla extract and any additional flavors or mix-ins. Popular options include crushed cookies, chopped nuts, or swirls of peanut butter. Work quickly as the mixture can start to set.
Step 5: Pouring and Cooling
Pour the fudge mixture into your prepared baking dish, spreading it evenly with a spatula. Allow it to cool at room temperature for at least 2 hours or until firm. For faster results, refrigerate the dish for about an hour.
Common Mistakes and How to Avoid Them
Even though making fudge is simple, a few common mistakes can trip you up. Let’s tackle them so you can avoid any missteps:
- Overcooking the mixture: This can lead to a dry or crumbly texture. Always cook on low heat and stir consistently.
- Not mixing enough: Improper mixing can cause uneven textures or separation. Stir until the mixture is smooth and glossy.
- Skipping the lining for the baking dish: Forgetting to line the dish makes removing the fudge a struggle. Use parchment paper or foil to make life easier.
- Grainy texture: If your fudge is grainy, it’s likely due to sugar crystals forming. This can be avoided by stirring consistently and ensuring all ingredients are fully melted.
By staying patient and attentive, you can sidestep these issues and create flawless fudge every time.
Storage and Shelf Life
Homemade fudge can last surprisingly long if stored correctly. Here’s how to keep it fresh and delicious:
- At room temperature: Store fudge in an airtight container, separating layers with parchment paper to prevent sticking. It will stay fresh for up to two weeks.
- In the refrigerator: For a longer shelf life, refrigerate the fudge in an airtight container. It can last up to four weeks this way.
- In the freezer: Fudge freezes well! Wrap individual pieces in plastic wrap and place them in a freezer-safe container. Thaw in the refrigerator for a few hours before serving.
Proper storage ensures your fudge remains soft, flavorful, and ready for enjoyment at any time.
Creative Fudge Variations
Once you’ve mastered the basic recipe, why not experiment with some creative twists? Here are a few ideas to inspire you:
- Peanut Butter Fudge: Add a layer of creamy or crunchy peanut butter on top of the chocolate base for a delicious combination.
- Mint Chocolate Fudge: Stir in a few drops of peppermint extract and sprinkle crushed candy canes for a holiday treat.
- Cookies and Cream Fudge: Mix in crushed Oreo cookies for a creamy, crunchy twist.
- Salted Caramel Fudge: Swirl caramel sauce into the chocolate mixture and sprinkle with sea salt for a gourmet flavor.
- Fruit and Nut Fudge: Add dried cranberries, raisins, or chopped almonds for a chewy, nutty bite.
The possibilities are endless—let your creativity shine!
Tips for Making Perfect Fudge Every Time
- Use high-quality ingredients: The better the chocolate, the richer your fudge will taste.
- Monitor the temperature: A candy thermometer can be your best friend, ensuring the mixture reaches the right consistency.
- Be patient: Rushing through steps like cooling can ruin the texture. Give your fudge plenty of time to set properly.
- Experiment wisely: Start with small batches when trying new flavors or techniques to avoid wasting ingredients.
By following these tips, you’ll create fudge that’s perfect every time—whether you’re making it for yourself or as a gift.
Benefits of Sharing Homemade Fudge
There’s something special about sharing a homemade treat like fudge. It’s a thoughtful and personal way to show you care. Here are some reasons why fudge makes an excellent gift:
- Affordable yet luxurious: Fudge is cost-effective to make but feels indulgent to receive.
- Customizable: You can tailor flavors to suit the preferences of your recipient.
- Easy to package: Wrap individual pieces in decorative paper or place them in a gift box for a polished look.
- Suitable for all occasions: From holidays to birthdays, fudge is always a hit.
Homemade fudge is a simple way to spread joy and sweetness to those around you.
FAQs about Easy Fudge Recipe
1. What ingredients do I need for an easy fudge recipe?
Most easy fudge recipes require minimal ingredients such as chocolate chips, condensed milk, butter, and vanilla extract. Some variations might include nuts, marshmallows, or different flavors of chips like peanut butter or white chocolate.
2. How long does it take to make fudge?
You can make fudge in under 30 minutes with just a few minutes of preparation and the rest of the time spent setting in the refrigerator. Some recipes may require cooling time, which can extend the total time needed.
3. Do I need a candy thermometer to make fudge?
No, one of the beauties of easy fudge recipes is that they often don’t require a candy thermometer. Most recipes use condensed milk and a microwave or stovetop method that doesn’t need precise temperature monitoring.
4. Can I make fudge without condensed milk?
Yes, there are alternative recipes that use ingredients like cream and sugar, but condensed milk is popular for its simplicity and reliable texture.
5. How do I store fudge, and how long does it last?
Fudge can be stored in an airtight container at room temperature for up to 1-2 weeks, in the refrigerator for up to 3 weeks, and in the freezer for up to 3 months. Ensure it is well wrapped to avoid absorbing odors from other foods.
6. Why did my fudge turn out too soft or too hard?
If your fudge is too soft, it may not have been cooked enough or needed more time to set. If it’s too hard, it may have been overcooked or too much of any dry ingredients was used. Adjusting the cooking time or ingredient ratios can help achieve the perfect consistency.
7. Can I make vegan fudge?
Absolutely! Substitute the butter with coconut oil or a vegan butter alternative, and use a dairy-free condensed milk. Many stores carry vegan chocolate chips as well.
Conclusion
Making fudge at home is a delightful experience that’s as rewarding as it is delicious. With just a few ingredients and simple steps, you can create a treat that rivals the finest candy shops. Whether you stick with the classic recipe or explore creative variations, the result is guaranteed to please.
So, why not give it a try? Roll up your sleeves, gather your ingredients, and start crafting a batch of homemade fudge. Trust me—you’ll never go back to store-bought!


