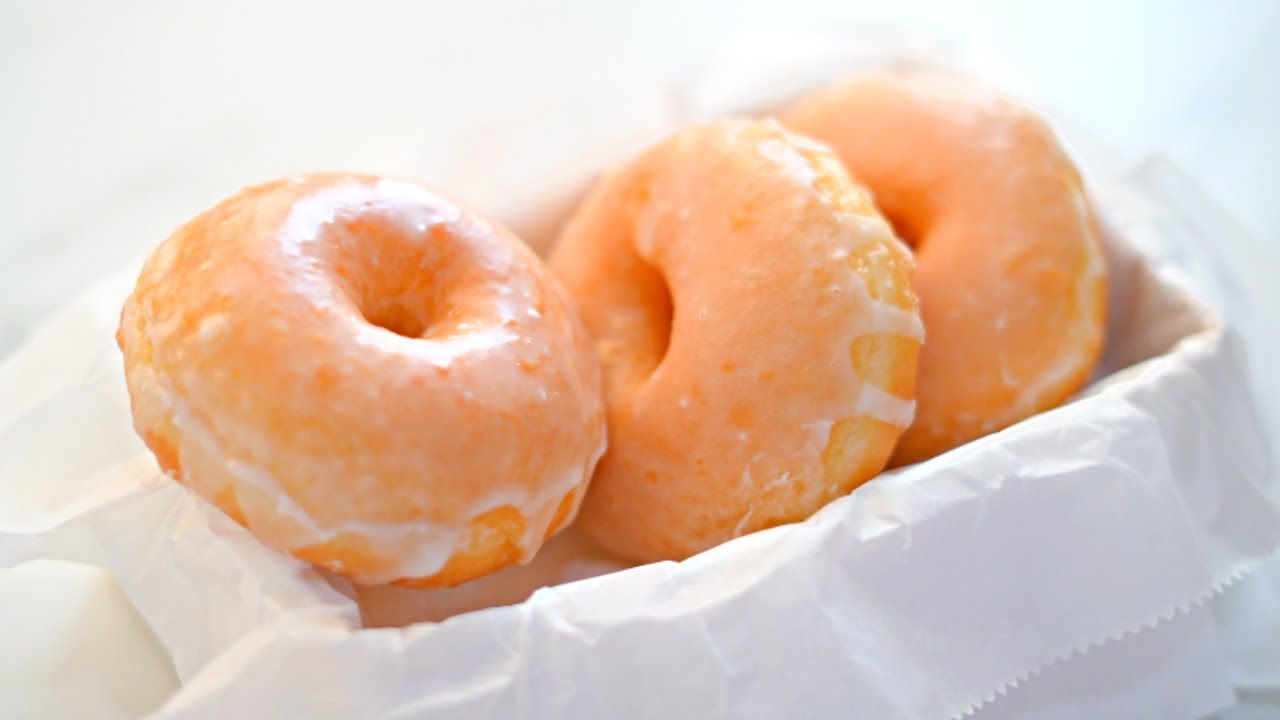
Easy Donut Recipe: Let’s be honest, who doesn’t love a warm, fluffy donut? Whether glazed, dusted with sugar, or filled with cream, donuts are a favorite treat around the world. The best part? You don’t have to head to the nearest bakery to enjoy them. With this easy donut recipe, you’ll whip up golden, delicious donuts in your own kitchen. It’s simpler than you think, and yes—you don’t need to be a pro baker to get it right.
This guide is designed to walk you through every step, from preparing the dough to that final sugary coating. By the time you finish, you’ll not only have a plate full of mouthwatering donuts but also the confidence to make them any time a craving hits!
Why Homemade Donuts Are Worth It
You might be wondering, “Why go through all the effort when I can just buy donuts?” Good question—and here’s the answer: homemade donuts are fresher, more customizable, and way more satisfying.
Think about it: store-bought donuts often come loaded with preservatives and artificial flavors. But when you make them at home, you control the ingredients. Want them extra fluffy? No problem. Prefer them less sweet? Easy fix. Craving a certain topping? Go wild.
Plus, there’s a certain joy in kneading the dough, watching it rise, and finally tasting something you created from scratch. It turns a regular morning into something a little more special. And let’s be honest—your kitchen smelling like fresh donuts? That’s a win in itself.
Ingredients You’ll Need
Before we dive into the fun part (making the donuts), let’s gather everything you’ll need. Simple pantry staples, nothing fancy!
For the Dough:
- 2 ¼ tsp (1 packet) active dry yeast
- 1 cup warm milk (around 110°F)
- ¼ cup granulated sugar
- 2 large eggs
- ½ cup unsalted butter, melted
- 1 tsp vanilla extract
- 4 cups all-purpose flour (plus more for dusting)
- ½ tsp salt
For Frying:
- 1 quart vegetable oil (for deep frying)
Optional Toppings:
- Granulated sugar or powdered sugar
- Chocolate glaze or vanilla glaze
- Sprinkles, cinnamon sugar, or nuts
These ingredients form the base of your classic yeast donut. From here, you can build and tweak however you like.
Equipment You’ll Need
Having the right tools can make the process smoother. Here’s what you’ll need:
- Large mixing bowl
- Stand mixer (optional but helpful)
- Rolling pin
- Donut cutter or two round cutters (one large, one small)
- Baking sheet
- Paper towels
- Slotted spoon or spider strainer
- Deep frying pan or deep fryer
- Thermometer (for oil temperature)
Don’t stress if you’re missing some tools—there are always easy substitutions (e.g., a glass for cutting donuts, a spoon for stirring).
How to Make Easy Donut – Step-by-Step Instructions
Now for the best part—making the donuts! Follow these steps carefully, and you’ll be enjoying homemade goodness in no time.
Step 1: Activate the Yeast
Start by mixing the warm milk and sugar in a bowl. Sprinkle the yeast over the top and let it sit for 5–10 minutes. You’ll know it’s ready when it looks frothy and bubbly. This step is crucial because it’s what gives your donuts that perfect rise.
Tip: Make sure the milk isn’t too hot or too cold—aim for the temperature of a warm bath.
Step 2: Make the Dough
Once the yeast is activated, add in the eggs, melted butter, and vanilla. Mix until combined. Slowly incorporate the flour and salt, one cup at a time, until a soft dough forms.
You can knead the dough by hand for 8–10 minutes or use a stand mixer with a dough hook for about 5–6 minutes. The dough should be elastic but not sticky.
Step 3: Let It Rise
Place the dough in a greased bowl, cover it with a clean kitchen towel, and let it rise in a warm spot for 1–2 hours, or until it doubles in size. Patience is key here—the longer it rises, the fluffier the donuts.
Once risen, punch down the dough to release air bubbles. Now it’s ready to be shaped.
Step 4: Cut Out the Donuts
Roll out the dough on a lightly floured surface to about ½ inch thickness. Use a donut cutter (or two round cutters) to cut out your donuts and holes. Lay them on a baking sheet lined with parchment paper.
Let them rest again for 30 minutes. This second rise helps them puff up beautifully when fried.
Step 5: Fry the Donuts
Heat the oil in a deep pan to 350°F (175°C). Fry a few donuts at a time—don’t overcrowd the pan. Cook each side for 1–2 minutes, or until golden brown.
Use a slotted spoon to transfer them to a paper towel-lined tray. Be careful—hot oil can be dangerous. Keep kids and pets at a distance during this step.
Step 6: Add Toppings
While they’re still warm, coat the donuts in sugar, dip them in glaze, or drizzle with chocolate. You can even fill them with jam or custard for extra indulgence.
Tips for Perfect Donuts
Getting that bakery-style donut at home might seem tricky, but a few smart tricks can make a world of difference. Here’s what you need to know to nail it every single time:
- Use Fresh Yeast: If your yeast doesn’t bubble up during activation, it’s dead. Toss it and start with a new packet.
- Measure Correctly: Too much flour can make your donuts dense. Spoon flour into the measuring cup and level it off instead of scooping.
- Mind the Oil Temperature: A kitchen thermometer is your best friend. If the oil is too hot, the donuts burn on the outside and stay raw inside. Too cool, and they’ll soak up oil like a sponge.
- Let Them Rise Twice: Don’t skip the second rise after cutting. That extra puff makes all the difference in fluffiness.
- Don’t Overcrowd the Pan: Fry in small batches to keep the oil temperature stable and give donuts room to float and expand.
Want extra fluffy donuts? Add a splash of milk or even a touch of mashed potatoes to the dough—it’s a classic trick some bakers swear by!
Storage and Reheating Tips
So you made a big batch (because why not?), and now you’ve got leftovers. Don’t worry—here’s how to keep them fresh and delicious:
- Short-term storage: Keep donuts in an airtight container at room temperature for up to 2 days. If they’re glazed, separate them with parchment paper so they don’t stick together.
- Refrigeration: Not recommended. It tends to dry them out.
- Freezing: You can freeze the fried (but unglazed) donuts in a sealed container for up to 2 months. Reheat in the oven or air fryer.
- Reheating: Warm them up in the microwave for 10–15 seconds or pop them in the oven at 300°F for 5–7 minutes. This brings back that “just-made” softness.
For glazed donuts, reheating in the microwave works best. It softens them and slightly melts the glaze for that gooey finish.
FAQs about Easy Donut Recipe
1. Can I make donuts without a deep fryer?
Yes! You can fry donuts in a deep pot with enough oil or even bake them in the oven for a healthier version.
2. What kind of flour is best for homemade donuts?
All-purpose flour works great for most easy donut recipes. For a lighter texture, you can use cake flour.
3. How long does it take to fry donuts?
Typically, each donut takes about 1 to 2 minutes per side until golden brown.
4. Can I make the dough ahead of time?
Absolutely! You can refrigerate the dough overnight and fry the donuts the next morning.
5. How do I store leftover donuts?
Store them in an airtight container at room temperature for up to 2 days. Reheat in the microwave for a few seconds to refresh.
6. Can I freeze donuts?
Yes, cooked and cooled donuts freeze well. Wrap them individually and store in a freezer-safe bag for up to 2 months.
7. What are the best toppings for donuts?
Classic toppings include powdered sugar, cinnamon sugar, chocolate glaze, and sprinkles. Get creative with your favorites!
8. Why are my donuts greasy?
If the oil is too cool, the donuts absorb more oil. Make sure the oil stays at 350°F (175°C) for best results.
9. Can I use instant yeast instead of active dry yeast?
Yes. Instant yeast can be added directly to the flour without proofing and typically rises faster.
10. Is it possible to make vegan donuts?
Definitely! Substitute plant-based milk, vegan butter, and egg alternatives to create delicious vegan donuts.
Conclusion
There you have it—your foolproof guide to making easy, delicious donuts at home. Whether you’re making them for a weekend brunch, a family gathering, or just because you felt like treating yourself, these donuts hit the spot every single time.
They’re soft, golden, and completely customizable with your favorite toppings. And once you get the hang of it, you’ll realize how fun and addictive the process can be. Baking donuts from scratch is not just about eating something tasty—it’s about enjoying the journey, too.
So roll up those sleeves, dust your counter with flour, and get frying. You’re just a few steps away from donut heaven.