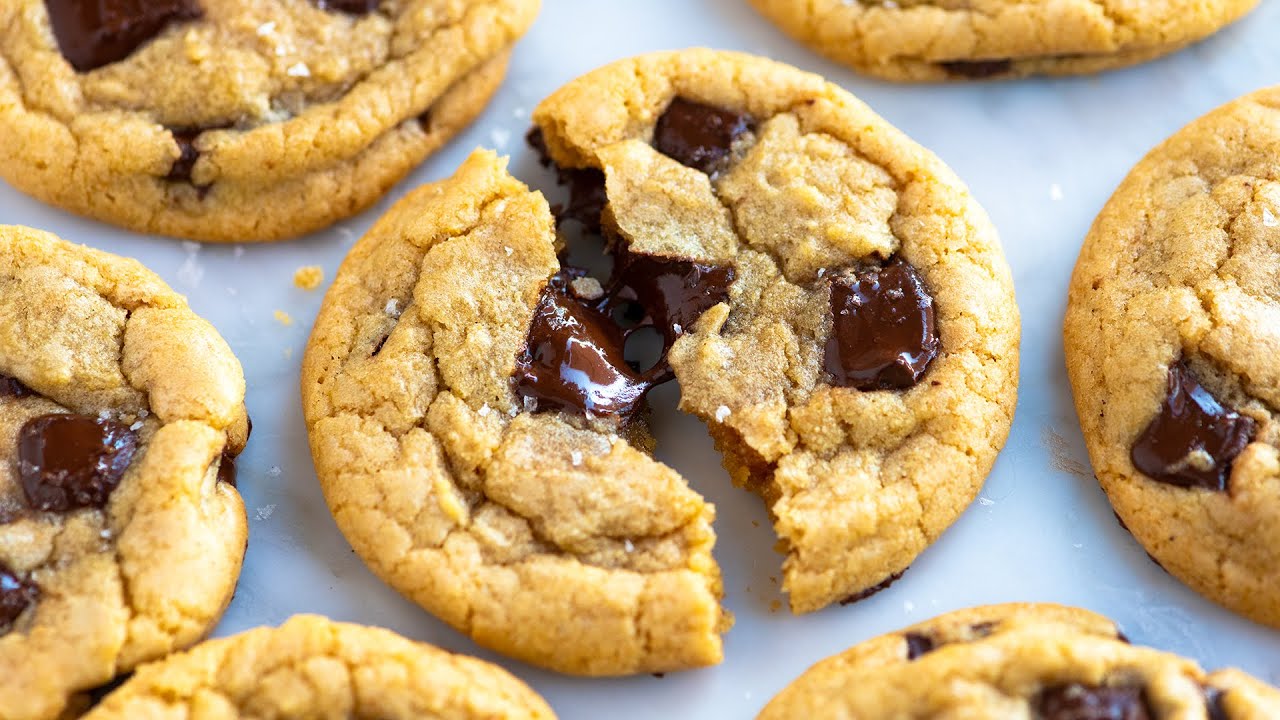
Easy Cookie Recipe: Cookies are that perfect little treat—warm, sweet, and just the right mix of crispy and chewy. They’re not just desserts; they’re comfort food in bite-sized pieces. What makes them even better? A recipe that’s super simple and quick to whip up. Whether you’re a newbie baker or someone just looking for a foolproof go-to, this easy cookie recipe has got your back.
Baking doesn’t have to be intimidating. In fact, the best recipes are often the easiest ones. With just a few ingredients and minimal equipment, you can bake a batch of cookies that not only tastes amazing but smells like heaven in your kitchen. Plus, it’s a great way to spend quality time with kids or wind down after a long day.
This step-by-step guide is designed for simplicity. No complicated instructions, no fancy ingredients—just pure cookie goodness from scratch. So tie up that apron, preheat your oven, and let’s dive into the easiest cookie recipe you’ll ever need.
Ingredients Needed
Before you start, make sure you’ve got all your ingredients lined up. Here’s what you’ll need for the basic cookie dough:
Basic Ingredients:
- 1 cup (2 sticks) unsalted butter, softened
- 1 cup white sugar
- 1 cup packed brown sugar
- 2 large eggs
- 2 teaspoons vanilla extract
- 3 cups all-purpose flour
- 1 teaspoon baking soda
- ½ teaspoon baking powder
- 1 teaspoon salt
- 2 cups chocolate chips (optional but highly recommended)
Optional Add-Ins:
- Nuts (walnuts, pecans, almonds)
- Dried fruits (cranberries, raisins)
- Shredded coconut
- White chocolate chips or butterscotch chips
- A pinch of cinnamon or nutmeg for extra flavor
The beauty of this recipe is its flexibility. You can easily tweak the ingredients to match your taste preferences or dietary needs. Want a little less sugar? Reduce it by ¼ cup. Prefer crunchy cookies? Add some chopped nuts. It’s all up to you.
Make sure all your ingredients are at room temperature—especially the butter and eggs. This helps everything mix smoothly and evenly, giving your cookies that perfect texture we all crave.
Tools Required
You don’t need a fancy kitchen setup to make cookies. In fact, this recipe can be made with just a few basics:
Essential Tools:
- Large mixing bowl
- Hand mixer or stand mixer (you can also mix by hand with a sturdy spoon)
- Measuring cups and spoons
- Baking sheet
- Parchment paper or silicone baking mat
- Cooling rack
Handy Substitutes:
- No mixer? No problem—just mix by hand using a wooden spoon.
- No parchment paper? Lightly grease your baking sheet with butter or non-stick spray.
- No cooling rack? Use a clean cutting board or countertop lined with paper towels.
Having the right tools definitely makes baking easier, but don’t let a missing gadget stop you from enjoying homemade cookies. With a little creativity, you can always find a way around it.
Preparing the Dough
Now comes the fun part—making the dough. This is where all the ingredients come together to create that magical cookie base. Follow these simple steps:
Cream the Butter and Sugars:
- In your mixing bowl, combine the softened butter, white sugar, and brown sugar.
- Beat until the mixture is light and fluffy. This step adds air to the dough and helps with cookie texture.
Add the Eggs and Vanilla:
- Crack in the eggs one at a time, mixing after each addition.
- Pour in the vanilla extract and mix until combined.
Mix Dry Ingredients Separately:
- In another bowl, whisk together the flour, baking soda, baking powder, and salt.
- Gradually add the dry mixture to the wet ingredients, mixing just until combined. Don’t overmix—this can make the cookies tough.
Fold in Your Add-Ins:
- Stir in chocolate chips, nuts, or whatever else you’re using.
- Use a spatula or wooden spoon to mix by hand, ensuring even distribution.
You should end up with a thick, slightly sticky dough that holds its shape well. If it feels too soft, pop it in the fridge for 15–20 minutes to firm up before baking.
Baking the Cookies
Alright, time to transform that dough into golden-brown deliciousness. Here’s how to get it just right:
Preheat Your Oven:
- Set your oven to 350°F (175°C).
- Let it fully preheat before baking to ensure even cooking.
Line the Baking Sheet: Use parchment paper or a silicone mat to prevent sticking and make cleanup easier.
Scoop the Dough:
- Use a tablespoon or cookie scoop to drop even portions of dough onto the sheet.
- Leave about 2 inches between each scoop to allow for spreading.
Bake:
- Place the tray in the center of the oven.
- Bake for 10–12 minutes, or until the edges are lightly golden. The centers might look a little soft—that’s perfect.
Cool: Let the cookies sit on the baking sheet for 2 minutes before transferring them to a wire rack to cool completely.
And there you have it—your kitchen should smell amazing right about now.
Cooling and Storing
Once your cookies are baked to perfection, it’s important to let them cool properly before you dig in—or store them for later. Rushing this step can lead to broken or soggy cookies, and we definitely don’t want that.
Cooling Process:
- After taking the cookies out of the oven, let them rest on the baking sheet for about 2–3 minutes. This gives them time to firm up and makes it easier to move them without breaking.
- Then, transfer the cookies to a wire cooling rack. This allows air to circulate around the cookies, preventing them from getting soggy on the bottom.
- If you don’t have a wire rack, place the cookies on a cutting board or a clean kitchen towel spread over the counter.
Storing Your Cookies:
- Once the cookies are completely cool, store them in an airtight container to keep them soft and fresh.
- Layer the cookies with parchment paper in between if you’re stacking them to avoid sticking.
- For maximum freshness, keep them at room temperature for up to one week. If you want to store them longer, you’ve got two options:
- Refrigerate: Cookies stay good for up to two weeks in the fridge. Just warm them up slightly in the microwave before eating.
- Freeze: Freeze baked cookies in an airtight container or zip-top bag for up to three months. You can also freeze the dough and bake it fresh whenever the craving hits.
Whether you’re saving a few for a rainy day or prepping for a party, proper storage ensures your cookies stay just as delicious as when they came out of the oven.
Customizing Your Cookies
The best part about a basic cookie dough recipe? It’s like a blank canvas—you can dress it up however you like! Here are some fun and delicious ways to customize your cookies and make them truly your own.
Flavor Variations:
- Double Chocolate: Add ½ cup of cocoa powder to the dough and swap white sugar for brown sugar for a richer taste.
- Peanut Butter: Replace ½ cup of butter with creamy peanut butter for a nutty twist.
- Spiced Cookies: Mix in 1 teaspoon of cinnamon and ½ teaspoon of nutmeg for a cozy fall flavor.
Creative Toppings and Mix-ins:
- Sprinkles: Great for birthdays or holidays—just mix them into the dough or sprinkle on top before baking.
- Mini Marshmallows: Add for gooey, campfire-style cookies.
- Caramel Chunks: For a rich, sweet surprise in every bite.
- Crushed Candy or Cookies: Think Oreos, peppermint candies, or pretzels for a fun crunch.
Theme Ideas:
- For Valentine’s Day, try red velvet cookie dough with white chocolate chips.
- During Halloween, mix in candy corn or eyeball candies.
- Christmas? Think peppermint extract and crushed candy canes.
The sky’s the limit! Just make sure you balance the mix-ins with the base dough so you don’t overload it. Aim for about 1 to 1½ cups of add-ins total per batch of dough.
Common Mistakes to Avoid
Even with a super simple recipe, there are a few pitfalls that can mess with your cookie game. Here’s what to watch out for:
1. Overmixing the Dough:
- Mixing too much after adding the flour can develop the gluten in the flour, leading to tough cookies.
- Stop mixing as soon as everything is combined—your dough should still look a little lumpy.
2. Using Cold Butter or Eggs:
- Cold ingredients don’t mix well and can create uneven dough.
- Let your butter and eggs sit at room temperature for 30 minutes before starting.
3. Incorrect Measuring:
- Always spoon and level your flour rather than scooping it directly from the bag, which can compact it and lead to dry cookies.
- Use measuring cups for dry ingredients and liquid measuring cups for wet ones.
4. Crowding the Baking Sheet:
- Cookies need space to spread out. If they’re too close, you’ll end up with one big, lumpy cookie blob.
5. Baking Too Long:
- Cookies continue to cook even after you take them out of the oven. If you wait until they look fully done in the oven, they’ll likely be overbaked.
- Take them out when the edges are set and the center is still soft.
Avoiding these common errors can make the difference between just okay cookies and ones that everyone keeps coming back for!
Troubleshooting Cookie Problems
Sometimes, even when you follow the recipe, cookies don’t come out quite right. Don’t stress—it happens to the best of us. Here’s how to troubleshoot some common issues:
Problem: Flat Cookies
Why it happens:
- Your butter was too warm or melted.
- You didn’t chill the dough.
- You used too little flour.
Fix:
- Chill the dough for 30 minutes before baking.
- Try adding 1–2 tablespoons more flour to help the cookies hold shape.
Problem: Dry or Crumbly Cookies
Why it happens:
- Too much flour.
- Overbaking.
- Not enough fat (butter or eggs).
Fix:
- Make sure to measure flour correctly.
- Reduce baking time by 1–2 minutes.
- Try adding an extra egg yolk for moisture.
Problem: Cookies Too Puffy and Cake-Like
Why it happens:
- Too much flour or baking powder.
- Not enough sugar or butter.
Fix:
- Adjust your ingredient ratios.
- Flatten the dough balls slightly before baking to encourage spreading.
Once you understand the science behind the problems, it’s easy to tweak your process and get perfect cookies every time.
Tips for Perfect Cookies Every Time
Perfect cookies might feel like magic, but really, they’re all about smart technique. Whether you’re baking your first batch or your fiftieth, these tried-and-true tips can make a big difference.
1. Use Room Temperature Ingredients
This can’t be stressed enough—room temp butter and eggs blend better and result in a smoother, more cohesive dough. If you forget to take them out ahead of time, soften butter in the microwave for 10–15 seconds (don’t melt it!) and place eggs in warm water for 5 minutes.
2. Chill the Dough
Chilling the dough, even for 20–30 minutes, firms up the fat, preventing excessive spreading in the oven. This trick also deepens the flavors and gives your cookies a nice chewy texture.
3. Use a Cookie Scoop
Using a cookie scoop ensures all your cookies are the same size. This helps them bake evenly so you don’t end up with some raw and others burnt.
4. Bake One Sheet at a Time
Even though it’s tempting to use two racks, baking one sheet in the center of the oven ensures consistent heat circulation and better results.
5. Don’t Overcrowd the Baking Tray
Give your cookies space! Leave about 2 inches between each scoop of dough to allow for spreading without merging into each other.
6. Don’t Overbake
Cookies often look underdone when they’re actually perfect. The edges should be golden, and the centers a bit soft—they’ll firm up as they cool.
7. Experiment With Bake Times
Every oven is a bit different. Your cookies might need 9 minutes or maybe 13, depending on your appliance. Keep a close eye on the first batch to find your perfect time.
8. Cool Completely Before Storing
Warm cookies in a container can turn into a soggy mess. Let them cool fully before sealing them up.
Following these tips will help turn even a basic recipe into bakery-level goodness. Once you get the hang of the details, you’ll feel confident tweaking recipes and inventing your own creations.
Making it a Fun Activity with Kids
One of the best things about cookies is how much fun they are to make—especially with kids. This recipe is so easy, even little hands can help out. It’s a great way to bond as a family, teach kids kitchen skills, and create sweet memories (and treats!).
Steps Kids Can Help With:
- Measuring Ingredients: Kids love scooping flour and sugar. It’s also a sneaky way to teach math and motor skills.
- Cracking Eggs: Sure, it might get messy—but it’s all part of the fun!
- Mixing the Dough: Whether by hand or using a mixer, this is where the magic happens.
- Adding Mix-Ins: Let kids choose their favorite toppings—M&Ms, sprinkles, or even gummy bears.
- Scooping Dough: Cookie scoops or spoons work great and are safe for kids to handle.
- Decorating: This is where creativity shines. Add colorful toppings before or after baking for a personalized touch.
Safety Tips:
- Keep hot trays out of reach.
- Supervise closely around sharp tools and the oven.
- Use oven mitts at all times when baking.
Fun Idea: Make it a cookie decorating party! Whip up a few different doughs or cookie shapes and let kids decorate their own. It’s perfect for birthdays, holidays, or just a weekend treat.
Baking cookies with kids turns an ordinary recipe into a memorable event. Plus, who doesn’t love getting messy with flour and sneaking cookie dough straight from the bowl?
Healthier Alternatives
Trying to eat cleaner but still want cookies? Good news—there are tons of ways to make your favorite treat a little healthier without sacrificing flavor. Here’s how:
1. Reduce Sugar:
- Cut sugar by ¼ to ½ cup depending on your preference. You’d be surprised how sweet cookies can still be.
- Try using coconut sugar, maple syrup, or honey as alternatives.
2. Swap the Butter:
- Use coconut oil or mashed avocado in place of butter.
- Applesauce can also be a great substitute, especially for soft, chewy cookies.
3. Use Whole Wheat Flour:
- Substitute half or all of the all-purpose flour with whole wheat for more fiber and nutrients.
- Almond flour is another great gluten-free, protein-packed option.
4. Add in Healthy Extras:
- Mix in flaxseeds, chia seeds, or oats for added texture and health benefits.
- Add finely chopped nuts for good fats and crunch.
5. Vegan Version:
- Use flax eggs (1 tbsp ground flax + 3 tbsp water = 1 egg) instead of regular eggs.
- Use plant-based butter or coconut oil.
- Choose dairy-free chocolate chips or dark chocolate.
These tweaks make cookies not just a treat, but a smarter snack you can feel good about sharing with your family. Healthier cookies can still taste indulgent—sometimes even better than the original!
Cookie Presentation Ideas
Presentation is everything—especially if you’re gifting your cookies or serving them at a party. A little creativity goes a long way when it comes to making your treats look as good as they taste.
For Gifting:
- Cookie Jars: Stack cookies in a mason jar, tie a ribbon around the lid, and add a cute label.
- Paper Boxes: Use craft boxes lined with parchment paper for a rustic, handmade feel.
- Tin Containers: A classic choice, especially during holidays. Add a handwritten tag for a personal touch.
For Parties and Events:
- Cookie Trays: Arrange a mix of cookie types in layers on a large tray or tiered stand.
- Themed Shapes: Use cookie cutters to create shapes that match your event—stars, hearts, or even letters.
- Dipping Station: Serve plain cookies with sides of melted chocolate, caramel, or sprinkles for a DIY dipping fun.
Seasonal Decorating:
- Add colored frosting or icing to turn basic cookies into festive treats for Christmas, Easter, or Halloween.
- Dust with powdered sugar, edible glitter, or cinnamon for an elegant finish.
With just a few little touches, your homemade cookies can look like they came straight from a professional bakery—and they’ll taste even better because they were made with love.
FAQs about Easy Cookie Recipe
1. Can I freeze cookie dough for later?
Absolutely! Cookie dough freezes beautifully. Scoop out the dough into balls and place them on a baking sheet lined with parchment paper. Freeze until solid, then transfer to a zip-top freezer bag. Label with the date, and you’re good to go for up to 3 months. When ready to bake, pop them straight into the oven—just add an extra 2–3 minutes to the baking time.
2. How long do homemade cookies last?
If stored properly in an airtight container, your cookies will stay fresh at room temperature for about 5–7 days. In the fridge, they’ll last closer to two weeks, though the texture may change slightly. For longer storage, freezing is your best option.
3. Why are my cookies spreading too much in the oven?
This usually happens when the dough is too warm or there’s too much butter. Make sure to chill your dough for at least 30 minutes before baking, and double-check your ingredient measurements. Also, avoid placing dough on a hot baking sheet—use a cool one each time.
4. Can I make this recipe gluten-free?
Yes! You can substitute the all-purpose flour with a gluten-free flour blend (1:1 ratio). Just make sure your blend contains xanthan gum for structure. You may need to tweak the baking time slightly, so keep a close eye on the first batch.
5. What’s the best way to reheat cookies?
To revive that fresh-out-the-oven taste, microwave cookies for 10–15 seconds. If you’re reheating multiple cookies, place them on a baking sheet and warm them in a 300°F oven for 5–7 minutes. This will make them soft and gooey again without overcooking.
Conclusion
There you have it—the ultimate, easy cookie recipe that anyone can master. From gathering your ingredients to mixing the dough, baking them golden-brown, and adding your own creative flair, every step is straightforward and fun. Cookies are more than just sweet treats; they’re an invitation to slow down, share joy, and create lasting memories.
Whether you’re baking for a party, a family get-together, or just to satisfy your sweet tooth on a Tuesday afternoon, this recipe is your go-to. The best part? You can customize it endlessly, get the kids involved, or even turn it into a healthier snack without losing that classic cookie goodness.
So, go ahead—preheat that oven and start baking. Your kitchen’s about to smell amazing, and your taste buds will thank you. And who knows? This simple cookie recipe might just become your signature treat.