Easy Apple Crisp Recipe: Ah, apple crisp. Just saying it brings cozy vibes and the comforting smell of baked cinnamon-spiced apples wafting through the kitchen. This dessert is a classic, loved by many for its simplicity and soul-warming taste. Unlike a pie, there’s no crust to fuss over, making apple crisp an approachable go-to recipe even for beginners.
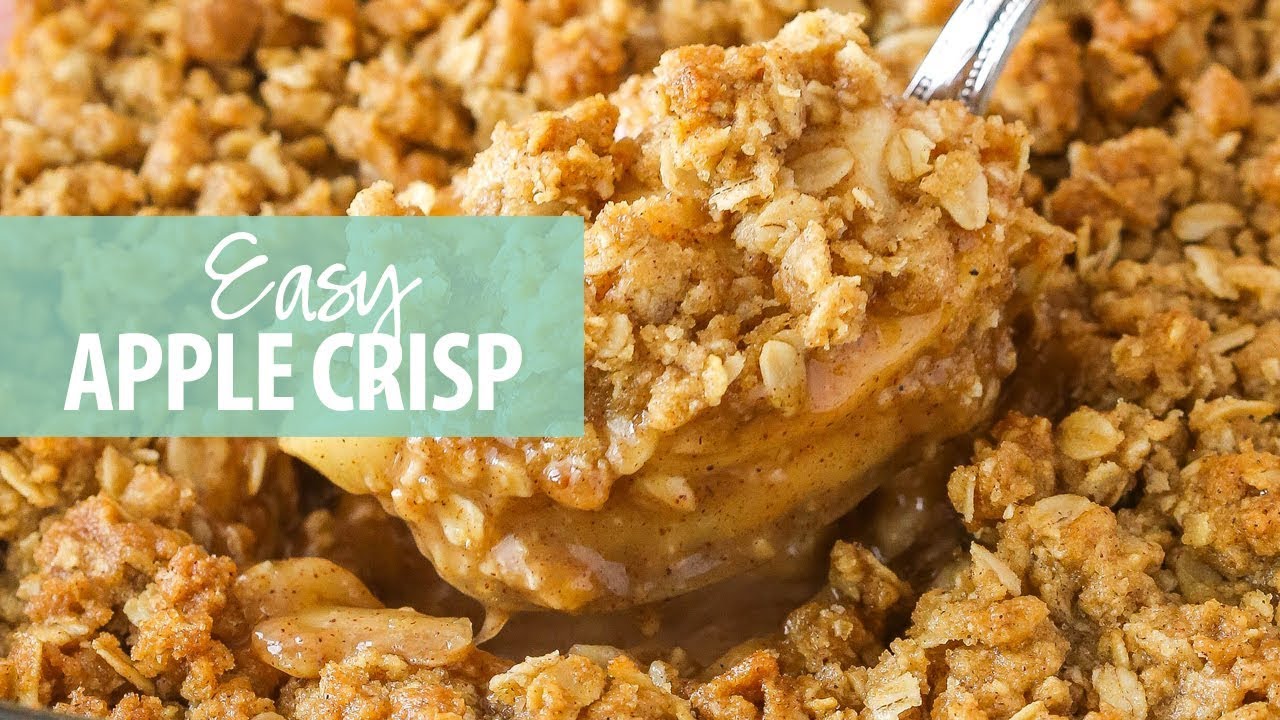
So what exactly is an apple crisp? It’s a warm, bubbly baked dessert made with sweet and tart apples layered under a crunchy, buttery oat topping. When baked, the apples turn soft and juicy while the topping becomes golden and crisp—hence the name.
Whether it’s for a weeknight treat, a holiday gathering, or just a chilly day when you need something sweet and satisfying, this easy apple crisp recipe is here to save the day. And the best part? You probably already have most of the ingredients in your kitchen.
Ingredients You’ll Need
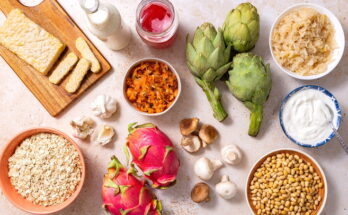
Before diving into the steps, let’s talk ingredients. Apple crisp is the kind of recipe where basic pantry staples come together to create something magical.
For the Apple Filling:
- 6 to 8 medium apples (Granny Smith, Honeycrisp, or a mix)
- 1/4 cup granulated sugar
- 1/2 teaspoon ground cinnamon
- 1 tablespoon lemon juice
- 1 teaspoon vanilla extract
- 1 tablespoon all-purpose flour (for thickening)
For the Crisp Topping:
- 1 cup old-fashioned oats
- 3/4 cup all-purpose flour
- 1/2 cup packed brown sugar
- 1/2 cup unsalted butter (cold and cubed)
- 1/2 teaspoon cinnamon
- 1/4 teaspoon salt
Optional Add-ins:
- Chopped nuts (pecans or walnuts)
- Nutmeg or cardamom for extra spice
- Raisins or dried cranberries
These ingredients create the ideal balance between tart apples and a sweet, crunchy topping that’s buttery without being greasy.
Step-by-Step Apple Crisp Recipe
This is where the magic happens! Let’s break it down into simple, easy-to-follow steps so you can have this dreamy dessert ready in under an hour.
Step 1: Preparing the Apples
Peel, core, and slice your apples. Aim for slices about 1/4-inch thick—thick enough to hold their shape but thin enough to soften nicely in the oven. Once sliced, toss them in a bowl with the sugar, lemon juice, cinnamon, vanilla, and flour. Mix gently to coat the apples evenly.
Place the apple mixture into a greased 9×13-inch baking dish. Spread them out so they cook evenly.
Step 2: Making the Crisp Topping
In a separate bowl, combine oats, flour, brown sugar, cinnamon, and salt. Add the cold, cubed butter. Use your fingers or a pastry cutter to mix everything together until it resembles coarse crumbs. You want small chunks of butter still visible—this is what creates that irresistible crumbly texture.
Optional: Stir in some chopped nuts for added crunch and flavor.
Step 3: Assembling the Dish
Sprinkle the crisp topping evenly over the apples. Don’t press it down—just let it fall naturally so it can get that perfect golden texture in the oven.
Step 4: Baking to Perfection
Preheat your oven to 350°F (175°C). Bake the apple crisp for about 40-45 minutes, or until the topping is golden brown and the apples are bubbling underneath.
Let it cool for 5-10 minutes before serving. This gives the juices time to settle and makes serving much easier.
Tips for the Perfect Apple Crisp
Want to make your apple crisp next-level? Here are some tried-and-true tips:
- Pick the Right Apples: A mix of tart and sweet varieties gives the best flavor and texture. Granny Smith + Honeycrisp is a killer combo.
- Don’t Skip the Lemon Juice: It brightens the flavor and balances the sweetness.
- Chill Your Butter: Cold butter helps create that dreamy, crumbly topping. Don’t use melted butter!
Serving Suggestions
Apple crisp is divine straight out of the oven, but let’s be honest—it’s all about the toppings, right? The warm apple filling and the crunchy topping are fantastic on their own, but when paired with the right toppings, they hit a whole new level of dessert magic.
Best Toppings to Elevate Your Crisp
- Vanilla Ice Cream – The classic. Cold, creamy ice cream slowly melting into the hot apple crisp is just… chef’s kiss. The contrast in temperature and texture is pure dessert heaven.
- Whipped Cream – Light, fluffy, and super easy. You can make your own or use store-bought, but don’t skip it if you want that diner-style feel.
- Caramel Sauce – Drizzle a bit of warm caramel sauce on top, and it becomes almost gourmet. Bonus if it’s salted caramel.
- Maple Syrup – For a fall-inspired twist, a dash of real maple syrup over the crisp can be incredible.
Hot or Cold? Here’s the Deal
Apple crisp is most commonly served warm, fresh out of the oven or reheated just enough to get the apples juicy again. But that’s not the only way! Many people love it cold, especially for breakfast the next day. Yes, it makes a fantastic breakfast too—especially when paired with Greek yogurt.
Here’s a fun idea: serve apple crisp in individual ramekins for a fancy dinner party feel, or scoop it into bowls for a casual, cozy night in.
Storing and Reheating
One of the best parts about apple crisp? It stores beautifully. Whether you’ve made a huge batch or just have leftovers, here’s how to keep it tasting fresh.
How Long Does It Last?
- At Room Temperature: Good for about 1 day, covered loosely with foil.
- In the Fridge: Store in an airtight container or covered tightly with plastic wrap for up to 5 days.
- In the Freezer: Apple crisp freezes well! Let it cool completely, then freeze it in a freezer-safe container or tightly wrapped dish. It lasts for up to 3 months.
Reheating Tips
To reheat, you have a few options:
- Microwave: Quick and easy. Scoop a portion into a microwave-safe bowl and heat for 30-60 seconds.
- Oven: Best if you want to bring back that crisp topping. Preheat your oven to 350°F (175°C), cover the dish with foil, and bake for 15-20 minutes until heated through.
- Air Fryer: Yes, it works! Heat individual portions at 300°F for 5-6 minutes to get the top nice and crisp again.
Pro Tip: Add a tiny pat of butter on top before reheating to freshen it up even more.
Variations to Try
Want to switch things up or cater to dietary needs? Apple crisp is incredibly versatile and easy to adapt.
Gluten-Free Apple Crisp
Swap out the all-purpose flour for almond flour, oat flour, or your favorite gluten-free blend. Make sure your oats are certified gluten-free!
Vegan Apple Crisp
Use vegan butter or coconut oil instead of regular butter. You can also add a flaxseed mix to give it a more “baked goods” feel, though it’s not required.
Add Some Nuts or Seeds
Chopped pecans, walnuts, or almonds make for a nutty crunch that pairs perfectly with the soft apples. Sunflower seeds or pumpkin seeds are great nut-free alternatives.
Spice It Up
Add nutmeg, cardamom, or even a pinch of ginger to give your crisp a more complex flavor profile. A sprinkle of clove can also bring a festive, holiday-like aroma.
Add Berries or Pears
Mix in blueberries, cranberries, or sliced pears with your apples for a fruity blend. Just be sure to adjust the sugar depending on how sweet or tart your additions are.
Common Mistakes to Avoid
Even a simple dessert like apple crisp has its pitfalls. Avoid these common mistakes to guarantee your crisp turns out perfect every time.
Using the Wrong Apples
Not all apples are created equal. Soft apples like Red Delicious turn mushy when baked. Stick with firmer varieties like Granny Smith, Honeycrisp, Fuji, or Pink Lady.
Soggy Topping
This usually happens when your butter is too soft, or the topping is packed too tightly. Cold butter is essential, and don’t pat the topping down—just scatter it on loosely.
Too Much Sugar
If your apples are already sweet, you may not need all the sugar the recipe calls for. Taste the apples before mixing, and adjust accordingly.
Undercooked Apples
Cut your apples too thick or bake too quickly, and you’ll end up with undercooked fruit. Slice apples evenly and bake long enough for them to become tender and juicy.
Skipping the Resting Time
Letting the crisp sit for 5-10 minutes after baking helps everything settle, allowing the flavors to blend and the juices to thicken slightly. Don’t skip it—it makes a big difference.
FAQs about Easy Apple Crisp Recipe
1. What are the best apples for apple crisp?
Granny Smith, Honeycrisp, and Fuji apples are excellent choices. They hold their shape well and offer a balance of tart and sweet flavors.
2. Can I use oats in my apple crisp topping?
Yes! Rolled oats add a delicious crunch and texture. Combine them with flour, brown sugar, butter, and cinnamon for a classic crisp topping.
3. How do I prevent my apple crisp from becoming soggy?
Avoid using overly juicy apples, and don’t cover the dish while baking. This helps the topping stay crisp and golden.
4. Can I make apple crisp ahead of time?
Absolutely. Prepare it up to a day in advance, store it covered in the fridge, and bake when ready. You can also reheat it in the oven for a fresh-baked feel.
5. Is it okay to freeze apple crisp?
Yes, both baked and unbaked apple crisp can be frozen. Wrap it tightly and freeze for up to 3 months. Thaw overnight in the fridge before reheating or baking.
6. What’s the difference between apple crisp and apple crumble?
Apple crisp usually contains oats in the topping, giving it a crunchy texture, while apple crumble has a more streusel-like topping without oats.
7. Can I make this recipe gluten-free?
Yes, simply substitute regular flour with a gluten-free flour blend and ensure your oats are certified gluten-free.
8. How long should I bake apple crisp?
Bake at 350°F (175°C) for 40–45 minutes or until the apples are tender and the topping is golden and crispy.
9. What should I serve with apple crisp?
A scoop of vanilla ice cream or a dollop of whipped cream pairs perfectly with the warm, spiced apples.
10. Can I use canned or frozen apples?
Fresh apples are best for texture and flavor, but you can use frozen apples (thawed and drained) or canned apples (preferably unsweetened) in a pinch.
Conclusion
The simplicity of ingredients, the ease of preparation, and the freedom to customize make it a favorite for seasoned bakers and newbies alike. The warm, tender apples paired with the golden, buttery crisp topping are a duo that truly can’t be beat.
It’s the kind of dessert that turns ordinary days into special ones and makes your home smell like a bakery. So next time you’re in the mood for something sweet and satisfying, skip the store-bought sweets and whip up this classic instead. Trust me—your kitchen will thank you.