Dry Brine Turkey Recipe: Making a turkey that’s juicy on the inside and beautifully crisp on the outside can be tricky. But if you want a foolproof way to get it right every single time, dry brining might just be your secret weapon. This method is easy, clean, and results in mouthwatering flavor that penetrates deep into the meat—no buckets of water required!
What Is Dry Brining?
Dry brining is simply rubbing salt and seasonings directly onto the meat. Unlike wet brining that requires gallons of liquid, dry brining works its magic through osmosis. The salt draws out moisture from the turkey, dissolves in it, and then reabsorbs, pulling all the flavor and seasoning right back into the bird.
This technique also starts drying out the skin ahead of roasting, which is exactly what gives that golden, crisp finish. It’s like giving your turkey a spa day with an exfoliating salt scrub—but tastier!
Why Choose Dry Brine Over Wet Brine?
Let’s be real—wet brining is a hassle. Not only do you need a massive container and fridge space, but handling gallons of raw turkey juice isn’t exactly appealing. Dry brining is cleaner, simpler, and more space-friendly.
Plus, you don’t end up with a waterlogged turkey. Instead, you get meat that’s seasoned all the way through, not just on the surface, and skin that’s gloriously crispy. Dry brining also requires less planning and equipment, making it perfect for both beginners and seasoned cooks.
Benefits of Dry Brining a Turkey
Enhanced Flavor
Dry brining lets the seasoning actually penetrate the meat. This means the turkey isn’t just salty on the outside—it’s deeply flavorful all the way to the bone. When you dry brine, you can also add other spices and herbs to amp up the complexity of taste.
Think garlic powder, paprika, rosemary, thyme, or even citrus zest. It’s like giving your turkey a full-blown marinade, but without the mess.
Crispy, Golden-Brown Skin
One of the most sought-after features of a Thanksgiving turkey is that ultra-crispy skin. Dry brining helps achieve that by drawing out surface moisture, which allows the skin to crisp up beautifully in the oven. No soggy skin here—just the kind of crunch that makes your guests’ eyes widen at the first bite.
Simpler and Less Messy
With dry brining, there’s no need to make space for a giant bucket in your fridge. You don’t need to worry about spills or cross-contamination from brine water. All you need is a tray, a rack, and some fridge space. Cleanup is a breeze, and the entire process feels much less intimidating.
What You Need to Dry Brine a Turkey
Essential Ingredients
Here’s your basic dry brine recipe:
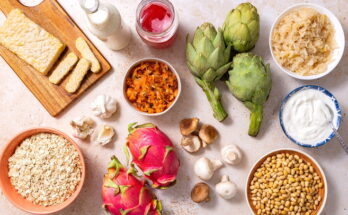
- Kosher Salt – About 1 tablespoon per 5 pounds of turkey
- Black Pepper – Freshly ground for better flavor
- Optional Add-ins:
- Garlic powder
- Onion powder
- Paprika
- Brown sugar
- Lemon or orange zest
- Dried herbs (rosemary, thyme, sage)
Feel free to get creative. The salt is non-negotiable, but the rest is your canvas to paint flavor on.
Tools and Equipment Required
To dry brine a turkey, you’ll need:
- A roasting pan or rimmed baking sheet
- A wire rack (to elevate the bird)
- Paper towels
- Plastic wrap or foil (optional)
- An oven thermometer (highly recommended for accuracy)
- Kitchen twine for trussing
Step-by-Step Dry Brine Turkey Recipe
Step 1: Select and Prepare Your Turkey
Start by choosing a good-quality turkey. Make sure it’s not pre-brined or injected with a saline solution—check the label carefully. Fresh turkeys are ideal, but if you go frozen, thaw it completely before brining.
Once thawed, remove the giblets and neck, and pat the turkey dry with paper towels. The drier the skin, the better the brine will stick.
Step 2: Make the Dry Brine Mix
In a small bowl, mix kosher salt with your preferred spices. A good baseline is:
- 3 tablespoons kosher salt
- 1 tablespoon ground black pepper
- 1 teaspoon garlic powder
- 1 teaspoon smoked paprika
- 1 teaspoon dried thyme
Mix it thoroughly and make sure it’s evenly blended. This is your flavor bomb—simple, but powerful.
Step 3: Apply the Dry Brine to the Turkey
Gently separate the turkey skin from the meat, especially over the breast and thighs. This is where the salt magic happens.
Now, rub the dry brine mixture all over:
- Under the skin
- On top of the skin
- Inside the cavity
Use your hands and make sure it’s evenly distributed. Don’t worry if it feels like a lot of salt—it’s necessary for the process.
Step 4: Refrigerate and Rest
Place the turkey breast-side up on a wire rack over a baking sheet or roasting pan. Leave it uncovered in the fridge for at least 24 hours, but ideally up to 72 hours. The longer it sits, the better the flavor and texture.
The air circulation helps dry out the skin, and the salt works its way deep into the meat. This is where the magic happens—so don’t rush it!
Step 5: Rinse (Optional) and Prepare for Roasting
Some folks rinse off the excess brine before roasting, but it’s totally optional. If you do, make sure to pat the turkey completely dry again with paper towels.
Then let the turkey sit at room temperature for about 30–60 minutes before roasting. This helps it cook more evenly.
You’re now ready to roast!
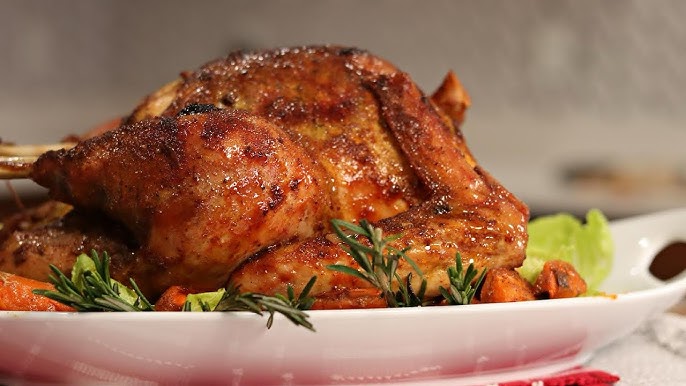
Roasting the Dry Brined Turkey
Once your turkey has been dry brined to perfection, it’s time to roast it to golden, juicy excellence. This is where all that flavor and crispy skin really come to life. Let’s break it down step by step so your bird is picture-perfect.
Cooking Tips and Temperature Guide
Preheat your oven to 325°F (165°C). Some like to start higher (around 450°F) for the first 30 minutes to really brown the skin, then reduce the heat. But a steady, even temperature also works beautifully—your choice.
Place your turkey breast-side up on a rack inside your roasting pan. This setup helps heat circulate all around the bird and allows fat to drip away, giving you that evenly roasted skin.
If you’re not stuffing the turkey (and it’s generally better not to when dry brining), loosely fill the cavity with aromatics like:
- Halved onions
- Garlic cloves
- Lemon wedges
- Fresh herbs like rosemary and thyme
Use a meat thermometer—don’t guess! Insert it into the thickest part of the thigh, without touching the bone. You’re aiming for:
- 165°F (74°C) in the thickest part of the breast
- 175°F (79°C) in the thigh
Depending on the size of your turkey, roasting can take anywhere from 2.5 to 4 hours. Always go by internal temperature, not time alone.
Basting? Optional. A dry-brined turkey stays juicy without constant basting, but brushing it once or twice with butter or pan drippings can give you an extra-luxurious finish.
Let it rest. Once out of the oven, tent the turkey with foil and let it rest for at least 30–45 minutes. This step locks in all those delicious juices and makes carving a breeze.
Serving and Carving Tips
Your turkey smells amazing, it’s golden and crispy, and the meat is juicy. Now don’t ruin it with bad carving! Here’s how to serve it like a pro:
- Start with the legs: Cut the skin between the leg and body, then push the leg down to find the joint. Slice through it cleanly.
- Remove the thighs and drumsticks: Separate the drumsticks and thighs at the joint.
- Carve the breast: Slice downward along one side of the breastbone, then cut the breast meat into even slices.
- Don’t forget the wings! They’re crispy and full of flavor—don’t let them go to waste.
Serve with your favorite sides—think stuffing, mashed potatoes, cranberry sauce—and you’ve got yourself a turkey dinner for the books.
FAQs about Dry Brine Turkey Recipe
1. What is a dry brine for turkey?
A dry brine is a seasoning method where salt and herbs are rubbed directly onto the turkey. Unlike a wet brine, it doesn’t require any water. It helps to tenderize the meat and infuse it with flavor while keeping the skin crispy.
2. How long should I dry brine my turkey?
For best results, dry brine your turkey for at least 24 to 72 hours. The longer the brine time, the deeper the flavor and better the moisture retention.
3. Do I need to rinse off the dry brine?
No, rinsing is not necessary. Simply pat the turkey dry with paper towels before roasting. Rinsing may wash away the flavor and create a mess.
4. Can I dry brine a frozen turkey?
Only after the turkey is completely thawed. Never apply a dry brine to a frozen bird as it won’t absorb properly.
5. Does dry brining make the turkey too salty?
Not if done correctly. Be sure to measure your salt properly—usually about 1 tablespoon of kosher salt per 4–5 pounds of turkey. Spread it evenly for balanced flavor.
6. Should I cover the turkey while dry brining?
For crispier skin, leave it uncovered in the refrigerator. This helps dry out the skin and gives you that golden, crunchy texture after roasting.
7. Can I add herbs and spices to the dry brine?
Yes! Feel free to mix in black pepper, garlic powder, paprika, thyme, rosemary, or any favorite seasoning for added flavor depth.
8. Is dry brining safe?
Absolutely. As long as the turkey is stored properly in the fridge and cooked to a safe internal temperature of 165°F (75°C), it’s completely safe.
9. Will dry brine work for turkey breast only?
Yes, you can dry brine turkey parts like the breast or thighs individually using the same method and brining time.
10. Can I stuff the turkey after dry brining?
It’s not recommended. Dry brining draws out moisture, so for food safety and even cooking, it’s best to cook stuffing separately.
Conclusion
Dry brining your turkey is more than just a trend—it’s a game-changing method that transforms your holiday bird from average to unforgettable. With just salt, a few spices, and a bit of fridge time, you’ll unlock juicy meat, intense flavor, and that restaurant-quality crispy skin everyone raves about.
No need to haul out gallons of liquid or stress over messy setups. This method is all about maximum flavor with minimum fuss.
Once you try it, there’s no going back.