Donuts Recipe: Craving that melt-in-your-mouth, sugary-sweet, fluffy treat that turns any day into a celebration? You’re not alone. Donuts have a magical way of transforming simple ingredients into pure joy. And guess what? You don’t need to visit a bakery to enjoy them—you can make donuts right at home. That’s right, this guide will walk you through a foolproof, step-by-step method to create classic homemade donuts from scratch. We’ll cover everything from mixing the dough to frying to perfection, and finally glazing them with all your favorite toppings.
Whether you’re a beginner or an experienced home cook, this guide is designed to make the process simple and fun. No complicated jargon, no fancy equipment—just straight-up delicious donuts, made with love and a bit of sugar (okay, maybe a lot of sugar). So, roll up your sleeves and get ready to experience the joy of homemade donuts.
Ingredients Needed for Homemade Donuts
Creating donuts from scratch means starting with quality ingredients. Each item in this recipe plays a crucial role in getting the texture, flavor, and fluff just right. Let’s break down what you’ll need into two categories: dry and wet ingredients.
Dry Ingredients
- All-Purpose Flour (4 cups): The base of your donut dough. It gives structure and substance.
- Granulated Sugar (½ cup): Adds sweetness and helps with browning during frying.
- Salt (1 tsp): Enhances all the flavors and balances the sweetness.
- Active Dry Yeast (2¼ tsp): The leavening agent that helps the dough rise and gives donuts their light, airy texture.
These dry ingredients should be measured carefully. Too much flour and your donuts will be tough. Too little sugar, and they’ll taste flat. Accuracy here is key to success.
Wet Ingredients
- Whole Milk (1 cup, warm): Activates the yeast and enriches the dough.
- Eggs (2 large): Bind the ingredients and contribute to the donut’s richness.
- Unsalted Butter (¼ cup, melted): Adds fat and flavor, making the donuts tender.
- Vanilla Extract (1½ tsp): Enhances the overall aroma and flavor profile.
The combination of wet and dry ingredients creates a rich, yeasted dough that’s soft and elastic. Be sure to use fresh yeast and room-temperature eggs to avoid any unpleasant surprises during the rising process.
Tools and Equipment You’ll Need
Let’s talk gear. While making donuts is more about technique than tools, having the right equipment can make the job easier and your results more professional.
- Mixing Bowls: At least two—one for mixing, one for proofing the dough.
- Stand Mixer with Dough Hook (optional): Great for kneading, but you can do it by hand too.
- Rolling Pin: To flatten the dough to the right thickness before cutting.
- Donut Cutter or Two Round Cutters: For shaping your donuts perfectly.
- Deep Fryer or Heavy Bottom Pot: Ensures even frying and better temperature control.
- Kitchen Thermometer: To monitor the oil temperature—essential for even frying.
- Cooling Rack and Paper Towels: Helps drain excess oil and keeps donuts from getting soggy.
Pro tip: Don’t have a donut cutter? No worries! Use a large round cookie cutter and a small bottle cap to make your own.
Step-by-Step Donut Making Process
Now, let’s dive into the good stuff. Making donuts at home can be broken down into simple, manageable steps. Follow them closely, and you’ll be enjoying fresh, homemade donuts in no time.
Step 1: Preparing the Dough
Start by activating your yeast. In a small bowl, combine the warm milk (about 110°F) with a teaspoon of sugar and sprinkle in the yeast. Let it sit for 5-10 minutes until it gets foamy—this means the yeast is alive and ready to work.
Next, in a large mixing bowl (or stand mixer), combine the flour, remaining sugar, and salt. Add in the activated yeast mixture, eggs, melted butter, and vanilla extract. Mix everything together until a dough forms.
Now it’s time to knead. If you’re using a stand mixer, let it knead with the dough hook for about 8 minutes on medium speed. If you’re kneading by hand, turn the dough onto a floured surface and knead for 10-12 minutes until the dough is smooth and elastic.
Shape the dough into a ball and place it in a greased bowl. Cover it with a clean kitchen towel or plastic wrap. This dough now needs to rest and rise…
Step 2: First Rise – Let the Dough Rest
After kneading, your dough needs time to rise and develop flavor and structure. Place the dough in a lightly greased bowl and cover it with a clean kitchen towel or plastic wrap. Let it rest in a warm, draft-free area for about 1 to 2 hours, or until it doubles in size.
Why is this important? Because the yeast is feasting on the sugars in the dough and producing carbon dioxide, which helps the dough rise and become airy. This is what gives donuts their signature fluffiness.
Don’t rush this part. If your kitchen is cold, you can place the bowl inside an oven that’s been slightly warmed (and then turned off) to create a cozy environment. Patience here pays off in the form of pillow-soft donuts.
Step 3: Rolling and Cutting the Dough
Once your dough has doubled in size, it’s time to shape it into donuts. First, punch down the dough gently to release any air bubbles. Transfer it to a floured surface and roll it out to about ½-inch thickness using a rolling pin.
Use a donut cutter (or two round cutters) to shape the donuts. Place the cut donuts and holes onto a parchment-lined baking sheet. Be sure to leave space between each piece, as they’ll need room to rise again.
You can gather the dough scraps and re-roll them once to cut out more donuts. Just be careful not to overwork the dough, or you’ll end up with tough donuts.
Step 4: Second Rise – Proofing the Donuts
After cutting, your donuts need a second rise, also known as proofing. Cover the shaped donuts with a towel and let them rest for 30-45 minutes until they puff up noticeably.
This step is crucial. It ensures your donuts are light and airy after frying. Skipping or rushing this step can lead to dense or unevenly cooked donuts.
During this time, you can start heating your oil. Use a deep fryer or a heavy-bottomed pot filled with 2-3 inches of oil. Heat it to 350°F (175°C). A kitchen thermometer helps maintain the right temperature, which is vital for even frying.
Step 5: Frying the Donuts to Perfection
Now the magic happens. Carefully slide 2-3 donuts at a time into the hot oil. Don’t overcrowd the pot. Fry each donut for about 1-2 minutes per side, or until golden brown.
Use a slotted spoon or metal tongs to flip and remove the donuts. Place them on a paper towel-lined rack to drain excess oil.
Watch the oil temperature—if it drops too low, your donuts will absorb oil and turn greasy. If it’s too high, the outsides will burn before the insides cook through.
Fry the donut holes last; they cook faster and are great for snacking or testing your glaze!
Glazing and Topping Your Donuts
Here’s where you get to be creative. Donuts are like blank canvases—you can go classic or wild with flavors. Here are a couple of go-to glazes and topping ideas.
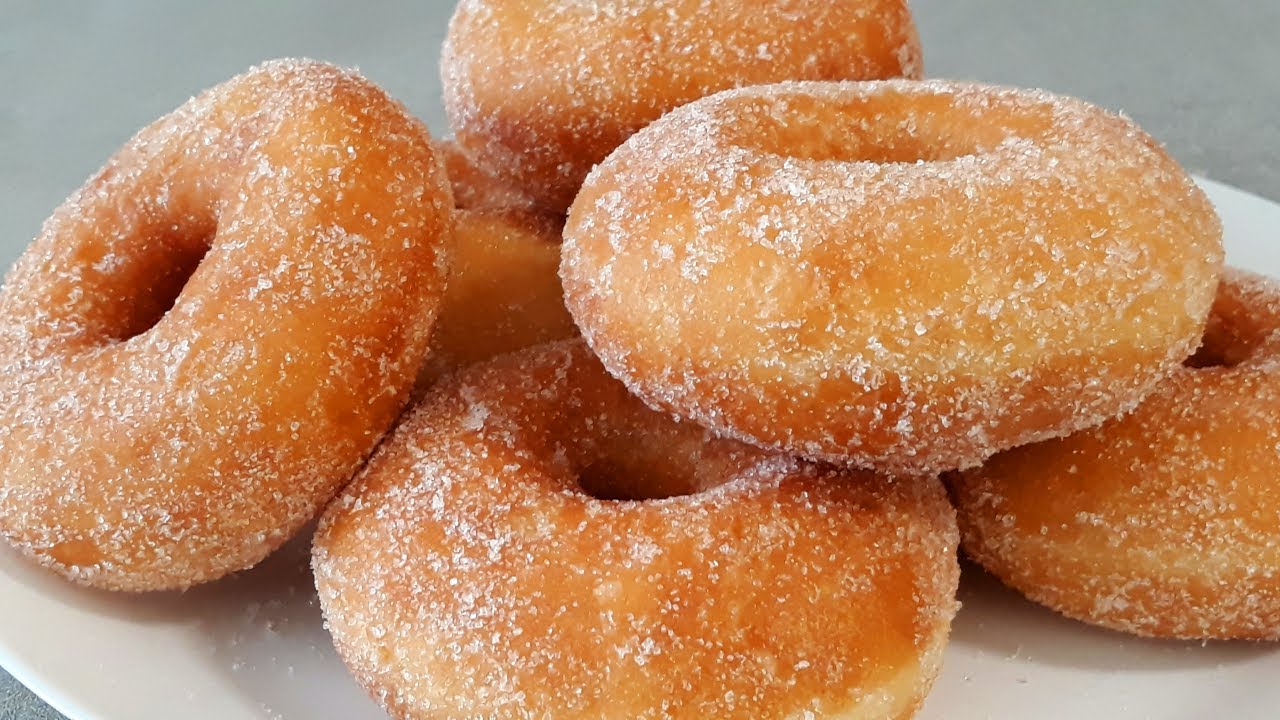
Classic Sugar Glaze
This is the quintessential donut glaze—simple, sweet, and shiny.
Ingredients:
- 2 cups powdered sugar
- ¼ cup milk
- 1 tsp vanilla extract
Instructions:
Mix everything in a bowl until smooth. Dip the warm donuts halfway into the glaze, let the excess drip off, and set them on a cooling rack to allow the glaze to set.
Want them extra glossy? Dip them twice!
Chocolate Glaze and Other Toppings
For chocolate lovers, here’s a decadent topping:
Ingredients:
- 1 cup powdered sugar
- ¼ cup unsweetened cocoa powder
- ¼ cup milk
- 1 tsp vanilla
Combine and mix until velvety. Dip the donuts while they’re still slightly warm. You can also sprinkle chopped nuts, rainbow sprinkles, or shredded coconut for extra flair.
Feeling adventurous? Try maple glaze, cinnamon sugar, or even fruit-filled variations. Your kitchen, your rules.
Tips for Perfect Donuts Every Time
Making donuts at home isn’t rocket science, but a few key tips can seriously level up your donut game. Let’s break down the most important dos and don’ts that will help you achieve donut perfection every single time.
1. Get the Dough Just Right
Your dough should be soft, slightly tacky, but not sticky. If it’s too dry, your donuts will turn out dense and tough. Too wet? They’ll be hard to shape and absorb too much oil while frying. If you’re unsure, err on the side of slightly wetter dough—you can always dust with a little flour while kneading.
Use fresh, high-quality yeast. Check the expiration date on your yeast packet, and always bloom it in warm milk before adding it to the dry ingredients to make sure it’s alive and active.
2. Rise Time = Flavor Time
Don’t rush the rising process. It might be tempting to skip ahead, but a good rise develops the dough’s structure and taste. Ideally, give your dough one full hour to double in size for the first rise, and 30 to 45 minutes for the second rise after shaping.
Pro tip: If you’re in a hurry, you can place the dough in a warm (but off!) oven with a bowl of hot water nearby to create a humid, warm proofing chamber.
3. Oil Temperature Matters
This is crucial. Too hot, and your donuts will burn on the outside while staying raw inside. Too cold, and they’ll soak up oil like a sponge—greasy and unappetizing. Keep your frying oil between 350°F and 375°F and monitor it throughout with a thermometer.
Also, use the right oil. Neutral oils like canola, vegetable, or peanut oil are ideal. Avoid olive oil or butter—they burn too easily and affect the taste.
4. Don’t Overcrowd the Pot
Adding too many donuts at once lowers the oil temperature, causing uneven frying. Stick to frying 2-3 donuts at a time unless you have a large deep fryer. This helps maintain a steady temperature and ensures each donut cooks evenly.
5. Let Them Cool Before Glazing
Warm donuts will soak in glaze beautifully, but too hot and the glaze melts off completely. Too cold, and the glaze won’t stick well. Let your donuts cool for about 5 minutes after frying before dipping them.
Want super glossy donuts like the pros? Dip once, let it set, then dip again.
6. Add Personal Touches
Don’t be afraid to get creative. Fill them with custard, jam, or Nutella using a piping bag. Top with chopped bacon, drizzle with caramel, or dust with cinnamon sugar. You’re only limited by your imagination!
FAQs about Donuts Recipe
1. How long do homemade donuts last?
Homemade donuts are best enjoyed fresh, ideally within a few hours of frying. If you need to store them, keep them in an airtight container at room temperature for up to 2 days. For best texture, avoid refrigeration—it tends to dry them out.
2. Can you bake instead of fry donuts?
Yes, you can! Baked donuts are lighter and a bit healthier. Use a donut pan and bake at 350°F (175°C) for about 10-12 minutes or until golden. While they won’t have the exact texture of fried ones, they’re still delicious and perfect for glazing.
3. What’s the best oil for frying donuts?
Neutral oils like canola, vegetable, or peanut oil are ideal for frying. They have high smoke points and won’t interfere with the flavor of your donuts.
4. How do you store leftover donuts?
Place cooled donuts in an airtight container lined with paper towels. Store at room temperature for up to 2 days. Avoid the fridge, as it makes donuts stale faster. You can warm them slightly in the microwave before eating.
5. Can I freeze donut dough?
Absolutely. After the first rise, shape your donuts, then freeze them on a baking sheet. Once frozen, transfer to a freezer bag. When ready to use, let them thaw and proof for about 1-2 hours before frying.
Conclusion
You’ve learned how to mix, rise, cut, fry, glaze, and perfect your donuts step by step. With the right ingredients, a little patience, and a sprinkle of creativity, homemade donuts can be even better than the store-bought kind. Whether it’s for a lazy Sunday morning, a celebration, or just because—you now have the power to whip up bakery-worthy donuts any time the craving hits.
So, what are you waiting for? Gather your ingredients, clear your counter, and let the sweet smell of fresh donuts fill your home. You’ve got this!